DPX500BT DPX300U DUAL DIN SIZED CD RECEIVER Quick Start Guide RECEPTEUR CD FORMAT DUAL DIN Guide de démarrage rapide RECEPTOR DUAL DE CD TAMAÑO DIN Guía de inicio rápido Take the time to read through this instruction manual. Familiarity with installation and operation procedures will help you obtain the best performance from your new Dual DIN sized CD receiver.
Contents About the Quick Start Guide About the Quick Start Guide.............................................. 2 This Quick Start Guide describes basic functions of this unit. For functions not described in this Guide, refer to the Instruction Manual on the following website: Before use ................................................................................. 3 Preparations/ Basic Operations ......................................... 4 Playing Music (CD/USB/iPod)..................................
Before use 2 WARNING To prevent injury or fire, take the following precautions: t Stop the car before operating the unit. t To prevent a short circuit, never put or leave any metallic objects (such as coins or metal tools) inside the unit. ¤ CAUTION t Adjust the volume so that you can hear sounds outside the car. Driving with the volume too high may cause an accident. t Wipe off the dirt on the panel with a dry silicon or soft cloth.
Preparations/ Basic Operations [Control knob] (Volume knob) Auxiliary input [SRC] USB terminal DPX300U [iPod] [DISP] Canceling the Demonstration Mode Cancel the demonstration mode when you use it for the first time after installation. 1 Press the [Control knob] to cancel the Demonstration mode when the message “CANCEL DEMO PRESS VOLUME KNOB” appears (approx. 15 seconds). 2 Turn the [Control knob] to select “YES”, and then press the [Control knob] knob.
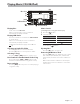
Playing Music (CD/USB/iPod) [0] Disc slot [1] [2] [4] [SRC] [¢] USB terminal [ ] [L] [ ] Control knob Playing Disc Insert a disc in the Disc slot. When it is inserted, the source is switched automatically and playback starts. Playing USB device Connect a USB device or iPod to the USB terminal as shown above. When it is connected, the source is switched automatically and playback starts.
Listening to the Radio [1] – [3] [4] – [6] [SRC] [ ] Selecting a Tuner source Press the [SRC] button to select “TUNER”. Selecting the Band Press the [ AM. ] button to select FM1, FM2, FM3 or Selecting a Station Press the [4] or [¢] button to select the station you want to listen to. 6 | Quick Start Guide [4] [¢] Station preset memory Press and hold the button ([1] to [6]) to assign the selected station.
Function of DPX500BT Hands-free phoning Control knob [SRC] [Ú] [7] Registering a Bluetooth device Dialing a number in the phone book You can register your Bluetooth device in this unit. Dial the phone number in the phone book of your cell-phone. If the phone book has not been downloaded to this unit, operate the cell-phone to download it. Refer to <17-2. Downloading the phone book> of Instruction manual. 1 2 Press the [SRC] to turn on the power.
Installation accessories Before Installation 2WARNING 1 .....1 2 .....1 3 .....1 4 .....2 5 (DPX500BT only) 3 m (9.5 ft) .....1 Installation Procedure 1. To prevent a short circuit, remove the key from the ignition and disconnect the - battery. 2. Make the proper input and output wire connections for each unit. 3. Connect the speaker wires of the wiring harness. 4. Connect the wiring harness wires in the following order: ground, battery, ignition. 5. Connect the wiring harness connector to the unit. 6.
DPX500BT only t Reception may become poor if there are metal objects near the Bluetooth antenna. (DPX500BT only) Installing the Microphone unit 1 2 3 4 Bluetooth antenna unit For Good Reception To assure good reception, note the following: t Communicate with the cell-phone within the lineof-sight distance of 10 m (30 ft). The communication range becomes shorter depending on the surrounding environment.
Installation the Unit Installing the trim plate Installing in Japanese-Made Cars and General Motors Cars Attach Accessory 2 to the unit. Install onto the car bracket using the screws (commercially available). The holes of the car bracket to use will differ depending on the car model. Car Bracket Accessory 2 Installing the unit Screws (M5 × 8 mm max.) ! t Use only the specified screws. Using wrong screws might damage the unit.
Removing the Unit Removing the trim plate Removing the Unit 1 1 Engage the catch pins on the extraction key (Accessory 4) and remove the two locks on the lower level. Lower the frame and pull it forward as shown in the figure. 2 Remove the trim plate by referring to the removal procedure in the section . Insert the two extraction keys (Accessory 4) deeply into the slots on each side, as shown.
Connecting Wires to Terminals Microphone input (DPX500BT only) Microphone (Accessory5) R L Antenna Cord FM/AM antenna input White To front left speaker White/Black Gray To front right speaker Gray/Black Green To rear left speaker Green/Black Purple To rear right speaker Purple/Black Ignition key switch Car fuse box ACC Red (Ignition wire) Yellow (Battery wire) Car fuse box (Main fuse) Black (Ground wire) · (To car chassis) + – Battery 12 | Quick Start Guide
R L Rear output Front output Sub Woofer output Fuse (10A) To SiriusXM Connect Vehicle Tuner (optional accessory) Wiring harness (Accessory1) If no connections are made, do not let the wire come out from the tab. Blue/White (Power control wire) P.CONT Blue (Antenna control wire) ANT. CONT When using the optional power amplifier, connect to its power control terminal.
Appendix About Audio file t Playable Audio files AAC-LC (.m4a), MP3 (.mp3), WMA (.wma), WAV of USB device (.wav) t Playable disc media CD-R/RW/ROM t Playable disc file formats ISO 9660 Level 1/2, Joliet, Long file name. t Playable USB devices USB mass storage class t Playable USB device file systems FAT12, FAT16, FAT32 The online manual about audio files is put on the site, www. kenwood.com/cs/ce/audiofile/.
Requirements IHeartRadio™: Specifications Requirements for listening to the IHeartRadio™ are as follows: iPhone or iPod touch t Use an Apple iPhone or iPod touch running iOS4 or later. t Search for “iHeart Link for KENWOOD” in the Apple iTunes App Store to find and install the most current version of the IHeart Link application on your device. t iPhone/ iPod touch connected to this unit with a KCA-iP102. FM tuner section Frequency range (200 kHz step) : 87.9 – 107.
2CAUTION 6TF PG DPOUSPMT PS BEKVTUNFOUT PS QFSGPSNBODF PG QSPDFEVSFT PUIFS UIBO UIPTF TQFDJGJFE IFSFJO NBZ SFTVMU JO IB[BSEPVT SBEJBUJPO FYQPTVSF *O DPNQMJBODF XJUI 'FEFSBM 3FHVMBUJPOT GPMMPXJOH BSF SFQSPEVDUJPOT PG MBCFMT PO PS JOTJEF UIF QSPEVDU SFMBUJOH UP MBTFS QSPEVDU TBGFUZ +7$ ,&/800% $PSQPSBUJPO *4)*,"8" ."$)* )"$)*0+* 4)* 50,:0 +"1"/ 5)*4 130%6$5 $.1-*&4 8*5) %))4 36-&4 $'3 46#$)"15&3 + */ &''&$5 %"5& 0' .