KDC-X979 KDC-MP925 KDC-X879 CD-RECEIVER INSTRUCTION MANUAL Take the time to read through this instruction manual. Familiarity with installation and operation procedures will help you obtain the best performance from your new CD-receiver. For your records Record the serial number, found on the back of the unit, in the spaces designated on the warranty card, and in the space provided below.
Contents Warning 4 Safety precautions 5 Notes 7 About CDs 8 Notes on Multi-function Key System 9 Notes on playing MP3/WMA 10 Notes on Sound Management System 12 General features 13 Power Hiding the Control Panel Selecting the Source Volume Attenuator Rotary Volume knob operation mode select TEL Mute Display Mode Switching Side Graphic Display Switching Text Display Switching Graphic part/ Spectrum Analyzer Display Switching Wallpaper selecting Text Display Switching Station/Disc Naming (SNPS
Menu system 45 Menu System Security Code Touch Sensor Tone Manual Clock Adjustment Date Adjustment Date Mode Synchronize Clock DSI (Disabled System Indicator) Selectable Illumination Triangle indicator setting Font Type Select Dimmer OFF Wait Time Setting Eject angle setting Panel action setting System Q Setting (KDC-X879) Audio Setup (KDC-X979) Built-in Amp Mute Setting B.M.S. (Bass Management System) (KDC-X979/KDC-X879) B.M.S.
2Warning 2CAUTION Use of controls or adjustments or performance of procedures other than those specified herein may result in hazardous radiation exposure. In compliance with Federal Regulations, following are reproductions of labels on, or inside the product relating to laser product safety. KENWOOD CORPORATION 2967-3, ISHIKAWA-CHO, HACHIOJI-SHI TOKYO, JAPAN KENWOOD CORP. CERTIFIES THIS EQUIPMENT CONFORMS TO DHHS REGULATIONS N0.21 CFR 1040. 10, CHAPTER 1, SUBCHAPTER J.
Safety precautions 2WARNING 2CAUTION To prevent injury or fire, take the following precautions: To prevent damage to the machine, take the following precautions: • Insert the unit all the way in until it is fully locked in place. Otherwise it may fall out of place when jolted. • When extending the ignition, battery, or ground wires, make sure to use automotive-grade wires or other wires with a 0.75mm² (AWG18) or more to prevent wire deterioration and damage to the wire coating.
Safety precautions About CD players/disc changers connected to this unit KENWOOD disc changers/ CD players released in 1998 or later can be connected to this unit. Refer to the catalog or consult your Kenwood dealer for connectable models of disc changers/ CD players. Note that any KENWOOD disc changers/ CD players released in 1997 or earlier and disc changers made by other makers cannot be connected to this unit. Unsupported connection may result in damage.
Notes Cleaning the Unit Sirius Satellite radio tuner If the faceplate of this unit is stained, wipe it with a dry soft cloth such as a silicon cloth. If the faceplate is stained badly, wipe the stain off with a cloth moistened with neutral cleaner, then wipe neutral detergent off. Refer to the Sirius tuner control features of this manual for the operation method of Sirius Satellite radio tuner KTC-SR901/SR902 (optional accessory) when connected.
About CDs Handling CDs Removing CDs • Don’t touch the recording surface of the CD. When removing CDs from this unit pull them out horizontally. CDs that can’t be used • CDs that aren’t round can’t be used. • CD-R and CD-RW are easier to damage than a normal music CD. Use a CD-R or a CD-RW after reading the caution items on the package etc. • Don’t stick tape etc. on the CD. Also, don’t use a CD with tape stuck on it.
Notes on Multi-function Key System Multi-function Key System serves to control various functions with the [2] — [5] buttons. The basic operation of the Multi-function Key System is described below. What’s the Multi-function Key System? This unit is equipped with the Multi-function Key System that enables the operation of multiple functions with one button. For example, you can enter the Display Control Mode or turn ON/OFF the Random Play by pressing the [3] button during CD play.
Notes on playing MP3/WMA Note, however, that the MP3/WMA recording media and formats acceptable are limited. When writing MP3/WMA, pay attention to the following restrictions. Acceptable media The MP3/WMA recording media acceptable to this unit are CD-ROM, CD-R, and CD-RW. When using CD-RW, do full format not quick format to prevent malfunction. Acceptable medium formats The following formats are available for the media used in this unit.
Loading such a medium may produce loud noise to damage the speakers. • Do no attempt to play a medium containing a non-MP3/ WMA file with the MP3/WMA extension. The unit mistakes non-MP3/WMA files for MP3/WMA data as long as they have the MP3/WMA extension. • Do not attempt to play a medium containing non MP3/ WMA. MP3/WMA playing order When selected for play, Folder Search, File Search, or for Folder Select, files and folders are accessed in the order in which they were written by the CD writer.
Notes on Sound Management System The KDC-X979 allows you to set up the best sound field to your car using the audio setup. This is the Sound Management System. First, set up the sound field in your car by 'Audio setup (Easy mode)' (page 28). Proceed to the following steps for sound field setup. There are two types of audio setup mode: Easy audio setup (called Easy mode) and Professional audio setup (called PRO mode). 1. Enter Audio Setup mode. Press the [NEXT] button.
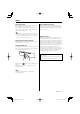
General features ATT VOL 1-6 Q 38 Power Turning ON the Power Turn the vehicle ignition ON. The panel appears. Turing OFF the Power Turn the vehicle ignition OFF or press the [SRC] button for at least 1 second. The panel hides. • Do not apply force to the panel during operation. It can cause damage. NEXT NAME.S AM/ SW FM 4 SRC ¢ Hiding the Control Panel Prevents tampering with the unit while your car is being serviced etc. Hiding the control panel Press the [SRC] button for at least 1 second.
General features Selecting the Source Press the [SRC] button. Source required SIRIUS tuner (Optional accessory) Tuner or HD Radio (Optional accessory) CD External disc (Optional accessory) Auxiliary input Standby (Illumination only mode) Display "SIRIUS" "TUNER" or “HD RADIO” "Compact Disc" "CD Changer" "AUX" "STANDBY" • You can select the Rotary Volume Operation mode only when the " " indicator is displayed above the [1] button during any function setup.
Display Mode Switching Switching the display mode. 1 Select the key function section Press the [NEXT] button. Repeatedly press the button until "DISP" is displayed above the [3] (KDC-MP925/X879)/ [4] (KDC-X979) button. Refer to 'Notes on Multi-function Key System' (page 9). 2 Enter display control mode Press the [3] ("DISP") (KDC-MP925/X879)/ [4] ("DISP") (KDC-X979) button. 3 Select the display mode Press the [2] ("MODE") button. Each time the button is pressed the display mode switches as shown below.
General features In CD & External disc source Display:A Text Display Switching Switching the text display. 1 Select the key function section Press the [NEXT] button. Repeatedly press the button until "DISP" is displayed above the [3]/ [4] button. Refer to 'Notes on Multi-function Key System' (page 9). 2 Enter display control mode Press the [3]/ [4] ("DISP") button. 3 Select the display mode Press the [2] ("MODE") button. Select the "Display:A" display.
Label Comment Band & Channel Number Date Clock Spectrum Analyzer & Clock "Label Name" "Comment" "Channel Number" "DATE" "CLOCK" "S/ANA+CLOCK" In Standby Information KENWOOD Logo Clock Date Display "LOGO" "CLOCK" "DATE" In Auxiliary input source • If the Disc title, Track title, Song title & Artist name, or Album name & Artist name is selected when the disc which does not have Disc title, Track title, Song title, Album name, or Artist name is played, track number and play time are displayed.
General features Display:B/ Display:C/ Display:D Display:B/ Display:C/ Display:D Graphic part/ Spectrum Analyzer Display Switching Wallpaper selecting Switching the graphic Display/ Spectrum analyzer display. 1 Select the key function section Press the [NEXT] button. Repeatedly press the button until "DISP" is displayed above the [3]/ [4] button. Refer to 'Notes on Multi-function Key System' (page 9). 2 Enter display control mode Press the [3]/ [4] ("DISP") button.
2 Enter display control mode Press the [3]/ [4] ("DISP") button. 3 Select the display mode Press the [2] ("MODE") button. Select the "Display:B"/ "Display:C" display. 4 Select the text Press the [3] ("TEXT") button. In HD Radio source Information Station name Title Frequency Date Clock Display "Station Name" "Title" "Frequency" "DATE" "CLOCK" In Standby • It can also be switched by pressing either [4] or [¢] button.
General features Station/Disc Naming (SNPS/DNPS) Attaching a title to a Station or CD. 1 Receive/play the station/disc you want to attach a title to • A title can’t be attached to MD or MP3/WMA media. • Refer to the 'Text Display Switching' (page 16/18) and select either "DNPS" or "SNPS". No name can be attached to the source if "DNPS" or "SNPS" cannot be selected for it. 2 Enter name set mode Press the [NAME.S] button for at least 2 seconds. "NAME SET" is displayed.
Panel Position Setting 2 Remove the Backpanel forward. Setting the angle or back-forward position of the control panel. When 'DSI (Disabled System Indicator)' (page47) is set to ON, DSI blinks. 1 Select the key function section Press the [NEXT] button. Repeatedly press the button until "PNL" is displayed above the [4]/ [5] button. 2 Enter Panel Position Setting mode Press the [4] ("PNL") (KDC-MP925/X879)/ [5] ("PNL") (KDC-X979) button.
General features Function of the KDC-MP925/KDC-X879 Audio Control 1 Select the source for adjustment 6 Adjust the Audio Control item Press the [4] or [¢] button. Each time the button is pressed the setting switches as shown below. Press the [SRC] button. 2 Select the key function section Press the [NEXT] button. Repeatedly press the button until "AUD" is displayed above the [2] button. Refer to 'Notes on Multi-function Key System' (page 9). 3 Enter Audio Control mode Press the [2] ("AUD") button.
[5] button • * Function of the KDC-X879 • According to the Bass Q Factor setting value, the frequencies that can be set in Bass Center Frequency change as shown below. Bass Q Factor 1.00/1.25/1.50 2.00 Bass Center Frequency 60/70/80/100 60/70/80/150 • When the bass extend is set to ON, low frequency response is extended by 20%. • WOW: TruBass, FOCUS and SRS 3D are all set to values shown below.
General features Function of the KDC-MP925/KDC-X879 System Q You can recall the best sound setting preset for different types of music. 1 Select the source to set Press the [SRC] button. 2 Select the Sound type Press the [Q] button. Each time the button is pressed the sound setting switches.
In SIRIUS Tuner, External disc, or Auxiliary input source Dual Zone System Makes the sound different for the front channel and rear channel. Output the Internal source sound from either one of the front or rear channels, and the sound of other source from the Dual zone channel. 1 Select the source Press the [SRC] button. Select the source sound to be output from the Dual zone channel. 2 Select the key function section Press the [NEXT] button.
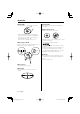
Function of the KDC-X979 Sound management features 1-6 NEXT 4 Audio control 1 Select the source for adjustment Press the [SRC] button. 2 Select the key function section Press the [NEXT] button. Repeatedly press the button until "AD CTRL" is displayed above the [2] button. Refer to 'Notes on Multi-function Key System' (page 9). 3 Enter Audio Control mode Press the [2] ("AD CTRL") button. 4 Select the Adjustment item section Press the [NEXT] button.
2nd section [2] "PLII" "MUSIC" (Music) "MOVIE" (Movie) "MATRIX" (Matrix) [5] "FINE" [3] "WOW" "LOW" (Low) "MIDDLE" (Middle) "HIGH" (High) "USER" (User) [5] "FINE" [2] "PNRM" [3] "DIM" [4] "CT-WDTH" [2] "FOCUS" [3] "TruBass-F" [3] "TruBass-R" [4] "SRS 3D" 2nd section Multi-function key operation [2] "POSI" [3] "BL/F" [3] "BL" [3] "F" [4] "VOFF" [5] "SW"* [5] "SW LEVEL" [5] "PHASE" Audio control item Position setting Balance setting Fader setting Volume offset Subwoofer level Subwoofer Phase setting •
Function of the KDC-X979 Sound management features Audio Setup (Easy mode) 1 Selects the Easy mode of Audio setup See the 'Audio Setup' (page 48) and select "Audio Setup: Easy". 2 Select the source for adjustment 6 Adjust the Audio setup item Press the [4] or [¢] button. Each time the button is pressed the setting switches as shown below. Audio setup Item Cabin setting Press the [SRC] button. 3 Select the key function section Press the [NEXT] button.
1st section Multi-function key operation [2] [2] "FRONT" "X’Over" [3] "REAR" [4] "CNTR" [5] "SW" [5] "PHASE" [3] [2] "FRONT" "DTA" [3] "REAR" [4] "CNTR" [5] "SW" [4] [2] "FRONT" [2] "BASS"* "EQ" [3] "MID"* [4] "TRE"* [3] "REAR" [2] "BASS"* [3] "MID"* [4] "TRE"* [4] "CNTR" [2] "BASS"* [3] "MID"* [4] "TRE"* [2] "FRONT" [2] "Front-L" [5] [2] "Front-R" "SPLEV" [3] "REAR" [3] "Rear-L" [3] "Rear-R" [4] "CT/SW" [4] "Center" [4] "Sub Woofer" [5] "T-TONE" *2 2nd section Audio setup Item High Pass Filter Front High
Function of the KDC-X979 Sound management features Audio Setup Memory (PRO mode) Audio Setup memory Recall 1 Selects the PRO mode of Audio setup 1 Enter Audio Setup mode See the 'Audio Setup' (page 48) and select "Audio Setup: PRO". 2 Select the source for adjustment Press the [SRC] button. 3 Select the key function section Press the [NEXT] button. Repeatedly press the button until "AD SET" is displayed above the [3] button. Refer to 'Notes on Multi-function Key System' (page 9).
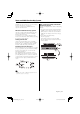
Tuner features 1-6 NEXT AUTO /AME Band display AM Preset station number FM 4 ¢ Frequency display Tuning Mode Tuning Choose the tuning mode. Selecting the station. Press the [AUTO] button. Each time the button is pressed the Tuning mode switches as shown below. Tuning mode Display Operation Auto seek "Auto 1" Automatic search for a station. Preset station seek "Auto 2" Search in order of the stations in the Preset memory.
Tuner features Function of remote Direct Access Tuning Auto Memory Entry Entering the frequency and tuning. Putting stations with good reception in the memory automatically. 1 Select the band 1 Select the band for Auto Memory Entry Press the [FM] or [AM] button. 2 Enter Direct Access Tuning mode Press the [DIRECT] button on the remote. "– – – –" is displayed. 3 Enter the frequency Press the number buttons on the remote. Example: Desired frequency Press button 92.
Function of Remote SNPP (Station Name Preset Play) Display SNPS and Select the station. 1 Enter SNPP mode Press the [DNPP] button on the remote. When "SNPP" is displayed, SNPS or PS displays in the FM1, FM2, FM3 and AM bands in order. • If the station has no name, the frequency is displayed instead. Changing the display order Press the [4] or [¢] button. Changing the displayed band Press the [FM] or [AM] button. 2 If the station you want is displayed Press the [OK] button on the remote.
RDS features 1-6 PTY SCRL/ AM NAME.S FM 4 ¢ Frequency display Radio text Radio Text Scroll Program Type preset Scrolling the displayed radio text. Putting the Program Type in the Preset button memory and calling it up quickly. Press the [SCRL] button. Presetting the Program Type 1 Select the Program Type to preset Registration of a station as a PTY Registering a Program Type for stations with no PTY data.
PTY (Program Type) 3 Search for the selected Program Type Selecting the Program Type and searching for a station. 1 Enter PTY mode Press the [PTY] button. "PTY Select" is displayed. station Press the [4] or [¢] button. When you want to search for other stations press the [4] or [¢] button again. • When the selected Program Type isn’t found, "NO PTY" is displayed. Select another Program Type. • This function can't be used during a traffic bulletin or AM reception.
CD/MP3/WMA/External disc control features 2-5 38 SCRL Track number Playing CD & MP3/WMA When there is no disc inserted 1 Open the panel to insert disc Press the [0] button. SRC NEXT AM/ FM/ DISC- DISC+ 4 ¢ Track time Eject the disc 1 Eject the disc Press the [0] button. 2 Return the panel to the original position Press the [0] button. 2 Insert a disc. • When the faceplate has been slid open, it might interfere with the shift lever or something else.
Playing External Disc Playing discs set in the optional accessory disc player connected to this unit. Press the [SRC] button. Select the display for the disc player you want. Display examples: Display "Compact Disc" "CD Changer" "MD Changer" Disc player CD player CD changer MD changer Pause and play Press the [38] button. Each time the button is pressed it pauses and plays.
CD/MP3/WMA/External disc control features Track/File/Disc/Folder Repeat Random Play Replaying the song, disc in the Disc changer or MP3/WMA folder you’re listening to. Play all the songs on the disc or MP3/WMA folder in random order. 1 Select the key function section 1 Select the key function section Press the [NEXT] button. Repeatedly press the button until "REP" is displayed above the [4] button. Refer to 'Notes on Multi-function Key System' (page 9).
Function of MP3/WMA Folder Select Canceling the Folder Select mode Press the [3] ("EXIT") button. Quickly selecting the folder you want to listen to. 1 Select the key function section Press the [NEXT] button. Repeatedly press the button until "FSEL" is displayed above the [5] button. Refer to 'Notes on Multi-function Key System' (page 9). Text/Title Scroll Scrolling the displayed CD text or MD title. Press the [SCRL] button. 2 Enter Folder Select mode Press the [5] ("FSEL") button.
SIRIUS tuner control features 1-6 NEXT AUTO SCRL Band display Select SIRIUS Satellite Radio Mode Selecting the SIRIUS Satellite Radio Tuner (optional accessory) connected to this unit. FM 4 SRC ¢ Channel number Display "Channel" "Preset" Operation Normal manual seeking control. Search in order of the channels in the Preset memory. Selecting SIRIUS Mode Press the [SRC] button. Select the "SIRIUS" display.
2 Select the item for adjustment Channel Preset Memory Press the desired [2] — [5] button. Each time the button is pressed the items that can be adjusted switch as shown below. Adjustment Item Search down in category Search up in category Search down for channel in selected category Search up for channel in selected category Button [2] [3] [4] [5] Display "CS–" "CS+" "CH–" "CH+" • You cannot operate this unit until all the Category information is acquired. Putting the channel in the memory.
SIRIUS tuner control features Channel Scan Every receivable Channel is checked for 10 seconds. 1 Start Channel Scan Press the [AUTO] button for at least 1 second. The channel number display blinks. 2 Release it when the song you want to listen to is received Press the [AUTO] button for at 1 second. Text Scroll for SIRIUS tuner source Scrolls the displayed channel name and other items. Press the [SCRL] button. 42 | English KDC-X979(K)_U.S _r5.0 42 03.11.
HD Radio control features SRC MENU Band display Tuning Selecting the station. AM FM 4 ¢ Frequency display • The RDS function will no longer be possible. • The HD Radio cannot be selected as a dual zone source. 1 Select HD Radio source Press the [SRC] button. Select the "HD RADIO" display. 2 Select the HF band Press the [FM] button. Each time the [FM] button is pressed it switches between the HF1, HF2, and HF3 bands. Select the HA band Press the [AM] button.
HD Radio control features Auto Memory Entry Putting a station with good reception in the memory automatically. 1 Select the band for Auto Memory Entry Press the [FM] or [AM] button. 2 Enter Menu mode Press the [MENU] button for at least 1 second. "MENU" is displayed. 3 Select the Auto Memory Entry mode Press the [FM] or [AM] button. Select the "Auto Memory" display. 4 Open Auto Memory Entry Press the [4] or [¢] button for at least 2 seconds.
Menu system SRC MENU AM FM 4 ¢ Menu display Menu System Setting during operation beep sound etc. functions. The Menu system basic operation method is explained here. The reference for the Menu items and their setting content is after this operation explanation. 1 Enter Menu mode Press the [MENU] button for at least 1 second. "MENU" is displayed. 4 Exit Menu mode Press the [MENU] button.
Menu system In Standby mode Security Code Because authorization by the Security Code is required when it’s removed from the vehicle, personalizing this unit is by using the Security Code is a help in preventing theft. Press the Reset button and when it’s removed from the battery power source 1 Turn the power ON. 2 Do the step 4 through 7 operation, and enter the Security Code. "APPROVED" is displayed. The unit can be used.
Date Adjustment DSI (Disabled System Indicator) 1 Select Date Adjust mode A red indicator will blink on the unit after the faceplate is removed, warning potential thieves. Press the [FM] or [AM] button. Select the "Date Adjust" display. 2 Enter Date Adjust mode Press the [4] or [¢] button for at least 1 second. The date display blinks. Display "DSI: ON" "DSI: OFF" Setting LED flashes. LED OFF. 3 Selecting the item (day, month, or year) to adjust Press the [4] or [¢] button.
Menu system In Standby mode Dimmer Dimming this unit’s display automatically when the vehicle light switch is turned ON. Display "Dimmer: ON" "Dimmer: OFF" Setting The display dims. The display doesn’t dim. OFF Wait Time Setting Panel action setting Sets the panel movement when the panel action (back/forward movement) is set to its most end position. Display "Panel Control:1" "Panel Control:2" Setting the time until the faceplate hide operation starts after the power is turned OFF.
In Standby mode Traffic Information Built-in Amp Mute Setting Toggles ON or OFF the mute control on the builtin amplifier. Turning ON this control enhances the preout quality. Display "AMP Mute: OFF" "AMP Mute: ON" Setting The built-in amplifier activates. The built-in amplifier deactivates. Function of the KDC-X979/KDC-X879 B.M.S. (Bass Management System) Adjust the bass boost level of the external amplifier using the main unit.
Menu system In HD Radio mode In HD Radio mode Tuning Mode Auto Memory Entry Sets the tuning mode. For the operation method refer to 'Auto Memory Entry' (page 44). Tuning mode Display Operation Auto seek "Seek mode: Auto 1" Automatic search for a station. Preset station "Seek mode: Auto 2" Search in order of the seek stations in the Preset memory. Manual "Seek mode: Manual" Normal manual tuning control. In HD Radio mode Receive mode Setting Sets the receive mode.
In Standby mode 7 Start downloading CD Read Setting When there is a problem on playing a CD with special format, this setting play the CD by force. Display "CD READ: 1" "CD READ: 2" Setting Play CD and MP3/WMA. Play CD by force. • Setting "CD READ: 2" cannot play MP3/WMA. Some music CDs may not be played back even in the "CD READ: 2" mode. Press the [4] or [¢] button for at least 2 seconds. "Downloading" is displayed. When the downloading finishes, "Finished Download" is displayed.
Menu system Function of the KDC-X979/KDC-X879 When LX AMP unit connecting AMP Control You can control the LX AMP connected to the unit. 1 Select AMP Control mode Press the [FM] or [AM] button. Select the "AMP Control" display. 2 Enter AMP Control mode Press the [4] or [¢] button for at least 1 second. 3 Select the AMP Control item for adjustment Press the [FM] or [AM] button. • For the details of the AMP Control item, see the Instruction manual attached to the LX AMP.
Basic Operations of remote SRC SRC VOL. ATT ATT VOL. FM/AM/DISC+/DISC– 38 38 FM+ DISC 4 AM– ¢ 4/¢ DNPP DNPP /SBF DIRECT /OK ABC DEF GHI JKL MNO PRS TUV WXY Not Used DIRECT/OK [0] — [9] QZ Loading and Replacing the battery Use two "AA"-size batteries. Slide the cover while pressing downwards to remove it as illustrated. Insert the batteries with the + and – poles aligned properly, following the illustration inside the case. Basic operations [VOL.] buttons Adjusting the volume.
Basic Operations of remote In Tuner source In SIRIUS tuner source [FM]/ [AM] buttons Select the band. Each time the [FM] button is pressed it switches between the FM1, FM2, and FM3 bands. [FM] buttons Select the preset band. [4]/ [¢] buttons Tune up or down band. [0] — [9] buttons Press buttons [1] — [6] to recall preset stations. [DIRECT]/ [OK] button Enters and cancels the 'Direct Access Tuning' (page 32) mode. [38] button Enters and cancels the 'PTY (Program Type)' (page 35) mode.
Accessories/ Installation Procedure Accessories Installation Procedure 1 ..........1 2 ..........2 1. To prevent a short circuit, remove the key from the ignition and disconnect the - battery. 2. Make the proper input and output wire connections for each unit. 3. Connect the speaker wires of the wiring harness. 4. Connect the wiring harness wires in the following order: ground, battery, ignition. 5. Connect the wiring harness connector to the unit. 6. Install the unit in your car. 7.
Connecting Wires to Terminals A B KDC-MP925 Subwoofer right output (Red) Subwoofer left output (White) KDC-X879 Subwoofer right output (Red) Subwoofer left output (White) A B Front right output (Red) FRONT Center output (Black) CENTER Subwoofer output (Black) SUB WOOFER KDC-X979 REAR Front left output (White) Rear right output (Red) Rear left output (White) AUX right input (Red) AUX IN AUX left input (White) To KENWOOD disc changer/ Sirius satellite radio tuner/ External optional accessory
Installation non-Japanese cars Japanese cars 1 Refer to the section 'Removing the hard rubber Metal mounting strap (commercially available) Firewall or metal support 2 frame' (page 59) and then remove the hard rubber frame. Align the holes in the unit (two locations on each side) with the vehicle mounting bracket and secure the unit with the accessory screws. T N N T/N T Bend the tabs of the mounting sleeve with a screwdriver or similar utensil and attach it in place.
Installation Locking the Backpanel to the unit If you want to fasten the faceplate to the main unit so that it does not fall off. 1 Refer to the Removing the Backpanel function of 2 the section on 'Theft Deterrent Panel' (page 21) and remove the Backpanel. Insert the panel lock screws into the holes at the sides of the panel. Accessory5 3 Reattach the Backpanel. • Never insert the panel lock screws in any other screw holes than the one specified.
Removing the Unit Removing the hard rubber frame 1 Engage the catch pins on the removal tool and remove the two locks on the upper level. Upper the frame and pull it forward as shown in the figure. Lock Catch Removing the Unit 1 Refer to the section 'Removing the hard rubber 2 3 frame' (page 59) and then remove the hard rubber frame. Remove the screw (M4 × 8) on the back panel. Insert the two removal tools deeply into the slots on each side, as shown.
Troubleshooting Guide What might seem to be a malfunction in your unit may just be the result of slight misoperation or miswiring. Before calling service, first check the following table for possible problems. ? Even if Loudness is turned ON, high-pitched tone isn’t compensated for. ✔ Tuner source is selected. ☞ High-pitched tone isn’t compensated for when in Tuner source. ✔ The 'System Q' (KDC-MP925/X879) (page 24) is set to SRS WOW. ☞ Turn it to the other items.
? Even though Synchronize Clock is ON, the clock can’t be adjusted. ✔ The received RDS station isn’t sending time data. ☞ Receive another RDS station. ? The Dimmer function doesn’t work. ✔ The Dimmer wire isn’t connected correctly. ☞ Check the Dimmer wire connection. ? The panel is not hidden even when the power is turned off. ✔ The protection function for preventing fingers or other things from getting caught in between the panel and this unit has been activated. ☞ Turn off the power again.
Troubleshooting Guide MP3/WMA source ? ? ? Cannot play an MP3/WMA. ✔ The media is scratched or dirty. ☞ Clean the media, referring to the CD cleaning of the section on 'About CDs' (page 8). The sound skips when an MP3/WMA is being played. ✔ The media is scratched or dirty. ☞ Clean the media, referring to the CD cleaning of the section on 'About CDs' (page 8). ✔ The recording condition is bad. ☞ Record the media again or use another media. The messages shown below display your systems condition.
Hold Error: NO NAME: The protective circuit in the unit activates when the temperature inside the automatic disc changer exceeds 60°C (140°F), stopping all operation. ➪ Cool down the unit by opening the windows or turning on the air conditioner. As the temperature falls below 60°C (140°F), the disc will start playing again. • Attempted to display DNPS during the CD play having no disc names preset. • Attempted to display SNPS during the receiving session of the station having no station name preset.
Specifications Specifications subject to change without notice. FM tuner section Frequency range (200 kHz space) : 87.9 MHz – 107.9 MHz Usable sensitivity (S/N = 30dB) : 9.3dBf (0.8 µV/75 Ω) Quieting Sensitivity (S/N = 50dB) : 15.2dBf (1.6 µV/75 Ω) Frequency response (±3.