
User's Manual


14
0(186(783
:+$7,6$0(18"
Many functions on this transceiver are selected or
configured via a software-controlled Menu, rather than
through the physical controls of the transceiver. Once
familiar with the Menu system, you will appreciate the
versatility it offers. You can customize the various
timings, settings, and programming functions on this
transceiver to meet your needs without using many
controls and switches.
0(18$0(18%
This transceiver has 2 menus: Menu A and Menu B.
These menus contain identical functions and can be
configured independently. The transceiver, therefore,
allows you to switch between 2 different environments
quickly and easily. For example, you can configure
Menu A for DXing and contesting while Menu B is
for relaxed local ragchewing. By switching from
Menu A to Menu B, you can instantly change the
Menu configuration and key assignment to suit your
current operating style. Or, 2 operators may share
a single transceiver by dedicating one Menu to each
operator. Both operators can always enjoy their own
configuration.
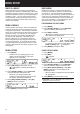
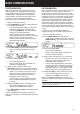
0(18$&&(66
1 Press [MENU].
• The Menu No. and setting appear on the
display, and the explanation of the menu
appears on the sub-display.
2 Press [A/B (A=B)] to select Menu A or B.
•“
” or “ ” appears, indicating which Menu is
selected.
3 Press [Q-M.IN]/ [Q-MR] or turn the MULTI/CH
control to select the desired Menu No.
• Each time you change the Menu No.,
a different scrolling message appears on the
sub-display, describing the Menu No.
4 Press [M.IN]/ [SCAN (SG.SEL)], or Mic [UP]/
[DWN] to select a parameter.
5 Press [MENU] to exit Menu mode.
48,&.0(18
Because the number of functions this transceiver
provides is extraordinary, there are numerous items
in each Menu. If you find accessing desired Menu
Nos. to be too time consuming, use the Quick Menu to
create your own customized, abbreviated Menu. You
can then add those Menu Nos. which you frequently
use, to the Quick Menu. Copying Menu Nos. to the
Quick Menu has no effect on the Menu.
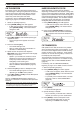
352*5$00,1*7+(48,&.0(18
1 Press [MENU].
2 Press [Q-M.IN]/ [Q-MR] or turn the MULTI/CH
control to select the desired Menu No.
3 Press [FINE (F.LOCK)].
•“
” appears, indicating that the Menu item has
been added to the Quick Menu.
• To remove the item from the Quick Menu, press
[FINE (F.LOCK)] again. “ ” disappears.
4 Press [MENU] to exit Menu mode.
86,1*7+(48,&.0(18
1 Press [MENU].
2 Press [MHz].
•“
” appears.
3 Press [Q-M.IN]/ [Q-MR] or turn the MULTI/CH
control to select the desired Quick Menu No.
4 Press [M.IN]/ [SCAN (SG.SEL)], or Mic [UP]/
[DWN] to change the current setting for the
selected Menu No.
• When the Menu is registered to the Quick Menu
list, “ ” appears.
5 Press [MENU] to exit Quick Menu mode.
Note: If the Quick Menu has not been programmed, Press [Q-
M.IN]/[Q-MR] or turning the MULTI/CH control in step 2 causes
“CHECK” to be output in Morse code.