Z920DVD DVD-RECEIVER INSTRUCTION MANUAL This player has been designed to play back the DVD software which has been encoded for specific region areas. It cannot play back the DVD software encoded for other region areas than the region areas for which it has been designed.
English Contents Safety precautions ......................3 Handling discs .............................6 Before Use ...................................8 General features Power .....................................................10 Volume....................................................10 Attenuator...............................................11 Switching Modes ...................................11 Switching Display Mode.........................12 Switching the Upper Part Display ..........
Safety precautions External disc control features Playing Other Disc mode .......................48 Fast Forwarding and Reversing Disc Play .............................................48 Track Search ...........................................48 Disc Search ............................................49 Track / Disc Repeat.................................49 Track Scan ..............................................49 Random Play ..........................................49 Magazine Random Play .............
English Safety precautions 2CAUTION To prevent damage to the machine, take the following precautions: • Make sure to ground the unit to a negative 12V DC power supply. • Do not open the top or bottom covers of the unit. • Do not install the unit in a spot exposed to direct sunlight or excessive heat or humidity. Also avoid places with too much dust or the possibility of water splashing. • Do not subject the faceplate to excessive shock, as it is a piece of precision equipment.
• The illustrations of the display and the panel appearing in this manual are examples used to explain more clearly how the controls are used. Therefore, what appears on the display in the illustrations may differ from what appears on the display on the actual equipment, and some of the illustrations on the display may represent something impossible in actual operation.
English Handling Discs Playing a Disc that is dirty, scratched or warped can cause the sound to skip and the unit to operate incorrectly, resulting in worsened sound quality. Take the following precautions to prevent your Discs from getting scratched or damaged. Handling Discs • Do not touch the recorded side of the Disc (i.e., the side opposite the label) when holding it.
Do Not Load CD Accessories in Slot Do not use commercially available CD accessories that can be loaded into the disc slot, such as stabilisers, protective sheets, or CD cleaning discs, since they can cause the unit to malfunction. Do Not Use Special Shape Discs • Be sure to use round shape Discs only for this unit and do not use any special shape Discs. Use of special shape Discs may cause the unit to malfunction. Removing the Disc Only remove the disc from the machine in a horizontal direction.
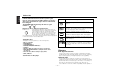
English Before Use This player has been designed to play back the DVD software which has been encoded for specific region areas. It cannot play back the DVD software encoded for other region areas than the region areas for which it has been designed. Icons on the DVD discs Icon Description ALL Indicates the region code where the disc can be played. 8 Number of voice languages recorded with the audio function. The number in the icon indicates the number of voice languages. (Max.
playback only, while some are P.B.C.-compatible and are capable of various special playback control operations. This player can play both of these VCDs. MPEG: Moving Picture Expert Group (DVD, VCD) This is an international standard for digital video and audio compression and decompression in media. Dolby Digital This is a digital audio compression technology developed by Dolby Laboratories. It is compatible with 5.
English General features Power Release button SRC/ PWR OFF u ¢ S.A FM Turning on the power: Press the SRC button. NOTE Turn the power on before carrying out the following procedures. Turning off the power: Hold down the PWR OFF button for one second or more. DSP AUD 3-D DAB PWR OFF XOVER d ATT DISP MENU NAME.S NOTE 4 DISP The status of the Code Security Function (page 54) is displayed whenever the power is switched on.
Attenuator NOTE This function allows you to turn down the volume quickly. Turning Attenuator On/Off: Press the ATT button to switch the attenuator on and off. When the attenuator is off, the volume returns to the original level. NOTE Turning the volume up, or turning it all the way down deactivates the attenuator function.
English General features Switching Display Mode You can select the display mode of this unit. Changing the Display Mode: Each time you press the DISP button, the display mode switches as follows: "Display Type A" Divide the display into the upper and lower parts to separately provide different information. The upper part display The lower part display The Icon/ Spectrum analyzer "Display Type B" The display will turn on by using only the upper part of the display and clock.
In External disc control mode: Track Time Disc name (DNPS)(only when being preset) Disc Title (Units featuring CD text/MD only) Track Title (Units featuring CD text/MD only) NOTE • You can give names to discs through the presetting disc name function (page 50). Note that depending on the unit, display may not be possible. • If you try to display the name of a disc that does not have one, "NO NAME" is displayed instead.
English General features Switching the Lower Part Display In DVD mode: This function switches the type of information on the lower part display when the display mode is "Display Type A". Spectrum Analyzer + Clock 1 Press the S.A button to enter the display control mode.
Switching Full-Screen Display NOTE • You can give names to discs through the presetting disc name function (page 50). Note that depending on the unit, display may not be possible. • If you try to display the name of a disc that does not have one, "NO NAME" is displayed instead. • When there is an attempt to display the title of a disc for which the disc title/track title has not been recorded, "NO TEXT" is displayed for CD and "NO TITLE" is displayed for MD.
English General features Switching Display during the Standby mode This function switches the type of information on the display in standby mode. 1 Press the SRC button repeatedly to select the standby mode. "ALL OFF" is displayed when the standby mode is selected. 2 Each time you press the S.
Audio effect control features • Do not apply excessive force to the faceplate bracket without attaching the faceplate. Doing so will cause the faceplate bracket to be deformed. • Do not touch the connector on the faceplate bracket after removing the faceplate. Touching the connector may cause damage to the unit. 3-D ¢ AUD/Q FM NOTE • The faceplate is a precision piece of equipment and can be damaged by shocks or jolts.
Audio effect control features English System Q Speaker Setting You can recall the best audio setting preset for different types of the music. This function allows you to adjust the setting that is recalled with the System Q, according to types of speakers. Switching the Preset Sound Setting: Each time you press the Q button, the preset sound setting switches as follows: 1 Press the SRC button repeatedly to select the standby mode.
Audio Control Setting: 1.Bass Centre Frequency Adjust various parameters of sound quality. Adjust the centre frequency of the bass. 1 Hold down the AUD button for one second or more to enter Display and setting: "Bass FRQ" : 60 / 70 / 80 / 100 (Only when the bass quality factor is set to 1.00, 1.25 or 1.50) / 150 (Only when the bass quality factor is set to 2.00) Hz. the control mode. 2 Selecting mode Press either the FM or AM button. Each time the button is pressed, the adjustment mode will change.
Audio effect control features English 5.Middle Centre Frequency 9.Treble Level Adjust the centre frequency of the middle. Adjust the treble level. Display and setting: "MID FRQ" : 0.5 / 1.0 / 1.5 / 2.0 kHz. Display and setting: "TRE" : - 9 – 0 – + 9 6.Middle Level 10.Balance Level Adjust the middle level. Adjust the balance level. Display and setting: "MID" : - 9 – 0 – + 9 Display and setting: "Balance" : Left 15 – 0 – Right 15 7.Middle Quality Factor 11.
13.Volume Offset Crossover Network Control Setting: Set the sound level of the each source selected by adjusting the level difference between the basic sound level and the required level. Adjust various parameters of sound quality. Display and setting: "Volume Offset" : - 8 – ± 0 2 Selecting mode 1 Hold down the XOVER button for one second or more to enter the control mode. Press either the FM or AM button. Each time the button is pressed, the adjustment mode will change.
Audio effect control features English Spatializer® Function Setting: 2.High-pass Filter Frequency for Rear Output Adjust the frequency of the High-pass filter for rear output. Display and setting: "REAR HPF" : THROUGH / 40Hz / 60Hz / 80Hz / 100Hz / 120Hz / 150Hz / 180Hz / 220Hz You get a 3-D stereo effect when the Spatializer® function is turned ON. 1 Hold down the 3-D button for one second or more to enter the 3-D stereo control mode.
Audio effect control features Dual Zone System S.A ¢ AUD/Q The following operation allows separate sound sources to control the output of the front and rear speakers. FM DSP AUD 3-D DAB PWR OFF XOVER DISP MENU NAME.S Setting the Dual Zone function: Press the S.A button for at least one second to enter the Dual Zone System setup mode. Each time you press the 38 button, the mode switches as follows: "ON" : The dual zone system function is on.
Audio effect control features English Audio Control Setting: 3.Sub Woofer Level Adjust various parameters of sound quality. Adjust the Sub Woofer output level. 1 Hold down the AUD button for one second or more to enter Display and setting: "SW Level" : - 35 – 0 – + 5 the control mode. 2 Selecting mode Press either the FM or AM button. Each time the button is pressed, the adjustment mode will change.
Crossover Network Control Setting: 2.Delay Time for the Front Right Speaker Adjust various parameters of sound quality. Adjust the delay time for front right output. 1 Hold down the XOVER button for one second or more to enter Display and setting: "F-R DTA" : 0.0m / 1.0m / 2.1m / 3.3m / 5.4m / the control mode. 2 Selecting mode Press either the FM or AM button. Each time the button is pressed, the adjustment mode will change. Please refer to the following for the contents of the adjustment modes.
Audio effect control features English Display and setting the slope: "SW Slope" : 12dB / 18dB / 24dB 5.Delay Time for the Rear Right Speaker Adjust the delay time for rear right output. Display and setting: "R-R DTA" : 0.0m / 1.0m / 2.1m / 3.3m / 5.4m / 0.1m 1.2m 2.2m 3.6m 5.7m / / / / / 0.3m 1.3m 2.4m 3.9m 6.0m / / / / 0.4m 1.5m 2.5m 4.2m / / / / 0.6m 1.6m 2.7m 4.5m NOTE / / / / 0.7m 1.8m 2.8m 4.8m / / / / 0.9m 1.9m 3.0m 5.
Surround Processor Control Setting: 10.Delay Time for the Centre Speaker Adjust the delay time for centre output. Adjust various parameters of sound quality. Display and setting: "CNTR DTA" : 0.0m / 0.1m / 0.3m / 0.4m / 0.6m / 0.7m / 0.9m / 1.0m / 1.2m / 1.3m / 1.5m 1 Hold down the Q button to enter the control mode. 2 Selecting mode Press either the FM or AM button. Each time the button is pressed, the adjustment mode will change. Please refer to the following for the contents of the adjustment modes.
Audio effect control features English 2.Parametric Equalizer 3.Storing Your Setting of the parametric equalizer Each time you press the FM or AM button, the adjustment mode will be switched as follows: "BAND-1 f" / "BAND-1 Gain" / "BAND-1 Q" / "BAND-2 f" / "BAND-2 Gain" / "BAND-2 Q" / "BAND-3 f" / "BAND-3 Gain" / "BAND-3 Q" / "BAND-4 f" / "BAND-4 Gain" / "BAND-4 Q" Press the #1 - #3 button for at least two seconds.
6.Selecting the Acoustic Image 8.Selecting the Multi Channel Display and Setting: "Bi Phantom ON" / "Bi Phantom OFF" Select the sound output speaker for Multi channel sound. NOTE Display and Setting: "Multi CH 3/2" / "Multi CH 2/2" / "Multi CH 3/0" / "Multi CH 2/0" • You cannot operate when “Dolby PL“ is set to “OFF”. • Not available during the Dual zone system is on. • You cannot operate when Dolby Digital 5.1ch surround or DTS 5.1ch surround DVD and DTS-CD are being played.
Audio effect control features English 10.Setting the Channel Balance This item allows you to adjust the output level of each channels of speaker using the built-in test signal.The output level must be adjusted from the listening position.The factory setup is “0 dB” for all types of speakers. Test Signal: Each time you press the 38 button to switch the noise sequencer on and off. NOTE Not available during the Dual zone system is on.
Tuner features Tuning ¢ SRC FM 1 Press the SRC button repeatedly until the tuner mode is obtained. "TUNER" is displayed only when the tuner mode is selected. 2 Press either the FM or AM button to select the band. Each time you press the FM button, the band switches between the FM1, FM2 and FM3. Press the AM button to select the MW and LW bands. DSP AUD 3-D DAB PWR OFF XOVER DISP MENU NAME.S 4 #1-6 3 • Auto Seek Tuning Press the ¢ button to seek increasing frequencies.
English Tuner features Direct Access Tuning (Function of remote control) When you know the frequency of the station that you want to listen to, you can input it directly for quick access. Store the frequency of the station currently being listened to. You can then recall that station with a single touch of a button. Station Preset Memory 1 Select the band by pressing the FM or AM button. 2 Press the DIRECT button. 1 Select the band/station that you want to have stored.
RDS features RDS (Radio Data System) ¢ RDS is a digital information system that lets you receive signals besides those of regular radio programmes, such as network information being transmitted from radio stations. When listening to an RDS station (ie, a station with RDS capability), the programme service name of the station is displayed along with the frequency, advising you quickly which station is being received. RDS (Radio Data System) stations also transmit frequency data for the same station.
English RDS features Traffic Information Function Presetting Volume for Traffic Information/News You can listen to traffic information. If you are listening to tapes or discs, they will continue playing until a traffic bulletin is broadcast. Turning TI function On/Off: Press the TI button to turn the function on and off. When the function is on, the TI indicator is turned on. When none is being received, the TI indicator will blink on and off.
Speech (All Speech) Music (All Music) 1. News (News) 2. Current Affairs (Current Affairs) 3. Information (Information) 4. Sports (Sport) 5. Education (Education) 6. Drama (Drama) 7. Culture (Cultures) 8. Science (Science) 9. Varied (Varied Speech) 10. Pop Music (Pop Music) 11. Rock Music (Rock Music) 12. Easy Listening Music (Easy Listening M) 13. Light Classical (Light Classic M) 14. Serious Classical (Serious Classics) 15. Other Music (Other Music) 16. Weather (Weather & Metr) 17. Finance (Finance) 18.
English RDS features Changing Language for Programme Type(PTY) Function Changing the display language to another language. 1 Press the 38(PTY) button. "PTY Select" is displayed, and the Programme Type Selection (PTY) Mode entered. 2 Enter the Changing Language Mode Press the DISP button to enter the changing language mode. 3 Changing the Display Language Press the FM or AM button.
DVD/VCD/CD control features Release button SRC ¢ FM Disc mode Track number / PBC indicator Track time Track number Track time DSP AUD 3-D DAB PWR OFF XOVER DISP MENU NAME.S NF IN indicator DISP #2 38 #3/ REP RDM 4 AM Play indicator Disc mode Title number Disc mode Chapter number IN indicator IN indicator Description about this indicator for these features can be displayed by setting the Lower Part Display (page 14) to "... + Function indicator".
English DVD/VCD/CD control features Playing DVDs/VCDs/CDs Playing DVDs/VCDs/CDs: A press of the release button causes the faceplate to drop to the front, thereby exposing the DISC slot. Holding the DISC with the labelled side facing up, insert it in the slot. The DISC will start playing. Push back the faceplate with your hand until it locks. The IN indicator will light when a DISC has been inserted.
Chapter Search (DVD) Track Search (VCD, CD) Search forwards or backwards through the chapters on the disc until you reach the one that you want to look to. Making a Forward Chapter Search: Press the ¢ button once to fast forward to the next chapter, twice to fast forward to the chapter after that, and so forth. Making a Reverse Chapter Search: Press the 4 button once to search back to the beginning of the current chapter, twice to search back to the beginning of the previous chapter, and so forth.
DVD/VCD/CD Setup Menu features English Selecting to the DVD Setup Menu Press the SETUP button to switch to the DVD Setup Menu.
Setting the Priority Language for Subtitle Set the language of the subtitles displayed on the screen. 1 Press the each the [ 5 or ∞ ] buttons to select the “LANGUAGES”. Press the [ ENTER ] button. 2 Press the each the [ 5 or ∞ ] buttons to select the “SUBTITLE”. Press the [ ENTER ] button. 3 Press the each the [ 5 or ∞ ] buttons to select the language. Press the [ ENTER ] button. NOTE • If the language isn’t in the list, select “OTHERS” and enter the “List of language codes”4 digit code.
DVD/VCD/CD Setup Menu features English List of language codes Code 6565 6566 6570 6577 6582 6583 6589 6590 6665 6669 6671 6672 6678 6679 6682 6765 6779 6783 6789 6865 6869 6890 6976 6978 6979 Language Afar Abkhazian Afrikaans Amharic Arabic Assamese Aymara Azerbaijani Bashkir Byelorussian Bulgarian Bihari Bengali, Bangla Tibetan Breton Catalan Corsican Czech Welsh Danish German Bhutani Greek English Esperanto Code 6983 6984 6985 7065 7073 7074 7079 7082 7089 7165 7168 7176
List of language codes Code Language Code 7789 7865 7869 7876 7879 7982 8065 8076 8083 8084 8185 8277 8279 8285 8365 8368 8372 8373 8375 8376 8377 8378 8379 8381 8382 Burmese Nauru Nepali Dutch Norwegian Oriya Punjabi Polish Pashto, Pushto Portuguese Quechua Rhaeto-Romance Romanian Russian Sanskrit Sindhi Serbo-Croatian Singhalese Slovak Slovenian Samoan Shona Somali Albanian Serbian 8385 8386 8387 8465 8469 8471 8472 8473 8475 8476 8479 8482 8484 8487 8575 8582 8590 8673 8679 8779 8872 8979 9072 9085
DVD/VCD/CD Setup Menu features English Select “Change Password” and enter a new 4 digit password. Setting the Rating Level (parental lock) Use this function to restrict the viewing of movies to children of appropriate age levels only. Setting the password: 1 Press the each the [ 5 or ∞ ] buttons to select the “PARENTAL”. Press the [ ENTER ] button. 2 Press the [ 1 ] - [ 0 ] button and enter your password ( 4-digit ). Input numbers are displayed “*”.
Setting the Optical Output Mode (DIGITAL OUT) NOTE Setting digital output type. This select can be made when the Dolby Digital signal is inputed. 1 Press the each the [ 5 or ∞ ] buttons to select the “AUDIO”. 4 Press the [ ENTER ] button. Press the [ ENTER ] button. 2 Press the each the [ 5 or ∞ ] buttons to select the “DIGITAL OUT”. Press the [ ENTER ] button.
DVD/VCD/CD Setup Menu features English Setting the Screen Mode Setting the Colour Scheme Use the procedure described below to set the output screen. Setting the On Screen Display colour. 1 Press the each the [ 5 or ∞ ] buttons to select the 1 Press the each the [ 5 or ∞ ] buttons to select the “PICTURE”. Press the [ ENTER ] button. “PICTURE”. Press the [ ENTER ] button.
External disc control features Setting the Zoom Setup Setting the reference point when zooming and the amount of movement when scrolling. Release button SRC ¢ DISC+ 1 Press the each the [ 5 or ∞ ] buttons to select the “PICTURE”. Press the [ ENTER ] button. 2 Press the each the [ 5 or ∞ ] buttons to select the “ZOOM DSP AUD SETUP”. Press the [ ENTER ] button. 3-D DAB PWR OFF 3 Press the each the [ 5 or ∞ ] buttons to select the “START XOVER POINT”.or “PAN SCALE” Press the [ ENTER ] button.
English External disc control features Playing Other Disc mode Fast Forwarding and Reversing Disc Play This function permits the connection of optional players and the playing of discs other than the loaded DVD (in the current unit). Fast Forwarding Disc Play: Hold down on the ¢ button. Release your finger to play the disc at that point. Reversing Disc Play: Hold down on the 4 button. Release your finger to play the disc at the point.
Disc Search (Function of disc changers) Search forwards or backwards through the discs in a disc changer until you reach the one that you want to listen to. Making a Reverse Disc Search: Press the DISC– button to display the desired disc number. Each time the button is pressed, the displayed disc number decreases by one. Play starts at the beginning of the displayed disc. Making a Forward Disc Search: Press the DISC+ button to display the desired disc number.
English External disc control features Magazine Random Play (Function of disc changers) Play the tracks on all the discs in the disc changer in random order. 1 Press the M.RDM button to switch the magazine random play function on and off. "M.Random ON" is displayed when magazine random play is turned on. The display of the disc and track numbers change continuously as the next track is being selected. When the disc/track has been selected, play starts.
• The Disc Name Preset function cannot be used during the Magazine random play as well as while a disc title or track title is displayed in the upper part display. 2 Press the NAME.S button for at least two seconds. "NAME SET" is displayed and the disc name preset mode is entered. The cursor blinks in the position where character input can be made. 3 Press either the 4 or ¢ button to move the cursor to the desired position. The 4 button moves the cursor to the left, and the ¢ button to the right.
— 52 — English
Menu settings Menu System SRC ¢ FM You can set the defaults for additional functions in the menu mode. Make a setting for each function, referring to the following operations. 1 Enter the menu mode Hold down the MENU button for one second or more. "MENU" is displayed when the menu mode is entered. The function that you can adjust is indicated with the current settings displayed. DSP AUD 3-D DAB PWR OFF XOVER DISP MENU NAME.
English Menu settings "CODE" appears in the display, you can start inputting the code. Code Security Function After a security code has been registered, power cannot be restored if the battery is disconnected from the unit unless the code is first input. 6 Press the Preset button and input the security code again. 7 Hold down the DISP button again for three seconds or more. "APPROVED" will appear in the display, with the code security function turning on.
Touch Sensor Tone This function produces a beep sound that accompanies button operation. It can be switched on or off. Display and setting: "Beep ON" : Beep setting is on. (Default setting) "Beep OFF" : Beep setting is off. NOTE The beep sound is not output from the preout jacks. Manual Time Adjustment Adjust the time manually. NOTE This adjustment is available only when the automatic time adjustment is set to off.
English Menu settings Calendar Adjustment Automatic Time Adjustment Adjust the date for the unit so that you can use the calendar function. Display and setting: 1 Select the display "Date Adjust" during the selecting function in the menu system. 2 Hold down either the 4 or ¢ button for one second or more to enter the Calendar adjustment mode. The date display will blink. 3 Selecting the item (day, month, or year) to adjust Press the 4 or ¢ button. The item blinking in the display can be adjusted.
Loudness Icon/Spectrum analyzer Select This function amplifies low and high tones when the volume is turned down. The LOUD indicator lights up, when the loudness function is on. This function permits switching of the spectrum analyzer display. Display and setting: 1 Select the display "Icon/Speana Select" during the selecting function in the menu system. 2 Pressing the 4 or ¢ button switches the Icon/Spectrum analyzer.
English Menu settings Display and setting: "News OFF" (Default setting), "News 00min" – "News 90min" (min= minutes) : When you select the news interruption timeout interval, the News function turns on and the NEWS indicator lights up. When a news bulletin is received, "NEWS" will be displayed and reception will begin at the preset volume.
Auto Memory Entry AF (Alternative Frequency ) Function You can automatically store all the receivable frequencies in the band currently being listened to, and then recall them with the touch of a button later. This function is especially useful when you are travelling and do not know what stations are available. Up to 6 frequencies can be stored this way. Display and setting: 1 Select the display "Auto-Memory" during the selecting function in the menu system.
English Menu settings Auto TP Seek Function Power OFF Timer When the TI function is on and poor reception conditions are experienced when listening to a traffic information station, another traffic information station with better reception will be searched for automatically. This function is on, when unit is first powered on. Display and setting: "ATPS ON" : The Auto TP Seek Function is on.
Basic Operations of remote control 3On Screen Display TV/DVD/AUD TV DVD AUD Joystick A VOL/ATT ATT AM STOP ENTER DIRECT RETURN TV PWR E RETURN AM STOP ENTER DIRECT RETURN TV PWR SRC SRC DIRECT OPEN SET UP MODE F H G I E TOP MENU 0-9 TOP MEMU V.
English Basic Operations of remote control Loading and Replacing the Batteries for the Remote Basic operations 2 CAUTION Do not set the remote on hot places such as above the dashboard. 1. Use two "AAA" batteries. Slide the cover while pressing downwards to remove it as illustrated. 2. Insert the batteries with the ª and · poles aligned properly following the illustration inside the case.
DVD/VCD/CD Control Function < DVD position > 3Pausing and Restarting Disc Play • Press the Joystick to make the disc pause. • Press the Joystick to start play again. 3Manual Search Forward search Move the Joystick to front side. Reverse search Move the Joystick to back side. Cancelling the search Press the [ 38 ] button to resume playback. NOTE (DVD/VCD) Each time you move the Joystick, the search speed goes from 2 times(22/33) to 3 times(222/333).
English Basic Operations of remote control 3Chapter, Title,Time and Number Search(DVD) 1 Each time you press the [ DIRECT ] button the direct search 3Direct Track Search (CD) 1 Press the [ DIRECT ] button to switch the direct track search mode. mode switches between the chapter,title,time and number. 2 Press the [ 0 ] - [ 9 ] buttons and enter the number or time. 3 Press the [ ENTER ] button to start the search for chapter,title and number search.
3Switching the Time Display for Disc(Monitor) External Disc Control Function< AUD position > Press the [ 9 ] button. Each time you press the [ 9 ] button, the time display during disc play switches as follows: DVD 3Pausing and Restarting Disc Play •Press the Joystick to make the disc pause. •Press the Joystick to start play again. 3Track Search C:Chapter time •Move the Joystick to left side to search through the tracks backwards. •Move the Joystick to right side to search through the tracks forwards.
English Accessories External view ......... Number of items External view ......... Number of items 1 5 .........1 2 .........2 3 .........1 4 .........1 6. 7. 8. 9. Connect the wiring harness connector to the unit. Install the unit in your car. Reconnect the - terminal of the battery. Press the reset button. .........1 2CAUTION 6 .........4 7 .........2 8 .........1 2CAUTION The use of any accessories except for those provided might result in damage to the unit.
Connecting Cables to Terminals FRONT VIDEO OUT To the monitor unit Connection cable (Accessory8) 2 CAUTION REAR PRK SW To parking brake detection switch harness of car To KDS-P901 NON FADING For the sake of safety, be sure to connect the parking sensor. To KENWOOD disc changer/ DAB control input/ KPA-SD100 NOTE To connect these leads, refer to the relevant instruction manuals.
English Connecting Cables to Terminals 2WARNING Connecting the ISO Connector (see p.67) The pin arrangement for the ISO connectors depends on the type of vehicle you drive. Make sure to make the proper connections to prevent damage to the unit. The default connection for the wiring harness is described in 1 below. If the ISO connector pins are set as described in 2 or 3, make the connection as illustrated.
Installation ■ Removing the hard rubber frame ■ Installation 1 Engage the catch pins on the removal tool and remove the Firewall or metal support two locks on the lower level. Lower the frame and pull it forward as shown in the figure. Screw (M4X8) (commercially available) Lock Bend the tabs of the mounting sleeve with a screwdriver or similar utensil and attach it in place.
Installation English ■ Removing the Unit ■ Screwing the Faceplate on the Unit 1 Refer to the section “Removing the hard rubber frame” and If you want to fasten the faceplate to the main unit so that it does not fall off, screw in the provided screw (M2 × 3 mm) in the hole shown below. then remove the hard rubber frame. 2 Remove the screw (M4×8) on the back panel. 3 Insert the two removal tools deeply into the slots on each Accessory4 side, as shown.
Troubleshooting Guide What might appear to be a malfunction in your unit may just be the result of slight misoperation or miswiring. Before calling service, first check the following table for possible problems. PROBLEM The power does not turn on. POSSIBLE CAUSE SOLUTION The fuse has blown. After checking for short circuits in the cables, replace the fuse with one having the same rating. No ACC position on vehicle ignition. Connect the same cable to the ignition as the battery cable.
Troubleshooting Guide English PROBLEM No sound can be heard, or the volume is low. The sound quality is poor or distorted. POSSIBLE CAUSE SOLUTION The Attenuator function is turned on. Turn off the Attenuator function. The fader and/or balance settings are set all the way to one side. Reset the fader and/or balance settings. The input/output cables or wiring harness are connected incorrectly. Reconnect the input/output cables and/or the wiring harness correctly.
Troubleshooting Guide PROBLEM POSSIBLE CAUSE SOLUTION The sound/picture skips on a DVD/VCD/CD. The disc is scratched or dirty. Clean the disc, referring to the section on "Cleaning discs" (see p. 6). A VCD cannot be played using menus. The VCD disc being played is not compatible with P.B.C. Menu playback is available only with VCD discs recorded with P.B.C. The subtitle is not displayed. The DVD disc being played does not contain the recording of subtitles.
Troubleshooting Guide English External disc control mode PROBLEM POSSIBLE CAUSE SOLUTION The disc control mode cannot be selected. No cable has been connected to the disc changer input terminal on the unit. Connect the cable to the disc changer input terminal on the unit. The specified disc does not play, but another one plays instead. The specified CD is very dirty. Clean the CD. The CD is upside-down. Load the CD with the labelled side up.
Troubleshooting Guide The following messages are displayed when certain problems are occurring in your system. Take the recommended actions. Eject No disc magazine has been loaded in the changer. The disc magazine is not completely loaded. ] Load the disc magazine properly. No disc in the unit. ] Insert the disc. No Disc No disc has been loaded in the disc magazine. ] Load a disc into the disc magazine. TOC Error No disc has been loaded in the disc magazine. ] Load a disc into the disc magazine.
English Specifications Specifications subject to change without notice. FM tuner section Audio section Frequency range (50 kHz space) ..............87.5 MHz – 108.0 MHz Usable sensitivity (S/N = 26dB) .................................0.7 µV/75 Ω Quieting Sensitivity (S/N = 46dB) ..............................1.6 µV/75 Ω Frequency response (±3.0 dB) ..............................30 Hz – 15 kHz Signal to Noise ratio (MONO) ..............................................65 dB Selectivity (DIN) (±400 kHz)....