CD-RECEIVER KDC-BT8044U KDC-BT8044UY KDC-W7544U KDC-W7644UY KDC-W7044U KDC-W7144UY INSTRUCTION MANUAL © B64-4421-00/00 (EW/E2W) B64-4421-00_00_en.indd 1 09.1.
Contents Before use Basic Operation 3 4 Hands-free phoning Function Control 6 Display Settings 11 Display Type Selection Text Display Selection Illumination Color Selection Auxiliary Input Display Setting Music disc/Audio file Operation 14 Music Search Music Search for iPod Searching for Music by Initial All Random iPod Control by Hand Mode Direct Music Search Direct Disc Search Basic Operation of Disc Changer (Optional) Tuner Operation Sound Setup 28 Cabin selection Speaker setting DTA (Digit
Before use 2WARNING To prevent injury or fire, take the following precautions: • To prevent a short circuit, never put or leave any metallic objects (such as coins or metal tools) inside the unit. Do not use this unit before canceling Demonstration mode! This unit is initially set on the Demonstration mode. When using this unit for the first time, cancel the (page 26). How to reset your unit • If this unit or the connected unit (disc auto changer, etc.
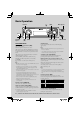
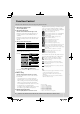
Basic Operation [ Release ] [SRC] Microphone AUX Auxiliary input [ ] [TI] General functions Power/Source Select button: [SRC] Turns on the power. When the power is ON, select a source. SRC Select mode 1: Press the [SRC] button and then turn the Control knob or push it toward up or down. To determine the selected source, press the Control knob. SRC Select mode 2: Pressing this button each time switches between sources.
For example, you can recall and playback the playlist in iPod while listening to Tuner. Refer to (page 33). ⁄ • 3 inch (8 cm) CD cannot be used. Attempt to insert using an adapter can cause malfunction. Disc ejection: [0] Tuner functions ⁄ FM band: Control knob Switches between FM1, FM2, and FM3 each time pushing toward up. • You can eject the disc for 10 minutes after switching off the engine. AM band: Control knob Switches to AM when pushing toward down.
Function Control Functions in the table below can be set up by using Function Control. Displayed item is depending on currently selected source or mode. The mark in Condition column shows the condition to which the item is displayed. 1 Enter Function Control mode Press the [FNC] button. 2 Select a Function group. Push the Control knob towards right or left. Pushing the Control knob towards left allows you to set the preference items (“MENU”, “SETUP”, or “SOUND”).
Source function item Function “iPod BY HAND” Setting “ON”/ “OFF”* “FILE SCAN” “ON”/ “OFF”* “FOLDER RDM” “ON”/ “OFF”* “ALL RANDOM” “ON”/ “OFF”* “FILE REPEAT” “ON”/ “OFF”* “FOLDER REP” “ON”/ “OFF”* “TRACK SCAN” “ON”/ “OFF”* “DISC RANDOM” “ON”/ “OFF”* “MAGAZINE RDM” “ON”/ “OFF”* “TRACK REPEAT” “ON”/ “OFF”* “DISC REPEAT” “ON”/ “OFF”* Entry “PTY SEARCH” “AUTO MEMORY” Setting overview When set to “ON”, allows you to operate iPod with the control on the iPod.
Function Control Category Item “NR Level”** Setting “–2” – “0”* – “+2” “SP Select”** “Front”*/ “F-R”/ “F-L” “ON”*/ “OFF” “Call Beep”** “BT F/W Update”** “Beep” “Clock Adjust” “Date Adjust” Condition Page — * * Output a beep from the speaker when a call comes in. * Display the firmware version and update the firmware. 37 — 1 sec. Setting the operation check sound (beep sound) ON/ OFF. Sets the clock. Sets the date. 1 sec. 1 sec.
Category Item “AF” Setting “OFF”/ “ON”* “Regional” “OFF”/ “ON”* “Auto TP Seek” “OFF”/ “ON”* “MONO” “OFF”/ “ON”* “Name Set” — Condition Page * — — — 13 “OFF”/ “ON”* Selects Russian as the display language. “Scroll” Specifies whether the text is scrolled automatically. “Favorite Delete” “Auto”*/ “Manual” — Deletes Favorite Preset Memory. 33 “Built in AUX” “OFF”*/ “ON” Sets whether to display AUX during source selection.
Function Control Category Item “Speaker” “Preset” “DTA” — “X’Over” — “Recall” — “Memory” “DPS Set” “BT” “Voice Recognize” “Voice Tag” “PB Name Edit” “SMS” Setting — — “Bypass”/ “Through”* — Entry Setting overview Condition Page Sets the connected speaker, speaker size, and 28 installation position. Makes fine adjustment of the compensation value 29 specified at Cabin. Makes fine adjustment of the X’Over value specified at 29 Speaker. Registering the value setup by Sound Control.
Display Settings Display Type Selection Text Display Selection Shown below are examples of display types. Changes displayed information on each source following; Display “TYPE [A]” “TYPE [B]” “TYPE [C]” “TYPE [D]” Display Type Displays 4 to 5 lines of text. Displays a line of text and video. Displays a line of text and the spectrum analyzer. Displays the clock. 1 Enter Display type selection mode Select “SETUP” > “Display Select” > “Type Select”.
Display Settings 1 Enter Text display selection mode Select “SETUP” > “Display Select” > “Text Select”. For how to select Function Control item, refer to (page 6). 2 Select the text display part Push the Control knob towards up or down. The selected text display part blinks. Illumination Color Selection Selecting the Illumination Color of the panel. 1 Enter Illumination color selection mode Select “SETUP” > “Color Select”.
Auxiliary Input Display Setting Selects the display when changing to Auxiliary input source. 1 Select the AUX source Press the [SRC] button. 2 Enter Auxiliary input display setting mode Select “MENU” > “Name Set”. For how to select Function Control item, refer to (page 6). 3 Enter Auxiliary input display setting mode Press the Control knob for at least 1 second. The presently selected Auxiliary input display is displayed. 4 Select the Auxiliary input display Turn the Control knob.
Music disc/Audio file Operation Function of Audio file/ Internal CD source Function of iPod Music Search Music Search for iPod Selecting the music you want to listen to from the device or media being played now. Search for the song (in iPod) you want to play. 1 Enter Music Search mode Press the [ ] button. “SEARCH” is displayed. Displays the current Audio file name.
2 Start the alphabet search Push the Control knob towards down. “A B C …” is displayed. • If you can not search for a song by an alphabetic character in the browse item selected now, the data on the screen does not change. 3 Select the initial to be searched for Operation type Move to the next character. Move to the next row. Operation Turn the Control knob or push it towards right or left. Push the Control knob towards up or down. 4 Determine the selected initial Press the Control knob. Start search.
Music disc/Audio file Operation Function of disc changers with remote control Direct Disc Search Searchs the disc by entering the disc number. 1 Enter the disc number Press the number buttons on the remote control. 2 Search the disc Press the [FM+] or [AM–] button. Cancelling Direct Disc Search Press the [38] button. ⁄ • Direct Disc Search cannot be performed during playing of Random play or scan play. • Input “0” to select disc 10.
Tuner Operation Auto Memory Entry Preset Tuning Putting stations with good reception in the memory automatically. Recalling the stations in the memory. 1 Enter Auto Memory Entry mode Select “AUTO MEMORY”. For how to select Function Control items, refer to (page 6). 2 Open Auto Memory Entry Turn the Control knob to select “YES”, and then press the Control knob. When 6 stations that can be received are put in the memory, auto memory entry closes.
Tuner Operation PTY (Program Type) Program Type Preset Selecting the Program Type below and searching for a station; Putting the Program Type in the Preset button memory and quick recall.
Function of KDC-BT8044U/ KDC-BT8044UY KDC-W7544U/ KDC-W7644UY/ KDC-W7044U/ KDC-W7144UY with KCA-BT200 (Optional Accessory) Operation of hands-free phoning your cell-phone to return to the hands-free talk mode. Before Use • For details on the Bluetooth cell-phone with the hands-free function, see (page 43). • You need to register your cell-phone before using it with this unit. For more details, see (page 35).
Function of KDC-BT8044U/ KDC-BT8044UY KDC-W7544U/ KDC-W7644UY/ KDC-W7044U/ KDC-W7144UY with KCA-BT200 (Optional Accessory) Operation of hands-free phoning Making a call Speed dialing (Preset dial) 1 Enter dialing method mode 1 Enter dialing method mode KDC-BT8044U/ KDC-BT8044UY: Press the [ ] button. KDC-W7544U/ KDC-W7644UY/ KDC-W7044U/ KDC-W7144UY: Press the [ ] button for at least 1 second. 2 Select a dialing method Press the Control knob.
Calling a number in the Phone Book Calling a number in the call log 1 Enter dialing method mode 1 Enter dialing method mode KDC-BT8044U/ KDC-BT8044UY: Press the [ ] button. KDC-W7544U/ KDC-W7644UY/ KDC-W7044U/ KDC-W7144UY: Press the [ ] button for at least 1 second. 2 Select the Phone Book mode Press the Control knob. Select the “INITIAL” display, proceed to step 3. Select the “PHONE BOOK” display, proceed to step 4. 3 Select the initial to be searched for Operation type Move to the next character.
Function of KDC-BT8044U/ KDC-BT8044UY KDC-W7544U/ KDC-W7644UY/ KDC-W7044U/ KDC-W7144UY with KCA-BT200 (Optional Accessory) Operation of hands-free phoning Make a voice dialing call 1 Enter voice recognize mode Select “BT” > “Voice Recognize”. For how to select Function Control item, refer to (page 6). “Ready” is displayed. 2 Press the Control knob. “PB Name?” is displayed. When a beep is heard, utter the name within 2 second. 3 “PN Type” is displayed.
Bluetooth Audio Operation Before Use • For details on the Bluetooth Audio player which can be connected, see (page 43). • You need to register your Bluetooth Audio player before using it with this unit. For more details, see (page 35). • You to select the Bluetooth audio player you wish to connect. Refer to (page 36). Basic Operation Selecting Bluetooth Audio source Press the [SRC] button.
Other Functions Activating Security Code Deactivating Security Code ⁄ To deactivate the Security Code function. • You can set the Security Code with a 4 digit number of your choice. • The Security Code cannot be displayed or referenced. Make a note of the Security Code and treasure it up. 1 Select Security code mode 1 Select Security code mode Select “MENU” > “Security Set”. For how to select Function Control item, refer to (page 6).
Manual Clock Adjustment Date Format Selection 1 Select Clock adjustment mode 1 Select Date format mode Select “MENU” > “Clock Adjust”. For how to select Function Control items, refer to (page 6). 2 Enter Clock adjustment mode Press the Control knob for at least 1 second. The clock display blinks. 3 Adjusting Clock Operation type Selecting the item (hours or minutes) Adjust each item Select “MENU” > “Date Mode”.
Other Functions Demonstration mode setting Theft Deterrent Faceplate Turning the demonstration mode ON/OFF. The faceplate of the unit can be detached and taken with you, helping to deter theft. 1 Select Demonstration mode Select “MENU” > “DEMO Mode”. For how to select Function Control items, refer to (page 6). 2 Set the Demonstration mode Press the Control knob for at least 2 seconds. Pressing this button for 2 seconds or longer toggles the setting between “ON” and “OFF”.
Audio Adjustments Audio Control Audio Setup You can adjust following Audio Control items; You can set Sound system , such as follows; Adjustment Item Display Range Rear volume “REAR VOLUME” 0 — 35 Subwoofer level “SUBWOOFER LEVEL” –15 — +15 Balance “BALANCE” Left 15 — Right 15 Fader “FADER” Rear 15 — Front 15 Exit Audio Control mode (Volume control mode) 1 Enter Audio Control mode Press the [AUD] knob. 2 Select the Audio item to adjust Press the [AUD] knob.
Sound Setup (page 6). Cabin selection You can compensate the delay of the sound arrival time by selecting your environment from the following car types; Car type Not compensating. Compact car Sedan Station wagon Minivan Sport-utility vehicle Passenger van Display “OFF” “Compact” “Sedan” “Wagon” “Minivan” “SUV” “Passenger Van” 1 Enter Cabin select mode Select “SOUND” > “Setup” > “Cabin”. For how to select Function Control item, refer to (page 6).
DTA (Digital Time Alignment) setting X’Over setting Adjusting fine tuning of the speaker position compensation value specified at (page 28). Fine adjusting the following setting values corresponding to the X’Over values set in the section (page 28); 1 Enter DTA setting mode Select “SOUND” > “Setup” > “DTA”. For how to select Function Control item, refer to (page 6).
Sound Setup Preset Equalizer curve select Manual Equalizer Control You can select following Equalizer curve; You can adjust following Equalizer Control items; Equalizer curve Natural User* Rock Pops Easy Top 40 Jazz Game iPod (During iPod source only) Display “Natural” “User” “Rock” “Pops” “Easy” “Top 40” “Jazz” “Game” “iPod” * The Equalizer curve set in the section is recalled. 1 Enter Preset Equalizer mode Select “SOUND” > “Control” > “EQ” > “Preset Equalizer”.
Preset position selection Manual position setting According to the listening position, select the position from the following settings so that the normal position of the sound environment can be compensated in accordance with the selected position; Making fine adjustment of the value specified at Preset position selection per speaker. Compensation seat Not compensating.
Sound Setup Audio Preset Memory Audio Preset Recall Registering the value setup by Sound Control. Recalling the sound setup registered by
Favorite Control Favorite Preset Memory Favorite Preset Recall Registering the operation procedure to select your favorite broadcast station or iPod Playlists/ Artists, etc. Retrieving an item registered to Favorite. 1 Display a favorite item Source TUNER iPod Registerable items Preset Memory List selection screen for Playlists/ Artists/ Albums, etc. Telephone number retrieval. Hands-free phone “ FAV ” is displayed when the operation procedure can be registered.
Favorite Control Favorite Name Setting Giving a name to Preset Memory registered to Favorite. 1 Enter Preset Recall mode Turn the Control knob. 2 Retrieve the Preset Memory to change Turn the Control knob. 3 Enter Favorite Name set mode Press the Control knob for at least 1 second. Select the “FAVORITE NAME SET” display. 4 Enter the name Operation type Move the cursor to the enter character position Select the character type* Select the characters Operation Push the Control knob towards right or left.
Function of KDC-BT8044U/ KDC-BT8044UY KDC-W7544U/ KDC-W7644UY/ KDC-W7044U/ KDC-W7144UY with KCA-BT200 (Optional Accessory) Bluetooth Setup Registering Bluetooth device To make your Bluetooth device (cell-phone) usable with this unit, you need to register it (pairing). You can register up to five Bluetooth devices to this unit. When registering from Bluetooth devices 1 Turn on the control unit.
Function of KDC-BT8044U/ KDC-BT8044UY KDC-W7544U/ KDC-W7644UY/ KDC-W7044U/ KDC-W7144UY with KCA-BT200 (Optional Accessory) Bluetooth Setup Registering PIN Code By operating the Bluetooth device, specify the PIN code necessary for registering this unit. 1 Select PIN code edit mode Select “MENU” > “PIN Code Edit”. For how to select Function Control item, refer to (page 6). 2 Enter PIN code edit mode Press the Control knob for at least 1 second.
“ “ (blank): The Bluetooth device is deselected. 5 Exit Bluetooth device selection mode Displaying the Firmware Version Display the version of the firmware of this unit. Press the [FNC] button. ⁄ • If a cell-phone is already selected, deselect it, and then select a different one. • If you cannot select a device using the audio player, connect the device with the audio player. 1 Enter Bluetooth Firmware update mode Select “MENU” > “BT F/W Update”.
Function of KDC-BT8044U/ KDC-BT8044UY KDC-W7544U/ KDC-W7644UY/ KDC-W7044U/ KDC-W7144UY with KCA-BT200 (Optional Accessory) Bluetooth Setup Adding a voice dialing command Select “PB Name Delete” (Delete) Add a voice tag to the phonebook for voice dialing. You can register up to 35 voice tags. 5 Delete a voice tag 1 Select Phonebook name edit mode Select “BT” > “Voice Tag” > “PB Name Edit”. For how to select Function Control item, refer to (page 6).
SMS (Short Message Service) Downloading the SMS The SMS arrived at the cell-phone is displayed on the receiver. A newly arrived message is displayed. Download the short message (SMS) arrived at the cell-phone so that it can be read on this unit. ¤ • To prevent car accidents, the driver should not read the SMS while driving. 1 Select SMS download mode Select “BT” > “SMS” > “SMS Download”. For how to select Function Control item, refer to (page 6).
Accessory of KDC-BT8044U/ KDC-BT8044UY/ KDC-W7644UY/ KDC-W7144UY Basic Operations of remote control In Tuner source SRC VOL SRC ATT ATT VOL AUD Band select Station select [FM]/[AM] [4]/[¢] Recall preset stations AUD FM/AM [1] — [6] In CD/USB source DIRECT 2-ZONE (page 15, 16, 17) Music select [4]/[¢] Folder/Disc select 0—9 Pause/Play [FM]/[AM] [38] General control Volume control Source select [VOL] [SRC] Volume reduce [ATT] When the button is pressed again, the volume returns to the p
Loading and Replacing battery Hands-free phone control Making a call Enter the dialing method selection mode Select a dialing method [ ] [38] Use two “AA”/ “R6”-size batteries. Slide the cover while pressing downwards to remove it as illustrated. Insert the batteries with the + and – poles aligned properly, following the illustration inside the case. Number dial input Operation type Input a digit. Input “+”. Input “#”. Input “*”. Clear the entered phone number.
Appendix About Audio file • Playable Audio file AAC-LC (.m4a), MP3 (.mp3), WMA (.wma) • Playable disc media CD-R/RW/ROM • Playable disc file format ISO 9660 Level 1/2, Joliet, Romeo, Long file name. • Playable USB device USB mass storage class • Playable USB device file system FAT16, FAT32 Although the audio files are complied with the standards listed above, the play maybe impossible depending on the types or conditions of media or device.
For operating KCA-BT200 (Optional) About the Cell-Phone For operation refer to Model-B-2 in the Instruction Manual of KCA-BT200, and the table below. This unit conforms to the following Bluetooth specifications: Version Bluetooth Standard Ver. 1.2 Profile HFP (Hands Free Profile) OPP (Object Push Profile) PBAP (Phonebook Access Profile) SYNC (Synchronization Profile) Notation used in the KCA-BT200 Instruction Manual [38] button Press the [AUTO]/[TI] button.
Appendix Menu Glossary • AF (Alternative Frequency) When the reception is poor, automatically alternate to another frequency broadcasting the same program in the same RDS network with better reception. • AMP Selecting “OFF” turns off the built-in amplifier. Turning off the built-in amplifier improves the quality of the sound from Preout.
• BT DVC Status (Displaying the Bluetooth device Status) You can display the connection status, signal strength, and battery level. : Battery level of cell-phone. Nearly dead Full : Signal strength of cell-phone. Maximum Minimum ⁄ • Icons are not displayed if information cannot be obtained from the cell-phone. • Since the number of steps of the control unit is different from that of the cell-phone, the statuses displayed on the control unit may discord from those displayed on the cell-phone.
Appendix • SWPRE (Switching Preout) Switches the preout between rear output (“REAR”) and subwoofer output (“SUB-W”). • Zone2 (Dual Zone) Set the destination (front speaker “Front” or rear speaker “Rear”) of the sub source (AUX IN) when the Dual Zone function is turned on. This Product is not installed by the manufacturer of a vehicle on the production line, nor by the professional importer of a vehicle into an EU Member State.
Accessories/ Installation Procedure Accessories 1 ..........1 2 ..........2 3* 3 m ..........1 *Accessory of KDC-BT8044U/ KDC-BT8044UY Installation Procedure 1. To prevent short circuits, remove the key from the ignition and disconnect the - terminal of the battery. 2. Make the proper input and output wire connections for each unit. 3. Connect the wire on the wiring harness. 4. Take Connector B on the wiring harness and connect it to the speaker connector in your vehicle. 5.
Connecting Wires to Terminals Steering remote control (Light Blue/Yellow) (KDC-BT8044UY/W7644UY/W7144UY only) To USB device USB connector (1m) REMO.CONT not remove the cap when ⁄ Do you do not use the USB cable. use the steering wheel ⁄ To remote control feature, The connector will cause the unit to malfunction if it gets in touch with any metallic part of the vehicle.
Connecting Wires to Terminals Connector Function Guide Pin Numbers for ISO Connectors External Power Connector A-4 A-5 A-6 A-7 A-8 Speaker Connector B-1 B-2 B-3 B-4 B-5 B-6 B-7 B-8 Installation Cable Colour Functions Yellow Blue/White Orange/White Red Black Battery Power Control Dimmer Ignition (ACC) Earth (Ground) Connection Purple Purple/Black Gray Gray/Black White White/Black Green Green/Black Installation/Removing the Unit Rear Right (+) Rear Right (–) Front Right (+) Front Right (–) Front Left
Installation/Removing the Unit Removing the hard rubber frame 1 Engage the catch pins on the removal tool and remove the two locks on the upper level. Upper the frame and pull it forward as shown in the figure. Accessory of KDC-BT8044U/ KDC-BT8044UY Installation the Microphone Unit 1 Check the installation position of the microphone (accessory 3). 2 Remove oil and other dirt from the installation surface. 3 Install the microphone.
Troubleshooting Guide Some functions of this unit may be disabled by some settings made on this unit. ! • Cannot set up the subwoofer. • No output from the subwoofer. • Cannot set up the subwoofer position of Manual position setting. ▲ • of (page 4) is not set to On. • The Dual zone function is enabled. ☞
Troubleshooting Guide Hands-free ? The hands-free talk volume is low. ✔ The hands-free talk volume is set at a low level. ☞ The hands-free talk volume can be adjusted independently. Adjust it during hands-free talk. “MENU” > “Mic Gain” and “NR Level” (page 6). ? No sound is heard from the rear speakers. ✔ You are talking in the hand-free talk mode. ☞ No sound is heard from the rear speakers in the hands-free talk mode. ? No beep is heard at reception of an incoming call.
No Music Data/Error 15: • The connected USB device contains no playable audio file. • Media was played that does not have data recorded that the unit can play. Too Long: No Message: No short message in In Box. USB ERROR: No Record: The voice tag is not registered in the phonebook. Memory Full: The number of voice tags reaches the maximum number to be registered in the phonebook. iPod Error: Some trouble may have occurred to the connected USB device.
Specifications FM tuner section Frequency range (50 kHz space) : 87.5 MHz – 108.0 MHz Usable sensitivity (S/N = 26dB) : 0.7 μV/75 Ω Quieting Sensitivity (S/N = 46dB) : 1.6 μV/75 Ω Frequency response (±3.
Audio section Maximum output power : 50 W x 4 Output power (DIN 45324, +B=14.
Declaration of Conformity with regard to the EMC Directive 2004/108/EC For KDC-BT8044U/ KDC-BT8044UY: Declaration of Conformity with regard to the R&TTE Directive 1999/5/EC Manufacturer: Kenwood Corporation 2967-3 Ishikawa-machi, Hachioji-shi, Tokyo, 192-8525 Japan EU Representative's: Kenwood Electronics Europe BV Amsterdamseweg 37, 1422 AC UITHOORN, The Netherlands Magyar Alulírott, Kenwood, kijelenti, hogy a jelen KDC-BT8044U/ KDC-BT8044UY megfelel az 1999/5/EC irányelvben meghatározott alapvető követe