KFC-1673MRWL KFC-1673MRBL MARINE SPEAKER INSTRUCTION MANUAL HAUT-PARLEUR MARINE MODE D'EMPLOI ALTAVOZ MARINO MANUAL DE INSTRUCCIONES JVCKENWOOD Corporation © 2020 JVCKENWOOD Corporation BSA-3570-00/01 (K)
IMPORTANT SAFETY INSTRUCTIONS Lh Caution: Read this page carefully to ensure safe operation. A WARNING A CAUTION Before mounting or wiring etc., be sure to remove the wire from the battery ground Installation and wiring of the product requires expert skill and experience. To ensure terminal. (Not doing so can cause shorts or fires.) safety, be sure to have your dealer or specialist perform the installation and wiring.
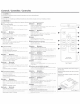
Parts I Pieces I Piezas No. NO No Part Name Designation des pieces Nombre de pieza Outside Shape Forme exterieure Forma externa Quantity Quantite Cantidad No. Part Name NO Designation des pieces No Nombre de pieza Speaker A (6.5" 2 w ay, RGB LED with controller) CD Haut-parleur A (6,5" 2 voies, DEL RGB avec controleu r) Altavoz A (6,5'; 2 vfas, LED RGB con controlador) Link cable B 1 Cont roller -------.J.
Connections I Raccordements I Conexiones & WARNING ILt. AVERTISSEMENT I Remove the ignition key and d isconnect the negative 0 terminal of the battery to prevent short circuits. & Retirer la cle de contact et debrancher la borne negative 0 de la batterie pour eviter les court-circuits. ■ Wiring Verifiez qu'aucun fil ou connecteur non connecte ne touche les parties metalliques ou la carrosserie de la voiture.
Connecting the power supply wires and link cable (RGB LED) Connexion des fils d'alimentation et du cable de liaison (DEL RGB) Conexion de los cables de la fuente de alimentacion y el cable de enlace (LED RGB) 1. Pass 2 heat shrink tubes® onto the link cable B@. 2. Connect the link cable B ® to the left and right speakers. 3. Put the heat shrink tube ® over the connection area of the connector. Apply heat with a heat gun or similar to shrink the tube and protect the connector from moisture, etc.
■ When using multiple pairs of speakers Lors de !'utilisation de plusieurs paires de haut-parleurs Cuando se usan varios pares de altavoces A maximum of up to 6 pairs of speakers can be +12V connected. Connect the link cables of the second and subsequent pairs of speakers as shown on the right. The figure shows an example of connecting 3 pairs of speakers. Connect the fourth and subseq uent pairs speakers in the same way as the third pair.
Installation I Installation I lnstalaci6n ■ Speaker locations/ Emplacement des haut-parleurs / Ubicacion de los altavoces Fig. 7 Examples of speaker locations Fig. 7 Exemples d'emplacements de haut-parleur Figura 7 Ejemplos de ubicaciones de los altavoces ■ How to use the template/ Utilisation du gabarit / Forma de utilizar la plantilla D ® Fig.
Controls I Contra/es I Controles 6 CAUTION Do not leave or install the remote control in hot places such as on the dashboard. I Lt ATTENTION Ne laissez pas ou n'installez pas la telecommande dans des endroits chauds comme sur le tableau de bord. I Lt PRECAUCl6N I No deje ni instale el mando a distancia en lugares calientes como el tablero de instrumentos. 0 C) (Turn on/Standby) Press to switch the LED lights of the speakers ON/OFF (standby mode).
■ How to replace the battery/ Comment remplacer la pile / Como cambiar la bateria If the Remote Controller operates only over shorter distances or does not operate at all, it is possible that the battery is depleted. In such instances, replace the battery with new one. a Si la telecommande fonctionne uniquement quand elle se trouve de courtes distances, ou ne fonctionne pas du tout, ii est possible que la pile soit dechargee. Si tel est le cas, remplacez la pile par une neuve.
Parts I Pieces I Piezas No. No No Part Name Designation des pieces Nombre de pieza Outside Shape Forme exterieure Forma externa Quantity Quantite Cantidad No. Part Name No Designation des pieces No Nombre de pieza Speaker A (6.
Troubleshooting Often, what appears to be a malfunction is due to user error. Before calling for service, please consult the following table. Problem RGB LED does not light. Remote control operation is not possible. Cause Remedy • The power supply of the+ 12 V wire is not connected. • Connect the w ire correctly. • The link cable is connected improperly. . Insert t he connector all the way in. • The remote control battery is exhausted. . Replace with new battery.
Specifications Specifications Design and specifications are subject to change without notice. La conception et /es specifications sont sujettes ii changement sans notification. Speakers Woofer ......................................................... 16 cm (6-1/2 in.) PP Mica cone Tweeter ............................................. 1.3 cm (1 /2 in.) PEI Balanced dome Peak power ..........................................................................................................
FCC CAUTION Supplier's Declaration of Conformity Changes or modificat ions not expressly approved by the party responsible for compliance could void the user's authority to operate the equipment. Trade Name: Products: Model Name: Responsible Party: NOTE: This equipment has been tested and found to comply with the limits for a Class B digital device, pursuant to part 15 of the FCC Rules. These limits are desig.
TEMPLATE JVCKENWOOD Corporation GABARIT PLANTILLA 4-04.
KENWOOD Warranty Card Ha1,1MeHOB3HLl1e MOAeJlL-1 Y6e~HTe
Est1mado Usuario de los productos KENWOOD Gracias por haber elegido este Producto KENWOOD Si resulta defectuoso baJo condiciones normales de funcionamiento, le rogamos que contacte con su distribuIdor autorizado mas abajo ind1cado, para informac16n acerca de la garantla JVCKENWOOD EUROPE B.V. Sucursal en Espana Carretera de Rubi, 88 008174 Sant Cugat del Valles, Barcelona Tel.+ 34-93-507-5252 www.kenwood.
U.S.A. JVCKENWOOD USA Corporation This warranty will be honored only in the U.S.A. KENWOOD LIMITED WARRANTY FOR CAR STEREO COMPONENTS HOW LONG IS THE WARRANTY JVCKENWOOD USA Corporation ("KENWOOD"")warrantsthis product for a period of one (1) year from the date of original purchase. WHAT IS COVERED AND WHAT IS NOT COVERED Except as specified below, this warranty covers all. defects in material and workmanship in KENWOOD car stereo components. The following are not covered by the warranty: 1. 2. 3.
JVCKENWOOD Canada Inc CANADA KENWOOD WARRANTY JVCKENWOOD Canada Inc. (hereinafter called "KENWOOD"), gives the following written warranty to the original customer of each new KENWOOD product distributed in Canada by KENWOOD and purchased from a dealer authorized by KENWOOD. KENWOOD warrants that each new KENWOOD product, under normal use, is free from any defects, subject to the terms and conditions set forth below.