
Owner's Manual


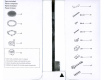
Table Of Contents

Installation
1.
Sele.:tthe
mounting
position,
referring!o·Precautions·.
2.
Place the supplied template on
the
door
panel
o.
the rear deck
and
mark
the
hole
poositions
3.
CUI
offa
large
hole
and
make
KreW
holes
4.
InSlalitheunitas
shown
in Fig.
3,Fig.4
Installation
1.
Determiner
la
position
de
montage
en
sereferanlauxinstruc'
tionsintitulees·Precautions".
2.Plilcerlagilbaritfournisurlilplagearriereelrept!rerlaposl-
tion
des
trous
de
montage
3.
Decouper un trou
de
g'(lnde
dimension
et
percertrous
pour
lesvis.
4.
hHtallE'rl·appareildelamaniereindiquee~laFig.3.Fig.4.
Instalacion
1.
Sele((ione
la
po~ki6n
de
monlaje
(on~ultando
·Precaudooe~·.
2.
Pongala
plantillil~uministradaenelpaneldela
puertiloen
la
estanterfatraseraymarquelaspo~idonesdelosagujeros
3.
Haga
un
aguJero
grande
y aguJeros
para
los
tornillo~.
4.
In~talela
unidad(omo~
muema
en
la~figura~3y4
Instalasao
1.
Sele(done
a
po~i~ao
de
montagem,
consultando
·Precau~6es·.
2.
Coloqueogabaritofornecidonopainelda
porta
ou
no
painel
posterior
e
marque
as
posl~6e~
dos
oriff(ios
3.
Remrte
um
grande
orifldo
e
petfure
o~
orifklos
do~
parilfuso~.
4,lnstaleaunidade(onfotmemostramFig.3eFig.4
"<':\.i
..
~I.l."...I"·A4o"--ot-')It'''''''''''I.\
~~It'I
...
..,J<"')l.<.~
..
~I.,.l\ilI"I~l,J'
c."'..,J<";;).l.,..J\ilI~.r
"",1-",,:,:7>e-'-"'I"'~I<-;..olI..,.aJI.'f
!
,.-)1
.. 'f
,.-)1
.... c-"
.......
LoS:
.....
"l'..,.s".1
Fig.
4·7 JFigura 4-71
v-t
,....."J
~\la,;IIJ"..>~
~~l~J...-J-~r',a.-}j";"t:"'/r.""'UI~">I-t
•...
kr";.b-}L~UI.:J~l
..
~?-'}lolIJ)ol~
...
UI
-"":;lYY",:.,~~~~'iI-'I)ot
t2AWG)..,....'~..ll-.,
......-"I
..r
..,'i..-..
....
~I".:.iJI~lC
...
L.....Si.....,..uIJl..o..o.:-I,;...:lJ.i.:."io
J..I
r',:,...;.s\'-;.J..I........
.,u....).,..JI~I~~Y...;.:.s...J
..........
.H.P.f'J:...(J.J
....
..,u,....Vt.>-..u
1
<.,.:.L,*'-'-
..
Fig.4-6/Flgur~4-6/'-t
,....."J
Os
nos
de
~Jtlfalantes
010
sAo
fomtildo~
com
..
huoldad
••
Obt~h~
nos
...
~udlo
com
0 <omprlrMnto
requerido,
P~
..
lig~r
os fios
de
~udio
A
unld~de,
fKople os flo. com
ConKl0f8
<oIectorMm
...
12l1t<on-.nd~_
..
oflo"'elt/fal~nleAWG.
Nou:
Na
utlliza-.aodo alUfalantecomo
um
altlfalante de 3
v;a<,
comb<n~do
com
urn
cooeclo, de capadtote'
n~o
polare~
em
~ie
de alti/alante
de
g'aves
(com
reslst~ncia
de
len,~
superior
~
MY
e
c~pad~ncia
inferior
ade27O!J.FlcomOH.P.F.
@
•
@-@-@)
•
@J
Fig.4-SfFigur.4-Sf.-tF"JI
Ligasiies
do
sistema
For
HONDA
and
other
manufiKturer
vehides
Pour
~hicules
HONDA
et
d'autres fabric::ants
Para
vehkulos
HONDA
y
de
otros
fabri(antes
Para
veku!os
HONDA
e
oUlrOS
fabrkantes
~~ltt.:....<>jl.u~uIJl:'-l
Flg.3-3/Figur.3-3J'I"-'I"~"Jl
Con
e."
unldad no
...
umlol.tt~n
los cabl
.....
Jo~
~IUvoces,
Obtenfll
~s
c~bles
de
.ltavoce. de
III
Iongitud
n_I~.
P".
cone<t~r
Io~
cabl.~
de
eltnoce.
e
..
unid
....
pong~
~ntes
Coneclore~
de
horqulll~
hernbr.flIlo~conduetores,
S.
r.comlend~
utlliur
..
caobh
d
..
h~voz
12
AWG.
Nou:
(uando utilice
el
altavoz (omo
un
~It~voz
de Ire'
vias
combinado con
un
aitavoz de
subgrave<,
conecteloscapa<:itore~nopol~resen~ie(conuna'esistenciadetensi6n.uperior~63Vyunacapacltancia
Inferiora270~F]comoH.P.F.
Conexiones
del
sistema
For
GM
vehkles
Pour~hic::ulesGM
Para
vehkulos
GM
Para
vekulos
GM
j.;;'Y'JI~ulJ~
How
to
remove
Commentretirer
C6moextraer
Como remover
ti"J1~
Fig.4-3IFigura4-3Jr-t~"J
ForFactory
or
OEM
lit
! PourIe
moUriel
usine
ou
d'ori,lne
I Pdra
el
oJuste
de
'dIN-leo
u
OEM!
'arer
encolxes defdbrico
ou
de
terceirosl
OEM
¥ JI
~I
¥ i.DW
How
to
install I
Comment
installer I
Mod<l
de
instalaci6n/Comoinstalar/.........!,.:JI:o......o....s;
Av.c _
~pp~..-lt
les
dbles
d
..
elKlllntes ne sont pas fournil.
se
procure
~
dbl"
d·ene.lnt
....
~:~uA-:s~Ui",
Pour
conntiter"s
<Ables
Al·.ppa
........
s eq.uip« A I
_mltf
d'une prj
..
Conctucl
....
cr.lKlllnu
...
callb... 12AWGACom
....
od••
R
....
~rqu.:
lor,que
les
enceintes
o;ont
utllisees comme
haut·pa~eurs
3-voies
en combinaison
aveo::
un
haut·
parleur
d·e.t~me
gr"ve,
,acCOfder
de,
mndensateurs
nOll
polari~~
en
~ie
(teoue en tension
~u~rieu'e
63V.moinsde27O\lF)commeH.P.F
KFC·P709PS
I
KFC·S703P
Flg.4-2/Flgur.4-2/T-tF"JI
Connexions
du
systeme
Changing
the
direction
of
tweeter
Modili(ationdel'orientationduhaut·parleur
d'aigus
Cambiodedirecd6ndelaltavozdeagudos
Altera~.iododirecdonamentodoAltifalantede
agudos
~.~
Fig.4-1IFigur~4-11\-t
I"""""JI
Fof removing
and
in~tal!ing
the
Tweeter, see
Fig.
4-3
and
4-4
Pour
retireret
in~taller
Ie haut·parletlr
d'aigu~,
voir Fig.4·3
et4-4.
Paradesin~talarein~talarelaltavozdeagudos.vealuliguras4--3y4-4.
Para a
remOl;~o
e a
instala~ao
do
attifalante
de
agudos, veja
Fig.
4--3
e 4-4.
~-t
.J'f-tr-
.....
I~I~,~
...... I...,....,.s-'"'".Jt;,.:..J
• Tweeter I Aigus f Altavoz
de
agudos
I Altifalante
de
agudos
I
.i>-!~
Flush
mounting!
Montage
encastr.!
MontaJe
nllfe/ado!
Montagem
plana/.,
..
:a:,l,l
~"'l
~J
• Woofer I GravesI Altavoz
de
graves
I Altifalante
de
graves
I
~
JJ
'Y
A~';
(~~-------c=c---,
()'Y
,1:)
F1,.3.1/'~""3.'/1.'
..."
'~
With
this unit. the
spuker
cord~~
...
noI
supplied.
Obt~Jn
the
~udlo
sp"~lt..-
cords with
the
~uired
'-<Igth.
To
colWM'Ct
the
'P"~lt..-
cords
to
the
unit.
tetlllln~tel'"
WiNS
with
"m~"
spade<onn.cton.
12
AWG
SPH"'
wl
...
ls
NCOm
....
nded.
Note:
When
using the speaker
a~
a Three·way
spe~ker
comb<ned
with
~
sub woofer connect nonpolar
<:apa.citorsinSeJleslwithvoltageresi.t~ncegreaterthan63V~nd<:apadtancelesslhan
27O\lF)
..
H.P.F.
System
connections
• Example I Example I Ejemplo I Exemplo I
JCi.A
Center
unit
Unitl!centrale
Unidadcentral
Unidadecentral
'O"",,,Jy,j'
Bla(k Blil(k
Noir Noir
Negro Negro
Preto Preto
i---;:::=::+!==:;6
~
~~~:rdeagUdO~
E9~~:~lantedeagUdOS
BliKk
IWhite stripe Passive crossover netW<l,k (Parts
induded)
BliI(k/White
~tripe
Rayl!Noir/blan(
Rl!~ausl!parateurpassif(Piecesmmprisesl
RayeNoir/blanc
Negro 1franja
blano::o
Red
divisorapa~iva
(Partes induidas)
Neglo/franja
blarxo
Pretol
Estriu
brarxo
Rede
de
separa~iio
pa~~iva
(Pe<;a,
indu§il~)
Preto 1Estrias bran(O
,
....
1/'-""='1
~~
:lJ~lJ:o,.,..=r.JIJop~(~l,Ij.;..)'~
,....
1I~1
Jo.o~
(9
Prohlb/tlonl
Interdiction'
Proh/bicl6n'
Proibi{aol
!)o....
..----.......
~
f---~~-&--
li,~
~~f~
e'
E!>
~
Note:
Be
.ure
to use
the
supplied
P~"ive
crossove,netwo,k
Aem~rque:
II
e,t
Indispen,.ble
d'utilise,
Ie
Rese~u
sepa,ateu,
passlf.
Not~:Asegure.ede
utiliurelfiltro.epar~dor
p~sivo;ncluido.
Not"
Asegure.e
de
utiliza, elfiltro separador
pa,ivoincluido
<.l~j,J.~I."""'~J~~..s;,;:iJ,;~
Fig, 5
General
(onne-c:tion IFig. 5 Raccordemen1
ordinaire
IFigure 5
Cone.i6n
general
f
Fi!l.5Lig.~6es!le,.lsJ,.\aIl~~I.I"""""JI
L.-.======~~
Installation
1.
Sele.:tthe
mounting
position,
referring!o·Precautions·.
2.
Place the supplied template on
the
door
panel
o.
the rear deck
and
mark
the
hole
poositions
3.
CUI
offa
large
hole
and
make
KreW
holes
4.
InSlalitheunilas
shown
in Fig.
3,Fig.4
Installation
1.
Determiner
la
position
de
montage
en
sereferanlauxinstruc'
tionsintitulees·Precautions".
2.Plilcerlagilbaritfournisurlilplagearriereelrept!rerlaposl-
tion
des
trous
de
montage
3.
Decouper un trou
de
g'(lnde
dimension
et
percertrous
pour
lesvis.
4.
hHtallE'rl·appareildelamaniereindiquee~laFig.3.Fig.4.
Instalacion
1.
Sele((ione
la
po~ki6n
de
monlaje
(on~ultando
·Precaudooe~·.
2.
Pongala
plantillil~uministradaenelpaneldela
puertiloen
la
eSlanterfatraseraymarquelaspo~idonesdelosagujeros
3.
Haga
un
aguJero
grande
y aguJeros
para
los
tornillo~.
4.
In~talela
unidad(omo~
muema
en
la~figura~3y4
Instalasao
1.
Sele(done
a
po~i~ao
de
montagem,
consultando
·Precau~6es·.
2.
Coloqueogabaritofornecidonopainelda
porta
ou
no
painel
posterior
e
marque
as
posl~6e~
dos
oriff(ios
3.
Remrte
um
grande
orifldo
e
petfure
o~
orifklos
do~
parilfuso~.
4,lnstaleaunidade(onfotmemostramFig.3eFig.4
"<':\.i
..
~I.l."...I"·A4o"--ot-')It'''''''''''I.\
~~It'I
...
..,J<"')l.<.~
..
~I.,.l\ilI"I~l,J'
c."'..,J<";;).l.,..J\ilI~.r
"",1-",,:,:7>e-'-"'I"'~I<-;..olI..,.aJI.'f
!
,.-)1
.. 'f
,.-)1
.... c-"
.......
LoS:
.....
"l'..,.s".1
Fig.
4·7 JFigura 4-71
v-t
,....."J
~\la,;IIJ"..>~
~~l~J...-J-~r',a.-}j";"t:"'/r.""'UI~">I-t
•...
kr";.b-}L~UI.:J~l
..
~?-'}lolIJ)ol~
...
UI
-"":;lYY",:.,~~~~'iI-'I)ot
t2AWG)..,....'~..ll-.,
......-"I
..r
..,'i..-..
....
~I".:.iJI~lC
...
L.....Si.....,..uIJl..o..o.:-I,;...:lJ.i.:."io
J..I
r',:,...;.s\'-;.J..I........
.,u....).,..JI~I~~Y...;.:.s...J
..........
.H.P.f'J:...(J.J
....
..,u,....Vt.>-..u
1
<.,.:.L,*'-'-
..
Fig.4-6/Flgur~4-6/'-t
,....."J
Os
nos
de
~Jtlfalantes
010
sAo
fomtildo~
com
..
hlloldad
••
Obt~h~
nos
...
~udlo
com
0 <omprlrMnto
requerido,
P~
..
lig~r
os fios
de
~udio
A
IInld~de,
fKople os flo. com
ConKl0f8
<oIectorMm
...
12l1t<on-.nd~_
..
oflo"'elt/fal~nleAWG.
Nou:
Na
utlliza-.aodo alUfalantecomo
um
altlfalante de 3
v;a<,
comb<n~do
com
urn
cooeclo, de capadtote'
n~o
polare~
em
~ie
de alti/alante
de
g'aves
(com
reslst~ncia
de
len,~
superior
~
MY
e
c~pad~ncia
inferior
ade27O!J.FlcomOH.P.F.
@
•
@-@-@)
•
@J
Fig.4-SfFigur.4-Sf.-tF"JI
Ligasiies
do
sistema
For
HONDA
and
other
manufiKlurer
vehides
Pour
~hicules
HONDA
et
d'autres fabric::ants
Para
vehkulos
HONDA
y
de
otros
fabri(antes
Para
veku!os
HONDA
e
oUlrOS
fabrkantes
~~ltt.:....<>jl.u~uIJl:'-l
Flg.3-3/Figur.3-3J'I"-'I"~"Jl
Con
e."
IInldad no
..
,"mlol.tt~n
los cabl
.....
Jo~
~IUvoces,
Obtenfll
~s
c~bles
de
.ltavoce. de
III
Iongitud
n_I~.
P".
cone<t~r
Io~
cabl.~
de
eltnoce.
e
..
IInid
....
pong~
~ntes
Coneclore~
de
horqlllll~
hernbr.flIlo~conduetores,
S.
r.comlend~
utlliur
..
caobh
d
..
h~voz
12
AWG.
Nou:
(uando utilice
el
altavo. (omo
un
~It~vo.
de Ire'
vias
combinado con
un
aitavoz de
subgrave<,
conecteloscapa<:itore~nopol~resen~ie(conuna'esistenciadetensi6n.uperior~63Vyunacapacltancia
Inferiora270~F]comoH.P.F.
Conexiones
del
sistema
For
GM
vehkles
Pour~hic::ulesGM
Para
vehkulos
GM
Para
vekulos
GM
j.;;'Y'JI~ulJ~
How
to
remove
Commentrelirer
C6moextraer
Como remover
ti"J1~
Fig.4-3IFigura4-3Jr-t~"J
ForFactory
or
OEM
lit
! PourIe
moUriel
usine
ou
d'ori,lne
I Pdra
el
oJuste
de
'dIN-leo
u
OEM!
'arer
encolxes defdbrico
ou
de
terceirosl
OEM
¥ JI
~I
¥ i.DW
How
to
install I
Comment
installer I
Mod<l
de
instalaci6n/Comoinstalar/.........!,.:JI:o......o....s;
Av.c _
~pp~..-lt
les
dbles
d
..
elKlllntes ne sont pas fOllrnil.
se
procllre
~
dbl
..
d·ene.lnt
....
~:~uA-:s~Ui",
Pour
conntiter"s
<Ables
Al·.ppa
........
s eq.uip« A I
_mltf
d'lIne prj
..
Conctucl
....
cr.lKlllnu
...
callb... 12AWGACom
....
od••
R
....
~rqll.:
lor,que
les
enceintes
o;ont
utllisees comme
haut·pa~eurs
3-voies
en combinaison
aveo::
un
haut·
parleur
d·e.t~me
gr"ve,
,acCOfder
de,
mndensateurs
nOll
polari~~
en
~ie
(teoue en tension
~u~rieu'e
63V.moinsde27O\lF)commeH.P.F
KFC·P709PS
I
KFC·S703P
Flg.4-2/Flgur.4-2/T-tF"JI
Connexions
du
systeme
Changing
the
direction
of
tweeter
Modili(ationdel'orientationduhaul·parleur
d'aigus
Cambiodedirecd6ndelaltavozdeagudos
Altera~.iododirecdonamenlodoAltifalantede
agudos
~.~
Fig.4-1IFigur~4-11\-t
I"""""JI
Fof removing
and
in~tal!ing
the
Tweeter, see
Fig.
4-3
and
4-4
Pour
retireret
in~taller
Ie haut·parletlr
d'aigu~,
voir Fig.4·3
el4-4.
Paradesin~talarein~talarelaltavozdeagudos.vealuliguras4--3y4-4.
Para a
remOl;~o
e a
instala~ao
do
attifalante
de
agudos, veja
Fig.
4--3
e 4-4.
~-t
.J'f-tr-
.....
I~I~,~
...... I...,....,.s-'"'".Jt;,.:..J
• Tweeter I
AigU5
f Altavoz
de
agudos
I Altifalante
de
agudos
I
.i>-!~
Flush
mounting!
Montage
encastr.!
MontaJe
nllfe/ado!
Montagem
plana/.,
..
:a:,l,l
~"'l
~J
• Woofer I GravesI Altavoz
de
graves
I Altifalante
de
graves
I
~
JJ
'Y
A~';
(~~-------c=c---,
()'Y
,1:)
F1,.3.1/'~""3.'/1.'
..."
'~
With
this IInit. the
spuker
cord~~
...
noI
supplied.
Obt~Jn
the
~lIdlo
sp"~lt..-
cords with
the
~lIired
'-<Igth.
To
colWM'Ct
the
'P"~lt..-
cords
to
the
unit.
tetlllln~tel'"
WiNS
with
"m~"
spade<onn.cton.
12
AWG
SPH"'
wl
...
ls
NCOm
....
nded.
Note:
When
using the speaker
a~
a Three·way
spe~ker
comb<ned
with
~
sub woofer connect nonpolar
<:apa.citorsinSeJleslwithvoltageresi.t~ncegreaterthan63V~nd<:apadtancelesslhan
27O\lF)
..
H.P.F.
System
connections
• Example I Example I Ejemplo I Exemplo I
JCi.A
Center
unit
Unitl!centrale
Unidadcentral
Unidadecentral
'O"",,,Jy,JA
Bla(k Blil(k
Noir Noir
Negro Negro
Preto Preto
i---;:::=::+!==:;6
~
~~~:rdeagUdO~
E9~~:~lantedeagUdOS
BliKk
IWhite stripe Passive crossover netW<l,k (Parts
induded)
BliI(k/White
~tripe
Rayl!Noir/blan(
Rl!~ausl!parateurpassif(Piecesmmprisesl
RayeNoir/blanc
Negro 1franja
blano::o
Red
divisorapa~iva
(Partes induidas)
Neglo/franja
blarxo
Pretol
Estriu
brarxo
Rede
de
separa~iio
pa~~iva
(Pe<;a,
indu§il~)
Preto 1Estrias bran(O
,
....
1/'-""='1
~~
:lJ~lJ:o,.,..=r.JIJop~(~l,Ij.;..)'~
,....
1I~1
Jo.o~
(9
Prohlb/tlonl
Interdiction'
Proh/bicl6n'
Proibi{aol
!)o....
..----.......
~
f---~~-&--
li,~
~~f~
e'
E!>
~
Note:
Be
.ure
to use
the
supplied
P~"ive
crossove,netwo,k
Aem~rqlle:
II
e,t
Indispen,.ble
d'utilise,
Ie
Rese~u
sepa,ateu,
passlf.
Not~:Asegure.ede
utiliurelfiltro.epar~dor
p~sivo;nclllido.
Not"
Asegure.e
de
utiliza, elfiltro separador
pa,ivoincluido
<.l~j,J.~I."""'~J~~..s;,;:iJ,;~
Fig, 5
General
(onne-c:tion IFig. 5 Raccordemen1
ordinaire
IFigure 5
Cone.i6n
general
f
Fi!l.5Lig.~6es!le,.lsJ,.\aIl~~I.I"""""JI
L.-.======~~