All Seasons™ Electric Grill FRONTIER FLORIDIAN RIO BUILT-IN BUILT-IN BUILT-IN PORTABLE PORTABLE Use & Care Guide - Installation Manual 120 and 240 V Models Kenyon International, Inc. P.O. Box 925 8 Heritage Park Road Clinton, CT 06413 USA Phone: 860-664-4906 Fax: 860-664-4907 www.kenyonappliances.
Table of Contents Section Page Important Safeguards .............................................................................................................. 3 How to Use Grill Quick Start Tips ............................................................................................................... 4 Stuffed French Toast ....................................................................................................... 7 Product Specifications ...................................
IMPORTANT SAFEGUARDS When using electrical appliances, basic safety precautions should always be followed including the following: 1. Read ALL instructions prior to using product. 2. Do not touch hot surfaces. Use handles or knobs. 3. To protect against electrical shock, do not immerse cord or plugs in water or other liquid. 4. Close supervision is necessary when any appliances are used near children. 5. Unplug from outlet when not in use and before cleaning.
HOW TO USE GRILL THE ABOVE TAG IS AFFIXED TO THE LID HANDLE OF YOUR GRILL. READ THIS INFORMATIVE PIECE OF INFORMATION PRIOR TO USING YOUR GRILL. IT IS NOT ILLEGAL TO REMOVE THIS TAG HOWEVER ALL USERS OF THE GRILL SHOULD READ PRIOR TO REMOVAL.
1. Before using your grill, remove the cooking grate and drip tray from the grill. Wash the grill with warm soapy water using a non-abrasive cloth. USE ONLY HIGH TEMP PLASTIC UTENSILS WHEN GRILLING. Visit our web site to purchase a set of high quality stainless steel/ high temp plastic grill utensils, www.kenyonappliances.com. 2. Make sure the drip trays are inserted all the way into the bottom of grill and electric element brackets are resting on the element support bracket. 3.
12. To clean the grill, first be sure the cooking surface has cooled enough to handle. Then remove the grates, lift up the electric elements until they lock in the up position, remove the middle grate support cross bar, then the drip trays. The grate support cross bar is removed by lifting the rear and pulling the front notch off of the supporting tab. To install the support reverse the procedure. Do not cook on the without the support in place! 13.
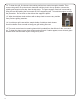
Stuffed French Toast 16 slices 1 lb. ½ cup 4 T. Thin Sliced Bread “any kind but not the white stuff” Cream Cheese (softened) Peach Preserves (or your favorite) Butter French Toast Batter: 5 Large eggs thoroughly beaten 1 cup Milk 1 T. Cinnamon, ground ½ t. Allspice, ground ½ t. Coriander, ground 2 oz. Water (Dark Rum, Optional) In a large bowl place the eggs and beat with a wire whisk. Add the milk and beat again until incorporated.
PRODUCT SPECIFICATION Frontier Model B70050 - 120V AC - 1300 WATTS - 11 AMPS Model B70051 - 240V AC - 1300 WATTS - 6 AMPS Overall dimensions: 21” x 12” x 4 1/2” (7 3/4” with lid) 533mm x 305mm x 114mm (197mm with lid) Depth does not include drain fitting Cutout dimensions: 19 3/4” x 11 5/8” with 1/4” radius corners 501.
INSTALLATION Package Contents Your All Seasons™ Grill is assembled and ready for use. Before you use the grill write your unit’s serial number here for future reference: _________________. The serial number can be found on the short side of the grill at the end with the glass control panel. The serial number consists of six digits.
Electrical Requirements Check the Electrical Supply Requirements This product must be installed in accordance with national, state and local electric codes. The following table provides the correct voltage, amperage and frequency that must be supplied to the grill. The supply must be from an individual grounded circuit that is protected by a circuit breaker and rated per the specifications for the model as shown in the table below.
Countertop Cutout DIMENSIONS B70050 GRILL Please read this section prior to making cutout for the grill. It is important to plan ahead for installation of the grill, keeping the following dimensions in mind (please refer to Fig. 2 below).
WARNING: To eliminate the risk of burns from reaching over heated grill, cabinet storage space located above the grill should be avoided. If cabinet storage is to be provided, the risk can be reduced by installing a range hood that projects horizontally a minimum of 5 inches beyond the bottom of the cabinets. Before making the countertop cutout, check for clearance. Check to see that the grill will clear the front and side walls of the base cabinet.
Drain Connection For your convenience, the grill is equipped with a 1/8” NPT brass pipe fitting and 90º brass elbow which you can attach the 1/4” ID flexible hose that came with your grill. The portable version of the grill comes with a brass pipe plug installed in the drain fitting. If you are using your grill as a portable unit, save the hose and 90º brass fitting for possible installation in the future. Drain fitting for 1/4” ID hose Fig.
OPERATION OF GRILL DO NOT USE WATER ON GREASE FIRES Smother fire or flame or use dry chemical or foam-type extinguisher. USE ONLY DRY POT HOLDERS Moist or damp pot holders on hot surfaces may result in burns from steam. Do not let pot holder touch the grate or element of the grill. Do not use a towel or other bulky cloth in place of a pot holder.
Touch Control POWER ON INDICATOR This display indicates whether the grill is ON or OFF. POWER LEVEL DISPLAY POWER LEVEL DISPLAY (+) POWER SENSOR POWER ON INDICATOR Digital display indicates heat output of grill. The indicator lamps follow the sweep of the screened graphic. There are eight possible heat levels. (+) POWER SENSOR Touching this sensor will increase the heat output of the grill in increments of one.
CALIBRATION Upon application of electrical power to the grill, the controller will run a self-calibration process. The controller will then sound an audible confirmation tone and the display will briefly illuminate. The grill is now ready to be used. ON/OFF POWER ON INDICATOR ENERGIZING THE GRILL To turn the grill ON, touch and hold the Master Power Sensor for two seconds. The controller will then beep and the Power On Indicator will illuminate.
TURNING “OFF” THE GRILL To turn off the grill, simply touch and hold the Master Power Sensor for two seconds. The controller will de-energize and shut off the heating element. IN AN EMERGENCY THE GRILL CAN BE TURNED OFF BY PRESSING THE “TEST” BUTTON ON THE GFCI. AUTOMATIC SHUT-OFF The electronic control of your KENYON grill has been programmed with safety in mind and features an automatic shut-off. The grill is programmed to shut down after a predetermined time after being energized (see table below).
Power Cord THIS PERTAINS TO 120V MODELS ONLY GROUNDED 3-PRONG PLUG GROUND FAULT CIRCUIT INTERRUPTER (GFCI) The GFCI is a safety device designed to protect the user from any electrical shock hazard. INDICATOR LIGHT The indicator light will stay illuminated when electrical power is applied and indicates that the GFCI is working properly. TEST/EMERGENCY OFF BUTTON Pressing this button will test the GFCI. The indicator light will go out and electrical power will not be supplied to the grill.
Grill Parts HEATING ELEMENT The heating element is designed to pivot as shown to remove/replace the baffle tray and drip tray. It will stay in the up position. To put down apply slight downward pressure. GRATE BAFFLE TRAY The baffle tray supports the drip tray, heating element and grate and must always be used when operating the grill. DRIP TRAY The disposable drip tray collects all the fat and juices created during the cooking process. The drip tray must be emptied after each use.
Lid Removal Fig. 7 LID REMOVAL The grill lid is removable for cleaning. To remove the lid, slide the quick release pin out of the hinge. (see Fig. 7) With the quick release pin removed, grasp the lid, lifting on the left side to clear the hinge and slide it the left until clear of the hinge pin on the right. (see Fig. 8) Once the lid is removed, it can be washed in warm, soapy water. QUICK RELEASE PINQUICK RELEASE PIN Fig.
Warranty Kenyon International, Inc (the “Company”) warrants its products in normal usage to be free of defects in materials and workmanship subject to the conditions and limitations below. Any part, which proves to be defective in normal usage during the warranty period will be repaired or replaced by the Company. This warranty covers certain products built by the Company and is subject to the following conditions and limitations: 1.