Keri Systems User Manual TAP100 Application Software
TAP 100 Application Software Manual © 1997 Keri Systems, Inc. ALL RIGHTS RESERVED Document Number 01813-001, Revision 3.3 February, 1999 Keri Systems, ProxNet, TAP100, HPP-100 Hand-Held Programmer, PXL-100, OB-3, OB-9, and KMM-40 Memory Module are trademarks of Keri Systems, Inc. Other product names are trademarks or registered trademarks of their owners. Keri Systems, Inc. reserves the right to change, without notice, product offerings or specifications.
TAP100 Application Software Manual Contents TAP100 SOFTWARE SETUP AND NAVIGATION 6 Introducing the TAP100 Software Software Manual Conventions Software Notes 6 6 6 Minimum System Requirements 6 Software Installation 7 Checking the PC System’s Time and Date 7 Starting the Program 9 Using the Menu System The Menu Bar Selecting a Menu Item The Status Message Line The Pull-Down Menus The Network Communication Sprite The Info and Quit Menu Options The Info Option The Quit Option Dialog Boxes SYSTEM
TAP 100 Application Software Manual Configuring the ProxNet Set the Timing Functions Set the System Time and Date Set Daylight Savings Time Set Time Zones Set Holidays Configure the Readers Opening the Reader Database Query Status of a Reader Global Secure Setting Reader I/O Assignments Setting an ‘OR’ I/O Assignment Setting an ‘AND’ I/O Assignment Clearing All I/O Assignments CREATING/MAINTAINING A USER DATABASE Create a Cardfile Database Enrolling Cards Open Cardholder File Search for Cardholder Data Voi
TAP100 Application Software Manual Figures FIGURE 1 - TAP100 MAIN MENU SCREEN FIGURE 2 - INFO MENU OPTION INFORMATION FIGURE 3 - SETUP MENU OPTION SCREEN FIGURE 4 - UTILITY MENU OPTION SCREEN FIGURE 5 - READERS MENU OPTION SCREEN FIGURE 6 - CARDS MENU OPTION SCREEN FIGURE 7 - TRANSACTIONS MENU OPTION SCREEN 10 11 14 15 33 48 58 Tables TABLE 1 - PULL-DOWN MENU SUMMARY TABLE 2 - AUTOMATIC LOCK/UNLOCK STATE 11 69 Revision 3.
TAP 100 Application Software Manual TAP100 Software Setup and Navigation Introducing the TAP100 Software The TAP100 Software provides access control programming for one or for multiple access control sites, each with multiple access locations. It features complete alarm management and programming flexibility for networks of up to 32 PXL-100 Control Units. Software programming is performed through an easy to manage pull-down menu structure.
TAP100 Application Software Manual Software Installation The TAP100 software must be loaded and executed from the PC system’s hard drive. The following set of instructions explain how to load the TAP100 software onto a PC system. 1. Start-up the computer. 2. At the C:\> DOS prompt, create a new directory by typing: C:\> md proxnet 3. Insert the TAP100 floppy disk into the 3.5” disk drive. Depending upon your system configuration, this may be either the A: drive or the B: drive.
TAP 100 Application Software Manual Current time is XX : XX : XX . XX p/a This lists the time on the host PC system in Hours : Minutes : Seconds . Hundredths of a Second and then P.M. or A.M. If you are satisfied the system time is correct, type: If you need to change the system time, enter the hours, minutes, and P.M. or A.M. indicator to which you want to set the host PC system clock. For example: To set the host PC system clock to 9:15 A.M.
TAP100 Application Software Manual Starting the Program Due to the manner in which PC systems allow executing programs to locate and access support files, the TAP100 program must be executed from the PROXNET directory. This allows the TAP100 program to locate and access all its support files. If the program is executed from another directory, it will not be able to locate and access its support files and will not execute correctly.
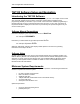
TAP 100 Application Software Manual Using the Menu System Once the password has been accepted, the TAP100 program begins, displaying the main menu. Cards Transactions TAP100 - Keri Systems, Inc. Readers Utilities Setup Info Quit ‘Hot’ Key Menu Bar Network Communication Sprite Status Message Line + Press a hot key to make a selection. Figure 1 - TAP100 Main Menu Screen The Menu Bar At the top of the main menu is the menu bar (see Figure 1).
TAP100 Application Software Manual The Status Message Line At the bottom of the menu screen is a status message line (see Figure 1). The status message line displays information about the command in progress. When working with complex commands, don’t neglect the status message line. It can assist you in tracking where you are in the command or prompt you for the type of information to be entered. The Pull-Down Menus Selecting a pull-down menu from the menu bar will cause a list of items to appear.
TAP 100 Application Software Manual The Quit Option The Quit menu option exits the TAP100 program and returns to DOS. To quit the TAP100 program, use your pointing device and select Quit. The following prompt box will appear. This will end your session with TAP100. DO YOU REALLY WANT TO DO THIS? YES/OK NO/CANCEL To exit the program, use your pointing device and select YES/OK. To remain in the TAP100 program, use your pointing device and select NO/CANCEL to return to the main menu.
TAP100 Application Software Manual System Configuration This section provides a logical progression of commands required for configuring your system for an access control application. Please review this section in its entirety before configuring your system. This section will cover system security, setting program operating options, configuring system communications, and configuring the ProxNet system.
TAP 100 Application Software Manual Enter your new password. NOTE: Passwords are ‘case-sensitive.’ This means a password may consist of both upper- and lower-case letters. Be sure to enter the new password exactly as you want it to be, paying close attention to the upper- and lower-cases. Once entered, the program will ask you to confirm the new password by displaying: Please enter it again just to be sure: Again, carefully enter your new password.
TAP100 Application Software Manual Using your pointing device, select Enter PIN. The following prompt box will appear, asking for your 4 digit PIN. PIN Entry Enter your PIN: + + + + The status message line will display: Your PIN must be verified to enable communications with ProxLock. The very first time the PIN is entered, it will be the factory default PIN: 0 0 0 0. Enter your four digit PIN by typing: 0 0 0 0 When your PIN is accepted, a prompt box will appear, confirming the PIN entry.
TAP 100 Application Software Manual Use your pointing device and select Utilities, and then select Change System PIN. The following prompt box will appear, asking for the new 4 digit PIN. Set System PIN Enter new PIN: + + + + The status message line will display: Change the system PIN to a new value. Enter your new four digit PIN by typing the desired digits. For example: To enter a new PIN of 1 2 3 4 type: 1 2 3 4 The following prompt box will appear. You are about to change the system PIN.
TAP100 Application Software Manual Configuring the TAP100 Software This section provides instruction for setting TAP100 program options, identifying the directory used for storing the program and the data files required by the system, configuring system communications, configuring the ProxNet control units, and configuring the card readers.
TAP 100 Application Software Manual by assigning it to a working time zone. This is an easy and convenient way to disable a card for someone who is on vacation or has taken a leave-of-absence. The card cannot be used while it is assigned to this time zone. But, the card remains in the database, and can be quickly enabled when the person returns. NOTE: By factory default, time zone 7 has been configured as a ‘Never’ time zone.
TAP100 Application Software Manual The status message line will display: Choose event display settings. Use your pointing device and select the event log viewing options that meet your needs and select OK. Or, select QUIT to exit the selection without making a change. Identifying the Database Files Directory When the TAP100 software was loaded onto the PC system, it was recommended that the software be installed into a directory named proxnet.
TAP 100 Application Software Manual Configuring/Verifying Communications The next four commands in the setup menu deal specifically with configuring the usage of the system’s communications network for the TAP100 software.
TAP100 Application Software Manual Serial Port Connection ( • ) Local Prox Network on COM1 ( ) Phone connection/modem on COM1 ( ) Memory Module on COM1 OK QUIT The status message line will display: Select a new connection. NOTE: The Memory Module is an obsolete hardware option. It is supported for those customers who already have Memory Modules in use. For details on Memory Module operation, please contact your Keri dealer or system installer.
TAP 100 Application Software Manual To set the phone dialing method, use your pointing device and select Dialing Method. A prompt box will appear, displaying the two options. Dialing Method ( • ) Tone ( ) Pulse OK QUIT The status message line will display: Select tone or pulse dialing. Use your pointing device and select the dialing method that meets your telephone system and select OK. Or, select QUIT to exit the selection without making a change.
TAP100 Application Software Manual Advanced COM Setup PORT COM1 COM2 COM3 COM4 IRQ 4 3 4 3 ADDR 03F8 02F8 03E8 02E8 ENTER = accept ESC = quit F1 = restore default values The status message line will display: Customize IRQ assignments and interrupt service vectors. To exit this command without making a change, press . To restore the IRQ and ADDR values to the factory default, press .
TAP 100 Application Software Manual The System ID is the address of the master control unit on the network. Net Faults is a counter keeping track of the number of times there is a network failure or a control unit goes off-line. If power is removed from a control unit, it will go off-line and the counter will be incremented. A high number in this field may indicate a loose wire somewhere in the communication network.
TAP100 Application Software Manual To simplify this process, a table, breaking down this conversion process is provided in Appendix 2. By working the responding nodes value through the table in Appendix 2, you can easily determine which controllers are responding to the network Favorite Nodes, by factory definition, is always set to 00000001. Links in Bindery identifies the number of reader I/O links that have been defined for the system.
TAP 100 Application Software Manual Configuring the ProxNet In this section, we will describe the configuration of the ProxNet: setting all system timing functions, configuring the reader database, and defining the reader’s I/O assignments. Set the Timing Functions The following commands deal with setting system time, date, time zone, and holiday zone functions.
TAP100 Application Software Manual Set Daylight Savings Time To enable or disable the one-hour daylight savings time change, use your pointing device and select Utility and then Daylight Savings. The following prompt box will appear. Daylight Savings Mode ( ) (•) Enabled Disabled OK QUIT The status message line will display: Choose daylight savings time state. Use your pointing device and select Enabled or Disabled to match the current daylight savings mode and select OK.
TAP 100 Application Software Manual For example: TZNUM 1 has an access period of 07:00 to 18:00 (7 A.M. to 6 P.M.) on Monday through Friday. An access card assigned to TZNUM 1 will be allowed access between these hours Monday through Friday. If used at any other time, an access card assigned to TZNUM 1 will cause an alarm event. NOTE: Time zones 0, 6, and 7 have reserved functions. An access card assigned to time zone 0 will always be allowed access to the controlled area.
TAP100 Application Software Manual When this box appears, it will display either the Special Time Zone window or the Definable Time Zone window. Use the Left and Right arrow keys to toggle between windows. For this example, toggle to the Definable Time Zone window. Use your pointing device and select Monday, Tuesday, Wednesday, Thursday, and Friday. As you select these days, an “X” will appear between the brackets for that day.
TAP 100 Application Software Manual Repeat this process for each time zone required to meet your application’s needs. Once all time zone entries have been set, you can PRINT a hard copy of the time zone table. This will allow you to review the entire time zone entry table one last time before sending this information to the control units. To print a hard copy of the time zone table, use your pointing device and select PRINT. The following prompt box will appear.
TAP100 Application Software Manual system. To set holidays, use your pointing device and select Utility and then Holiday. The following prompt box will appear. HOLIDAY SCHEDULE NUM 1 2 3 4 5 6 7 8 DATE MODIFY PRINT SEND QUIT All holiday dates must be entered in a month/day format with two characters for the month and two characters for the day (i.e. January 1 is entered as 01/01). All unassigned holiday dates will be listed with a date of 00/00.
TAP 100 Application Software Manual TAP-100 VERSION X.XX Holiday Schedule DATE TIME page # ========================================================== NUM 1 2 3 4 5 6 7 8 9 10 ••• 20 DATE 01/01 04/16 05/29 07/04 09/04 11/23 11/24 12/24 12/25 Once you have reviewed the holiday table and are satisfied with all its entries, you must send this information to all control units on the network. Use your pointing device and select SEND.
TAP100 Application Software Manual Configure the Readers In this section we will the instructions for entering all the information required to create a reader database for day-to-day operation. We will also look at commands for adding a new reader to an existing database and at commands for globally securing the readers. TAP100 - Keri Systems, Inc.
TAP 100 Application Software Manual select Modify. The following prompt box will appear with a flashing cursor at the first entry of the table.
TAP100 Application Software Manual command on page 70) or 24 hours have passed. This prevents a person from entering a controlled area with an access card and then “passing” that card back to another person to use for entry. In network APB, there is one access reader and multiple egress readers; all other rules apply. The factory default is to disable local APB, but for this example we will enable local APB. Use your pointing device and select local APB.
TAP 100 Application Software Manual Modifying Reader 4 Reader Name A EMP ENTRANCE Reader Name B EMP EXIT Open time (seconds) 40 Unlock time (seconds) 20 Local APB enabled (Y/N) Y Auto-Unlock time zone 1 07 Auto-Unlock time zone 2 07 Supervised I/O (Y/N) Y Alarm Control (Y/N) Y Input Normal Polarity (O/C) C Press ENTER to accept, ESC to abort Once all reader database entries have been made, you can PRINT a hard copy of the readers database.
TAP100 Application Software Manual When this process is complete, the status message line will display: Done. Query Status of a Reader The query status of a reader command gives a table of all current operating parameters defined for that reader. To query the status of a reader, you must know the address of the reader to query. Use your pointing device and select Readers and then Query status of a reader. The following prompt box will appear.
TAP 100 Application Software Manual For example: To set the global secure time to 20:30 hours (8:30 P.M.), use your pointing device and select Readers and then Global Secure. The status message line will display: Initiating communication with local network on COM1 . . . please wait. The following prompt box will appear. GLOBAL SECURE Hour: Min: 20 00 Press ESC to abort. Type: 20 30 A new prompt box will appear, asking you to verify your entry.
TAP100 Application Software Manual Setting an ‘OR’ I/O Assignment To set-up the required input to output links for an ‘OR’ connection, use your pointing device and select Utilities and then I/O Assignments. The following prompt box will appear.
TAP 100 Application Software Manual The first field to define is the Input Reader field. This field defines which reader the input signal is coming from. Use your pointing device and select the Input Reader field. The following prompt box will appear. Select A Reader Choose an Input Reader OK/ENTER accepts, QUIT/ESC cancels. 1 2 3 ••• All Reader 1 Reader 2 Reader 3 OK QUIT To exit without selecting a reader, use your pointing device and select QUIT.
TAP100 Application Software Manual PC. For this example, we want to report input events, so use your pointing device and select Send to PC. The fifth field to define is the Output Lines field. This field defines which of the 2 available outputs at the reader is being assigned to this link. The factory default for both outputs is set to Not Used. The handling of the output line can be defined in one of three ways: Deactivate, Activate, or Momentary.
TAP 100 Application Software Manual I/O ASSIGNMENTS FOR LINK 1 Input Reader: 2 Reader 2 Input Lines: 1 ( ) Active ( • ) Normal 2 ( ) Active ( ) Normal 3 ( ) Active ( ) Normal 4 ( ) Active ( ) Normal Sup I/O: No ( ( ( ( ) Tamper ) Tamper ) Tamper ) Tamper Polarity: Norm.
TAP100 Application Software Manual TAP-100 VERSION X.XX I/O Assignments DATE TIME page # ========================================================== LINK 0 1 ••• 31 INPUT READER Reader 1 (01) Reader 2 (02) 1 N N INPUTS 2 3 4 – – – – – – PC PC PC OUTPUT READER Reader 2 (02) Reader 2 (02) OUTPUTS 1 2 M – M – -----Available ----- After reviewing this information, if you are not satisfied with a link entry, you must use the up and down arrow keys and select the link that needs changing.
TAP 100 Application Software Manual Use the up and down arrows to select the links you wish to define. In this example, we will work with I/O assignment link 3. We will use inputs 3 and 4 and we will use output 2 on reader 3. Use the up and down arrows and place the highlight bar on link 3. Use your pointing device and select MODIFY. The following prompt box will appear.
TAP100 Application Software Manual NOTE: The Tamper value is used by the control unit itself. It is designed to be connected to a tamper switch on the enclosure protecting the control unit. This allows you to define an input to indicating if an individual is attempting to tamper with the control unit. In this example, use your pointing device and select Normal on Input Lines 3 and 4. All other inputs should be set to None. The third field to define is the Output Reader field.
TAP 100 Application Software Manual I/O ASSIGNMENTS FOR LINK 3 Input Reader: 3 Reader 3 Sup I/O: No Polarity: Norm.
TAP100 Application Software Manual If you wish to clear all links and create a new I/O assignment table, use your pointing device and select YES/OK. Otherwise select NO/CANCEL. Please use this command with care as it can have a major impact on the security of your access control system. Revision 3.
TAP 100 Application Software Manual Creating/Maintaining a User Database Once the TAP100 software, communications and the ProxNet have been configured, a user database needs to be created and maintained. This section describes the process used to create and maintain a user database: creating a cardfile and maintaining transaction data files. Cards Transactions Open cardholder file Enroll Batch of Cards Get Network cards data Get Memory Module data Security Fence TAP100 - Keri Systems, Inc.
TAP100 Application Software Manual Use your pointing device and enter the starting slot and the ending slot. If you are not satisfied with your entry, select QUIT to exit the selection without making a change. If your entry is correct, use your pointing device and select OK. For example: If you are entering one card into slot 5, the following prompt box will appear asking you to confirm this entry. You are about to enroll 1 cards at slots 5 to 5.
TAP 100 Application Software Manual BATCH ENROLL MODE Now enrolling card at slot 5. Present card to reader. . . Read card #0123456789 at slot 2. Once all of the cards have been successfully read and all of the slots have been filled, the system will display the following prompt box, indicating successful enrollment. BATCH ENROLL MODE Successfully enrolled slots 5 through 10. NOTE: For ease of card/slot managment, you should consider marking each card with the slot number you have assigned to it.
TAP100 Application Software Manual blank and the disabled card field will be blank. To enter a card user’s name and department, use your pointing device and select Personal. The prompt box will request the following information. Modify Slot 1 Name: PERSONAL Dept: ACCESS OK Hire Date: QUIT ID:12345678 Card is Disabled [ ] Use your pointing device and select the name field. Enter the card user’s first name, middle initial, and last name. Use your pointing device and select the department field.
TAP 100 Application Software Manual Access Authorization Selection Choose a time zone to be applied to all readers. [ ] Holiday Access 0 1 2 3 Always 07:00 - 18:00 15:00 - 00:30 23:30 - 07:30 So So So Mo Tu Mo Tu Mo Tu We Th We Th We Th Fr Fr Fr Sa Sa Sa 4 07:00 - 16:00 So Mo Tu We Th Fr Sa OK QUIT If you are not satisfied with your entry, use your pointing device and select QUIT to exit the selection without making a change. If your entry is correct, use your pointing device and select OK.
TAP100 Application Software Manual Access Authorization Selection Choose a time zone to be applied to all readers. [ ] Holiday Access 0 1 2 3 4 Always 07:00 - 18:00 15:00 - 00:30 23:30 - 07:30 07:00 - 16:00 So So So So Mo Mo Mo Mo Tu Tu Tu Tu We We We We Th Th Th Th Fr Fr Fr Fr OK Sa Sa Sa Sa QUIT Use the arrow keys and arrow up or down until the time zone to be assigned to the user’s slot for that reader is highlighted.
TAP 100 Application Software Manual After reviewing this information, if you are not satisfied with your entry, use your pointing device and select QUIT to exit without entering the information into the database. Otherwise, use your pointing device and select OK. This will return you to the modify slot menu where you have one more chance to review your information before making the entry into the cardholder database. If you are satisfied with your entry, use your pointing device and select OK.
TAP100 Application Software Manual Once communication is established, the information is transferred to the network. Sending Cards to Network 0% 100% As the slot/cardholder information is being sent to the network, the status bar in this prompt box will monitor how far along the process is. When this process is complete, the Status Message Line will display: Successfully sent cards to network. Once the cardholder file data is sent to the network, the cards data base construction process is complete.
TAP 100 Application Software Manual The sort criteria has two options allowing you to set the cardholder display screen to display all slots in ascending numerical order or to display all slots by name in alphabetical order. NOTE: Slots without an assigned user name have a lower alphabetical precedence than those with an assigned user name. When sorting alphabetically, slots without an assigned user name will be displayed before slots with an assigned user name.
TAP100 Application Software Manual your entry, use your pointing device and select QUIT to exit the selection without making a change. If your entry is correct, use your pointing device and select OK. The following prompt box will appear. You are about to void slots 1 to 3.
TAP 100 Application Software Manual If you do not want to erase the existing cards database, use your pointing device and select NO/CANCEL. Otherwise, use your pointing device and select YES/OK. Since this operation erases the existing cards database, a second prompt box will appear. Just to be sure, I’ll ask you one more time: DO YOU REALLY WANT TO DO THIS? YES/OK NO/CANCEL If you do not want to erase the existing cards database, use your pointing device and select NO/CANCEL.
TAP100 Application Software Manual Open Transactions File The open transactions file command allows you to review a history of events that have occurred on the network. It also allows you to get detailed information on any single event. To open the transactions file, use your pointing device and select Transactions and then Open transactions file. If no transactions have occurred (as in a brand new installation), the following prompt box will appear. The transaction database is empty.
TAP 100 Application Software Manual If you select Slot, the following prompt box appears. Slot Range Start: End: 0 7000 Press ENTER key if data is OK. Press ESC key to quit. The default is all available slots. Use your pointing device and select the range of slots you wish to limit viewing to. Press if the slot range entered is correct. Otherwise , press to not set a slot range. If you select Name, the following prompt box appears. Name Range Start: End: A Z Press ENTER key if data is OK.
TAP100 Application Software Manual The default is a large date range. Use your pointing device and select the date range you wish to limit viewing to. Press if the date range entered is correct. Otherwise , press to not set a date range. If you select Time, the following prompt box appears. Time Range Start: End: 00:00 23:59 Press ENTER key if data is OK. Press ESC key to quit. The default is the full 24-hour clock.
TAP 100 Application Software Manual Print Job Progress 0% 100% Press ESC to abort the print job. As transaction information is being printed, the status bar in this prompt box will monitor how far along the print process is. When the print job has finished, you can review the transaction data. The printout will appear something like this. TAP-100 VERSION X.
TAP100 Application Software Manual If you do not wish to set event log viewing options, use your pointing device and select QUIT. Otherwise, use your pointing device and select the event log viewing option that will best display transaction data for your monitoring purposes. Then use your pointing device and select OK. The original transactions log prompt box will appear with all transaction data screened according to the criteria you have set.
TAP 100 Application Software Manual Backup File The backup file command allows you to review the data in an archived transaction log file. Use your pointing device and select Transactions and then Backup file. The following prompt box will appear. Enter backup filename: Enter the name of an existing transaction data file and press (i.e. jan96.dbf as in the example above).
TAP100 Application Software Manual GETTING TRANSACTIONS FROM NETWORK DATE TIME CARDHOLDER 3/03 08:00 John Q Public 3/03 17:00 John Q Public ••• Clearing xx transactions from reader yy. READER 4-A EMP ENTR 4-B EMP EXIT DESCRIPTION INP1-T/OPEN OUT1-ACTIVE Press any key to continue. Press any key to return to the TAP100 main menu.
TAP 100 Application Software Manual Advanced Commands Advanced commands are used to perform specific immediate tasks on the network. These tasks include real-time monitoring of network events, installing a new reader to an existing network, immediate reader locking and unlocking, global locking and unlocking of all readers, and card security functions.
TAP100 Application Software Manual Install New Reader The install new reader command sends all the required TAP100 software operating/configuration information to a reader that has been added to the access control network. It may also be used to re-initialize a reader that has had its EPROM firmware updated or is no longer responding to the access control network.
TAP 100 Application Software Manual Once communication is complete, the reader is locked. Unlock A Reader The unlock a reader command immediately unlocks a selected reader, allowing access or egress. To immediately unlock a reader, use your pointing device and select Readers and then Unlock a reader. The following prompt box will appear. Reader number to unlock: (1-32) The Status Message Line will display: Initiating communication with local network on COM1 . . . please wait.
TAP100 Application Software Manual Once communication is complete, the global lock/unlock function has been enabled. Disable Global Lock/Unlock The disable global lock/unlock (GLU) function disables the ability for an external device to automatically lock or unlock all readers on the network at one time.
TAP 100 Application Software Manual Card Security Management Commands There are two system security management commands. The first, anti-passback amnesty, clears the anti-passback counter allowing “reaccess” for cards. The second, the card security fence, allows cards to remotely arm an alarm panel. Anti-Passback Amnesty The anti-passback command is used to ensure one-card/one-way access into and then out of a controlled area.
TAP100 Application Software Manual Security Fence set to 100. Nodelist = 00000001. The security fence has now been set. Revision 3.
TAP 100 Application Software Manual This page is intentionally left blank. Page 72 Revision 3.
TAP100 Application Software Manual Appendices 1. 2. 3. 4. 5. 6. Status of Doors Table Responding Nodes Table Time Zone Table Worksheet Glossary of Terms Customer Support Information Warranty Information Revision 3.
TAP 100 Application Software Manual This page is intentionally left blank. Page 74 Revision 3.
TAP100 Application Software Manual Status of Doors Table The status of doors table is provided to help you determine which doors are secured. Execute the Verifying Network Operation command found on page 23 and compare the status of doors value returned to the entries in this table. Hexadecimal Digit xxxx xxxX Hexadecimal Value if X is a . . . 0 1 2 3 4 5 6 7 8 9 A B C D E F Binary Value its value is . . .
TAP 100 Application Software Manual Status of Doors Table (continued) Hexadecimal Digit xxxx xXxx Hexadecimal Value if X is a . . . 0 1 2 3 4 5 6 7 8 9 A B C D E F Binary Value its value is . . . 0000 0001 0010 0011 0100 0101 0110 0111 1000 1001 1010 1011 1100 1101 1110 1111 Active Readers indicating the secured doors are . . .
TAP100 Application Software Manual Status of Doors Table (continued) Hexadecimal Digit xxXx xxxx Hexadecimal Value if X is a . . . 0 1 2 3 4 5 6 7 8 9 A B C D E F Binary Value its value is . . . 0000 0001 0010 0011 0100 0101 0110 0111 1000 1001 1010 1011 1100 1101 1110 1111 Active Readers indicating the secired doors are . . .
TAP 100 Application Software Manual Responding Nodes Table The responding nodes table is provided to help you determine which nodes are active and responding to the network. Execute the Verifying Network Operation command found on page 23 and compare the responding nodes value returned to the entries in this table. Hexadecimal Digit xxxx xxxX Hexadecimal Value if X is a . . . 0 1 2 3 4 5 6 7 8 9 A B C D E F Binary Value its value is . . .
TAP100 Application Software Manual Responding Nodes Table (continued) Hexadecimal Digit xxxx xXxx Hexadecimal Value if X is a . . . 0 1 2 3 4 5 6 7 8 9 A B C D E F Binary Value its value is . . . 0000 0001 0010 0011 0100 0101 0110 0111 1000 1001 1010 1011 1100 1101 1110 1111 Active Readers indicating the active readers are . . .
TAP 100 Application Software Manual Responding Nodes Table (continued) Hexadecimal Digit xxXx xxxx Hexadecimal Value if X is a . . . 0 1 2 3 4 5 6 7 8 9 A B C D E F Binary Value its value is . . . 0000 0001 0010 0011 0100 0101 0110 0111 1000 1001 1010 1011 1100 1101 1110 1111 Active Readers indicating the active readers are . . .
TAP100 Application Software Manual Time Zone Table Worksheet Copy this table and use it to help you determine the time zone requirements for your application. While filling out this table, please note the following rules. Time zones are numbered from 0 to 31. Time zones 0, 6, and 7 are set with Factory Fixed values. All time entries are done by 24-hour clock (i.e. 7 P.M. is 19:00 hours).
TAP 100 Application Software Manual Glossary anti-passback — Ensures one-card/one-way access into and then out of a controlled area. An authorized card presented to the access reader will allow access, but will not work again for access until presented to the egress reader. card — A small electro-mechanical device that has a unique electro-magnetic signature. Cards are programmed to grant access and egress to an access control system.
TAP100 Application Software Manual Customer Support Information Whenever using Keri Systems, Inc. hardware or software, if a data entry mistake or error condition is detected, a dialog box will appear listing the possible causes for the error and potential solutions (except when using the HPP-100 Hand-Held Programmer). If these suggestions do not solve the problem, contact either your dealer or your distributor.
TAP 100 Application Software Manual Warranty Information 1. Keri Systems, Inc. products are warranted to the original Buyer to be free from defects in material and workmanship for eighteen (18) months from the date of shipment from Keri Systems, Inc. This Limited Warranty does not apply if the product has been damaged by accident, abuse, misuse, misapplication, modification, or negligence. NO WARRANTIES, EXPRESS OR IMPLIED, EXTEND BEYOND THE TERMS OF THIS CONTRACT.