WARNINGS & CAUTIONS 1. WARNING: FAILURE TO INSTALL, MAINTAIN, AND/OR OPERATE THIS KEROSENE HEATER ACCORDING TO MANUFACTURER'S INSTRUCTIONS MAY RESULT IN CONDITIONS WHICH CAN PRODUCE BODILY INJURY AND/OR PROPERTY DAMAGE. NOTE: The WARNING and IMPORTANT Instructions appearing in this manual are not meant to cover afl possible conditions and situations that may scour. It must be understood that common sense, caution, and carefulness are factors which cannot be built into this heater.
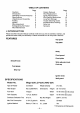
Cautions Introduction Operating Controls/Features Specifications Unpacking and Assembly Fusing Ignition Wick Adjustment Extinguishing the Heater Wick Maintenance INTRODUCTION TABLE OF CONTENTS Page Carbon Removal 7 Wick Replacement 8 niter Replacement 8 Wick Raising Mechanism 10 Long Term Storage 11 Trouble Shooting Guide 12 Exploded Parts Drawing 13 Parts List 14 Kerosene 15 Lease read this Instruction Manual carefully.
i UNPACKING AND ASSEMBLY Unpacking Remove the heater and all packing materials rom the fig.1) Take time to locate each of these items: Mph DD amber BHOB0OSEL! Reach inside the body of the heater, remove all packing materials and & Front Gil take out the burner, After tooting each of these ll ems, remove the Styrofoam and all other packing materials in the box, Save the box for summer storage. (fig.1} Assembly 1. Drip Tray Place the heater on the drip ray and dock in position by turning clockwise. {506 fig.
3. Burner and Top Plate Bet the burner into the body, following the instructions on the burner : "This side up”. Locate the spring adjusting the burner, 50 # can be reached when the door is open. {fig.4} Place the top plate on the top of the heater so the holes on the attached brackets are aligned o mount the bail harlequin as described below. (fig.4) (i 4. Top Grill and Bail Handle Attach the 1op grill to the three metal mounting brackets. (fig.
V. AUTOMATIC IGNITION SYSTEM The first time the healer is Iit, it should be done outdoors to aglow residues of oils and waxes used in manufacturing the heals and the wick 1o burn off. This will eliminate any odors from this initial light up from collecting inside the home. The heater has bean designed to be lit by using the automatic ignition system.
NOTE: The flames must be adjusted so that they are neither too high nor too low in order to obtain proper combustion. Basic adjustment of the flame is controlled by using the wick adjuster knob 1o raise or lower the wick. A fine adjustment of the fame can bie made by grasping the boomer knob and moving the burner from side to side and front to back until the bright yellow-white dames appearing at the top of the burner are as even as possible.
Vil WICK MAINTENANCE VERY IMPORTANT ! The top of & fiberglass wick accumulates carbon in the process of burning kerosene. This must be removed to maintain peak efficiency in burning, 1t Is mast important that you feel for carbon hardness after the second o third tankful of fuel, A wick in good condition will fes! soft while one that is carbonized will feel like a bristle brush or, in late stages, the top could be coated with hard black carbon.
B, WICK REPLACEMENT Wick replacement should be performed on a completely cool heater after the dank is employ and the remainder of the kerosene in the healer has been numbed off. {1} Remove the batteries from the heats. (2} Removal top guard. {3} Take off the top plate. Lift burner assembly out of heater. (4} Pull off the wick adjuster knob. Open the fuel cap, (fig. 14} {fig.14) {8) Unscrew 3 screws from the body and lift it off, (fig.15) {8) Lift off the hod base. (fig.
{28} Reinstall the heater body and tighten 4 screws. {29) Replace the burner into the body making sure to folio the instructions on the burner, "this side up’, {30) Reinstall top plate. {31) Reinstall! top guard and fasten 2 securing scows. Install the batteries in the battery case. Fife with clean, pure 1-K kerosene. Wait at least 80 minutes for kerosene to fully saturate the new wick, IMPORTANT I i this is not done air bubbles may form in the wick reducing its ability to draw up kerosene.
WICK-RAISING MECHANISM-— CONVECTION TYPE Rotating the wick control knob clockwise terns the pinion at the other end of the wick control shalt and causes the rack mounted along the cuter circumference of the wick : frame 1o turn. This results in the wick Tgrsjon being fitted 10 the top of the wick holder prong assembly. As the wick fiches, the torsion spring mounted on the wick control shaft is put under tension and compressed, The wick can be contacted by the ignite when in the full “up® position.
IMPORTANT: For the automatic safety shutoff mechanism to function as intended, the wick must be free of gummy tar deposits. This can be accomplished by regularly “dry booming” the wick as described on page 7 under "Wick Maintenance® and "Carbon Removal / Dry Bumming” CAUTION The operation of the automatic safety shutoff mechanism should be checked periodically, ie., once a week during the heating season. This can be done by using the wick control knee 1o raise the wick 10 the fully upright position.
QUICK CURES FOR COMMON TROUBLES Heater Won't Light Action to be Taken 1. Walter in kerosene Remove wick assembly and dry out wick on absorbent paper. Drain tank. Reinstall wick assembly. Fill with clean, pure kerosene {1-K Low Sulfur. 2, Empty tank Fill with clean, pure kerosene (1-K Low Hiphuggers, 3. Ignite tails to glow Check and replace batteries if necessary. Replace ignite brightly coil, disconnected or broken wire, 4.
KEROSENE rotating and using proper kerosene s the single mast important thing you, the owner, can do 10 ensure your satisfaction in the use of the heater. The comet grade of kerosene will be labeled 1-K, which means it has been carefully refined to finale virtually all but the merest trace of sulfur. Pursuit causes the “rotten sgg” smell.