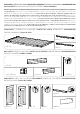
FUSION 754 ™ USER MANUAL | MODE D'EMPLOI | MANUAL DEL USUARIO | GEBRAUCHSANLEITUNG | GEBRUIKSHANDLEIDING | MANUALE PER L’UTENTE | MANUAL DO UTILIZADOR A-1352 563354 SKU: 17199516 | 17199846 FUSION SHED ASSEMBLY US: Tel: 1-(888)-374-4262, Fax: 317-575-4502 Canada: Tel: 1-(800)-661-6721 UK: Tel: 0121-5060008, Fax: 0121-4220808 Spain: Tlf: +34.949 27 74 21, Fax: +34.
BEFORE STARTING ASSEMBLY | AVANT DE COMMENCER LE MONTAGE | ANTES DE EMPEZAR EL ARMADO | VOR MONTAGEBEGINN | VOORDAT U BEGINT TE MONTEREN | PRIMA DI INIZIARE IL MONTAGGIO | ANTES DE INICIAR A MONTAGEM Read the care and safety guidelines at the end of this manual | Review all assembly instructions | Assemble all the parts according to the directions in this manual. Do not skip any steps.
HANDLE WITH CARE | À MANIPULER AVEC PRÉCAUTION | TRATAR CON CUIDADO | SORGFÄLTIG BEHANDELN | VOORZICHTIG BEHANDELEN | MANEGGIARE CON CURA | MANUSEIE COM CUIDADO Handle the panels with utmost care during pre-assembly and throughout the assembly. Carefully place the panels on the ground. Avoid stepping on them or placing any objects on top of them | Handling and assembling the panels requires 2 people. Manipulez les panneaux avec la plus grande précaution lors du pré-assemblage et pendant tout le montage.
External floor measurements are: | Les measures externes de la étage sont: | Las medidas del suelo externo son: | Die Außen-Bodenmaße betragen: | De afmetingen van de externe vloer zijn: | Le misure del pavimento esterno sono: | As medidas externas do chão são: 82. 7” | 210 cm cm | 114 ” 8 . 44 For external access during assembly, make sure to leave enough room around the outside of the shed assembly site. Level the doors only after the shed has been placed in its final location.
SHED PARTS | PIÈCES DE L’ABRI | PARTES DEL COBERTIZO | TEILE DES SCHUPPENS | ONDERDELEN VAN HET SCHUURTJE | COMPONENTI DEL DEPOSITO ATTREZZI | PEÇAS DO ABRIGO Remove all parts from the package(s) and spread them out on a clean work surface | Code letters are imprinted on each part for easy identification | Retirez toutes les pièces du/des paquet(s) et étalez-les sur une surface de travail propre | Des lettres sont imprimées sur chaque pièce pour une identification facile | Saque todas las piezas del paquete
ROOF PARTS | PIÈCES DU TOIT | PARTES DEL TECHO | DACHELEMENTE | DAKONDERDELEN | PARTI DEL TETTO | PEÇAS DO TELHADO FNAV FNPZ FNTU (x2) FNTE (x2) FNB4 (x2) (x2) (x1) Metal parts | Pièces métalliques | Piezas metálicas | Metallteile | Metalen delen | Parti in metallo | Partes metálicas FNMF FNM4 (x1) FNMB (x1) FNMC (x4) FNMS (x2) (x1) FNH8 (x2) 7
SMALL PARTS | PETITES PIÈCES | PARTES PEQUEÑAS | KLEINTEILE MINUTERIA | PEÇAS PEQUENAS FNCH (x2) FNTC FNHL (x1) FNHD (x4) (x4) FNDC (x2) FNTM (x2) FNAC (x2) FNH6 (x1) FNH3 (x1) FNH5 (x1) FNH2 (x1) FNHA (x2) FNH4 (x1) FNH7 (x1) | KLEINE ONDERDELEN | FNH1 (x1) SCREWS | VIS | SCHRAUBEN | TORNILLOS | SCHROEVEN | VIT | PARAFUSOS cm inch 1 2 0.5 3 1 4 1.5 sc12 (x41) 34 mm / 1.38” cm inch inch (x2) 2 0.5 3 1 4 1 2 0.5 3 1 cm inch 1.
FLOOR ASSEMBLY | MONTAGE DU SOL| ARMADO DEL PISO| MONTAGE DER BODENPLATTE | VLOERPANELEN | MONTAGGIO DEL PAVIMENTO | MONTAGEM DO PISO 1 FNE2 FNE1 (x1) FNFL (x1) sc15 (x1) (x1) sc15 x 1 1 FNE2 FNE1 2 Front Avant Delante Vorderseite Voorkant Anteriore Frente 2 FNFL sc15 (x9) sc15 x 9 Front Avant Delante Vorderseite Voorkant Anteriore Frente 9
WALL ASSEMBLY | MONTAGE DU MUR | ARMADO DE PAREDES | MONTAGE DER WÄNDE | MONTAGE VAN DE MUREN | ASSEMBL AGGIO DELLE PARETI | MONTAGEM DA PAREDE 3 FNP7 FNP4 (x1) (x2) FNP4 FNP7 Front Avant Delante Vorderseite Voorkant Anteriore Frente 4 FNMC FNP4 (x1) MC FN 1 10 2
sc15 (x2) Low Faible Bajo Niedrig Laag Bassa Baixa 6 1 2 1 2 3 5 sc15 x 2 6 sc15 (x4) FNMC (x3) sc15 X 2 sc15 X 1 sc15 X 1 11
7 FNPL + FNPR (x6) 1 3 P FN FNPL R L P FN FNPR 2 R P FN L P FN 8 FNPR FNPL (x1) FNPR CRA CK! FNPL x6 sc15 (x2) (x1) FNPR FNPL FNPL FNPR sc15 x 1 12 x6
9 sc12 (x20) sc12 x 20 sc12 10 1 FNP7 (x1) 2 FNP4 (x2) FNPL (x1) 3 FNPR (x1) 4 FNPL FNPR 13
11 sc15 (x8) sc15 x 2 FNPL FNPR 12 FNP7 (x4) FNP4 (x8) FNPL (x4) FNPR sc15 (x32) (x4) FNPL FNPR sc15 14
13 FNMB (x1) sc15 (x6) 1 2 FNMB sc15 x 5 FNMB sc15 x 1 14 FNDL FNDR (x1) (x1) 1 FNDL FNDR 2 FNDL FNDR 15
15 FNDC (x2) FNDT (x1) sc15 (x2) sc15 x1 16 16
FNCH 18 (x2) FNMF (x1) sc12 (x4) 11 22 sc12 x 4 17
DOOR ASSEMBLY | MONTAGE DE LA PORTE | ARMADO DE LA PUERTA | MONTAGE DER TÜR | DEURMONTAGE | MONTAGGIO DELLA PORTA | MONTAGEM DA PORTA 19 FNWD (x2) FNRD x2 1 FNLD (x1) (x1) x2 2 3 FNLD FNRD 20 FNHL FNHD (x1) (x4) 1 2A 2B 2B 2A 2B 2A 18 x2
21 sc15 (x36) sc15 x 18 sc15 x 18 22 1 2 1 2 19
ROOF ASSEMBLY | MONTAGE DU TOIT | ARMADO DEL TECHO | DACHMONTAGE | DAKMONTAGE | MONTAGGIO DEL TETTO | MONTAGEM DO TELHADO 23 FNTU FNTE (x2) (x2) x2 FNTE FNTU 24 sc15 (x14) x2 sc15 x 7 20
25 FNM4 (x2) sc15 (x10) (x2) x2 FNM4 sc15 1 2 sc15 x 5 26 FNAV No pre-drilled holes. Pas de trous pré-percés. Sin agujeros pretaladrados. Ohne vorgebohrte Löcher. Geen voorgeboorde gaten. Buchi preforati non presenti. Sem buracos perfurados previamente.
27 sc15 (x1) FNMB sc15 28 22
29 1 2 23
30 sd84 (x6) FNTC (x2) 1 2 3 sd84 x 1 31 sd84 (x6) 1 2 2 2 1 sd84 x 3 24 FNTC (x2) sd84 x 2
32 FNTM sd84 (x4) (x2) 1 2 sd84 x 2 33 FNB4 (x1) FNAC sc15 (x3) (x1) 1 2 1 2 3 sc15 x 3 25
34 FNAC (x1) sc15 (x3) 2 1 sc15 x 3 35 sc15 (x10) sc15 x 10 26
36 FNH6 1 sc15 1 sc15 (x2) (x1) 2 2 Left Gauche Izquierdo Verließ Links Sinistra esquerdo 37 1 FNH5 FNH4 (x1) sc15 x 1 (x1) sc15 (x1) 2 27
38 FNH1 FNH7 (x1) 1 sc15 (x2) (x1) 2 3 sc15 x 2 39 FNH2 (x1) FNH3 (x1) sc15 (x3) 1 sc15 x 1 2 sc15 x 2 28
40 sc15 FNH8 FNH9 (x2) (x2) FNHA sc15 (x6) (x2) FNHA FNH9 sc15 FNH8 FNH8 FNH8 FNHA sc15 sc15 FNH9 41 FNH8 FNMS (x1) sc15 SC15 (x6) Left Gauche Izquierdo Verließ Links Sinistra esquerdo sc15 FNMS 29
42 FNCP s13b (x20) (x4) s13b x 5 1 30 2
43 Level the doors only after the shed has been placed in its final location | Mettre à niveau les portes uniquement après que l’abri ait été placé dans son emplacement final | Nivele las puertas solamente después de que el cobertizo haya situado en su ubicación final | Richten Sie die Türen erst dann waagerecht aus, nachdem der Schuppen in seine endgültige Position gebracht wurde | Zet de deuren pas waterpas als het schuurtje op de uiteindelijke plek is geplaatst | Mettere a livello le porte solo al termin
44 sc15 (x2) Inside Intérieur Interior Innenseite Binnenkant Interno Interior sc15 x 1 45 sc12 (x17) sc12 x17 Inside Intérieur Interior Innenseite Binnenkant Interno Interior 32
MAINTENANCE | MANTENIMIENTO | WARTUNGSARBEITEN | ONDERHOUD | MANUTENZIONE | MANUTENÇÃO This shed is maintenance free. Paint or varnish are not necessary. Cet abri ne nécessite aucun entretien. Peindre ou vernir n’est pas nécessaire. El cobertizo no necesita mantenimiento. Tampoco hay que pintarlo ni barnizarlo. Dieser Schuppen benötigt keine Wartung. Streichen oder Lackieren ist nicht notwendig. Dit schuurtje is onderhoudsvrij. Het is niet nodig het te schilderen of te lakken.
DRILLING INTO THE WALLS | PERCER DANS LES MURS | TALADRAR LAS PAREDES | WANDBOHRUNGEN | IN DE WANDEN BOREN | BUCARE LE PARETI | FURAR AS PAREDES The shed’s unique characteristics enable versatile wall-mounting options. Mount tracks on the walls, or screw directly into the walls by drilling into the dedicated slots in the inner side of the panels (see illustration below). Use #10 x 1”/5 mm wood screws only. Do not use nails. Max. weight load per wall section: 77lbs/35kg; per screw: 8.8lbs/4kg.
OPTION | OPCIÓN | OPTIE | OPZION | OPÇÃOE Securing the shed to a foundation Affix the shed to the foundation by drilling holes in the shed floor at the pre-marked locations and screwing it into the foundation using appropriate screws (screws not included). Fixer l’abri sur une fondation Fixez l’abri à la fondation en perçant des trous dans le sol aux endroits pré-marqués et en insérant des vis adéquates dans la fondation (vis non fournies).
AND SAFETY GUIDELINES AFETY CARE GUIDELINES • The is intended foronly. storage purposes only. is not designed for habitation. intended forshed storage purposes It is not designed forIthabitation.
• Tragen Sie eine Schutzbrille befolgen Sie Verwendung von Elektrowerkzeugen immer dieHerstellers. Anweisungen des Herstellers. • Tragen Sie eine Schutzbrille und befolgen Sie beiund Verwendung vonbei Elektrowerkzeugen immer die Anweisungen des • Reinigenmit Sieeinem den Schuppen mit einem und einem mildenVerwenden Reinigungsmittel. Verwenden Sie auf keinen Fallund eine harte Bürste und • Reinigen Sie den Schuppen Gartenschlauch undGartenschlauch einem milden Reinigungsmittel.
WARRANTY 10-YEAR LIMITED WARRANTY e Product”) Your Keter was manufactured shed (“the Product”) from high-quality, was manufactured recyclable from materials high-quality, underrecyclable rigorous control materials andunder supervision. rigorous control and supervision. ccur with Should the Product, a problem please occuraddress with theyour Product, claimplease to Keter address customer yourservice claim to onKeter our website customer (www.keter.com) service on our or website by phone. (www.keter.
Deze garantie geldt niet voor Deze defecten garantie diegeldt het gevolg niet voor zijndefecten van normale die het slijtage, gevolgmet zijn inbegrip van normale van, slijtage, maar niet met beperkt inbegrip tot,van, schuren, maar krassen niet beperkt of breuken tot, schuren, ontstaan krassen tijdens of breuke het gebruik, verkleuring ofhet vervaging gebruik,van verkleuring de kleuren, of roest, vervaging onredelijk van de gebruik, kleuren, misbruik, roest, onredelijk nalatigheid, gebruik, wijzigingen, misb