
Operation Manual


Menu
KETRON • AUDYA 105
CHANNEL TX
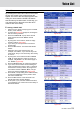
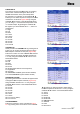
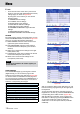
By pressing the F1 button a window like Figure 261
will appear. Here you can set all the MIDI transmission
channels for each part of the keyboard by using the
F1-F10 buttons.
Press the F1 button-10 corresponding to the part and
assign the MIDI transmission channel choosing from
1 to 16 by using the CURSOR Ó Á buttons
or the
DATA/VALUE wheel.
F1–Right
F2–Left
F3–Bass
F4–Drum1
F5–Drum2
F6–Global (global channel of the keyboard)
F7–Registration
F8–Voicetron
F9–ARRANGER CHORDS (opens another window)
F10–VOICE/DRAWBAR (opens another window)
Besides the F1-10 buttons, you can also select the
parts by using the CURSOR
§ ¶
buttons.
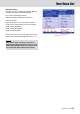
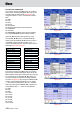
ARRANGER CHORDS
By pressing the F9 button an assign window for the
MIDI channels will appear as shown in Figure 262.
By pressing the F1-F10 buttons or the CURSOR
§
¶
buttons
you can select the parts of the Arranger to
which assign the transmission MIDI channel from 1 to
16 by using the CURSOR Ó Á buttons
or the DATA/
VALUE wheel.
F1–Chord1
F2–Chord2
F3–Chord3
F4–Chord4
F5–Chord5
F6–Lower1
F7–Lower2
F8–Live Chord L (Mono)
F9–Live Chord R
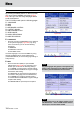
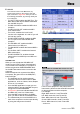
VOICE/DRAWBAR
By pressing the F10 button a window will appear
where to assign the MIDI channels for each VOICE,
DRAWBAR, Click and Percussion, as shown in Figure
263. By pressing the F1-F10 buttons or the CURSOR
§ ¶
buttons
you can select the parts to which assign
the MIDI transmission channel from 1 to 16 by using
the CURSOR Ó Á buttons
or the DATA/VALUE
wheel:
F1–Voice1
F2–Voice2
F3–Voice3
F4–2ndVoice1
F5–2ndVoice2
F6–GM/RAM Voices
F7–Drawbar
F8–Click
F9–Percussion
Figure 261
Figure 262
Figure 263
NOTE
To return to the previous MENU page, press the EXIT
button on the front panel. To exit the MENU window
without saving changes, press the MENU button.