Tedesco Benutzerhandbuch
INHALTSVERZEICHNIS Ketron DG100: ein phantastisches musikalisches Abenteuer nimmt seinen Anfang! Anschlüsse Schaltpult und Funktion der Druckknöpfe Die Verwaltung der Parameter Spaß mit DG100! Eine Schnellanleitung für Anfänger Voice und User Voice Program und One Touch Sound Load Sampler Drawbars Drum Set Arranger Style & Sound RAM Style und Flash RAM Pattern Edit Power On Set Up Song Play, Midifile und Karaoke Video Out und Karaoke Eine Midi-Datei aufzeichnen .KAR-Midi-Datei und .
Ketron DG100: ein phantastisches musikalisches Abenteuer nimmt seinen Anfang! Herzlichen Glückwunsch zum Kauf des neuen digitalen Fl gels Ketron DG100. Wir haben zwei Jahre intensiver Entwicklung und Programmierung darauf verwendet, Ihnen bessere natürlichere Klänge, moderne musikalische Arrangements und neue Wiedergabefunktionen für MIDIBasisstücke, Tonmuster, Textdateien und General MIDI zu bieten.
● ● ● Vereinfachte Verwaltung der Festplatte durch das neue Master Folder-Konzept. Eigens entwickeltes Menü für MIDI-Akkordeons. Neuer professioneller Look (aber der war bereits erfunden!). Nicht schlecht, oder? Wenn Sie von diesen Eigenschaften begeistert sind, hätten Sie das DG100 wahrscheinlich kaufen können, auch wenn Sie nur den Katalog gesehen hätten.
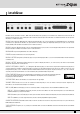
Anschlüsse Das DG100 ist mit einer Reihe von Audio-, MIDI- und Pedal-Anschlüssen ausgestattet, die für den Betrieb des Instruments erforderlich sind. Als Optional geliefert werden die Video-Schnittstelle und die beiden Pedalsteuerungen. An der Rückseite des Instruments finden sich die folgenden Anschlüsse (von links nach rechts): MICRO 1: Audioeingang für Mikrophon über symmetrischen XLR-Anschluss.
MAIN SWITCH: Netzschalter des DG100. AC: Netzkabel. ANDERE ELEMENTE DES DG100 FESTPLATTE Die serienmäßig in jedes DG100 eingebaute Festplatte mit sechs GB wurde nach Maßgabe von Geschwindigkeit und Robustheit gewählt. DISKETTENLAUFWERK Serienmäßig eingebaut gestattet es das Lesen und Beschreiben von Disketten mit 720 KB und 1,4 MB in DOS-Format. Es können auch Disketten verwendet werden, die auf PC formatiert wurden.
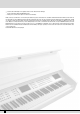
Schaltpult und Funktion der Druckknöpfe VOLUME SONG VOICES HARD/FLOPPY 4' 16' 1 1 3/5' GRAND PIANO RECORD PLAY PATTERN EDIT SEQUENCER MASTER FOLDER SINGLE REG.
MANUAL BASS Bei leuchtender LED ist es möglich, die Bassspur des Styles per Hand zu spielen. SPLIT Aktiviert die Wahl des Splitpunktes der Tastatur, der den Melodiebereich (Right) rechts von jenem links trennt, welcher dem Arranger und der manuellen Begleitung (Lower e Manual Bass) zugedacht ist. Um den Split festzusetzen, ist der Druckknopf SPLIT zu betätigen und die Note auf der Tastatur anzuschlagen, die den Split markiert.
Funktionen erfüllen). Um also einen Parameter zu aktivieren oder anzuwählen, ist lediglich der jeweilige Druckknopf zu betätigen. Wenn die Parameter in der Mitte des Displays dargestellt sind, sind diese mit CURSOR + und CURSOR – anzuwählen. Detaillierte Beschreibungen finden Sie auf den Seiten der Änderungen; hier beschränken wir uns darauf, die einzelnen Parameter kurz zu erläutern.
F9 EDIT DRUM: für die Schlagzeugspur, aber nicht nur gedacht, dient diese Funktionsgruppe der Programmierung eines vollständigen Drum Kits, von dem für jede Keyboardtaste zwei Muster aufgezeigt werden. F10 MICRO EDIT: ist dem Einsatz des Mikrophons und der Verwendung der beiden Eingänge zugeordnet, wobei die Möglichkeit besteht, Lautund Effektstärken zu ändern. DIE DRUCKKNÖPFE UND DIE WAHL DER STYLES Zwölf Druckknöpfe gestatten den Abruf von ebenso vielen Stylegruppen direkt vom Schaltpult aus.
vom Master Folder, dessen LED automatisch bei Betätigen von SOUND LOAD aufleuchtet. Um .WAV oder .MSP-Muster zu laden, ist es erforderlich, F8 Dir WAV anzuwählen, so dass der Verweis zu den jeweiligen Foldern erfolgt. Um zu den .INSMustern zurückzukehren, ist F9 Dir INSTRUM zu betätigen, wobei einzelne Dateien geladen werden oder von F9 ausgehend Dir Block angesteuert wird, um .INS-Dateigruppen in einem Vorgang zu laden. PORTAMENTO Bei leuchtender LED ist das Portamento zugeschaltet, d.h.
PROGRAM Zeigt bei leuchtender LED acht gespeicherte Programs an, die mit den Funktionsdruckknöpfen auszuwählen sind. Ein Program gruppiert bis zu vier der Melodie zugeordnete Klangfarben mit entsprechenden Parametern. 2ND VOICE Bei leuchtender LED wird über die Melodielinie eine zweite Stimme gelegt, deren Klang unter dem Hauptklang angezeigt wird.
COUNT/PAUSE RESTART Bei nicht belegtem Arranger fügt COUNT einen Count In-Takt ein, bei dem ein Stick die Viertel schlägt. Wenn vor COUNT bei leuchtender JUMP-LED auch INTRO betätigt wurde, wird am Ende des Einzähltaktes das gewählte Intro zugeschaltet. Bei Arranger in Funktion bewirkt die Betätigung des Druckknopfs die unmittelbare Rückkehr zum ersten Taktviertel unabhängig von der Tempoposition.
Die Verwaltung der Parameter Bevor die Programmierung als solche erläutert wird, ist die Verwaltung der Menüs und Parameter des DG100 zum Verständnis zu bringen. Die nachstehenden Anleitungen beziehen sich auf alle Kapitel des vorliegenden Handbuchs und sind für die Bedienung des Keyboards unabdingbar. EINHEITLICHER SCHRIFTSTIL Das Handbuch verwendet einen einheitlichen Schriftstil, wenn es sich um folgende Elemente handelt: Druckknöpfe am Schaltpult: in Großbuchstaben und Fettschrift (z.B.
DIE FUNKTIONSDRUCKKNÖPFE F1-F10 Es sind die fünf Druckknöpfe links und rechts vom Display. Sie werden so genannt, weil sie keine genaue Funktion ausüben (abgesehen vom Abruf der Menüs, wie bereits erwähnt), sondern jeweils die Funktion bzw. den Befehl übernehmen, der am Display in ihrer Höhe erscheint. Wenn Sie genau schauen, werden Sie bemerken, dass für jeden Druckknopf eine blaue Linie gezogen wurde, die präzise auf einen Displaybereich hinweist.
Spaß mit DG100! Eine Schnellanleitung für Anfänger Sicher möchten Sie wissen, wie einige Funktionen des DG100, beispielsweise die Wiedergabe von Midi-Dateien, der Arranger, das Abrufen von Styles und Voices, der Anschluss von MIDI-Akkordeons oder der Vocalizer mit Mikrophon zu verwenden sind. Dann ist dieses Kapitel wie für Sie geschaffen! Wenn Sie keine Programmierer und nicht daran interessiert sind, ins Detail der Menüs vorzudringen, können Sie sich mit dieser Anleitung vollauf begnügen.
vonnöten ist, vorab zu wissen, ob die Midi-Datei in Format 1 oder 0 ist. Wenn Sie versuchen, eine Midi-Datei oder .KAR-Datei in Format 1 zu laden, bietet das Instrument zwei Optionen: ● Konvertierung der Midi-Datei zur sofortigen Verwendung ● Sicherung der konvertierten Midi-Datei Es gibt eigentlich keinen Grund, auf Festplatte eine Midi- oder .KAR-Datei in Format 1 zu speichern, so dass es sich empfiehlt, sie immer nach der Konvertierung zu sichern, auch um den Ladevorgang zu beschleunigen.
● ● ● ● ● ● ● ● ● ● Auf der Hauptmenüseite SONG PLAY drücken. Die Quelle der Midi-Dateien, also Hard Disk oder Floppy Disk, mit PAGE +/- wählen. Die Funktion F6 Juke-Box zuschalten. Um F9 Chain Select zu aktivieren, ist der Druckknopf * zu betätigen. Die erste Midi-Datei der Kette mit VALUE +/- markieren. Die erste Midi-Datei der Kette mit F9 Chain Select quittieren. Neben der Midi-Datei erscheint das Symbol ♦. Die nachfolgende Midi-Datei mit VALUE +/- wählen.
machen können. Ketron jedenfalls hat Styles erarbeitet, die nie die Melodie überdecken, sondern diese immer hervorheben. Beim Einschalten ist das DG100 so eingestellt, dass der Arranger mit einem Pianoforte-Klang für die mit der rechten Hand zu spielende Melodielinie (Right), einem Background aus Streichinstrumenten und E-Piano für die linke Hand (Lower), einem Teilungspunkt der Tastatur (Split) zur Trennung des linken vom rechten Bereichs auf C3 und dem Style 001 Pub Song arbeitet.
● ● ● ● ● ● Um alle Fill Ins zyklisch zu wiederholen, ist einer der Druckknöpfe FILL 1, 2, 3 zu betätigen und niedergedrückt zu halten. Um die Lautstärke des Arrangers mit der der Melodie, die rechts gespielt wird, abzustimmen, sind die Druckknöpfe BALANCE +/- (VALUE +/-) zu betätigen. Um das Originaltempo des Styles wieder herzustellen, sind gleichzeitig die Druckknöpfe PAGE +/- zu betätigen.
Es ist selbstverständlich möglich, andere Features des Arrangers zu steuern, wie zum Beispiel die Klangfarben, die der rechten Hand zuzuordnen sind, oder die Einstellungen der einzelnen Begleitspuren. Für einen vergnüglichen Anfang allerdings reichen diese Grundkenntnisse.
Hierbei ist wie folgt vorzugehen. ● ● ● ● ● ● Hauptmenüseite über EXIT öffnen. Ins Editing-Menü der Mikrophoneingänge mit der Funktion F10 MICRO EDIT einsteigen. Am Display werden verschiedene Optionen angezeigt, unter anderem der Aktivierungszustand der Eingänge, die mit der Funktion F10 (ACTIVE) von Inactive auf Active umgeschaltet werden. Die Empfindlichkeit des Mikro-Eingangs mit dem Regler GAIN auf der Rückseite des Instruments einstellen, bis die LED Overload (ON LINE EFFECT) aufleuchtet.
WIE EIN MIDI-AKKORDEON ZU VERWENDEN IST Ketron hat ein eigenes Menü für den Anschluss von Akkordeons mit MIDI-Schnittstelle vorgesehen, welche über den Eingang MIDI In 2 geführt werden müssen. Um sich auf die hierfür erforderlichen Parameter Zugriff zu verschaffen, ist von der Hauptmenüseite aus F3 UTILITY anzuwählen und weiter F6 ACCORDION. Hier sind die diversen abzuändernden Parameter verfügbar, wobei natürlich die Aktivierung des MIDIAkkordeons am wichtigsten ist, die über F10 erfolgt, d.h.
Voice und User Voice Eine der grundlegenden Eigenschaften des DG100 ist seine Klangqualität, also seine Synthesizertechnik, die auf Multisamples aufbaut, welche nach den Prinzipien der Klangsubtraktion, Frequenzmodulation und Klangaddition verarbeitet werden. Die Samples sind in diesen Jahren von einem internationalen Programmiererteam entwickelt worden und machen sich wie das akustische Pianoforte bis zu 64 Muster zunutze, die entlang der Tastatur auf zwei unterschiedlichen Dynamikebenen angeordnet sind.
SECOND VOICE Das DG100 bietet die Möglichkeit, einen Layer aus zwei übereinander liegenden Klängen für die rechte Hand kreieren. Am Display erscheint unterhalb des Namens der gewählten Voice der klein geschriebene Name der zweiten Stimme oder Second Voice. Um die Second Voice verfügbar zu machen, ist der Druckknopf 2ND VOICE zu betätigen (die LED leuchtet auf). Als Defaulteinstellung enthält das DG100 bereits eine Second Voice für jeden Klang, wobei diese Kombination jederzeit geändert bzw.
ELEMENTE DER KLANGPROGRAMMIERUNG Ein DG100-Klang verwendet als Klangquelle eine in einem Wavetable aufgezeichnete Schwingung. Diese Schwingung kann auch aus verschiedenen Mustern erzeugt werden, die entlang der Tastatur oder nach Tastendynamik angeordnet sind, aber vom Musiker nicht geändert werden können. Der Rohklang der Schwingung wird mit einem Hüllenkurvengenerator behandelt, d.h. einer Funktion, die es gestattet, die Entwicklung der Lautstärke des Tons während des Spielens einer Note zu “entwerfen”.
STEUERUNG MIT WHEEL Durch Druck auf F9 Wheel erscheint am Display eine Tabelle mit den Parametern, die mit Wheel Modulation gesteuert werden können. Um durch die Parameter zu blättern, verwenden Sie CURSOR. Die einzelnen Parameter werden mit VALUE aktiviert. CUT OFF: LFO Pitch: LFO Amplitude: LFO Filter: Volume: Wha Wha: aktiviert die Öffnungs- und Schließsteuerung des Filters. aktiviert die Modulation der Frequenz (Pitch). aktiviert die Modulation der Amplitude (Tremolo).
Velocity Filter: steuert die Öffnung des Filters in Abhängigkeit von der Tastendynamik. Mit dem Wert 64 ist die Standardbedingung gegeben; bei niedrigeren Werten erzielen Sie einen weniger brillanten Klang, auch wenn mit gesteigerter Dynamik gespielt wird. Octave Shift: verschiebt die Oktave der User Voice in einem Bereich zwischen - 2 Oktaven und +2 Oktaven.
Bei aktiviertem Master Folder DISK drücken, um ins Disk-Menü einzusteigen. Den Speichervorgang mit F3 Save ansteuern. F9 User Voice anwählen. Auf der nächsten Seite ist der Name der Datei mit den Keyboardtasten einzugeben. Den Vorgang mit F10 Exec bestätigen oder mit F5 Escape abbrechen. User Voices werden in Folder 98 gespeichert.
Program und One Touch PROGRAM Um die Klangfülle des Melodieteils, d.h. des vom Splitpunkt der Tastatur rechts gelegenen Bereichs auszubauen, werden häufig mehrere Klänge gleichzeitig verwendet. Das einfachste System hierfür ist der Einsatz der Second Voice, aber für die Anspruchsvolleren unter Ihnen ist es auch dank der 76 Keyboardtasten möglich, bis zu vier kombinierte Voices auf unterschiedliche Art und Weise einzusetzen.
Die vierte Voice eines Program stellt einen Sonderfall dar: neben der Harmonisierung nach denselben Regeln der anderen Stimmen kann diese auch die Rolle der Second Voice übernehmen und hiermit über den Druckknopf 2ND VOICE zu- und ausgeschaltet werden. Um diese Option verfügbar zu machen, ist, nachdem Sie auf die vierte Voice gegangen sind, zwei Mal F10 Harmony zu betätigen.
F5/F10 Delay e Chorus: steuern die Signalstärke für Delay und Chorus, sofern der entsprechende Algorithmus gewählt wurde; der Wert wird mit den VALUE +/- -Knöpfen abgeändert bzw., wenn gleichzeitig betätigt, auf Null gesetzt. Im Gegensatz zu dem, was bisher besprochen wurde, sind die Parameter innerhalb der Zeilen nur mit dem Funktionsdruckknopf F5/F10 abzurufen, da für die letzte Zeile kein eigner Druckknopf verfügbar ist.
EIN PROGRAM LADEN UND SICHERN Nachdem ein Program geändert bzw. festgelegt wurde, ist es im Speicher oder auf Disk zu sichern. UM EIN EINZELNES PROGRAM IM RAM-SPEICHER ZU SICHERN ● ● ● ● Das zu sichernde Program anwählen. In die Edit Program-Umgebung einsteigen, indem erneut der dem Program entsprechende Funktionsdruckknopf betätigt wird oder von der Hauptmenüseite aus F8 Edit Program abgerufen wird. SAVE/ENTER drücken.
UM EIN EINZELNES PROGRAM VON DISK BEI AKTIVIERTEM MASTER FOLDER ZU LADEN ● ● ● ● ● ● DISK drücken. Mit PAGE +/- Hard Disk wählen. Mit F5 Folder Choice den zu ladenden Dateityp wählen. F2 Program aktivieren. Das Program mit VALUE +/- anwählen. F2 Load drücken. ONE TOUCH Als Defaulteinstellung enthält das DG100 bereits ein geordnetes Voice-Verzeichnis zum Abruf der Klänge mit der Funktion One Touch. Dieses gestattet es, Zehnergruppen aus den bevorzugten Klängen zu bilden, um den Zugriff zu beschleunigen.
Sound Load Obwohl es möglich ist, ein Sample oder eine Audiodatei wie bereits erläutert von Disk zu laden, gestattet das DG100, den Vorgang mit dem Druckknopf SOUND LOAD abzukürzen. Durch Betätigen von SOUND LOAD aktiviert das DG100 die Master Folder-Funktion und zeigt am Display den Inhalt des Folders 94 Sound an. Das DG100 unterscheidet die Audiodateien in zwei Klassen: - Wave: Audiodatei in .WAV-Format, die an dem zuvor stehenden “w” zu erkennen ist.
● ● ● ● ● ● ● SOUND LOAD drücken. Wenn gewünscht, den Dateityp mit F8 Dir Wave und F9 Dir Block/Instrument auswählen oder den gesamten Inhalt des Folders mit F1 Dir anzeigen. Die Dateien mit VALUE +/- anwählen. Die soweit vorhandenen nachfolgenden Seiten mit CURSOR +/- durchlaufen. Die Wahl der Datei mit F10 Select bestätigen; die Datei wird nun durch das Symbol > gekennzeichnet. Die eben beschriebenen Schritte wiederholen, um mehrere zu löschende Dateien anzuwählen.
Sampler Der Sampler des DG100 gestattet die Aufzeichnung von neuen Klängen durch Nutzung des Audioeingangs Micro 1 sowie die Verwaltung von WaveDateien auf Diskette, die mit einem PC erstellt wurden. Der DG100-Sampler verarbeitet die Signale mit 16 Bit und bei einer Aufzeichnungsfrequenz von 44,1 kHz in Monophonie.
Die Dauer der Aufzeichnung einstellen, indem F2 Time betätigt und der gewünschte Wert mit den VALUE +/- - Knöpfen eingegeben wird. Die Aufzeichnung über F10 Start starten, das DG100 schaltet auf Bereitschaft, bis das erste Audiosignal im Eingang abgetastet wird; bei Ablauf der eingestellten Zeit wird die Aufzeichnungsfunktion automatisch ausgeschaltet. ● Das Sample ist mit der Keyboardtaste C3 abzuspielen.
EDITING DES LOOPS Der Loop ist ein Teil eines Musters, der durch einen Anfangs- und einen Endpunkt definiert ist und automatisch wiederholt wird, bis die Note nicht mehr gespielt wird. Der Vorteil des Einsatzes von Loops liegt darin, dass viel RAM-Speicherplatz gespart werden kann. Aus diesem Grund machen sich die Keyboards seit Jahren Muster mit Loops zunutze.
EIN MULTISAMPLE LADEN, DAS GEÄNDERT WERDEN SOLL Von der Startseite des Menüs Sampler MSP verschaffen Sie sich Zugriff auf das Editing des Multisamples, indem F4 MSP Edit gedrückt wird , um ein bereits auf Hard oder Floppy Disk bestehendes Multisample zu laden. Dieser Vorgang erfolgt wie gewöhnlich nach Anwahl der Disk mit den PAGE +/—und VALUE +/—Knöpfen bzw. F10 Select zur Bestätigung der getroffenen Wahl.
F7 Key: definiert mit den VALUE +/—Knöpfen oder der entsprechenden Keyboardtaste die Ausgangsnote des Musters, die als Bezug für die Transposition entlang der Tastatur dient. Diese Funktion ist nur aktiviert, wenn F6 Pitch auf Normal gesetzt ist. F8 Fine: gestattet es mit den VALUE +/—Knöpfen, ein Muster in Cent-Schritten zu stimmen, wenn F6 Pitch auf Normal gesetzt ist. F9 Max Wave: legt die Anzahl der Tastatursplits fest, die für ein Multisample vorgesehen ist.
Drawbars Dank des leistungsstarken Klangmotors des DG100 ist es möglich, auch die Klangfarben der klassischen elektromagnetischen Orgeln zu reproduzieren, von denen die Hammondâ-Orgel sicher die bekannteste ist. Wenn Sie keine elektromagnetische Orgel kennen, ist darauf hinzuweisen, dass der Ton mit den sogenannten Drawbars zusammengesetzt wird, denen eine bestimmte Oberschwingung entspricht. Um die Klangfarbe zu erzeugen, werden auf verschiedenen Ebenen die erforderlichen Harmonischen hinzugefügt.
Drum Set Der rhythmische Bereich des DG100 arbeitet sowohl mit Drum Sets als auch mit Live Drums. Die Drum Sets sind der Spur Drum 1 (MIDI 10-Kanal) zugewiesen, während die Live Drums der Spur Drum 2 (MIDI 9-Kanal) innerhalb eines Styles zugeordnet sind. Das DG100 verfügt über 24 voreingestellte Drum Sets und weitere 24 User Drum Sets, die vom Musiker zu programmieren sind. EIN DRUM SET SPIELEN Um auf der Tastatur ein Drum Set zu spielen, ist der Druckknopf MANUAL DRUM zu betätigen.
BANK PROGRAM (C.C.=0) CHANGE 4 25 Latingr 1 4 26 Latingr 2 4 27 Latingr 3 4 28 Latingr 4 4 29 Latingr 5 4 30 Latingr 6 4 31 Latingr 7 4 32 Latingr 8 4 33 Tekno 1 4 34 Tekno 2 4 35 Newage 4 36 Latinhou 4 37 Slowbeat 4 38 Hiphop 4 39 Pop 4 40 Vocals 4 41 Rock 4 42 Jazz 1 4 43 Shuffle 4 44 Jazz 2 4 45 Bossanova 4 46 Samba 1 4 47 Samba 2 4 48 Pandero 4 49 Salsa 2 4 50 Eurolatin NAME DRUM MIXER Um die Drum Mixer-Seiten zu öffnen, ist der DRUM MIXER-Knopf zu betätigen.
Die zweite Seite ist der Lautstärkenregelung der einzelnen Gruppen dediziert, die mit den jeweiligen Funktionsdruckknöpfen angewählt werden. Die Lautstärke kann mit den VALUE +/—Knöpfen in einem Bereich zwischen 1 und 15 eingestellt werden. Die dritte Seite ist der Hallstärkenregelung der einzelnen Gruppen dediziert, die mit den jeweiligen Funktionsdruckknöpfen angewählt werden. Die Hallstärke kann mit den VALUE +/—Knöpfen in einem Bereich zwischen 1 und 15 eingestellt werden.
das Editing gewählt. Es gibt nämlich eine interne Entsprechung zwischen voreingestellten Drum Sets und User Drum Sets. Um ein anderes zu modifizierendes Drum Set anzuwählen, ist der Druckknopf DRUM SET zu betätigen und wie bereits ausgeführt ein anderes Drum Set abzurufen. Zur Drum Edit-Menüseite kehren Sie zurück, indem ein Mal EXIT oder erneut DRUM SET gedrückt wird. Um die Einstellungen der einzelnen Tasten zu ändern, ist zunächst die Note zu spielen, die über F2 Key angezeigt wird.
Arranger Der Arranger ist der Motor der automatischen Begleitung des DG100. Er gestattet, ein dynamisches und vielseitiges Arrangement durch den Einsatz der Styles und der jeweiligen Steuerungen zu kreieren. Ein Style ist eine Sammlung kurzer untereinander kombinierter Sequenzen in Dur, Moll und Sept.
Aktivierungszustand von JUMP Arranger-Zustand Betätigte Druckknöpfe Aktiviert Stop FILL 1, 2, 3 Start des Arrangers und Abspielen des gewählten Fill-ins, ohne nachfolgendes Aussetzen des Arrangers Aktiviert Stop TO END Es wird nur der To End-Takt gespielt Aktiviert Start INTRO 1, 2, 3 Der Arranger wird nicht unterbrochen, spielt die Takte des gewählten Intros und setzt seine Arbeit fort Aktiviert Stop COUNT IN Start des Arrangers bei Count In-Takt Aktiviert Stop COUNT IN gefolgt von INT
wird, während die Schlagzeugspuren auf jeden Fall weiterklingen. START: bei Betätigung wird die Ausführung der automatischen Begleitung gestartet. Ist der Arranger bereits in Funktion, setzt START den Arranger außer Betrieb, d.h. der START-Druckknopf fungiert als STOP-Druckknopf. SLOW: FAST: setzt den Tempowert des Arrangers oder Sequenzers herab. erhöht den Tempowert des Arrangers oder des Sequenzers.
besetzt ist. Dies um zu vermeiden, dass zusammen mit dem gespielten Akkord vor dem Arrangerstart auch die LowerNoten erklingen. Wenn die LED des Druckknopfs HOLD leuchtet, speichert der Arranger den gespielten Akkord, auch nachdem er nicht mehr angeschlagen wird. KEY STOP: setzt bei leuchtender LED die Ausführung des Arrangers aus, wenn ein kurzer Akkord oder eine kurze Note gespielt werden. Bei erneutem Anschlagen des gleichen Akkords bzw. der gleichen Note, setzt die Ausführung des Arrangers wieder ein.
wendet werden, in Echtzeit abzurufen. Die Funktion Style Setting gestattet es, jedem Style bis zu zehn Klänge zuzuordnen, die mit den jeweiligen Funktionsdruckknöpfen direkt abrufbar sind. Das DG100 verfügt über 48 Style Setting-Datensätze. Jeder dieser Datensätze ist mit nahezu jedem Style zu verknüpfen. Wird der Style auch bei Arranger in Ausführung geändert, werden die Klänge aktualisiert. Es ist möglich, die Einstellungen aller Style Settings im F4 Arrange Mode-Menü nach Belieben zu ändern.
F1 Low 1 Hold: durch wiederholtes Betätigen des Funktionsdruckknopfs F1 wird die Aktivierung (√) oder Deaktivierung der Speicherung der bei Lower 1 während der Ausführung des Arrangers gespielten Noten erzielt. Auf diese Weise ist es möglich, die bei Lower 1 links vom Splitpunkt gespielten Töne zu hören, auch nachdem sie nicht mehr gespielt werden. Als Defaulteinstellung ist Hold auf Lower 1 aktiviert, da in der Regel der Klang eines Streichinstruments oder ein Pad eingesetzt werden.
diese Funktion, den Wert festzusetzen, um den das Tempo bei einmaliger Betätigung des Druckknopfs RIT ACC (TAP) erhöht bzw. herabgesetzt wird. F2 AutoCrash: als Defaulteinstellung aktiviert bewirkt die Funktion einen Crash-Schlag am Ende jedes Intros und Fill Ins. Zur Deaktivierung ist der entsprechende Funktionsdruckknopf zu betätigen.
F1 Style Set: zeigt das aktuelle Style Set an. F2 Bass: als Defaulteinstellung aktiviert; Deaktivierung durch erneutes Betätigen des Funktionsdruckknopfs F2. F3 Chord 1: durch Betätigen des entsprechenden Druckknopfs, wird die Retrigger-Funktion für die Spur Chord 1 zugeschaltet. F4 Chord 2: durch Betätigen des entsprechenden Druckknopfs, wird die Retrigger-Funktion für die Spur Chord 2 zugeschaltet.
erforderlich ist, den Arranger zu starten, das jeweilige Intro oder Ending abzurufen und, nachdem der Bereich aktiviert wurde, die Klangfarbe, die geändert werden soll, zu wählen. Um die Klangfarbe zu ändern, ist wie folgt vorzugehen: ● ● ● ● ● ● ● ● Den Style, der geändert werden soll, anwählen und mit EXIT auf die Hauptmenüseite zurückkehren. In Arrange View einsteigen, indem der Druckknopf F5 ARRANGE VIEW betätigt wird.
ARRANGE VIEW: ZWEITE SEITE Die Hallstärke für jede Spur und die Lower-Teile bleibt für alle Style-Bereiche gleich. Zur Änderung sind zunächst die Spur oder der Teil mit dem entsprechenden Funktionsdruckknopf anzuwählen, um anschließend den Wert mit den VALUE +/—Knöpfen nach Wunsch einzustellen. ARRANGE VIEW: DRITTE SEITE Für jede Spur bzw. jeden Lower-Teil kann festgelegt werden, welcher Effekt, d.h. Chorus, Delay oder Distorsion den Klang verarbeitet und wie stark der Effekt sein soll.
Alle bisher beschriebenen Parameter von Arrange View sowie Retrigg Mode von Arrange Mode müssen in einem Custom Style gesichert werden, um auch später noch abgerufen werden zu können. Der Vorgang läuft wie bereits erläutert von Save/Enter ausgehend ab. SPEICHERN EINES CUSTOM STYLES ● ● ● ● Nach Änderung der Parameter ist der Druckknopf SAVE/ENTER zu betätigen, um den Speichervorgang anzusteuern. Auf der Seite, die angezeigt wird, F2 Styles wählen.
Style & Sound Die Styles mit neuen Mustern individuell zu gestalten, das ist eine der bisher ungekannten Möglichkeiten, die das DG100 bietet. Es können bis zu vier Audio-Samples (in .WAV, .INS und .MSP-Format) für ebenso viele Begleitspuren verwendet werden.
RAM Style und Flash RAM Dank der Geschwindigkeit der internen Festplatte ist es möglich, in den RAM-Speicher einen Style aus jedem Folder der Hard Disk zu laden. Der Ladevorgang erfolgt sowohl bei aktiviertem Arranger als auch bei Arranger im Stoppzustand und erfordert nicht mehr als zwei Sekunden. Im Gegensatz zu den Flash RAM-residenten Custom Styles verbleibt ein RAM Style bei abgeschaltetem Gerät nicht im Speicher.
Es ist möglich, den Inhalt des Folders mit F7 Pattern List über das gesamte Display anzuzeigen: in drei Spalten werden die Namen der Styles angezeigt und unten erscheint der aktuelle Tempowert sowie der Name des im Moment geladenen Styles. Von dieser Liste aus ist der zu ladende Style mit den CURSOR +/—Knöpfen auszuwählen und nach RAM mit F10 Load zu importieren. Wenn die Anzeige F10 Play erscheint, heißt das, dass der Style in den RAM-Speicher geladen wurde.
F2 Clear: löscht die Styles im RAM-Speicher F3 Clear & Load: lädt die angewählten Styles und löscht gleichzeitig die im RAM-Speicher vorhandenen Styles. F4 Memory Selection: gibt an, wieviel RAM-Speicherplatz von den angewählten Styles in Anspruch genommen wird. F5 Memory Free: gibt an, wieviel RAM-Speicherplatz noch für RAM-Styles frei ist. F6 Create Block: erstellt eine einzige Datei, die alle angewählten Styles enthält. Diese Funktion wird in der Folge noch eingehender beschrieben.
● ● ● wird das Symbol “>” angezeigt. Zum Laden eines Block Styles F1 Load drücken. Um den Inhalt des RAM-Speichers zu löschen, F2 Clear ansteuern. Um einen Block Style zu laden und den aktuellen Inhalt der Speicherstelle zu löschen, ist F3 Clear & Load zu betätigen. Die Styles sind nun im Speicher geladen. Zur Hauptmenüseite über EXIT zurückkehren. ● Den Abruf der Styles in RAM mit dem Druckknopf SINGLE RAM STYLE ansteuern, der bereits aktiviert ist, wenn keine anderen Vorgänge ausgeführt werden.
Pattern Edit Das DG100 gestattet, neue Styles sowohl in Echtzeit als auch durch Nutzung eines MIDI-Anschlusses aufzuzeichnen, um den Vorgang zu automatisieren bzw. zu beschleunigen. Zudem ist es möglich, verschiedene Style-Sections zu kopieren und Änderungen an den Klangfarben der Spuren vorzunehmen.
Eine weitere Voraussetzung, die erfüllt sein muss, ist, dass auf den Disk-Seiten Hard Disk angewählt wurde, da der Editor nur mit Dateien auf Festplatte arbeitet. Um auf Hard Disk zuzugreifen, ist: - DISK zu drücken und - mit den PAGE +/—Knöpfen “Hard” neben dem aktuell gewählten Folder anzuzeigen.
ZUWEISUNG DER KLANGFARBEN AN DIE SPUREN Für die Melodiespuren (Bass, Chord 1, 2, 3, 4, 5) können die Klangfarben aus der GM-Bank, der USER VOICE-Bank, in der die individuell kreierten gespeichert sind, und aus der RAM/FLASH-Bank aufgerufen werden, wo die eventuellen in RAM geladenen Samples für die Melodiespuren gesichert sind. Es sind nicht möglich, mit Drawbars geschaffene Klänge zu verwenden. Eine Melodiespur mit den CURSOR +/- -Knöpfen anwählen.
abzuhören, auch ohne sie zu ändern, ist diese mit F1 Section anzuwählen und dann mit F7 Play die Wiedergabe zu starten. Wird der Arranger über START aktiviert und ein Akkord gespielt, sofern der Splitpunkt es zulässt, so kann die betreffende Section auch mehrmals abgehört werden. F9 Velocity: gestattet die Änderung der Velocity-Werte einer oder aller Noten der im Moment angewählten Spur.
F8 Bas Octav: dient der Bestimmung der Oktave, in der der Grundton des Basses liegt. Der Wert kann durch wiederholtes Betätigen des Funktionsdruckknopfes F8 Bass Octave geändert werden. F9 Bass Type: während ein viersaitiger Bass nicht unter die Note E0 hinuntergehen kann, kann ein fünfsaitiger Bass bis zur Note C0 spielen. D.h. wenn ein 4 Strings-Bass gewählt wird, liegt die tiefste Bassnote bei E0, bei einem 5 Strings-Bass ist die tiefste Note C0.
Über die Startseite von Edit Pattern ist diese Seite zu öffnen, um den gesamten Inhalt einer einzelnen Section zu löschen. Es reicht hierfür, den der Section entsprechenden Funktionsdruckknopf zu aktivieren, nachdem eventuelle Variationen gewählt wurden, und F10 Execute zur Löschung zu drücken. F1 To End: F2 Intro: F3 Fill In: F4 Ending: F5 Escape: F6 Arrange A: F7 Arrange B: F8 Arrange C: F9 Arrange D: F10 Execute: Anwahl von To End.
Um den in Pattern Edit zu ladenden Style auszuwählen, ist die Liste mit den VALUE +/—Knöpfen zu durchlaufen und, nachdem der Style bestimmt wurde, ist F10 Select zu drücken. Automatisch kehren Sie nun zur Hauptmenüseite von Pattern Edit zurück. Um zur Startseite zurückzukehren, ohne einen Style zu wählen, ist F5 Escape zu betätigen. F6 MIDI RECORD Von der Edit Pattern - Ausgangsseite aus gewinnen Sie Zugang zu Midi Record F6.
zeichneten Loops, der mit dem Rhythmus synchronisiert bleibt, ohne dass sich die Klangfarbe ändert. Die Anwendungen dieses neuen hybriden Styles sind das Musikalischste, was ein Keyboard bieten kann: auf der einen Seite die Klangtreue des DG100, auf der anderen der Groove eines aufgenommenen Schlagzeugers. Im Anhang finden Sie praktische Beispiele für diese Innovation.
Power On Set Up Einige der programmierbaren, für die Verwendung des DG100 wichtigsten Einstellungen können gespeichert und automatisch beim Einschalten des Geräts abgerufen werden, so dass hiermit keine Zeit für die Wiederherstellung verloren geht. Diese Parameter sind nicht auf einer Seite zusammengefasst, sondern sie befinden sich in verschiedenen Menüs wie Arrange Mode, Arrange View, MIDI und sind mit den Druckknöpfen auf dem Schaltpult an- steuerbar.
Song Play, Midifile und Karaoke Nach Zugriff über den hierfür vorgesehenen Druckknopf am Schaltpult gestattet Song Play die Wiedergabe und Verwaltung von Midi-Dateien auf Festplatte und Diskette. Das DG100 ist mit den folgenden Formaten kompatibel: ● Standard MIDI-Datei in Format 0 und 1 ● Midi-Datei mit .MID-Zusatz ● Midi-Datei mit .KAR-Zusatz ● Midi-Datei mit Lyrics-Ereignissen und .KAR oder .
● mehr direkt über den Zifferntastenblock einzugeben. Wenn die vorhergehende Midi-Datei in Ausführung ist, erfolgt die Wiedergabe der neuen Datei, sobald der Ladevorgang beendet ist (nach fünf Sekunden etwa). Es ist auch möglich, das Verzeichnis über F5 Dir erneut abzurufen. Um die Wiedergabe zu stoppen, ist ebenso START zu drücken. EINE MIDI-DATEI VON HARD DISK LADEN Im Gegensatz zur Floppy Disk läuft das Laden von Hard Disk sehr schnell ab.
Um Midi-Dateiketten zu kreieren und diese auf Disk zu sichern, ist die Funktion Chain Edit im Menü Utility in Disk (siehe diesbezügliches Kapitel) zu aktivieren, da diese die Kreation einer Kette mit maximal 32 Midi-Dateien gestattet, welche als .CHN-Datei gesichert und mit F5 Dir in Song Play durch den Buchstaben “c” vor dem Namen gekennzeichnet wird.
● ● ● ● ● abzurufen. Werden dem Titel weitere Buchstaben hinzugefügt, wird die Suche genauer. Sollte beim Eingeben des Titels ein Fehler gemacht werden, ist erneut F5 zu betätigen und der Vorgang muss wiederholt werden. Wenn nur eine Midi-Datei mit diesem (teilweisen oder vollständigen) Titel vorhanden ist, wird diese durch Druck auf SAVE/ENTER sofort geladen.
F7 Video: gestattet die Steuerung der Video-Schnittstelle, die als Optional geliefert wird. Mehr Details hierzu finden Sie im Kapitel Video Out und Karaoke. F8 Lead: gestattet es, die Spur der Melodielinie, die mit Lead Channel auf der Seite 3 F3 Transposer festgelegt wird, schnell zu- bzw. auszuschalten. Den Druckknopf betätigen, um zwischen On und Off umzuschalten.
F4 Panpot: ändert die Klangregelung auf Stereoebene. Es ist möglich, den Wert mit den VALUE +/- -Knöpfen nach Belieben festzulegen, die, wenn sie gleichzeitig betätigt werden, den Klang in mittlere Stellung auf Stereoebene zurücksetzen. F5 Filter ruft die Seite auf, die dem Ausschluss einiger MIDI-Ereignisse bei Wiedergabe der Spur dediziert ist.
ÄNDERUNG EINES PARAMETERS FÜR ALLE SECHZEHN PARTS Wie oben erwähnt, ist es möglich, die Einstellung eines einzelnen Parameters für alle sechzehn Spuren dank der Funktion F10 16 Parts anzuzeigen. Um sich schnell auf einen Parameter Zugriff zu verschaffen, kann dieser in der Seite GM Part gewählt werden. Durch Druck auf F1016 Parts zeigt das Display den Status jenes Parameters für die sechzehn Spuren an – es wird eine auf die Parts bezogene Tabelle mit vier Zeilen und vier Spalten dargestellt.
EINE PERMANENTE MIDI-DATEIKETTE AUF DISK KREIEREN Es ist nicht möglich, eine mit Juke-Box kreierte Kette auf Disk zu sichern. Allerdings enthält das Disk-Menü eine Funktion, die zur Kreation und Sicherung von Ketten aus maximal 32 Midi-Dateien dient Von der Hauptmenüseite aus ist zunächst DISK und dann F9 Utiliy zu aktivieren.
● Die Kette mit F7 Save Chain sichern; auf der abgerufenen Seite kann der Name mit den Keyboardtasten und CURSOR-Knöpfen eingegeben werden. Mit F10 Exec bestätigen oder mit F5 Escape abbrechen. EINE MIDI-DATEIKETTE VERWENDEN Die auf diese Weise kreierte Kette wird in Song Play mit der Funktion Load aus dem Disk-Menü geladen oder direkt von der Song PlayStartseite abgerufen, indem über den Zifferntastenblock (STYLES-Knöpfe) die Nummer der Chain-Datei eingegeben wird.
Video Out und Karaoke Die als Optional zu liefernde Videokarte gestattet Ihnen, ein TV-Gerät oder einen Monitor anzuschließen, um Nachrichten bzw. in Silben gegliederte Texte anzuzeigen oder das Display des DG100 zu verdoppeln. Die Einstellmöglichkeiten für den Videoausgang sind vom Menü Song Play zu erreichen, das mit dem hierfür vorgesehenen Druckknopf aktiviert wird.
Off: auf dem Bildschirm wird ausschließlich der Text der Midi-Datei angezeigt, unabhängig vom Display des DG100. Die Einstellung Mirror Off kann nützlich sein, um den Text vom Bildschirm zu lesen, wenn die Anzeige des Textes am DG100 mit Lyric Off deaktiviert wurde. Song Play muss hierbei auf Stop sein. F7 Zoom gestattet die Vergrößerung der am Bildschirm angezeigten Zeichen. Zoom greift nicht, wenn F6 Mirror auf On gestellt ist.
Eine Midi-Datei aufzeichnen Alles, was am DG100 ausgeführt wird - automatische Begleitung und Bedienungen vom Schaltpult mit eingeschlossen – kann als Midi-Datei direkt auf Diskette oder Festplatte aufgezeichnet werden. Die Aufzeichnungen können in der Folge mit dem DG100-residenten Sequenzer oder mit Sequenzer-Software für PC/Mac bearbeitet werden. Da die Spuren der Begleitung General MIDI Standard-Klänge einsetzen, ist es auch möglich, schnell mit anderen GM-Modulen kompatible Arrangements zu kreieren.
.KAR-Midi-Datei und .TXT-Textdatei Die Funktion Karaoke gestattet die Anzeige auf Display des Textes (Lyrics) einer Midi-Datei in Wiedergabe. Hierbei ist auch die Silbengliederung durch graphische Mittel möglich. Der Text in einer Midi-Datei wird als Meta-Ereignis behandelt und deshalb gibt es Midi-Dateien + Lyrics mit .MID und .KAR-Zusatz. Im Allgemeinen ist eine .
Unabhängig vom Arrangerstatua (gestartet oder auf Stop) ist es möglich, jederzeit .TXT-Dateien in RAM zu laden: ● ● ● ● ● ● ● DISK drücken Floppy Disk oder Hard Disk mit den PAGE +/—Knöpfen wählen Bei Hard Disk ist der Folder zu suchen, der die .TXT-Dateien enthält. Bei aktiviertem Master Folder entspricht der gesuchte Folder dem Folder 97 Textfile. Es ist möglich, auch neue Folder bei deaktiviertem Master Folder zu erstellen, um die eigenen .TXT-Dateien zu organisieren.
Ein Mikrophon verwenden Das DG100 gestattet den Einsatz von verschiedenen Mikrophonen. Dies aufgrund von zwei getrennten Eingängen, von denen einer (Eingang Mic 1) mit einem professionellen Vorverstärker und XLR-Symmetrieanschluss zur Minimierung von Interferenzen ausgerüstet ist. Nur der Eingang Mic 1 kann den internen Vocalizer nutzen und verfügt darüber hinaus über einen separaten Audioausgang, um die Stimme und das verarbeitete Signal einem externen Mixer zusenden zu können.
Eingang Mic 1 auf Mic 2 umzuschalten , ist F6 zu drücken. Die Einstellung erfolgt über die VALUE +/- -Knöpfe, die, wenn sie gleichzeitig betätigt werden, den Wert auf Null setzen. F7 Reverb 1-2: wie F6 Echo 1-2 aber auf den Hall bezogen. F8 Pitch Shift: wirkt nur auf das Signal des Mikrophons am Eingang Mic 1 und gestattet die Transposition der gesungenen Noten in Halbtonschritten. Wenn die Werte überhöht sind, ist der Klang der Stimme verzerrt.
Vocalizer Der Vocalizer bietet eine besondere Art von Effekten, deren Zweck darin besteht, das Tonsignal am Mikrophoneingang nach ganz bestimmten Regeln zu harmonisieren. Diese Funktion wurde spezifisch für die menschliche Stimme entwickelt und fügt der gesungenen Note zwei oder drei weitere Noten hinzu, wodurch ein Stimmenduett oder -trio entsteht, das die Klangfarbe der am Mikrophoneingang vorhandenen Stimme verwendet.
F1 Direct: hiermit wird die Stärke des Tonsignals vom Micro 1 - Eingang festgelegt, das zusammen mit dem Vocalizer Effekt wiedergegeben wird. Kann mit den VALUE +/- -Knöpfen abgeändert werden. F2 Vocalize: steuert die Stärke des vom Vocalizer verarbeiteten Signals, das an den Audio-Ausgang geschickt wird. Wird mit den VALUE +/- -Knöpfen eingestellt.
Frequenzbändern der Formanten, damit sich die Klangfarbe bei Änderung der Tonhöhe nicht allzu sehr verändert. Die komplexe Theorie der Formanten basiert im wesentlichen auf der Annahme, dass die menschliche Stimme sich dadurch auszeichnet, dass sie feste Frequenzbereiche für bestimmte Tonhöhen hat, mit deren Änderung unterschiedliche Klangfarben zu erzielen sind. Die Parameter werden mit den CURSOR +/- -Knöpfen gewählt und die Werte mit den VALUE +/- - Knöpfen eingegeben.
Wenn die gesungene Note nicht Bestandteil des Akkords ist, wird diese vom Vocalizer nicht wiedergegeben, ist aber als direktes Audiosignal vorhanden. Der Vocalizer gibt in diesem Fall eine Stimme wieder, deren Ton jenem gesungenen am nächsten kommt und mit dem Akkord kompatibel ist. Wenn die gesungene Note zum Akkord gehört, erzeugt der Vocalizer die Harmonisierung in Abhängigkeit dieser Note, indem er verschiedene Umkehrungen vornimmt.
Full 2: Full 3: Jazz 1: Jazz 2: Jazz 3: MIDI Mode: Full 1 ähnlich, die erzeugte Stimme allerdings liegt oberhalb der rechts vom Splitpunkt der Tastatur gespielten Note. Full 2 ähnlich, alle erzeugten Stimmen liegen oberhalb der rechts vom Splitpunkt der Tastatur gespielten Note. verwendet die bei Jazz Trio 1 angewandte Harmonisierungstabelle in Automatic Chord 2 mit dem Unterschied, dass die Umkehrungen des links vom Splitpunkt gespielten Akkords von der rechts gespielten Note abhängig gemacht werden.
EIN VOCAL SET AUF FESTPLATTE ODER DISKETTE SPEICHERN Die gesamte Gruppe der zwölf Vocal Sets kann auf Diskette oder Festplatte gespeichert werden. Das Speichern eines einzelnen Vocal Sets hingegen ist nicht möglich. Der Vorgang wird folgendermaßen durchgeführt: ● ● ● ● ● ● ● ● ● Das DISK-Menü mit dem entsprechenden Druckknopf öffnen, die LED leuchtet auf. Mit den PAGE +/—Knöpfen entweder Hard oder Floppy als Zieldatenträger wählen.
Effekte Die DSP des DG100 sind in der Lage Hall-, Chorus-, Delay- und Modulationseffekte zu erzeugen, die auf den Upper- und Lower-Teilen, den Begleitspuren und den von außen kommenden Audiosignalen greifen. Das DG100 ist auch mit einem Equalizer ausgerüstet, der den Endklang formt. Von diesem Menü aus ist es auch möglich, die Lautstärke der einzelnen Audioausgänge zu ändern.
F4 Bass Boost: gestattet es, die Empfindlichkeit der Bässe zu erhöhen bzw. herabzusetzen, um in der Verstärkung mit mehr ,oder weniger markierten Basslinien zu arbeiten. Der Parameter wird durch wiederholte Betätigung des Druckknopfs F4 eingestellt. F5 Escape: Rückkehr zum Effect-Menü. F6 Out 1 Level: legt die Lautstärke des Audioausgangs 1 oder Left/Mono fest. F7 Out 2 Level: legt die Lautstärke des Audioausgangs 2 oder Right fest. F8 Out 3 Level: legt die Lautstärke des Audioausgangs 3 fest.
PARAMETER FÜR DIE CHORUS-ALGORITHMEN Level: Delay: Feedback: Rate: Depth: Signallautstärke Länge der Verzögerung Repetitionsgrad des Delay Modulationsgeschwindigkeit Modulationsstärke PARAMETER FÜR DIE DELAY-ALGORITHMEN Volume Center: Lautstärke des mittleren Signals Volume Left: Lautstärke des linken Signals Volume Right: Lautstärke des rechten Signals Delay Center: Verzögerungsdauer für die Repetition des mittleren Signals Delay Left: wie oben, nur für das linke Signal Delay Right: wie oben, nur für das
On Line Effect und Rotor Der ON LINE EFFECT-Knopf ruft ein Menü auf, das der Verwaltung der Effekte für die Voices der rechten Hand, d.h. der Melodielinie dient. Diese Parameter werden separat behandelt, um eine schnelle Steuerung der Zuschaltung der Effekte zu ermöglichen. Eine bessere Definition ist allerdings über die Programs zu erzielen, die im gleichnamigen Kapitel eingehend erläutert sind.
Registration Dank dieser speziellen Datensätze ist es möglich, alle Einstellungen und Hauptparameter, die das DG100 steuern, unmittelbar abzurufen. Nach ihrer Programmierung gestatten die Registrations es, den Stylewechsel, die Voice-Änderungen, die Einstellung der Effekte und vor allem den automatischen Abruf der mit einem Style verknüpften Audiomuster bzw. eventuellen .TXT-Datei schnell abzuwickeln.
EINE SINGLE REGISTRATION ABRUFEN UND SICHERN Der Abruf einer Single Registration erfolgt durch Druck auf den SINGLE REGISTR.-Knopf (die LED leuchtet auf). Der Quell-Folder der Single Registration kann der Folder 93 sein, wenn der Master Folder aktiviert wurde, oder jeder andere vom Benutzer bei deaktiviertem Master Folder erstellte Folder.
ihr Aktivierungszustand wird mit F10 Select geändert wird. Beim ersten Zugriff auf das Menü F3 Registr. Mode werden die Global-Parameter gezeigt, die nur in diesem Moment geändert werden können. Um die nachfolgenden Seiten abzurufen, ist F1 zu drücken. Nachstehend folgt die Beschreibung. Global: gestattet die Deaktivierung der Steuerung aller mit MIDI verbundenen Parameter, d.h. Arrange Mode, Drum Mixer, Utility, Effect, 2nd Voice, Global Transpose, Split Point, Left Level und Tempo.
Utility Die Utility-Menüs gestatten die Verwaltung der Steuergeräte, der MIDI-Akkordeons, der Pedalschaltung, der Reaktionskurve auf die Tastendynamik, der Audioausgänge und einiger Parameter, die den allgemeinen Status des DG100 beeinflussen. Durch Druck auf F3 Utility von der Hauptmenüseite aus erreichen Sie die erste Seite, die als 1/3 oben rechts am Display ausgewiesen ist. Um die anderen beiden Seiten des Menüs zu öffnen, sind die PAGE +/—Knöpfe zu verwenden.
F4 Pitch: ruft ein neues Menü ab, das der Regelung der Tonhöhe dediziert ist. Die hier verfügbaren Parameter sind die folgenden: F1 Tune: der in Hertz ausgedrückte Werte, der in +/- 100 Cent-Schritten mit den VALUE +/—Knöpfen abzuändern ist, legt die Feinstimmung des gesamten Klanggenerators des DG100 fest. Durch gleichzeitige Betätigung der beiden VALUE +/—Knöpfe kehren Sie zur Standardtonhöhe von 440 Hz zurück. F2 Vibrato: deaktiviert bei Off-Stellung das Vibrato auf den Klängen, die es verwenden.
F5 Footswitch: das DG100 kann zwei als Optional gelieferte Pedalsteuerungen zum Einsatz bringen (FS13 mit 13 Schaltungen und FS6 mit sechs Schaltungen), mit denen verschiedenste Funktionen wie bereits bei der Baureihe X bedient werden können. F5 Footswitch ruft eine Seite auf, in der die den Schaltern zugewiesenen Funktionen angezeigt werden.
Reaktionskurve in Form eines kartesischen Koordinatensystems, bei dem auf der x-Achse der von der Tastatur erkannte Geschwindigkeitswert (Key In) eingetragen ist und auf der y-Achse der Ausgangswert (Key Out) nach Maßgabe der errechneten Kurve. Alle Änderungen an der Kurve werden in Echtzeit angezeigt. Die verfügbaren Parameter sind: F1 Key In: gibt den von den Keyboardtasten erkannten Geschwindigkeitswert an, der auch mit den VALUE +/—Knöpfen eingestellt werden kann.
angezeigt, deren Noten mit den Keyboardtasten zwischen C5 und B5 gewählt werden. Nach Anwahl einer Note erscheint in einem Feld der Wert –50 Cent (ein Viertelton), der mit den VALUE +/—Knöpfen geändert werden kann. Durch erneutes Betätigen derselben Taste wird die Änderung rückgängig gemacht und die Stimmung kehrt in die ursprüngliche Lage zurück. Die verfügbaren Parameter sind die folgenden: F1 Left: legt fest, ob die Intervalle der arabischen Tonleiter auch auf den Arranger- oder Lower-Bereichen greifen.
F7 GM Out Ass.: ruft die Seite auf, mit der die separaten Ausgänge den sechzehn MIDI-Parts in General MIDI und den Schlagzeugbereichen zugewiesen werden. Die Einstellung der Parameter erfolgt wie bei F6 Keyboard Out Assign, worauf verwiesen wird. F8 Voi. Select: gestattet die Wahl der Abrufmodalitäten der Voices. Bei Mode 1 wird automatisch immer die zuletzt innerhalb einer Gruppe angewählte Voice aufgerufen. Um diese zu ändern, ist eine andere innerhalb derselben Gruppe zu bestimmen.
F7 Chorus Lck: bei On-Stellung bleibt der Chorus der gewählten Voice blockiert, auch wenn die Voice geändert und Midi-Dateien ausgeführt werden. F8 Vocal Ch: gestattet es, unabhängig von der Quell-Midi-Datei den zur Steuerung der Vocalizers gewählten MIDI-Kanal zu sperren (Locked). Auf diese Weise wird vermieden, immer denselben MIDI-Kanal für unterschiedliche Midi-Dateien einstellen zu müssen. F9 Song Play: wählt die Zugriffsdauer auf eine Midi-Datei auf Hard Disk zwischen Normal, d.h.
MIDI-Akkordeon Das DG100 kann von einem über MIDI angeschlossenen Akkordeon gesteuert werden, da die Zuweisung der MIDI-Kanäle an die einzelnen Tastaturabschnitte, die Transposition des Basses, die Velocity und auch der Einsatz der Schlagzeugklänge hiermit kontrollierbar sind. Diese Steuerungsmöglichkeiten hängen direkt von der MIDI-Implementierung des Akkordeons ab, so dass manche der nachtsehend beschriebenen Funktionen bei sehr einfachen MIDI-Akkordeons nicht verfügbar sind.
F9 Lower Oct: für jeden Lower 1 und Lower 2 zugewiesenen Klang ist es möglich, die Oktave mit den VALUE +/- -Knöpfen zu ändern, wobei F9 dazu dient, von einem auf den anderen Parameter umzuschalten. F10 Accordion Mode: aktiviert bzw. deaktiviert die Verwendung der Parameter für das MIDI-Akkordeon.
MIDI MIDI ist ein Kommunikationsprotokoll, mit dem Befehle, Nachrichten und Ereignisse übertragen und empfangen werden können, die dann von einem kompatiblen Musikinstrument in Noten, Ereignisse und Befehle übersetzt werden. Dieses Protokoll gestattet es also, einen Computer mit geeigneten Programmen an das DG100 anzuschließen, andere Klangmodule oder Keyboards direkt vom DG100 aus zu steuern sowie MIDIAkkordeons, -Saxophone oder -Gitarren anzukoppeln.
wenn sie gleichzeitig betätigt werden, den Wert auf Null setzen. Das Display zeigt in Höhe von F3 ebenso wie unter der Klangfarbe den gewählten Effekt an. F4 Panpot: ändert die Klangregelung auf Stereoebene. Es ist möglich, den Wert mit den VALUE +/- -Knöpfen nach Belieben festzulegen, die, wenn sie gleichzeitig betätigt werden, den Klang in mittlere Stellung auf Stereoebene zurücksetzen. F5 Filter: ruft die Seite auf, die dem Ausschluss einiger MIDI-Ereignisse bei Wiedergabe der Spur dediziert ist.
F10 16 Parts: aktiviert die Anzeige eines einzelnen Parameters, dessen Wert für alle sechzehn Parts dargestellt wird. ÄNDERUNG EINES PARAMETERS FÜR ALLE SECHZEHN GM PARTS Wie oben erwähnt, ist es möglich die Einstellung eines einzelnen Parameters für alle sechzehn Spuren dank der eben beschriebenen Funktion F10 16 Parts anzuzeigen. Um sich schnell auf einen Parameter Zugriff zu verschaffen, kann dieser in der Seite GM Part gewählt werden.
F1 Channel Transmit: gestattet es, jedem Bereich einen an MIDI Out übertragenden MIDI-Kanal zuzuordnen. Darüber hinaus sind folgende Funktionen verfügbar: F4: schaltet von Channel Transmit auf Channel Receive und umgekehrt um. F5 Escape: führt zur Startseite des MIDI-Menüs zurück. F10 MIDI Setup: ruft die bereits für den Einsatz des DG100 über MIDI vorgegebenen oder gespeicherten Einstellungen ab.
ist das einzige Menü, das von der Startseite des MIDI-Menüs aufgerufen werden muss; es gestattet den Zugriff auf einige Einstellungen, die den MIDI-Ports zugedacht sind. Die Parameter, deren Werte durch wiederholtes Betätigen des entsprechenden Funktionsdruckknopfs abgerufen werden, sind: F1 MIDI In 1: gestattet die Änderung der ursprünglichen Einstellung des MIDI-Ports von GM auf Keyboard. F2 MIDI In2/Computer: wie bei F1 MIDI In 1.
Ein MIDI-Pedal verwenden Das DG100 gestattet den Anschluss eines MIDI-Pedals zur Steuerung der manuellen Basslinie und der Einstellung der Akkorde. Es ist hierfür erforderlich, den MIDI-Empfangskanal des Bassteils mit dem Übertragungskanal des Pedals wie folgt abzustimmen: ● ● ● ● ● Das MIDI-Pedal an MIDI In 2 (Keyboard) anschließen. Von der Hauptmenüseite aus F6 MIDI drücken. F2 Channel Receive anwählen.
Demo & Hit Während der Live-Darbietungen kann es von Vorteil sein, ein Stückverzeichnis zur Verfügung zu haben, das auf einfachen Knopfdruck abrufbar ist. Demo & Hit ist eine Funktion, die mit der Master Folder-Funktion in Verbindung steht und direkt auf einen speziellen Hard Disk-Folder bezogen ist, in dem jede von Diskette oder Festplatte stammende Midi-Datei gespeichert wird, wobei auf den 99 Seiten jeweils 10 Midi-Dateien zusammengefasst sind.
Die eventuell in Ausführung befindliche Midi-Datei anhalten, indem START gedrückt wird. Den Druckknopf * (FOLK) betätigen; am Display erscheint das komplette Verzeichnis der Midi-Dateien, die mit VALUE +/- und CURSOR +/- zu durchlaufen sind. Die zu ändernde Demo & Hit-Seite mit den PAGE +/- -Druckknöpfen oder durch Eingabe der Seitenzahl über den Zifferntastenblock (STYLESDruckknöpfe) anwählen. Die Seitenzahl erscheint oben rechts am Display.
DISK Das DG100 integriert eine serienmäßige 6-GB-Festplatte mit einem Laufwerk für 720 Kb (DD)- oder 1,4 MB (HD)-Disketten. Für die Disketten verwendet das DG100 eine DOSFormatierung, so dass es möglich ist, dieselben Disketten zu verwenden, um Dateien von PC oder Mac zu importieren bzw. hierhin zu exportieren. Der Direktanschluss an einen PC auf der Rückseite der Schaltpults gestattet die Verwaltung des Hard Disk-Inhalts von einem PC aus und dies dank einer hochentwickelten Anwendung von Ketron.
Beim Kauf des DG100 enthält die Festplatte Folder, die leer sein können und eben als Bezug für die Master Folder-Funktion dienen: diese Mappen sind schreibgeschützt und können nicht gelöscht werden. DIE VERWENDUNG DER MASTER FOLDER-FUNKTION Sie werden sich fragen, wann es sich empfiehlt, den Master Folder zu aktivieren und wann nicht.
DIE DISK-FUNKTIONEN FÜR DIE HARD DISK Das DG100 verfügt über einige Funktionen, um die Ladevorgänge zu vereinfachen: es kann den gesamten Inhalt eines einzelnen Folders anzeigen; nur einen Dateityp am Display anzeigen, wenn verschiedene Dateitypen in demselben Folder enthalten sind; eine oder mehrere zu ladende Dateien wählen. Und dies neben den üblichen Funktionen wie Load, Copy und Rename.
angewählt wurde. Wenn hingegen bereits eine oder mehrere Dateien mit F10 Select angewählt wurden, werden nur die durch das Symbol > gekennzeichneten geladen. Eine weitere Möglichkeit für Folder mit wenigen Dateien besteht in der Anwahl des gesamten Inhalts durch gleichzeitigen Druck auf VALUE +/-. F3 Save: ruft eine Seite ab, in der der Dateityp gewählt werden kann, welcher auf Disk gespeichert werden soll. Einige dieser Optionen sind allerdings nicht immer aktiv.
● ● ● Mit VALUE +/- bewegen Sie sich unter den visualisierten Dateien von einer zur anderen. Mit CURSOR +/- gehen Sie auf die nächste Dateiengruppe über, falls vorhanden. Mit F10 Select bestätigen Sie die zu kopierende Datei, neben der ein Pfeil erscheint, um die Auswahl zu bestätigen. Durch gleichzeitigen Druck auf die VALUE +/- Knöpfe werden alle auf der Diskette oder im aktiven Folder vorhandenen Dateien gewählt.
Verwendung stehenden Folders. Die Optionen sind dieselben wie die in F3 Save erläuterten. F6 Delete: löscht eine oder mehrere Dateien, die mit F10 Select gewählt wurden. Bevor der Vorgang zu Ende geführt wird, zeigt das DG100 eine Warnmeldung an, auf die folgt zu reagieren ist: F5 Escape: Abbruch des Vorgangs oder F10 Exec: Quittierung des Löschvorgang. F7 Rename: gestattet die Umbenennung der angewählten oder einfach markierten Datei durch Zuhilfenahme der Keyboardtasten und CURSOR +/—Knöpfe.
● ● ● Der Vorgang mit F10 Exec bestätigen oder mit F5 Escape abbrechen. Durch Betätigung von F10 Exec wird eine neue Seite geöffnet, in der es möglich, die Datei, die kopiert wird, mit den Keyboardtasten und den CURSOR +/—Knöpfen umzubenennen. Die möglichen Optionen sind: F5 Escape: bricht den Vorgang ab und führt zum Disk-Menü zurück. F8 Skip: überspringt die Kopie der laufenden Datei. F9 Copy All: kopiert alle Dateien, ohne sie umzubenennen. F10 Execute: quittiert die Kopie der einzelnen Datei.
● ● ● ● Die Midi-Datei mit F10 Select anwählen, so dass neben dem Namen eine Nummer erscheint, welche die Position innerhalb der Kette angibt. Ebenso für die anderen Midi-Dateien vorgehen. Sollte eine Datei aufgrund eines Fehlers mit die Kette aufgenommen werden, so ist die betreffende Datei mit F10 Select erneut anzuwählen. Die Datei wird hiermit aus der Kette entfernt, und die Nummerierung der anderen Dateien angepasst.
F7 Rename: F9 Utility: gestattet es, eine mit den VALUE +/—Knöpfen angewählte Datei umzubenennen. ruft eine Seite mit den folgenden Optionen ab: F1 Info: zeigt den freien Speicherplatz auf der Diskette und die Anzahl der vorhandenen Dateien an. F4 Format: aktiviert die Formatierung in MS DOS der eingeschobenen Diskette. Hierzu ist es erforderlich, die Sperre aufzuheben, indem F6 Lock Format betätigt wird und auf Aufforderung mit F10 Exec quittiert wird oder der Vorgang über F5 Escape abgebrochen wird.
Aktualisierung und Rücksetzung des DG100 AKTUALISIERUNG DES BETRIEBSSYSTEMS Dank des Einsatzes eines Flash RAM-Speichers für das Betriebssystem kann das DG100 laufend aktualisiert werden, ohne dass es erforderlich ist, den Kundendienst beizuziehen. Die von Ketron gelieferten Originaldateien des Betriebssystems (www.ketron.it) sind auf eine 1,4 MB-Diskette zu kopieren, die aus Kompatibilitätsgründen am besten mit dem DG100 formatiert wird.
Sequencer Der im Gerät eingebaute Sequenzer gestattet es Ihnen, schnell und problemlos Midi-Sequenzen zu erstellen oder zu bearbeiten, denn er verfügt über leistungsstarke Funktionen, die nur in hochwertigen Computerprogrammen zu finden sind. Wenn Sie die Taste SEQUENCER drücken, erhalten Sie Zugang zur Hauptseite. Hinweis: Alle Vorgänge, die Sie mit dem Sequenzer durchführen, müssen stets auf der Festplatte gesichert werden (siehe LOAD/SAVE), bevor Sie das Menü verlassen oder das Keyboard ausschalten.
CHAN: Auf der rechten Seite eines jeden Spurnamens steht der Midi-Kanal zum AbhörenMit dem Cursor<> erhalten Sie Zugang zum Feld der Kanäle, während Sie mit den Werttasten -/+ den Abhörkanal ändern können. Die Standardeinstellung sieht [All] vor, was bedeutet, dass die Midi-Events beim Abhören auf den Kanälen gespielt werden, auf denen sie ursprünglich aufgenommen wurden.
ist es möglich, 16 verschiedene Instrumente unabhängig voneinander zu spielen. Beispiel: Sie möchten dem Gerät folgendes mitteilen: "Das Klavier spielt auf dem Kanal 1".Dies bedeutet, dass der Programmwechsler (Program Change) mit der Klangfarbe eines Klaviers an den Kanal 1 gesandt werden soll. Alle Noten, die an den Kanal 1 gesandt werden, nehmen daher die Klangfarbe des Klaviers und die Steuerbefehle (Lautstärke, Nachhall usw.) an, die auf diesem Kanal eingestellt worden sind.
Nun können Sie die Aufnahme ausführen; jedes Midi-Event wird aufgenommen werden. Wenn Sie erneut F2 drücken, bleibt die Aufnahme stehen. Wie wird die aufgenommene Spur abgehört: Während der Aufnahme können Sie jederzeit abhören, was Sie vorher aufgenommen haben. Wenn Sie hingegen nur hören wollen, dann müssen Sie die Taste Seq.play (Save/Enter) drücken. Sie hören die Aufnahme ab der eingestellten POSITION.
● ● Mittels der Tasten F7(LAST RECORD), F8(PART) und F9(ALL TRACK) wird der Teil der Spur ausgewählt, an dem Sie die Quantisierung vornehmen wollen. Last Record: Es wird die letzte Aufnahme quantisiert; als Ausgangspunkt wird automatisch der Beginn der letzten Aufnahme angesehen. Part: Jeder beliebige Teil der Spur. Diese Funktion wird automatisch markiert, sobald ein Ausgangspunkt verändert wird. All Track: Die gesamte Spur.
Gemeinsam mit der Funktion PROGRAM stellt das Symbol 1st die Klangfarbe dar (siehe Liste der Stimmen in den Bedienungsanleitungen).
Bearbeitungsfenster; anhand der Tasten Cursor<> können Sie sich zwischen den verschiedenen Event-Feldern hin- und herbewegen, um die gewünschten Änderungen vorzunehmen; mit den Werttasten -/+ können Sie den Wert im markierten Feld ändern. Um den Vorgang zu bestätigen, drücken Sie F10 (Execute), um ihn zu beenden, F5 (Escape).
Nachfolgenden wollen wir die verschiedenen Felder beschreiben, aus denen diese Seite besteht (alle anhand der Taste Cursor<> zugänglich). COND: Dies ist der Zustand (Condition) des Bearbeitungs-Intervalles (im Display links oben). Hierbei wird ausgewählt, auf welchen Takte-Abschnitt sich die Bearbeitung auswirken soll. Wenn sie anhand der Werttasten -/+ All auswählen, dann gelten die Änderungen für die gesamte Spur.
10 einsetzen. Wenn hingegen None markiert ist, dann wird im zweiten Byte des Events keine Änderung vorgenommen. CH (Channel): Der Midi-Kanal kann z.B. durch Eingabe des Wertes 16 geändert werden. Alle Events, die den eingestellten Voraussetzungen entsprechen, werden über den Midi-Kanal 16 laufen. Wenn None markiert ist, dann wird keine Kanal-Änderung beim Event durchgeführt. Im Gegensatz zu den anderen Funktionen können Sie bei dieser nicht zwischen den drei Möglichkeiten -/+/= wählen.
Die Funktion COPY/MOVE ermöglicht es Ihnen, Teile einer Spur oder auch die ganze Spur zu kopieren (COPY) oder in eine andere Position zu bewegen (MOVE), und zwar sowohl innerhalb der selben Spur als auch auf einer anderen Spur. Drücken Sie die Taste F8, um Zugang zu dieser Funktion zu erhalten. In der Mitte der Seite COPY/MOVE erscheinen zwei Fenster. Das obere Fenster betrifft die Ausgangsspur, das untere die Zielspur.
tet und die Steuerbefehle bei Takt 1 stehen, so schickt der Sequenzer unmittelbar alle Steuerbefehle, die vom Anfang der Sequenz an vorhanden sind, bis zur Nummer 20 vor. Durch diese Funktion werden die Noten immer so gespielt wie sie eingestellt worden sind, unabhängig vom Start der Sequenz. RESET STOP: Wenn diese Funktion auf On steht (Taste F6), dann werden bei jedem Stop die noch nicht gesicherten Noten gelöscht und das Pitch Bend wird wieder eingestellt.
drücken Sie F4(FUNCTION) und daraufhin F7(DEMIX). Beispiel: Nehmen wir an, Sie haben einen internen Style auf der Spur 01 aufgenommen und Sie wollen nun die Richtung der Bässe ändern. Mit der Funktion Demix werden die Events auf dem entsprechenden Kanal vom Bass-Teil in eine separate Spur gebracht (z.B. Spur 5, denn die Standardspur für die Bässe ist die Nr. 5). Nun wird die Spur 05 ausgewählt, welche nur Informationen zum Bass enthält. In der Spalte Chan.
Form einer Solton-Exklusivnachricht, die dazu dient, die Parameter des Gerätes zu ändern, lautet wie folgt: F0h, 26h, 7Bh, Parameter_Kode Wert_1, Wert_2, .. ,Wert_n, F7 Die Werte F0h und F7h werden automatisch vom Sequenzer angezeigt. Schauen wir uns einige konkrete Beispiele an: Wenn Sie ins erste Feld 26h eingeben und ins zweite 7bh, dann steht im dritten Feld der Schlüssel des Parameters, auf den sich die Nachricht bezieht.
Mastertrack INS/MOD SIGNATURE: Mit dieser Funktion können Sie Signature-Events eingeben/ändern. Mit der Taste F3 öffnen Sie das Bearbeitungsfenster. Anhand der Taste Cursor<> nehmen Sie Zugang zu den Feldern Position und Value, mit der Werttaste -/+ können Sie die Änderungen durchführen. Drücken Sie F10, um den Vorgang durchzuführen, F5, um ihn zu beenden. Mastertrack LYRIC: Wenn Sie die Taste F8 drücken, erscheint die Seite LYRIC, wo Sie Text-Events in die Sequenz einfügen können.
METRONOME: Mit der Funktionstaste F1 wird der Taktmesser ein- und ausgeschaltet. MODE RECORD: Mit F1 können Sie einen der zwei Aufnahmemodes auswählen: Overdub oder Replace (siehe RECORD). RECORD PRECOUNT: Durch wiederholtes Drücken der Taste F3 bestimmen Sie, wieviele Takte zwischen dem Moment, in dem Sie den Befehl zur Aufnahme geben und dem, in dem die Aufnahme effektiv startet, vergehen sollen. Es stehen Ihnen von 0 bis 5 PrecountTakte (Bar) zur Verfügung.
Ausführung des Ladevorgangs kehrt der Sequenzer automatisch zum Hauptmenü zurück. Die Spuren, die die MidiDatei gefüllt hat, tragen den Status "i" und wenn die Midi-Datei im Format Multispur ist, so wird automatisch für jede Spur der Ausführkanal ausgewählt (Spalte Chan). Im MASTER TRACK hingegen werden das Tempo und die Signature der gegenwärtigen Midi-Datei aufgenommen, und falls solche vorhanden sind, auch etwaige Text-Events oder Exclusivnachrichten.
Tutorial Nachfolgend finden Sie eine Anleitung, die Sie schrittweise bei der Konversion von Styles der Reihe MS führt, sowie bei der Verwendung von Tonmustern in den Midi-Dateien und bei der Synchronisation zwischen Loop und Style. DIE STYLES DER REIHE MS UND X KONVERTIEREN Um einen Style der Reihe MS zu verwenden, ist dieser zunächst von Diskette auf Festplatte zu kopieren und dann mit Edit Pattern zu konvertieren.
AUFBEREITUNG DES AUDIO-LOOPS Damit der Audio-Loop verwendet werden kann, muss er vorab mit dem im DG100 residenten Sampler aufbereitet werden. Um die Audiodatei in den Sampler zu laden, ist auf der Hauptmenüseite SAMPLER MSP anzuwählen (die LED des Druckknopfs leuchtet auf). ● Bei aktivierter MASTER FOLDER–Funktion F1 Load betätigen, um sich auf das Audiodateiverzeichnis im 94 Sound Folder Zugriff zu verschaffen.
dies durch Betätigung der Druckknöpfe INTRO 1, INTRO 2, INTRO3, FILL 1, FILL 2, FILL 3, BREAK und TO END während die Midi-Datei gespielt wird. Es können maximal acht Audiodateien abgerufen werden, um damit Remix in Echtzeit wie im Dance-Modus zu realisieren. Die Ansteuerung des Loops kann mit MIDI-Befehlen des Typs Note On/Off auf demselben MIDI-Kanal erfolgen, über den die Audiodatei läuft.
DEN AUDIO-LOOP IN DEN RAM-SPEICHER LADEN Wenn die Audiodatei mit dem Sampler aufbereitet worden ist, ist diese bereits in den RAM-Speicher geladen; der Druckknopf RAM/FLASH ruft nämlich die Selektion der Muster bei leuchtender LED ab. Im gegenteiligen Fall ist es erforderlich, bei aktivierter MASTER FOLDER-Funktion im DISK-Menü F5 Folder Choice und dann F4 Sound zu betätigen.
148 DG100 Benutzerhandbuch
Technical tables
INDEX Specifications Preset program changes Presets GM Voices Drum Sets Live Drums (DRUM2) Midi Banks & Prog.
Specifications KEYBOARD POLIPHONY SOUND GENERATION 88 hammer action weighted keys. Dynamic: 6 Velocity Curves. 3 Pedals: Soft, Sostenuto, Sustain RAM SOUND ARRANGER 16 Mbyte RAM Sounds. Single & Block Sound loading. Files.Wav,Msp and Ins supported. Sounds Autoloading. DRUM SETS 24 internal Drum Sets. 24 User Drum Sets. 24 Live Drum Sets. Controls: Volume,Reverb,Panpot. Drum on/off switches. Manual Drums.Drum Mixer. 10 Drum Sections. Ram sounds assignable to User Drum Set. PROGRAMS 128 Programs.
Preset program changes P. CH.
62 63 64 65 66 67 68 69 70 71 72 73 74 75 76 77 78 79 80 81 82 83 84 85 86 87 88 89 90 91 92 93 94 95 96 97 98 99 100 101 102 103 104 105 106 107 108 109 110 111 112 113 114 115 116 117 118 119 120 121 122 123 124 125 126 127 128 Brass Synbrass1 Synbrass2 Altosoft Contralto Rocksax Tenor Oboe Englishorn Bassoon Clarinet Piccolo Flute Recorder Andes Bottle Shakuashi Whistle Ocarina Polysynt Synclead Square Oldmatrix Sweeplead Syntax Saw5th Plate Fantasy Breaths Dancehit Airpad Glockpad Metal Halo Sweep Ice
Presets PIANO EL PIANO CHROM ORGAN ACCORD.
GM Voices Kalimba Bag Pipe Fiddle Mandolin Zither Hackbrett Fado Charango Bouzouki Steel Drum Santur Zurma Bluegrass Ukulele Lute Tres EFFECT Vocal 1 Vocal 2 Vocal 3 Vocal 4 Vocal 5 Jodlers Science –Fx Scratches Sea Shore Applause Elicopter Telephone Bird Gun Shot Freetslide Wind Chimes Beel Tree Ends Syntom Woodblock BANK A (CONTROL CHANGE 00, VALUE=0) PROGRAM CHANGE 1 2 3 4 5 6 7 8 9 10 11 12 13 14 15 16 17 18 19 20 21 22 23 24 25 26 27 28 29 30 31 32 33 34 35 36 37 38 39 40 41 42 43 44 45 46 47 48 49 5
BANK B (CONTROL CHANGE 00, VALUE=1) PROGRAM CHANGE 01 02 03 04 05 06 07 08 09 10 11 12 13 14 15 16 17 18 19 20 21 22 23 24 25 26 27 28 29 30 31 32 33 34 35 36 37 38 39 40 41 42 43 44 45 46 47 48 49 50 51 52 53 54 55 56 57 58 59 60 61 62 63 64 PROGRAM CHANGE NAME Jingle Electric House Elopiano Rodes Funky Pno Fm Piano 1 Fm Piano2 Toybox Chimes Mallets Long Vibes Malimba Carillon Tinkles Windchimes Rotary Pop organ Drawbars Positive Master Diatonic Cassotto Bandoneon Spanish Country Funk 60’ Stopped Plucked
Drum Sets PROGRAM CHANGE 1 9 10 11 12 17 25 26 28 29 30 33 41 49 57 58 59 65 66 73 121 122 123 124 NAME Standard Folk Acoustic Pop Jazz Dry Hard Rock Power Techno Progressive Rave Hip-Hop Fusion Brush Orchestra Contemporary Vocal 1 Vocal 2 Latin 1 Latin 2 Rock&Roll Beat Electro Country R&B Live Drums (DRUM2) BANK PROGRAM NAME (C.C.
Midi Banks & Prog.
Styles 8 BEAT 16 BEAT POP & FUNK COUNTRY 1 2 3 4 5 6 7 8 9 10 101 102 103 104 105 111 112 113 114 Pub Song Piano Ballad Slow Ballad Country Beat Engl.
258 Reggae 2 ROCK & ROLL 50 51 52 53 54 55 56 57 213 216 217 218 215 219 220 221 222 223 224 225 212 214 Rock & Roll Boogie Surf 60 ‘S Pop Slow Rock Country Rock Scand Bugg Lucky Twist Rock’n Roll 1 Rock’n Roll 2 Rock’n Roll 3 Texmex Boogie Wo Bugg Shuffle Slow Rock 1 Slow Rock 2 Slow Rock 3 Slow Rock 4 Pop 60 Pop Twist FOLK 299 300 301 302 303 304 305 306 307 226 227 228 281 282 262 266 267 206 207 208 209 210 263 264 265 269 270 271 272 273 274 275 276 289 290 291 277 278 292 293 294 211 Valzer Polka
Midi implementation NOTE ON 9nH kk vv NOTE OFF 8nH kk vv 9nH kk 00H EnH bl bh PITCH BEND PROGRAM CHANGE CHANNEL AFTERTOUCH CONTROL 00H CONTROL 01H CONTROL 05H CONTROL 06H CONTROL 07H CONTROL 0AH CONTROL 0BH CONTROL 40H CONTROL 41H CONTROL 42H CONTROL 43H CONTROL 5BH CONTROL 5DH CONTROL 77H CONTROL 78H CONTROL 79H CONTROL 7BH CONTROL 7EH CONTROL 7FH CONTROL 54H CONTROL 55H CONTROL 1EH CONTROL 1FH CONTROL 10H CONTROL 11H RPN 0000H RPN 0001H RPN 0002H NRPN 0108H NRPN 0109H NRPN 010AH NRPN 0110H NRPN 0111H
Vocalizer control list CONTROL 5CH NRPN 6002H NRPN 6003H NRPN 600AH BnH 5CH cc BnH 65H 60H 64H 02H 06H vv BnH 65H 60H 64H 03H 06H vv BnH 65H 60H 64H 0AH 06H vv NRPN 600BH NRPN 6104H NRPN 6105H NRPN 6106H NRPN 6304H NRPN 6305H NRPN 6306H NRPN 6307H NRPN 6308H NRPN 6309H NRPN 630AH NRPN 630BH NRPN 630CH NRPN 630DH NRPN 630EH NRPN 630FH NRPN 6403H NRPN 6405H NRPN 6406H NRPN 6407H NRPN 6414H NRPN 6415H NRPN 6416H NRPN 641AH NRPN 641BH NRPN 641CH BnH 65H 60H 64H 0BH BnH 65H 61H 64H 04H BnH 65H 61H 64H 05H BnH
System exclusive Ketron-DG100 TABS F0H 26H 7CH Code_tab Status F7H Code_tab = 00H - 7FH Tab code (see list) Status = 7FH Tab pressed Status = 00H Tab released Code_tab list: 00H Piano 01H ElectricPno 02H Chrom 03H Organ 04H Accordeon 05H Guitar 06H Bass 07H Strings 08H Choir 09H Brass 0AH Sax 0BH Flute 0CH Pad 0DH Synth 0EH Ethnic 0FH Effects 10H Drawbars 11H Drum set 12H Single Regis 13H Vocalizer 14H Sampler 15H Sound Load 16H On line Eff 17H Style Sett.
09H In./End. 3 0AH Fill 1 0BH Fill 2 0CH Fill 3 0DH Break 0EH Start/Stop 0FH Count In 19H 7th 1AH m7th 1BH 5+ 1CH dim 1DH Glide 1EH Kick Off 1FH Snare Off 29H Bass Lock 2AH Chord Lock 2BH Fall Off 2CH Shake 2DH Overdrive 2EH Delay 2FH Wha-Wha 39H Arabic_3 3AH Arabic_4 3BH Arabic_5 3CH Arabic_6 3DH Micro Dry 3EH Fade Out 3FH Crash 50H Left Drum 51H Interac. Arranger 52H Not Used 1 53H Not Used 2 PARAMETERS GENERAL FORM F0H 26H 7BH Code Data_1..
Type: 0 = no effects 1 = Leslie 2 = Distorsor 3 = Chorus 4 = Delay 5 = Delay + Chorus 6 = Distorsor + Chorus 7 = Distorsor + Delay 8 = Distorsor + Delay + Chorus CHORUS PARAMETERS F0H 26H 7BH Cho_par 00H Value F7H Cho_par: 3BH 74H 75H 76H 77H Chorus Volume "" Delay "" Feedback "" Rate "" Depth Value 0 - 7FH " 0 - 7FH " 0 - 7FH " 0 - 7FH " 0 - 7FH DELAY PARAMETERS F0H 26H 7BH Delay_par 00h Value F7H Delay_par: 2BH 2CH Delay Feed " Filter Value 0 - 7FH " 0 - 68H Delay Time: F0H 26H 7BH 29h 00H Time
Examples: Numc=1 Numd=23 select song number 123 Numc=2 Numd=3 select song number 203 SCALE TUNING (ARABIC) F0H 26H 7BH 0AH Chan Data1...Data12 F7H Data: 00H-7FH; 40h = no detune Chan: 00H-0FH Chan: 7EH lower channels 0H right channels 7FH all channels MASTER TUNE F0H 26H 7BH 0CH 00h Data1,Data2 F7H Data1 00H-0CH high nibble Data2 00H-0FH low nibble Es. Data1=06h Data2=04h no tune (64h) Es. Data1=00h Data2=00h -100% tune Es.
Curve: Soft1 = 00H Soft2 = 01H Normal= 02H Hard1 = 03H Hard2 = 04H Fixed = 05H User1 = 06H User2 = 06H User3 = 08H User4 = 09H User5 = 0AH FIXED VELOCITY CURVE VALUE F0H 26H 7BH 16H 00H Value F7H Value = 01H-7FH GM PART KEY-SHIFT F0H 26H 7BH 1AH 00H GMPart Shift_value F7H GMPart = 00H-10H Shift_value = 10H-70H; No Shift=40H LEFT LEVEL F0H 26H 7BH 1CH 00H Left_level F7H Left_level 00h-7FH SONG_BALANCE F0H 26H 7BH 1DH 00H Song_balance F7H Song_balance 00h-7FH REGISTRATION BANK & NUMBER F0H 26H 7BH
CNTRL: 4EH 59H 5AH 5BH 5CH 5DH 5EH bend lfo tva AfterTouch pitch ctrl AfterTouch tvf cutoff AfterTouch amplitude AfterTouch lfo pitch AfterTouch lfo tvf depth AfterTouch lfo tva depth 60h Voices pitch ctrl 61h Voices tvf cutoff 62h Voices amplitude 63h Voicse lfo pitch 64h Voices lfo tvf dpth 65h Voices lfo tva dpth GENERAL MIDI VOLUME F0H 26H 7BH 38H 00H Value F7H Value 00-7FH default: 7FH GENERAL MIDI PAN F0H 26H 7BH 39H 00H Value F7H Value 00-7FH default: 40H DISK MIDI PORT F0H 26H 7BH 30H 00H Val
AUTOCHORD2 Value: 0 = Full Trio 1 1 = Full Trio 2 2 = Full Trio 3 3 = Jazz Trio 1 4 = Jazz Trio 2 5 = Jazz Trio 3 HARMONY Value: 0 = Harmony Right 1 = Harmony Left 2 = Full 1 3 = Full 2 4 = Full 3 5 = Jazz 1 6 = Jazz 2 7 = Jazz 3 8 = Midi Mode FIXED INTERVAL Value: 0 = Unison 1 = Octave Up 2 = Octave Down 3 = Octave Up/Down 4 = Lead+Octa. Down 5 = Lead+Octa.
Stampa: FLAMINI s.r.l.
KETRON s.r.l. 60020 Ancona ITALY Via Giuseppe Taliercio, 7 Ph. +39 (0)71 285771 Fax +39 (0)71 2857748 www.ketron.