
Operation Manual
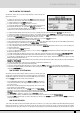

KEY START/SONG REMIX PLAY
When the LED is lit and the Arranger is stopped, this push button is used to start the accompaniment when a note
to the left of the split point on the keyboard is played. If an
IINNTTRROO
or a
FFIILLLL
is selected, as soon as a chord is played,
that Intro or Fill-In of the style will start. To control the performance of the Lower section, namely the manual voi-
ces for the left hand, the player must access the
AARRRRAANNGGEE MMOODDEE
menu where these Lower voices can be disabled
when the Arranger is not running. This also allows the user to prevent the Lower voice(s) from sounding prior to the
arranger starting. When in Song Play mode, this push button is used to select the drum track of the Song being
played, for the Remix function.
KEY STOP/STYLE REMIX PLAY
When the LED is lit it stops the Arranger performance if a very short note or chord is played. It is restarted if another
one or even the same one is played. If the note or the chord is held down for longer than a quarter note, the
Arranger continues to play. With the Arranger stopped,
KKEEYY SSTTOOPP
is used to restart it by playing a chord that is lon-
ger than the time set in Sync Time in the Arrange Mode menu. If a
FFIILLLL
or an
IINNTTRROO
has been selected, with the
Arranger stopped and a chord that is longer than the above mentioned value is played, the whole FILL or the INTRO
will be played, whereas if the chord is very short, the Arranger will stop immediately. If the
KKEEYY SSTTAARRTT
LED is lit, as
soon as the player takes his hand off the left part of the split point, the Arranger stops and starts again as soon as
a note or a chord is played on the part of the keyboard to the left of the split point. When in Song Play mode, this
push button is used to select the drum track of the Style for the Remix function.
FILL
When the Arranger is enabled, this key is pressed to activate one or more Fill-in beats. If it is pressed with the style stop-
ped, it will be played. If the
JJuummpp
function is enabled (LED lit), the
FFIILLLL
button skips the style onto the next variation.
BREAK This is used to add a Break beat at the end of which the Arranger will start to play again.
TAP If you tap on this button with a set frequency four times, the SD5 determines the tempo value automatically (based
on how quickly or slowly you were tapping on this button) and uses this new tempo for the arranger or sequence
to be played. The playback of the arranger or sequence will start provided they were in stop or standby mode prior
to tapping on the
TTAAPP
button. When the Arranger and Sequencer are running, the push button is used to increase
the Tempo in steps of five points each time it is pressed (
AAcccceelleerraannddoo
). By holding the TAP push button down, the
Accelerando is reversed (this can be seen by the direction of the arrow) thus decreasing the Tempo in steps of five
each time it is pressed (
RRiittaarrddaannddoo
).
COUNT/PAUSE RESTART With the Arranger stopped,
CCOOUUNNTT
adds a Count In beat where the artificial 'drummer' (using drum sticks) counts
in 4 beats. If an
IINNTTRROO
has also been pressed before
CCOOUUNNTT
with the
JJUUMMPP
push button enabled, the Intro chosen
will be enabled at the end of the count. With the Arranger running, pressing this push button immediately restarts
the arranger with the first beat of the first bar, regardless of which measure the arranger is currently in. This may
prove very useful when backing a singer whose timing is all over the place! When working with the Sequencer
(
SSEEQQUUEENNCCEERR
LED lit), this push button sets the playback to stand-by until the
CCOOUUNNTT
/
PPAAUUSSEE RREESSTTAARRTT
push button is
pressed again (used as a PAUSE).
START When pressed it starts to play the automatic accompaniment. If
SSTTAARRTT
is pressed while the Arranger is already
playing then everything is stopped, in other words it acts as a Stop push button.
HOLD When the LED is on the last chord played to the left of the Split point on the keyboard is memorised and kept acti-
ve driving the Arranger which carries on playing normally even after the left hand is taken off the keys. This chord
is held as the harmonic basis of all the Arranger parts until a new chord is actually played below the split point
which the Arranger follows by changing the parts to suit. If the LED is switched off, the accompaniment will only
work as long as the chord is held down on the keyboard, but the drum tracks will continue to play regardless.
SLOW This decreases the Tempo value of the Arranger or of the Sequencer.
FAST This increases the Tempo value of the Arranger or of the Sequencer. By pressing
SSLLOOWW
and
FFAASSTT
together at the
same time, the Tempo value is locked (marked by an asterisk) so that it cannot be modified by calling up another
Style with a different Tempo. To disable this locking, press
SSLLOOWW
and
FFAASSTT
together at the same time . To restore
the default Tempo of the style press
PPAAGGEE ++
and
PPAAGGEE --
together at the same time.
A, B, C, D/RIFF.
Each of these push buttons corresponds to a variation of the style, from the most simple to the most complex. Further
to these push buttons, also
JJuummpp FFiillll
in the
LLeefftt CCoonnttrrooll
menu can be used to move forward or back between the varia-
tions. In some styles, the arrangement D may be made up of a Riff or in other words of a typical harmonic sequence
and produced in reference to the type of music of the rhythm selected. The presence of a Riff sequence is pointed out
on the display of the SD5 by the letter R between two square brackets ([R]) under the name of the current style.
Furthermore, each time a style with a Riff is selected, the LED relative to the arrangement D flashes. When the Riff is
activated, when you press the relative key, the arranger acknowledges the chord played just in the first musical beat.
The Riff will only be played based on the harmonic tune played at the time.
SD5
10
Control panel and push button functions