
Operation Manual


the
DDAATTAA CCUURRSSOORR ((UUpp aanndd DDoowwnn))
push buttons or type in its number and then press
FF44 LLoocckk
. The symbol o will appear
next to the Folder. A number of Folders can be locked. To disable the lock function, find the folder protected and then
press
FF44 LLoocckk
again. The degree of protection can be increased using a password to be programmed according to the
instructions given at the end of this chapter.
F5 Escape: This is used to return to the previous page of the
DDiisskk
menu.
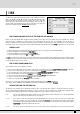
F6 Report:
This creates a TXT file on Floppy Disk that shows the whole contents of the Folder currently selected, split-up per extension and in alpha-
betical order. The file can be read both from Mac and PC and can prove quite useful to have a list of files when there are many files sto-
red.
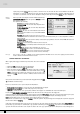
F7 Copy: This is used to copy the file, selected using the and
FF1100 SSeelleecctt
push buttons from the Folder currently selected and a Folder at
choice within the Hard Disk. The following options are possible:
F5 Escape: This is used to return to the previous page of the
DDiisskk
menu.
F8 Target Folder: This displays the list of Folders in the middle of the display amongst which you can choose that
desired using the
DDAATTAA CCUURRSSOORR
push buttons.
F10 Exec: This confirms that the file selected is to be copied in the chosen Folder using
FF88 TTaarrggeett FFoollddeerr
.
The complete procedure entails the following steps:
●
Select the Folder in which the files to be copied are stored.
●
Press
FF77 CCooppyy
.
●
Select one or a number of files to be copied using the
DDAATTAA CCUURRSSOORR
and
FF1100 SSeelleecctt
push buttons.
●
Press F8 Target Folder and find the destination Folder using the
DDAATTAA CCUURRSSOORR
push buttons from the list that
appears.
●
Confirm the procedure using
FF1100 EExxeecc
, or cancel it using
FF55 EEssccaappee
.
●
Press F10 Exec and a new page appears in which the file being copied can be re-named using the keyboard
keys and the DATA CURSOR push buttons. The options possible are the following:
F5 Escape: This cancels the procedure and returns to the Disk menu.
FF88 SSkkiipp::
This skips the copying procedure of the current file.
FF99 CCooppyy AAllll::
This copies all the files without re-naming them.
FF1100 EExxeeccuuttee
: This confirms that the single file is to be copied.
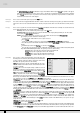
F9 Utility: This is used to control some parameters such as the Tempo and
the transposition of a Midi file, the formatting of the Hard Disk, the
creation of chains of Midi files and the operational control of the
Hard Disk. The options possible are the following:
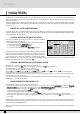
FF11 IInnffoo::
This displays the capacity of the Hard Disk, the space avai-
lable, the number of the Folder and files stored and the percenta-
ge of space available.
FF22 TTeemmppoo::
This is used to modify the Tempo of a Midi file stored in
the Folder currently in use. Once the Midi files are displayed, select
that desired using the
DDAATTAA CCUURRSSOORR
push buttons, then press
FF1100
EExxeecc
. A window appears where the difference in steps of 1 can be
entered compared to the original Tempo using the
DDAATTAA CCUURRSSOORR
push buttons. Once the value has been entered, press
FF1100 EExxeecc
that calls up a new window where the original name of the Midi file can be modified. When the modification has been comple-
ted, confirm the procedure using
FF1100 EExxeecc
or press
FF55 EEssccaappee
to skip saving it.
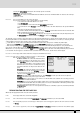
FF33 TTrraannssppoosseerr::
This is used to define a negative or positive transposition value for the Midi file selected. Once the Midi files are
displayed, select that desired using the
DDAATTAA CCUURRSSOORR
push buttons, then press
FF1100 EExxeecc
. A window appears where you can defi-
ne whether the transposition applied will be valid only for the Midi file (
SSoonngg
) or whether it will also apply to the keyboard tran-
sposition (
GGlloobbaall
). To select this application mode, cyclically press the
FF99
function push button that shows the application mode
and upon completion press
FF1100 EExxeecc
to confirm or press
FF55 EEssccaappee
to cancel the procedure. Once you have confirmed you can
enter the transposition value to be applied to the Midi file, using the
DDAATTAA CCUURRSSOORR
push buttons. Confirm again using
FF1100 EExxeecc
that will call up the window in which the name can be modified. Confirm the transposition procedure using
FF1100 EExxeecc
or abandon
using
FF55 EEssccaappee..
FF44 FFoorrmmaatt::
This is used to format the Hard Disk and can be done only by disabling the default protection function using the
FF66
LLoocckk FFoorrmmaatt
push button. You will be requested to confirm using
FF1100 EExxeecc
or to abandon using
FF55 EEssccaappee
. Once the protection
function has been disabled you can format the Hard Disk by pressing F4 Format. You will be requested twice to confirm using
FF1100 EExxeecc
. Press
FF55 EEssccaappee
to cancel the procedure. The formatting lock function is enabled each time the SD5 is turned on to
avoid irreversible mistakes. The formatting procedure
ddeelleetteess
the entire contents of the Hard Disk for good so please use spa-
ringly and wisely!!
FF55 EEssccaappee::
This returns to the previous page of the
DDiisskk
menu.
FF66 LLoocckk FFoorrmmaatt
: This locks the
FF44 FFoorrmmaatt
function.
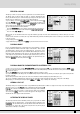
FF77 CChhaaiinn EEddiitt::
This is used to create chains of (no longer than 32) Midi files, to be played back one after the other without having
to call up each file individually. It only works for the Midi files stored in the same Folder, which is called up as already explained
for the
FF33 TTrraannssppoosseerr
. Once
FF77 CChhaaiinn EEddiitt
has been pressed the SD5 displays the Midi files stored in the Folder that can be selec-
SD5
82
DISK