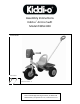
Assembly Instructions Kiddi‐o® Air‐tire Swift Model # 8852‐800 Picture Similar Tools Needed Adjustable Wrench – x1 Flathead Screwdriver – x1 KETTLER® Int’l Inc. 1355 London Bridge Road Virginia Beach, VA 23453‐USA T‐866‐804‐0440 / parts@kettlerusa.com / www.kettlerusa.
Read these instructions carefully before assembling the product or using it for the first time. They contain important information for your safety and for the correct use and maintenance of this product. Keep the instructions in a safe place for information or for ordering spare parts. WARNING –*TO AVOID SERIOUS INJURY* Adult supervision required. Never use near steps, slopes, driveways, hills, roadways, alleys, or swimming pool areas. Always wear shoes. Never use near motor vehicles.
this has been done. If any parts require replacement, use only original spares manufactured by KETTLER®. Use of the Toy ■ Ensure that the tricycle is not used until it has been properly assembled and checked by an adult person. ■ In case of tricycles without a free‐wheel consider the fact that the pedals will rotate even when the tricycle is pushed. ■ Do not transport any objects on the tricycle. ■ Always adjust the use of the tricycle to the conditions encountered.
Assembly of the toy vehicle ■ Please ensure that the tricycle will only be used for playing when assembly has been carried out correctly, and checked, by an adult. ■ The tricycle must be assembled carefully by an adult person. Study the assembly instructions carefully before beginning work. Assemble the tricycle in the exact sequence shown by the letters in the diagrams. This is essential for the safe function and use of the tricycle.
THERE ARE NO WARRANTIES, EXPRESSED OR IMPLIED, MADE BY EITHER THE DISTRIBUTOR OR THE MANUFACTURER ON KETTLER® PRODUCTS, EXCEPT THE MANUFACTURER’S LIMITED WARRANTY AGAINST DEFECTS IN MATERIAL SET OUT BELOW: This KETTLER® Limited Warranty applies to products sold through the KETTLER® Authorized Dealer Network to the original retail purchaser and authenticated by proof of purchase from a retailer located in the United States. Any shipments made under this warranty will be shipped to the United States only.
Lisez attentivement ces consignes avant d’assembler le produit ou de l’utiliser pour la première fois. Elles contiennent des informations importantes pour votre sécurité ainsi que l’utilisation correcte et la maintenance de ce produit. Conservez les consignes dans un endroit sûr pour information ou la commande de pièces détachées. ® Ce produit KETTLER a été conçu conformément aux dernières normes de sécurité en vigueur et soumis à une surveillance constante de la qualité.
■ Dans le cas de tricycles qui ne sont pas munis d’une roue libre, veuillez noter que les pédales tourneront aussi lorsque le tricycle sera poussé. ■ Ne transportez aucun objet sur le tricycle. ■ Adaptez toujours l’utilisation du tricycle aux conditions environnantes. ■ Les tricycles ne possèdent pas de système de freinage efficace en permanence. Par conséquent, empêchez le tricycle de rouler au loin lorsque vous le garez.
risques de blessure. Travaillez avec soin et soyez prudents lors du montage de l'appareil! ■ Assurez que la zone de travail ne présente aucun risque. Ne laissez pas traîner par exemple des outils et rangez p. ex. le matériau d'emballage de manière à ce qu'il ne constitue pas de dangers. Des feuilles / sacs plastiques présentent un risque d'étouffement pour les enfants! ■ D'abord, assemblez toutes les parties sans serrer les vis et contrôlez leur bonne mise en place.
LES PRODUITS KETTLER® NE SONT COUVERTS PAR AUCUNE GARANTIE, EXPRESSE OU TACITE, ASSUREE PAR LE DISTRIBUTEUR OU LE FABRICANT, EXCEPTE LA GARANTIE LIMITEE DU CONSTRUCTEUR CONTRE LES VICES DE MATIERE EXPOSEE CI‐DESSOUS : La garantie limitée de KETTLER®s’applique aux produits vendus par le réseau d’agents agréés à l’a‐ cheteur détaillant d’origine et authentifiés par une preuve d’achat auprès d’un détaillant implanté aux Etats‐Unis.
Lea estas instrucciones atentamente antes de montar el producto o de utilizarlo por primera vez. Contiene información importante para su seguridad y para el correcto uso y mantenimiento de este producto. Conserve las instrucciones en un lugar seguro para consultar información o para pedir repuestos. Este producto se ha diseñado de acuerdo con los últimos estándares de seguridad y está sujeto a un control de calidad constante.
■ Adapte siempre el uso del triciclo a las condiciones existentes. ■ Los triciclos no tienen un sistema de frenada continua efectivo. Por tanto, debe evitar que el triciclo pueda salir rodando cuando lo aparque. ¡No deje nunca el triciclo aparcado con el niño montado en él sin supervisión! ■ No arrastre nunca el triciclo detrás de usted con el niño sentado en él. ■ Enseñe a su hijo a utilizar el vehículo correctamente y tenga en cuenta los posibles peligros.
terminada esta etapa del montaje, apriete los tornillos a fondo contra la resistencia (dispositivo de seguridad contra el aflojamiento) mediante una llave. A continuación, controle todas las conexiones atornilladas. Atención: una vez se hayan aflojado las tuercas de seguridad, éstas no podrán volver a ser utilizadas (el dispositivo de seguridad contra el aflojamiento ha sido destruido). Reemplácelas por tuercas nuevas. ■ Para simplificar el montaje calentar los puños de manillar en agua caliente.
NO SE OTORGA NINGUNA GARANTÍA, EXPRESA NI IMPLÍCITA, NI POR PARTE DEL DISTRIBUIDOR NI DEL FABRICANTE CON RESPECTO A LOS PRODUCTOS KETTLER®, EXCEPTO LA GARANTÍA LIMITADA DEL FABRICANTE FRENTE A DEFECTOS EN LOS MATERIALES QUE SE ESTABLECE A CONTINUACIÓN: Esta Garantía Limitada de KETTLER ® es aplicable a los productos que se vendan a través de la Red de Distribuidores Autorizados de KETTLER ® al comprador minorista original y que se verifiquen mediante el comprobante de compra de un minorista situado en Estad
Measuring Guide F Gabarit pour système de serrage E Referencia de medición para el material de atornilladura Examples Examples Ejemplos 14
Checklist 1 1 1 1 1 1 1 1 1 1 1 1 1 15 M 12 1 M6 x 65mm 1 M6 x 25 mm 1 2 1 M5 x 30 mm
1a 1b A B B ! 1 mm M in M 6 x 25 2 A B 2x M 12 16
3 4 0 - 6 cm 0 - 2 . 3 6 in B klac k- A 5 6 A B M 6x65mm 17 klac k- klac k ...
7 8 M 5x30mm 9a 9b ! 18
Detaching for repairs F E Démontage pour réparation Desmontaje en casa de la reparación 1a 1 B A 2 2a B A 19
1 3 2 2,5 bar/36 PSI ! USA Re inflate • The rubber tire needs to be seated correctly on the rim. • Squeeze tire to rim as illustrated to achieve correct seating of the tire on the rim whilst inflating. • It is advisable to inflate the tire with the aid of a compressor usually found at your local garage. Tire needs to be inflated quickly. E Hinchado de los neumáticos • El neumático deshinchado debe estar correctamente montado sobre la llanta.
Spare Drawing Model #8852-800 Spare Parts Parts Drawing forfor Model 8852-500 8 13 28 9 23 26 12 11 27 20 25 15 29 1 16 10 24 17 31 21 3 4 2 30 32 14 6 18 21 5 19
Spare Parts List for Air‐Tire Swift Model 8852‐800 Pos.η escriptioŶ Yty.