Keurig® Vue® V500 Brewer Use & Care Guide
IMPORTANT SAFEGUARDS Safe Operation & Use When using electrical appliances, basic safety precautions should be followed, including the following: 1. Read all instructions before using. 2. Do not touch hot surfaces. Use handles and knobs when available. 3. This appliance must be properly installed and located in accordance with these instructions before it is used. 4.
Table of Contents Section 1 Brewer Overview 6 Section 2 Preparing Your Brewer 8 Section 3 Using Your Brewer 9 Section 4 Setting the Time & Temperature 17 Section 5 Caring For Your Brewer 20 Section 6 Recycling the Vue® Pack’s Plastic Cup 22 Section 7 Troubleshooting 23 Section 8 Warranty 24 Record Your Brewer Serial Number Above The serial number can be found on the bottom of the brewer box and on the left side of the brewer once the Water Reservoir has been removed.
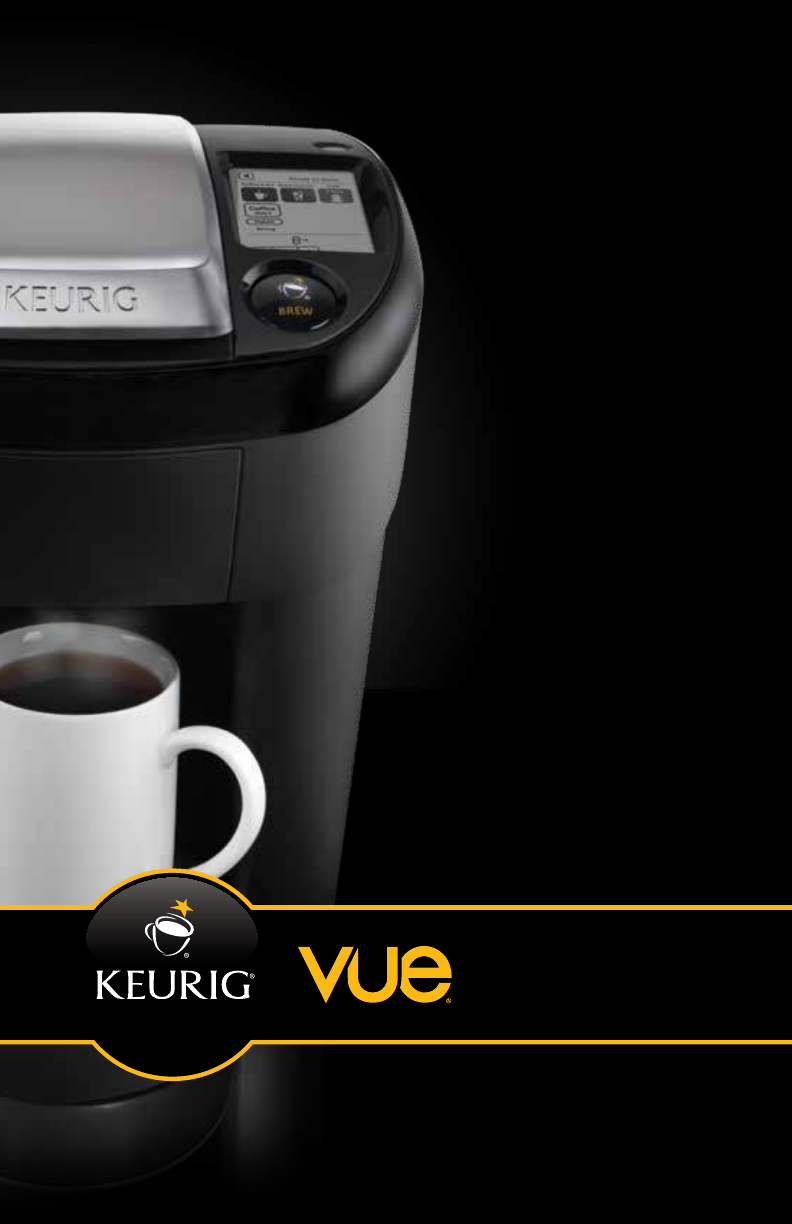
SECTION 1 Brewer Overview B C J D A A “BREW” Button Flashing indicates brewer is ready to brew B Power Button C Touchscreen D Handle E Brew Head E F Power Cord G Drip Tray H Adjustable Drip Tray Plate I I Water Reservoir J Water Reservoir Lid F H G The Keurig® Vue® brewer is not for use with K-Cup® packs.
SECTION 2 SECTION 3 Preparing Your Brewer Using Your Brewer Step 1 Remove all adhesive tape and labels from brewer. Lift Handle and remove shipping disc. Lower Handle before filling Water Reservoir or powering on brewer. Plug cord into grounded outlet. Step 1 If brewer has been exposed to temperatures below freezing, allow brewer at least two hours to reach room temperature before brewing. A frozen or extremely cold brewer will not operate. Brew what you love, the way you love it.
SECTION 3 SECTION 3 Using Your Brewer Using Your Brewer Brewing Coffee, Tea, Hot Cocoa and Hot Apple Cider Choose Vue® Pack Make sure your Vue® pack features the Coffee & Tea Icon. Lift the Handle, insert the Vue® pack into the Holder and lower the Handle. Select Beverage Type & Size After you lower the Handle, the screen will display as pictured with the “Coffee” button, “Regular” and 8 oz. beverage size. To make coffee, choose your strength and size. If you prefer a stronger brew, select “Strong.
SECTION 3 SECTION 3 Using Your Brewer Using Your Brewer Brewing Café Beverages Requires 2 packs Step 1 Step 2 Choose Café Step 1 Pack Choose Café Step 2 Pack Make sure your Vue® pack features the Café Icon. Insert the Vue® pack into the Holder and lower the Handle. Lift the Handle, insert the Vue® pack into the Holder and lower the Handle. Select “Café” Select Beverage Type & Size Press the “Café” button. Then the Touchscreen will display as pictured. Froth is available in the 4 oz.
SECTION 3 SECTION 3 Using Your Brewer Using Your Brewer Brewing Over Ice What is a Cleansing Brew? After brewing certain Vue® pack varieties such as hot cocoa, iced tea or a café beverage, we recommend performing a cleansing brew as follows: Prepare Your Cup Fill a 16 oz. plastic cup with ice. Do not use glass. Remove the Drip Tray if necessary and place cup under the Brew Head. Choose Vue® Pack Make sure your Vue® pack features the Brew Over Ice Icon.
SECTION 3 SECTION 4 Using Your Brewer Setting the Time & Temperature Adding Water Accessing the Settings Menu When the water supply is low, the Touchscreen will display as pictured. When the brewer is on and not brewing, the “Menu” option will appear on the Touchscreen. Follow the steps below to access the settings menu. Press and hold the “Menu” button to access. Use the “Menu” button to tab through the setting options. Bottled or filtered water is recommended.
SECTION 4 SECTION 4 Setting the Time & Temperature Programming the “On Time” Feature By programming your brewer to turn on each morning, you will never have to wait for the brewer to warm up to brew your first cup. It takes the brewer approximately 4 minutes to warm up from room temperature. The clock must be set in order for the on/off feature to operate correctly. See page 17 for directions.
SECTION 5 SECTION 5 Caring For Your Brewer Caring For Your Brewer Cleaning & Maintenance Cleaning External Parts Cleaning of the brewer’s external parts is recommended one to two times per month. Never immerse the brewer in water or other liquids. The Housing and other external parts may be cleaned with a soapy, damp, non-abrasive cloth. The Drip Tray can accumulate up to 12 oz. of overflow. The Drip Tray and the Adjustable Drip Tray Plate should be periodically inspected and rinsed clean.
SECTION 6 SECTION 7 Recycling the Vue Pack’s Plastic Cup Troubleshooting ® Recycle your Vue® pack’s plastic cup wherever #5 plastic is accepted. #5 plastic may not be recyclable in your community today, so please check locally with your municipality or waste hauler, or visit www.vuerecycling.com for more information about recycling your Vue® pack’s plastic cup. SITUATION SOLUTION Brewer does not • Plug brewer into an independent outlet without dimmer control.
SECTION 8 SECTION 8 Warranty Warranty Limited One Year Warranty How do you obtain warranty service? Keurig warrants that your brewer will be free of defects in materials or workmanship under normal home use for one year from the date of purchase. It is recommended that you fill out and return the warranty card enclosed with your brewer so that your purchase information will be stored in our system.
Notes 26 27
Keurig, Incorporated 55 Walkers Brook Drive Reading, MA 01867 Keurig, Incorporated is a wholly-owned subsidiary of Green Mountain Coffee Roasters, Inc. For Household Use Only Made in China. Printed in China. © 2012 Keurig, Incorporated All rights reserved www.keurig.com | 1.866.901.