
User Manual
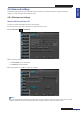
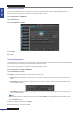
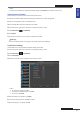
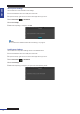
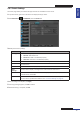

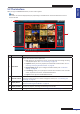
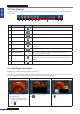
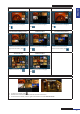
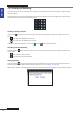
Table Of Contents
- About this Manual
- Chapter 1: Product Overview
- Chapter 2: Installation
- Chapter 3: Getting Started
- Chapter 4: Using the DVR
- Chapter 5: KGUARD Web Client
- 5.1 Login
- 5.2 The Interface
- 5.3 Live Viewing
- 5.4 Searching and Playing Recorded Videos
- 5.5 Remote Settings
- 5.6 Local Settings
- Chapter 6: Using KView Series Software
- Chapter 7: Troubleshooting & FAQ
- Appendix: Specifications

ENGLISH
Chapter 5: KGUARD Web Client
78
DVR User’s Manual
5.3 Live Viewing
From the Live screen, use the Display Controls to open or close the channels, adjust the volume, and switch between
screen modes.
1 2 3 4 5 6 8 9 107
No. Item Descripon
1
Open All Channels Click to open all channels for viewing.
2
Close All Channels Click to close all channels for viewing.
3
Previous Click to view the previous channels.
4
Next Click to save the changes.
5
Full Screen Click to view the channels in full screen.
6
Stretch Click to stretch the screen. Click it again to return to the original
proporons.
7
Display / Hide Screen
Modes
Click to display or hide the screen mode icons.
8
Screen Mode Icons Click a screen mode icon to switch the screen display. See “5.3.1
Switching Screen Modes” below.
9
PTZ Control The PTZ Control icon appears only in full screen mode. Click to turn
the PTZ control on or o. This funcon is applicable only if using a PTZ
camera.
10
Audio Turn o or turn on the audio.
5.3.1 Switching Screen Modes
By default, a 9-channel grid display appears on the screen.
The Live screen can be viewed in dierent modes: 1-channel, 4-channel grid, 6-channel grid, 8-channel grid, 9-channel
grid, 10-channel grid, 13-channel grid, 14-channel grid, 16-channel grid, and full screen.
1-Channel 4-Channel Grid 6-Channel Grid
To view one channel at a me, do
one of the following:
• Double-click on the channel.
Double-click again to return to
grid display.
• Click .
To view 4 channels on the grid,
click .
To view 6 channels on the grid,
click .