
User Manual
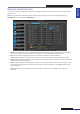
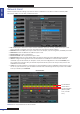

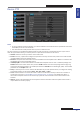

Table Of Contents
- About this Manual
- Quick Setup Guide
- Understanding the Live Viewing Screen
- Basic DVR Operation
- Accessibility Features
- Operating the DVR
- Main Menu
- Display: Live
- Display: Output
- Display: Privacy Zone
- Record: REC Para
- Record: Schedule
- Record: Record Setup
- Search: Record Search
- Search: Event Search
- Search: Log
- Network: Network
- Network: Remote Stream
- Network: Email
- Network: DDNS
- Alarm: Motion
- Device: HDD
- Device: PTZ
- Device: Cloud Storage
- System: General
- System: Users
- System: Info
- Advanced: Maintain
- Remote Access Via Web Client
- Appendix
ENGLISH
Easy Link PRO Series: Operang the DVR
78
DVR User’s Manual
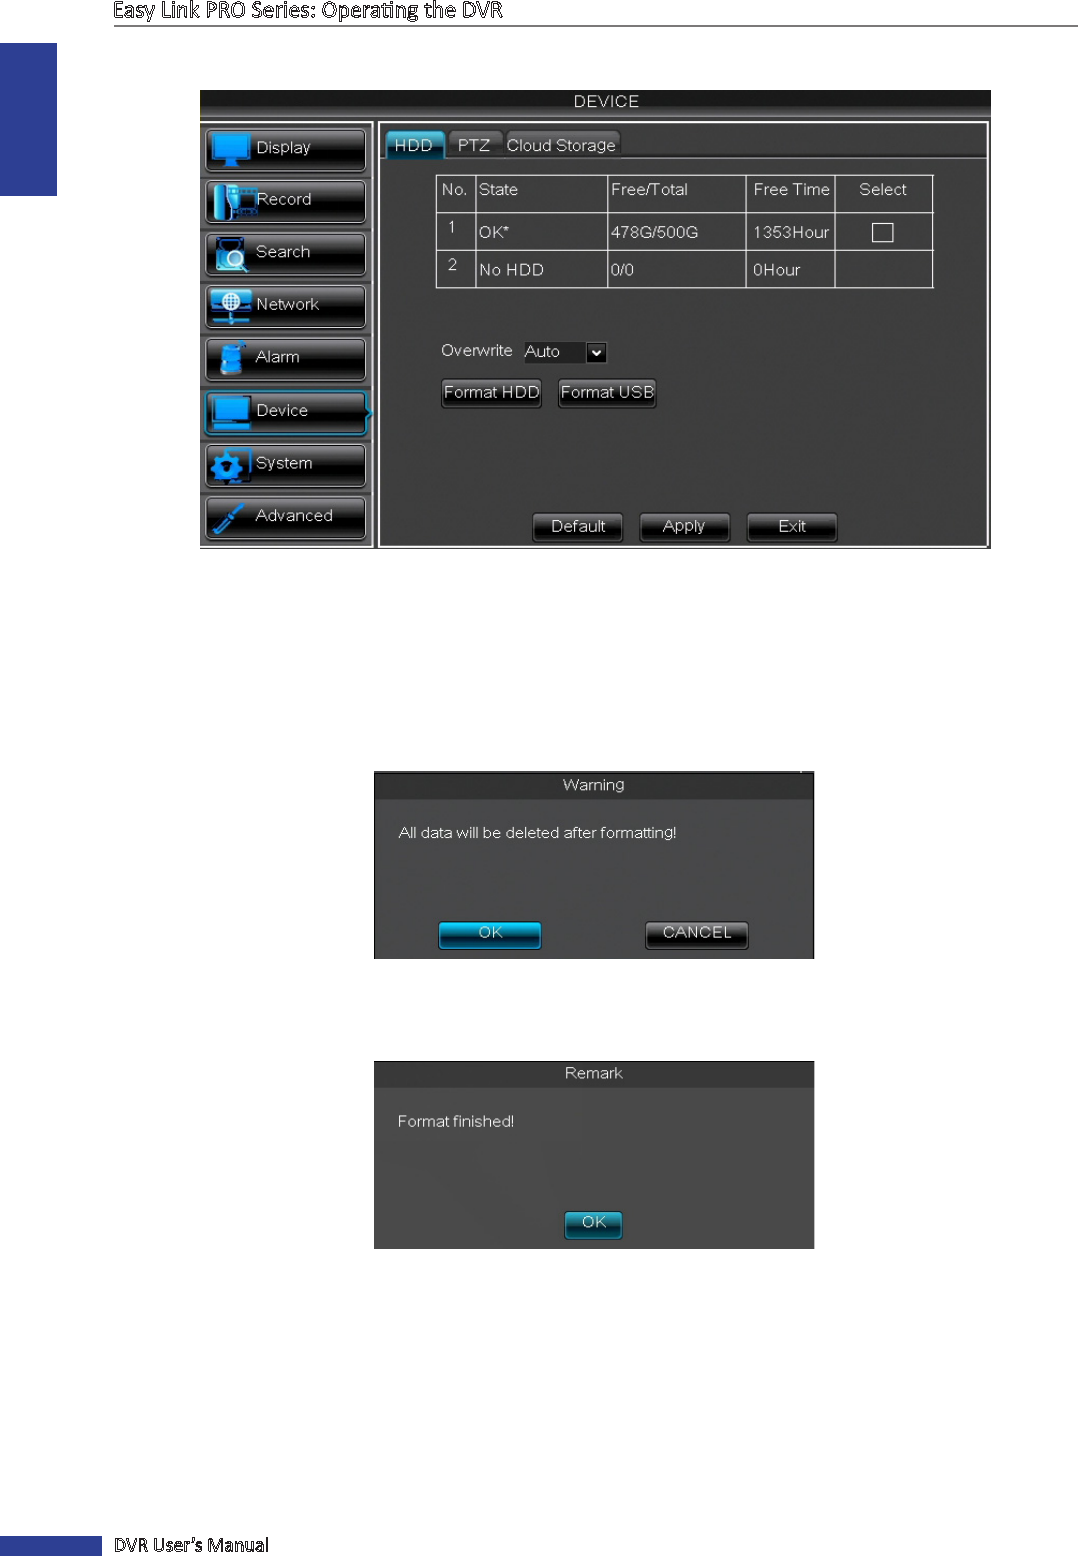
Device: HDD
In this menu you can view and congure the internal HDD, that the DVR uses for saving the reocrdings. You will see the
state, free/total space and free recording me informaon concerning the HDD.
If you start up the DVR for the rst me, you need to format the HDD.
NOTE: Make sure you are not formang an HDD that has already data on it, unless you want to delete the previous
data.
• Format HDD/Format USB: First you need to select the HDD for formang. Check the Select check-box. A warning
message appears on screen, asking your conrmaon to delete all data on the disk aer formang. Click OK.
Wait unl the HDD is formaed. For example, formang a 500GB HDD will take about 1-2 minutes. When the
formang is complete, a nocaon appears on the screen. Click OK.
• Overwrite: Use this opon to overwrite the old recordings on the HDD when the HDD is full. For example, if you
choose the opon 7 days then only the last 7 days recordings are kept on the HDD. To prevent overwring any
old recordings, select Disable. If you have disabled this funcon, please check the HDD status regularily, to make
sure the HDD is not full.