
User Manual
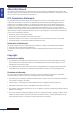
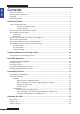
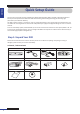
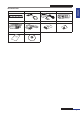
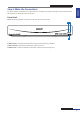

Table Of Contents
- About this Manual
- Quick Setup Guide
- Understanding the Live Viewing Screen
- Basic DVR Operation
- Accessibility Features
- Operating the DVR
- Main Menu
- Display: Live
- Display: Output
- Display: Privacy Zone
- Record: REC Para
- Record: Schedule
- Record: Record Setup
- Search: Record Search
- Search: Event Search
- Search: Log
- Network: Network
- Network: Remote Stream
- Network: Email
- Network: DDNS
- Alarm: Motion
- Device: HDD
- Device: PTZ
- Device: Cloud Storage
- System: General
- System: Users
- System: Info
- Advanced: Maintain
- Remote Access Via Web Client
- Appendix
ENGLISH
Easy Link PRO Series: Quick Setup Guide
8
DVR User’s Manual
Step 2: Install the Hard Disk Drive (HDD)
The reason you need to install an HDD on the DVR is to be able to save video footages from the security camera(s).
This DVR supports one 3.5” or 2.5” SATA HDD.
CAUTION: DO NOT install or remove the hard disk drive while the device power is turned ON.
To install the HDD, follow the instrucons below.
NOTE:
• Depending on the model you purchased, the actual product may slightly dier from the images below.
• The illustraons below show an 8-channel DVR, same procedures apply to a 4-channel and 16-channel DVR.
1. Remove the cover
Loosen the screws as shown.
2. Install and secure the HDD
Connect the data and power cables to the HDD and
place the HDD on the DVR case.
3. Replace the cover
Aach the cover and the screws back in place.
Push back then li up the cover to remove it.
Align the HDD on the holes on the DVR case and
secure the HDD using the four (4) supplied screws.