KKGGUUAARRDD SSTTAANNDDAALLOONNEE DDVVRRSSHHAA--110044..VV22//110088..VV22 UUSSEERR M MAANNUUAALL Инструкция пользователя SHA104.V2 SHA108.V2 1 All Rights Reserved www.kguardsecurity.
KKGGUUAARRDD SSTTAANNDDAALLOONNEE DDVVRRSSHHAA--110044..VV22//110088..VV22 UUSSEERR M MAANNUUAALL СОДЕРЖАНИЕ Глава 1. Возможности.............................................................................................................................................. 5 Глава 2. Панель ........................................................................................................................................................ 6 2.1. Передняя панель..............................................
KKGGUUAARRDD SSTTAANNDDAALLOONNEE DDVVRRSSHHAA--110044..VV22//110088..VV22 UUSSEERR M MAANNUUAALL Глава 5. Сетевой доступ (Удалённый) .................................................................................................................. 63 5.1. Настройки IE................................................................................................................................................. 63 5.2. Web логин (IE браузер) .................................................................
KKGGUUAARRDD SSTTAANNDDAALLOONNEE DDVVRRSSHHAA--110044..VV22//110088..VV22 UUSSEERR M MAANNUUAALL Приложение E- Использование бесплатных DDNS в Интернете .................................................................. 127 Приложение F- Структурная диаграмма экрана OSD.................................................................................... 133 Приложение G- Решение типовых проблем (FAQ) ........................................................................................
KKGGUUAARRDD SSTTAANNDDAALLOONNEE DDVVRRSSHHAA--110044..VV22//110088..VV22 UUSSEERR M MAANNUUAALL Инструкция по безопасности Не касайтесь открытых электрических частей. Возможен удар электрическим током. Выполняйте инструкции указанные ниже. Неправильная установка, неверное заземление, некорректное использование и обслуживание электрического оборудования – всегда источник повышенной опасности.. Не пытайтесь установить оборудование на улице, где ветер и дождь могут быть очень сильными.
KKGGUUAARRDD SSTTAANNDDAALLOONNEE DDVVRRSSHHAA--110044..VV22//110088..VV22 UUSSEERR M MAANNUUAALL Не закрывайте вентиляционные отверстия. Не подносите намагниченные предметы к оборудованию. Не кладите какие-либо предметы сверху на оборудование. Внимание Этот символ показывает потенциальную опасность, риск или условие требующее специального внимания. Пользователь должен обратить особое внимание на инструкции по использованию, обслуживанию или ремонту .
KKGGUUAARRDD SSTTAANNDDAALLOONNEE DDVVRRSSHHAA--110044..VV22//110088..VV22 UUSSEERR M MAANNUUAALL СОГЛАШЕНИЕ О СООТВЕТСВИИ FCC Данное устройство соответствует части 15 Правил FCC. При работе выполняются следующие 2 условия: Устройство не создает вредных помех и допускает воздействие внешних помех, включая помехи, которые могут вызвать неправильное функционирование.
KKGGUUAARRDD SSTTAANNDDAALLOONNEE DDVVRRSSHHAA--110044..VV22//110088..VV22 UUSSEERR M MAANNUUAALL ОГРАНИЧЕНИЕ ОТВЕТСТВЕННОСТИ Данная публикация предоставляется ”как есть”, без каких либо гарантий, выраженных или предполагаемых, включая, но не ограничивая, пригодность товара, ответственность за неверное использование или нарушение авторских прав третьих лиц. Данная публикация может включать технические неточности или типографские ошибки.
KKGGUUAARRDD SSTTAANNDDAALLOONNEE DDVVRRSSHHAA--110044..VV22//110088..VV22 UUSSEERR M MAANNUUAALL Глава 1. Возможности Комплектность: CD*1 Пульт дистанционного управлнения*1 Адаптер питания 12В/3А *1 5 All Rights Reserved Мышка*1 www.kguardsecurity.
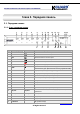
KKGGUUAARRDD SSTTAANNDDAALLOONNEE DDVVRRSSHHAA--110044..VV22//110088..VV22 UUSSEERR M MAANNUUAALL Глава 2. Передняя панель 2.1. Передняя панель 2.1.1. 4-кан. передняя панель 1 2 3 4 5 7 6 8 Отметка 9 10 12 11 13 15 18 19 14 16 17 20 Но.
KKGGUUAARRDD SSTTAANNDDAALLOONNEE DDVVRRSSHHAA--110044..VV22//110088..VV22 UUSSEERR M MAANNUUAALL 2.1.2. 8-кан Передняя панель 1 2 3 4 5 7 6 8 Отметка 9 10 12 11 Функция 13 15 18 19 14 16 17 20 Но.
KKGGUUAARRDD SSTTAANNDDAALLOONNEE DDVVRRSSHHAA--110044..VV22//110088..VV22 UUSSEERR M MAANNUUAALL 2.2. Задняя панель 4-кан DVR 8-кан DVR Но. 1. 2. Разъём Видео вход Video output Функция 4CH:Подключение CH1-4 устройств видео ввода(BNC) 8CH: Подключение CH1-8 устройств видео ввода(BNC) Выход подключения монитора (BNC) Audio Input 4CH DVR: 4CH аудио вход (RCA) 8CH DVR: 4CH аудио вход (RCA) Audio Output 4CH DVR: 2CH выход (RCA) 8CH DVR: 2CH выход (RCA) 5.
KKGGUUAARRDD SSTTAANNDDAALLOONNEE DDVVRRSSHHAA--110044..VV22//110088..VV22 UUSSEERR M MAANNUUAALL 2.3.
KKGGUUAARRDD SSTTAANNDDAALLOONNEE DDVVRRSSHHAA--110044..VV22//110088..VV22 UUSSEERR M MAANNUUAALL Для использования виртуальной клавиатуры: 1. Нажмите на опции или поле, таком как User ID или Пароль. 2. Нажмите 0~9 для ввода желаемой цифры. 3. Нажмите для переключения между цифрами, заглавными, строчными буквами и специальными символами. 4. Нажмите для Удаления. Клавиши меняют цвет с оранжевого на белый при нажатии. 5. Нажмите для ввода/подтверждения и закройте виртуальную клавиатуру.
KKGGUUAARRDD SSTTAANNDDAALLOONNEE DDVVRRSSHHAA--110044..VV22//110088..VV22 UUSSEERR M MAANNUUAALL Глава 3. Установка 3.1. Установка (HDD) Не устанавливайте и не вынимайте HDD при включенном питании DVR ! Шаг 1. Отверните винты с левой и правой стороны и сзади. Шаг 2. Снимите верхнюю крышку, толкая назад и слегка поднимая её. Шаг 3. Подключите кабели к HDD (интерфейсный и питания). 11 All Rights Reserved www.kguardsecurity.
KKGGUUAARRDD SSTTAANNDDAALLOONNEE DDVVRRSSHHAA--110044..VV22//110088..VV22 UUSSEERR M MAANNUUAALL Шаг 4. Установите HDD в отсек и прикрутите аккуратно винтами. Шаг 5. Проверьте, правильно ли подключены разъёмы и нет ли забытых кабелей, а затем установите крышку на место и прикрутите винтами. 3.2. Подключение камеры и монитора Подключите кабель камеры к видео входу DVR (BNC), монитор к видео выходу DVR (BNC) и, при необходимости подключите интерфейс управления камерой PTZ (разъём RS485). 3.3.
KKGGUUAARRDD SSTTAANNDDAALLOONNEE DDVVRRSSHHAA--110044..VV22//110088..VV22 UUSSEERR M MAANNUUAALL 3.4. Диаграмма соединений: 13 All Rights Reserved www.kguardsecurity.
KKGGUUAARRDD SSTTAANNDDAALLOONNEE DDVVRRSSHHAA--110044..VV22//110088..VV22 UUSSEERR M MAANNUUAALL Глава 4. Дисплей OSD 4.1. Структура OSD дисплея (4кан) 14 All Rights Reserved www.kguardsecurity.
KKGGUUAARRDD SSTTAANNDDAALLOONNEE DDVVRRSSHHAA--110044..VV22//110088..VV22 UUSSEERR M MAANNUUAALL 4.1.1. Структура OSD дисплея (8кан) 15 All Rights Reserved www.kguardsecurity.
KKGGUUAARRDD SSTTAANNDDAALLOONNEE DDVVRRSSHHAA--110044..VV22//110088..VV22 UUSSEERR M MAANNUUAALL 4.2. Изображение главного экрана (Запись) Символы отображаемые на главном экране: Символ/иконка Функция Обнаружено движение Сбой HDD, HDD заполнен Идет видео запись Потерян видеосигнал Video Loss Когда DVR находится в режиме записи, иконка [ ] или [ ] отображаются на экране. Но иконка [ ] отображается на экране когда запись была начата по срабатыванию датчика движения.
KKGGUUAARRDD SSTTAANNDDAALLOONNEE DDVVRRSSHHAA--110044..VV22//110088..VV22 UUSSEERR M MAANNUUAALL 4.3. Всплывающее меню настроек 4.3.1. Меню блокировки Для безопасности, система имеет защиту доступа к OSD меню. Шаг 1. Включите парольную защиту и введите имя пользователя/пароль в систему. Шаг 2. Нажмите ”Lock” и OSD меню заблокируется. 4.3.2. Разделённые окна (Для 8 канальной модели) Есть 3 режима разделённых окон: 1. каналы 1-4 2. каналы 5-8 3. каналы 1-8 17 All Rights Reserved www.kguardsecurity.
KKGGUUAARRDD SSTTAANNDDAALLOONNEE DDVVRRSSHHAA--110044..VV22//110088..VV22 UUSSEERR M MAANNUUAALL 4.3.3. Управление PTZ Функции Pointer Auto Pan Стрелки для выбора направления поворота PTZ. Центральный круг для автоматического режима поворота PTZ. Zoom in/zoom out Приближение / удаление Focus Фокус Iris Volume Channel select EXIT GOTO PRESET POINT SET Громкость Выбор канала PTZ камеры К предыдущей странице или выход. Позволяет вам перейти к определённой установленной точке.
KKGGUUAARRDD SSTTAANNDDAALLOONNEE DDVVRRSSHHAA--110044..VV22//110088..VV22 UUSSEERR M MAANNUUAALL точек зависит от производительности PTZ камеры. CLEAR SAVE Total Удаляет текущую точку. Сохраняет внесенные изменения. Количество сохраненных точек. Pre Указывает номер начальной точки при обходе, по умолчанию 01. STP Устанавливает время фиксации в точке. Если вы хотите использовать PTZ камеру, вначале установите параметры PTZ. Больше информации о PTZ вы найдете в секции 4.9. 4.3.3.1.
KKGGUUAARRDD SSTTAANNDDAALLOONNEE DDVVRRSSHHAA--110044..VV22//110088..VV22 UUSSEERR M MAANNUUAALL 4.3.4. Режим картинка-в-картинке 4.3.5. Поиск Для более подробной информации по поиску записей обратитесь в секцию 4.7 20 All Rights Reserved www.kguardsecurity.
KKGGUUAARRDD SSTTAANNDDAALLOONNEE DDVVRRSSHHAA--110044..VV22//110088..VV22 UUSSEERR M MAANNUUAALL 4.3.6. Запись (вручную) Вы можете легко войти в меню поиска записей [Record Search] из всплывающего меню и быстро найти/посмотреть историю сделанных записей. НАЧАТЬ ЗАПИСЬ ВРУЧНУЮ ОСТАНОВИТЬ ЗАПИСЬ ВРУЧНУЮ 21 All Rights Reserved www.kguardsecurity.
KKGGUUAARRDD SSTTAANNDDAALLOONNEE DDVVRRSSHHAA--110044..VV22//110088..VV22 UUSSEERR M MAANNUUAALL 4.3.7. Начать ротацию (SEQ/АВТО ПЕРЕКЛЮЧЕНИЕ КАНАЛОВ) Данная функция позволяет переключать каналы автоматически. 4.3.8. Выбор вывода GUI Данная функция позволяет выбрать место вывода GUI (графического интерфейса) между двумя мониторами (VGA или BNC). 22 All Rights Reserved www.kguardsecurity.
KKGGUUAARRDD SSTTAANNDDAALLOONNEE DDVVRRSSHHAA--110044..VV22//110088..VV22 UUSSEERR M MAANNUUAALL 4.4. Главное меню настроек (Экран) Вы можете выбрать для каждого канала, будет ли он отображаться в режиме просмотра и/или режиме записи, будет ли отображаться актуальное время, будет ли записываться актуальное время или нет. Так же, вы можете ввести заголовок для каждого канала. Вы можете отрегулировать яркость, насыщенность, контраст и тон для каждого канала. Для этого зайдите в пункт меню [Color]. Шаг 1.
KKGGUUAARRDD SSTTAANNDDAALLOONNEE DDVVRRSSHHAA--110044..VV22//110088..VV22 UUSSEERR M MAANNUUAALL 4.5. Главное меню настроек (Запись) 24 All Rights Reserved www.kguardsecurity.
KKGGUUAARRDD SSTTAANNDDAALLOONNEE DDVVRRSSHHAA--110044..VV22//110088..VV22 UUSSEERR M MAANNUUAALL Все функции Record setup Позволяет настроить статус записи для каждого канала (включено / выключено). Quality 3 варианта – Лучшее, Хорошее и Нормальное. Frame rate setup 2 варианта – Фиксированное и Вручную. Нажмите вариант 【Manual】 】 и затем [Frame rate setup] , и можете ввести частоту кадров для каждого канала. Audio Позволяет включить/выключить звук.
KKGGUUAARRDD SSTTAANNDDAALLOONNEE DDVVRRSSHHAA--110044..VV22//110088..VV22 UUSSEERR M MAANNUUAALL Скопировать настройки во все каналы или в один выбранный. Нажмите для применения изменений Настройка частоты кадров В этой опции вы можете настроить частоту кадров записи, если частота кадров превысит системные ограничения, система предупредит о том, что это неприемлемо. Скопировать настройки во все каналы или в один выбранный. 26 All Rights Reserved www.kguardsecurity.
KKGGUUAARRDD SSTTAANNDDAALLOONNEE DDVVRRSSHHAA--110044..VV22//110088..VV22 UUSSEERR M MAANNUUAALL 4.6. Главное меню настроек (Сеть) 27 All Rights Reserved www.kguardsecurity.
KKGGUUAARRDD SSTTAANNDDAALLOONNEE DDVVRRSSHHAA--110044..VV22//110088..VV22 UUSSEERR M MAANNUUAALL Тип Интернет соединения Порт для соединения с DVR Порт HTTP Описание: Т.к. DVR поддерживает просмотр видео удалённо через сеть, следовательно вы можете управлять им удалённо, отслеживать состояние, записывать, проигрывать и резервировать видеозаписи. 28 All Rights Reserved www.kguardsecurity.
KKGGUUAARRDD SSTTAANNDDAALLOONNEE DDVVRRSSHHAA--110044..VV22//110088..VV22 UUSSEERR M MAANNUUAALL Есть 4 типа сетевых настроек в DVR: DHCP PPPoE Static IP DDNS(Dynamic DNS) Функции DHCP – протокол автоматической конфигурации IP адреса в сетях PPPoE – протокол типа точка-точка поверх Ethernet Статический (постоянный) IP адрес Протокол (метод), который позволяет обращаться через символическое имя (адрес) к устройству с динамическим адресом.
KKGGUUAARRDD SSTTAANNDDAALLOONNEE DDVVRRSSHHAA--110044..VV22//110088..VV22 UUSSEERR M MAANNUUAALL Шаг 4. Нажмите на модели роутера, к которому подключен DVR. Шаг 5. Нажмите “click here to skip this advertisement” для получения бесплатных инструкций по настройке порт форвардинга в вашем роутере. (В верхнем углу экрана). After you enter into advertisement page please click on: When you go to the website: www.portforward.com, you will see an advertisement for setup port forwarding of router.
KKGGUUAARRDD SSTTAANNDDAALLOONNEE DDVVRRSSHHAA--110044..VV22//110088..VV22 UUSSEERR M MAANNUUAALL Шаг 6. После окончания настройки роутера вы можете проверить работает ли порт форвардинг. Шаг 7. Перейдите на сайт: http://www.canyouseeme.org/ 31 All Rights Reserved www.kguardsecurity.
KKGGUUAARRDD SSTTAANNDDAALLOONNEE DDVVRRSSHHAA--110044..VV22//110088..VV22 UUSSEERR M MAANNUUAALL Шаг 8. Шаг 9. Введите номер порта, который вы только только что настроили. *Например: порт 80. Нажмите для проверки работоспособности форвардинга. *Если вы все сделали правильно, отобразится следующая страница: 32 All Rights Reserved www.kguardsecurity.
KKGGUUAARRDD SSTTAANNDDAALLOONNEE DDVVRRSSHHAA--110044..VV22//110088..VV22 UUSSEERR M MAANNUUAALL Open port success *Если, что то неверно работает, следующая страница: Open port failed Если вы не можете использовать порты по умолчанию 80 и 9000, по причине занятости их другим приложением или ограничениями со стороны провайдера, используйте другой свободный порт. Не забудьте в этом случае поменять порт и в сетевых настройках DVR, порт прописывается сразу за адресом, после ”:”.
KKGGUUAARRDD SSTTAANNDDAALLOONNEE DDVVRRSSHHAA--110044..VV22//110088..VV22 UUSSEERR M MAANNUUAALL 4.7. Главное меню настроек (Поиск/Воспроизведение) *Вначале нажмите “Search”. *Дважды кликните по нужному времени и дате записи, затем нажмите ”playback”. *Нажмите ”Detail Files” *Проигрывается изображение 34 All Rights Reserved www.kguardsecurity.
KKGGUUAARRDD SSTTAANNDDAALLOONNEE DDVVRRSSHHAA--110044..VV22//110088..VV22 UUSSEERR M MAANNUUAALL *Выберите тип видео и отметьте файл, который вы хотите резервировать. *Вставьте USB устройство и нажмите ”Backup”. 35 All Rights Reserved www.kguardsecurity.
KKGGUUAARRDD SSTTAANNDDAALLOONNEE DDVVRRSSHHAA--110044..VV22//110088..VV22 UUSSEERR M MAANNUUAALL 4.7.1. Главное меню настроек (Поиск/Лог/Экспорт) *Вы можете экспортировать информацию о видео из лога (как текст). *Нажмите ”log”для поиска информации о видео. *Нажмите “search” и выберите тип лога для поиска информации о видео. 36 All Rights Reserved www.kguardsecurity.
KKGGUUAARRDD SSTTAANNDDAALLOONNEE DDVVRRSSHHAA--110044..VV22//110088..VV22 UUSSEERR M MAANNUUAALL *Нажмите “Export” для экспорта видео информации. *Перед экспортом, не забудьте вставить USB устройство. Функции Channel Позволяет выбрать канал(ы) для поиска. Time Search Вы можете искать по определённому времени и дате, это особенно удобно когда известно примерное время произошедшего события. Date Search Вы можете ограничить поиск списком записей на определённую дату.
KKGGUUAARRDD SSTTAANNDDAALLOONNEE DDVVRRSSHHAA--110044..VV22//110088..VV22 UUSSEERR M MAANNUUAALL First Нажмите “First” для перехода к первой странице. PREV (Previous page) Нажмите ”Previous page” для перехода к предыдущей странице. NEXT (Next page) Нажмите “Next page” для перехода на следующую страницу. Поиск лога На экране поиска записей нажмите “Log Search”, появится меню поиска лога. Нажмите “Search” внизу интерфейса для поиска необходимых логов.
KKGGUUAARRDD SSTTAANNDDAALLOONNEE DDVVRRSSHHAA--110044..VV22//110088..VV22 UUSSEERR M MAANNUUAALL 4.8. Главное меню настроек (Управление устройством) 4.8.1. Настройка HDD и сигнализации 39 All Rights Reserved www.kguardsecurity.
KKGGUUAARRDD SSTTAANNDDAALLOONNEE DDVVRRSSHHAA--110044..VV22//110088..VV22 UUSSEERR M MAANNUUAALL Управление HDD When DVR is connected to a HDD, the system will detect H.D.D automatically, when the new H.D.D was installed , system will ask for H.D.D formatting. The functions of” H.D.D Setup” NO: :The number of HDD TOTAL SPACE: The capacity of Hard Drive or free space on the Hard Drive.
KKGGUUAARRDD SSTTAANNDDAALLOONNEE DDVVRRSSHHAA--110044..VV22//110088..VV22 UUSSEERR M MAANNUUAALL Alarm Setup 41 All Rights Reserved www.kguardsecurity.
KKGGUUAARRDD SSTTAANNDDAALLOONNEE DDVVRRSSHHAA--110044..VV22//110088..VV22 UUSSEERR M MAANNUUAALL The functions of” Alarm Setup” Channel: the option allows you select one channel you want. HDD Loss: When the “Buzzer” is in the “ON” position and the system can’t find the HDD or HDD is not be formatted, the symbol “ ” will appear on the screen with buzzer sounded. HDD Space: When the “Buzzer” is in the “ON” position and the HDD out of storage space, the buzzer will be activated.
KKGGUUAARRDD SSTTAANNDDAALLOONNEE DDVVRRSSHHAA--110044..VV22//110088..VV22 UUSSEERR M MAANNUUAALL 4.8.2. Email Alarm Notification Because of the type and the ISP service company is variety worldwide, Hence, we only provide 1-2 company for an example, if you have any question of E-mail, please contact your local ISP service. Please make sure your DVR already connected to internet: E-mail must enable. If your E-mail have SSL encryption, you have to enable it. The port for sending E-mail.
KKGGUUAARRDD SSTTAANNDDAALLOONNEE DDVVRRSSHHAA--110044..VV22//110088..VV22 UUSSEERR M MAANNUUAALL SMTP Port The Specified sender port of SMTP server(forwarding server/Host) Generally the SMTP port value is 25 ,but for SMTP port of G-mail server is 465. *if your E-mail needs to be verified by SSL, the port is going to be 465(default value), and port 25(default value) is the Email without SSL verification.
KKGGUUAARRDD SSTTAANNDDAALLOONNEE DDVVRRSSHHAA--110044..VV22//110088..VV22 UUSSEERR M MAANNUUAALL Step 4. Click ”Alarm” icon. Step 5. Check the “EMAIL” block, and then click ”EMAIL SETUP” button. Step 6. Select ”Enable” for SSL, if your E-mail server needs the SSL verification. Step 7. Select ”Disable” for SSL, if your E-mail server doesn’t need the SSL verification。 Key-in the “SMTP Port” for the sender. *For example: the default value of Gmail SMTP Port is 465, and the others is 25.
KKGGUUAARRDD SSTTAANNDDAALLOONNEE DDVVRRSSHHAA--110044..VV22//110088..VV22 UUSSEERR M MAANNUUAALL Example: After finished setup of Email, you have to enable the function of motion detection. Step 13. Click “Motion” icon, and make sure motion detection is enabled. 46 All Rights Reserved www.kguardsecurity.
KKGGUUAARRDD SSTTAANNDDAALLOONNEE DDVVRRSSHHAA--110044..VV22//110088..VV22 UUSSEERR M MAANNUUAALL Motion Area *Before setting Gmail , please setup the motion area. 【Red: enable】;【blank: disable】 *If you don’t use Gmail, please skip this step. Step 14. Login Gmail and go to “Settings forwarding and POP/IMAP Enable IMAP”. This step is for Gmail only. Step 15. Now, check your e-mail and see if you receive an e-mail (along with attached Photo) from DVR. 47 All Rights Reserved www.kguardsecurity.
KKGGUUAARRDD SSTTAANNDDAALLOONNEE DDVVRRSSHHAA--110044..VV22//110088..VV22 UUSSEERR M MAANNUUAALL 4.9. PTZ & Mobile Setup Click Click 48 All Rights Reserved www.kguardsecurity.
KKGGUUAARRDD SSTTAANNDDAALLOONNEE DDVVRRSSHHAA--110044..VV22//110088..VV22 UUSSEERR M MAANNUUAALL PTZ Setup The functions of” PTZ Setup” PTZ protocol (Pelco-D or Pelco-P) Baud Rate (1200, 2400, 4800, 9600), Data bit (8, 7, 6, 5), Stop bit (1, 2), Parity (None, Odd, Even, Mark, Space), Address Code Cruise *PTZ device can be activated only when a channel in connection with the PTZ camera is selected. Mobile Setup 49 All Rights Reserved www.kguardsecurity.
KKGGUUAARRDD SSTTAANNDDAALLOONNEE DDVVRRSSHHAA--110044..VV22//110088..VV22 UUSSEERR M MAANNUUAALL The functions of” Mobile Setup” User Name: indicate user name of DVR. User password: indicate user password of DVR Server port: Mobile monitoring port. Setting range is between 1024 and 65535. Explanation: Please connect DVR to Internet before setting DVR port number and the server port number is not equal to network menus. The user name and password you enter can not be empty.
KKGGUUAARRDD SSTTAANNDDAALLOONNEE DDVVRRSSHHAA--110044..VV22//110088..VV22 UUSSEERR M MAANNUUAALL 4.10. Motion Detection Setup 51 All Rights Reserved www.kguardsecurity.
KKGGUUAARRDD SSTTAANNDDAALLOONNEE DDVVRRSSHHAA--110044..VV22//110088..VV22 UUSSEERR M MAANNUUAALL Motion Detection Setup The [Motion detection] Menu has three sections, including Channel Status, Sensitivity and Motion area. The functions of” Motion Detection Setup” Channel : This option allow you enable motion detection on any channel. SENSITIVITY: This option allows you to set sensitivity level of motion detection from higher to low with 8 being the most sensitive.
KKGGUUAARRDD SSTTAANNDDAALLOONNEE DDVVRRSSHHAA--110044..VV22//110088..VV22 UUSSEERR M MAANNUUAALL 4.11. Main Menu Setup 【System/Privacy Zone/Time/Password/Video/Language/Maintain】 】 The “System” Menu includes: Time Setup, User Password, Audio/Video Setting, Language select, System Info. , Privacy zone and System Maintenance. After entering into the “System” menu, you can configure the relative parameters to meet your needs. *The OSD switching between VGA and BNC is in the section of Audio/video setting.
KKGGUUAARRDD SSTTAANNDDAALLOONNEE DDVVRRSSHHAA--110044..VV22//110088..VV22 UUSSEERR M MAANNUUAALL TIME/DATE NTP UPDATE BUTTON DST SETUP BUTTON DST SETUP BY WEEK 54 All Rights Reserved www.kguardsecurity.
KKGGUUAARRDD SSTTAANNDDAALLOONNEE DDVVRRSSHHAA--110044..VV22//110088..VV22 UUSSEERR M MAANNUUAALL DST SETUP BY DATE You can modify the system date, time, date/time format, and time zone, DST (day time saving) status and NTP. There are 2 types of DST which you can setup. 1. Setup by week 2. Setup by date Click ”Apply” button to save the settings. Password This option allows you set the device ID for the DVR and set the system password and authority.
KKGGUUAARRDD SSTTAANNDDAALLOONNEE DDVVRRSSHHAA--110044..VV22//110088..VV22 UUSSEERR M MAANNUUAALL 1. Click ”Password” icon to enter the setup page of password. 2. Select the user which you would like to enable the authority. *for administrator, you don’t need to setup permission. 3. Click ”Permission” button to set the authority for user. 4. Click “Apply” button to confirm the settings. 5. Click ”Edit” button to enable the password. 6. Enable password. 7. key-in password. 8.
KKGGUUAARRDD SSTTAANNDDAALLOONNEE DDVVRRSSHHAA--110044..VV22//110088..VV22 UUSSEERR M MAANNUUAALL Video/Audio Setup Video System: allow you set Camera system (PAL, NTSC). VGA Resolution: include 4 options - 1280×1024、1024×768、800×600 and 1440×900. Rotate time: :allow you select sequence time between from 5s and 300s. OSD Output: Allow you to select the video output between VGA /BNC/AUTO. The default main menu options is on VGA output.
KKGGUUAARRDD SSTTAANNDDAALLOONNEE DDVVRRSSHHAA--110044..VV22//110088..VV22 UUSSEERR M MAANNUUAALL Margin Setup Click the [Volume] and/or [Margin] options on the right-bottom corner of the Video/Audio screen to adjust the volume and/or margin respectively. 58 All Rights Reserved www.kguardsecurity.
KKGGUUAARRDD SSTTAANNDDAALLOONNEE DDVVRRSSHHAA--110044..VV22//110088..VV22 UUSSEERR M MAANNUUAALL Privacy Zone *The total area of privacy zone is 4 areas. Step 1. Right Click ”Main menu” option. Step 4. Click on”Privacy Zone”. Step 2. Click on”system” icon. Step 5. Check the area which you need. Step 3. Click on”Video” icon. Step 6. Click on”Setup” to set the area. 59 All Rights Reserved www.kguardsecurity.
KKGGUUAARRDD SSTTAANNDDAALLOONNEE DDVVRRSSHHAA--110044..VV22//110088..VV22 UUSSEERR M MAANNUUAALL Language Enter into [Language] menu to select the language you want to use on the DVR and then click [APPLY] button. The selection will be available after system Auto restarts. System Information Enter into [System Information] menu to view system info, including Device type, Software (firmware) version, IE version and MAC address etc.
KKGGUUAARRDD SSTTAANNDDAALLOONNEE DDVVRRSSHHAA--110044..VV22//110088..VV22 UUSSEERR M MAANNUUAALL Maintain This option allows you recover the DVR settings to factory default settings, update system software (firmware), and set system auto-maintenance. *There are 4 functions: : *After enabling ”Auto Maintain” function , the system will perform regular maintenance depend on your need. Please note the [Auto Maintain] function will be available only when DVR is on the Main interface and have no user online.
KKGGUUAARRDD SSTTAANNDDAALLOONNEE DDVVRRSSHHAA--110044..VV22//110088..VV22 UUSSEERR M MAANNUUAALL Load Default from the function of MAINTAIN : After entering into this system , you can select the item which you need to reset to factory default. 62 All Rights Reserved www.kguardsecurity.
KKGGUUAARRDD SSTTAANNDDAALLOONNEE DDVVRRSSHHAA--110044..VV22//110088..VV22 UUSSEERR M MAANNUUAALL Chapter 5. Network Access(Remote) There are 2 methods to remote access the DVR via network: Internet Explorer Browser (IE),and Mobile phones. 5.1. IE Setup 5.2. Web Log-in(IE Browser) 4-CH DVR allow you have 5 users on-line simultaneously.。 8-CH DVR allow you have 3 users on-line simultaneously.。 *The default username is “Admin”. * Default password is empty. 63 All Rights Reserved www.kguardsecurity.
KKGGUUAARRDD SSTTAANNDDAALLOONNEE DDVVRRSSHHAA--110044..VV22//110088..VV22 UUSSEERR M MAANNUUAALL 5.3 Control Panel(Live view) The Control panel Live video connect/disconnect (ON/OFF) Snapshot: Picture Format: *.bmp Record: To record live video remotely Channel display mode: 1 ch/4 ch/8ch/16ch/full screen Volume button Click the [ Click the [ ] icon of one channel to display the image of specified channel. ] icon to start manual record. 64 All Rights Reserved www.kguardsecurity.
KKGGUUAARRDD SSTTAANNDDAALLOONNEE DDVVRRSSHHAA--110044..VV22//110088..VV22 UUSSEERR M MAANNUUAALL PTZ Control Direction Pointer To move the PTZ to any direction Zoom Focus Iris Zoom in/zoomout;focus adjunstment and Iris control Pan & Tilt Pos Indicates that you can choose the cruise starting point ,as your desire. SET To set the preset point. Clear To delete the preset point. To load the last preset point GoTo Key-in the preset point and click it to load the last preset point which you set.
KKGGUUAARRDD SSTTAANNDDAALLOONNEE DDVVRRSSHHAA--110044..VV22//110088..VV22 UUSSEERR M MAANNUUAALL 5.4. Setup(Remote Setting) 5.4.1. Structure of Remote Setting After completed each setup, you have to click” 66 All Rights Reserved ” to confirm the setting. www.kguardsecurity.
KKGGUUAARRDD SSTTAANNDDAALLOONNEE DDVVRRSSHHAA--110044..VV22//110088..VV22 UUSSEERR M MAANNUUAALL 5.4.2. Display Setup You can setup Channel title/the title position/enable or disable live view/live view time display and record time display. when you see ” ”button, you can copy the setting to the channel which you would like to copy. 4 CH 8 CH 67 All Rights Reserved www.kguardsecurity.
KKGGUUAARRDD SSTTAANNDDAALLOONNEE DDVVRRSSHHAA--110044..VV22//110088..VV22 UUSSEERR M MAANNUUAALL 5.4.3. Record Schedule: This function allows you to setup the record schedule from remote site. Step 1. Select ”Enable” button from “Record” inside the “Record Schedule Setup”. Step 2. Select “Schedule” from “Record Mode”. Step 3. Click button to setup the record mode. 68 All Rights Reserved www.kguardsecurity.
KKGGUUAARRDD SSTTAANNDDAALLOONNEE DDVVRRSSHHAA--110044..VV22//110088..VV22 UUSSEERR M MAANNUUAALL Step 4. Check the record mode which you would like to setup. There are 3 types of record mode: *【 【Red color: Alarm Record】 】【Green color: Normal record】 】【transparent/white: No record.】 】 【 【 Step 5. Click button to save the setting. 69 All Rights Reserved www.kguardsecurity.
KKGGUUAARRDD SSTTAANNDDAALLOONNEE DDVVRRSSHHAA--110044..VV22//110088..VV22 UUSSEERR M MAANNUUAALL 5.4.4. Alarm Setup You enable or disable the buzzer/motion alarm/HDD Loss alarm/Not enough HDD space alarm/Video Loss alarm/Post recording/Pre-record 5.4.5. Network There are 4 modes of Network setup Static IP/ DHCP PPPoE DDNS Email Setup For setting static IP & DHCP. For setting PPPoE. For setting specified DDNS. To send E-mail for some special event. For all setting, please refer to the information below.
KKGGUUAARRDD SSTTAANNDDAALLOONNEE DDVVRRSSHHAA--110044..VV22//110088..VV22 UUSSEERR M MAANNUUAALL 5.4.5.1. Static IP Step 1. Click ”STATIC & DHCP” option. Step 2. Choose Type ”Static IP & DHCP”, and key in all information, including, IP Address/Media Port/Web Port/Gateway/ Netmask / DNS Server. *Normally, the DVR will have the same information with internet. Step 3. Click button to save settings. 5.4.5.2. DHCP Dynamic Host Configuration Protocol (DHCP).
KKGGUUAARRDD SSTTAANNDDAALLOONNEE DDVVRRSSHHAA--110044..VV22//110088..VV22 UUSSEERR M MAANNUUAALL 5.4.5.3. PPPoE Point-to-Point Protocol over Ethernet (PPPoE) is a network protocol for encapsulating Point-to-Point Protocol (PPP) frames inside Ethernet frames. By using PPPoE, users can virtually "dial" from one machine to another over an Ethernet network, establish a point to point connection between them and then securely transport data packets over the connection.
KKGGUUAARRDD SSTTAANNDDAALLOONNEE DDVVRRSSHHAA--110044..VV22//110088..VV22 UUSSEERR M MAANNUUAALL 5.4.5.4. DDNS Dynamic DNS is a method, protocol, or network service that provides the capability for a networked device. 1. 2. 3. 4. Click ” DDNS ” option. Set DDNS to “ Enable” Choose the server for DDNS Key-in the information which was provided by ISP service company. 5. Click” “button to confirm settings. *For free DDNS , Please refer to ”Appendix D” 73 All Rights Reserved www.kguardsecurity.
KKGGUUAARRDD SSTTAANNDDAALLOONNEE DDVVRRSSHHAA--110044..VV22//110088..VV22 UUSSEERR M MAANNUUAALL 5.4.5.5. Email Setup If you have any question of E-mail Setting, Please refer to section 4.7.2.(E-mail setup). 1. Click ”Email Setup” Option. 2. Email to “Enable” 3. IF your Email with Email Encryption, you have to set ”SSL” to enable”. 4. key-in SMTP server. 5. key-in the Email address of sender. 6. key-in the Email address of receiver. 7. Set the sending interval for Email 8. Key-in the SMTP port. 9.
KKGGUUAARRDD SSTTAANNDDAALLOONNEE DDVVRRSSHHAA--110044..VV22//110088..VV22 UUSSEERR M MAANNUUAALL 5.4.6. Device (H.D.D/PTZ/Mobile/Motion) In this option, you can view the information of H.D.D. as well as setup PTZ/Mobile/Motion detection. H.D.D. information PTZ Setup Mobile 75 All Rights Reserved www.kguardsecurity.
KKGGUUAARRDD SSTTAANNDDAALLOONNEE DDVVRRSSHHAA--110044..VV22//110088..VV22 UUSSEERR M MAANNUUAALL Motion: Please follow the step , below: Step 1. Step 2. Enable Motion detection: Click “ ”button. Step 3. The motion detection setup block will pop-out and you can click the area which you don’t want to setup. 76 All Rights Reserved www.kguardsecurity.
KKGGUUAARRDD SSTTAANNDDAALLOONNEE DDVVRRSSHHAA--110044..VV22//110088..VV22 UUSSEERR M MAANNUUAALL 5.4.7. System setup(Password/DST) There are 4 options: System Setup User setup DST Information 5.4.7.1. System setup 5.4.7.2. Authority(Password management) You can set 6 users in this setting, if you would like to set the authority for each user, you have to log in the account of Admin. 1. Click ”User” Option. 2. Choose the user which you would like to provide authority (6 users). 3. Set Active to ”Enable”.
KKGGUUAARRDD SSTTAANNDDAALLOONNEE DDVVRRSSHHAA--110044..VV22//110088..VV22 UUSSEERR M MAANNUUAALL 5.4.7.3. DST SETUP Step 1. Click ”DST” option. Step 2. Enable “DST”. Step 3. Choose the offset time . 78 All Rights Reserved www.kguardsecurity.
KKGGUUAARRDD SSTTAANNDDAALLOONNEE DDVVRRSSHHAA--110044..VV22//110088..VV22 UUSSEERR M MAANNUUAALL Step 4. Choose “Daylight Saving Time Mode”. There are 2 types of DST: 1.Choose by week 2.Choose by date 5.4.7.4. System information 5.5. Local Setting This option allows you set “Record Save Path”, “Snapshot Save Path” and “File Save Path”. 79 All Rights Reserved www.kguardsecurity.
KKGGUUAARRDD SSTTAANNDDAALLOONNEE DDVVRRSSHHAA--110044..VV22//110088..VV22 UUSSEERR M MAANNUUAALL 5.6. Playback(IE Browser): Step 1. Step 2. Click ”Playback” option. Click the date which you would like to playback. Step 3. Also, you can click “ ” button to search the video file again, or use file list to choose which channel you would like to playback, and then click on ” ” button. *The video file list will be displayed. 80 All Rights Reserved www.kguardsecurity.
KKGGUUAARRDD SSTTAANNDDAALLOONNEE DDVVRRSSHHAA--110044..VV22//110088..VV22 UUSSEERR M MAANNUUAALL Step 4. Click specified video file which you would like to playback, remotely. The video will be displayed. When the video file is playing, the system won’t allow you to download video files. Step 5. Close the playing video and then click Step 6. When the video file was downloaded, the dialogue box will display. button to download video file. 81 All Rights Reserved www.kguardsecurity.
KKGGUUAARRDD SSTTAANNDDAALLOONNEE DDVVRRSSHHAA--110044..VV22//110088..VV22 UUSSEERR M MAANNUUAALL *And you can check the file path, as below. *Remote manual recording file will be saved to【 【Record save path】 】. *Local recording file will be saved to [File save path]. *Double-click any file listed or highlight any file and click [Play] button to play the selected recording file. *Click [Download] button to download and save selected recording file to specified saving path.
KKGGUUAARRDD SSTTAANNDDAALLOONNEE DDVVRRSSHHAA--110044..VV22//110088..VV22 UUSSEERR M MAANNUUAALL 5.7. Mobile Phones Access The DVR is currently compatible with mobile phones running Windows Mobile, Symbian, iPhone, Blackberry and Android operating system. *Due to the model of mobile phone is variety, so we only provide 1 model for your reference, if you have any question of your mobile phone ,please refer to appendix J.
KKGGUUAARRDD SSTTAANNDDAALLOONNEE DDVVRRSSHHAA--110044..VV22//110088..VV22 UUSSEERR M MAANNUUAALL USER NAME USER PASSWORD SERVER PORT All Functions The login user name of DVR The login Password of DVR Mobile monitoring port. Setting range is between 1024 and 65535. Please note that the server port of DVR must with the same port of mobile . You also need to forward this port at the virtual server option of your router. 84 All Rights Reserved www.kguardsecurity.
KKGGUUAARRDD SSTTAANNDDAALLOONNEE DDVVRRSSHHAA--110044..VV22//110088..VV22 UUSSEERR M MAANNUUAALL 5.8. Install & Operate (Windows® Mobile Phones) Step 1. Step 2. Step 3. Install the webcam program that is included on the supplied CD by click Click the type of mobile which you need from 5 icons. Copying the “Aseesetup.CAB” file into mobile phone. Step 4. Click “ASeesetup” and choose an installation location ,after the initialization. Step 5. Click “Install” button to start the installation processing.
KKGGUUAARRDD SSTTAANNDDAALLOONNEE DDVVRRSSHHAA--110044..VV22//110088..VV22 UUSSEERR M MAANNUUAALL Step 6. Step 7. After completed installation, click “ASee” icon to run the program. Key-in the information of DVR and Check box. All Functions User’s Name Indicate that the user name which have been set on DVR-[Mobile Set] menu. Password Indicate that the password which has been set on DVR-[Mobile set] menu.
KKGGUUAARRDD SSTTAANNDDAALLOONNEE DDVVRRSSHHAA--110044..VV22//110088..VV22 UUSSEERR M MAANNUUAALL Step 8. Now, you can check the list of your connecting information. Step 9. Press button, to enter the main screen and to view the video. 87 All Rights Reserved www.kguardsecurity.
KKGGUUAARRDD SSTTAANNDDAALLOONNEE DDVVRRSSHHAA--110044..VV22//110088..VV22 UUSSEERR M MAANNUUAALL Picture Function key 【Items】 Description 【Channel option】 】 Click button, to select the channel which you would like to view.
KKGGUUAARRDD SSTTAANNDDAALLOONNEE DDVVRRSSHHAA--110044..VV22//110088..VV22 UUSSEERR M MAANNUUAALL 5.9. Install & Operate (Symbian® Phones) Step 1. Install the program that is included on the supplied CD by copying the file to the mobile phone. “ASee_AL_3rd _0723.sisx”(3RD EDITION) or “See_AL_5th_0723.sisx”(5TH EDITION) *Click “Mobile” and then choose the software which you need.
KKGGUUAARRDD SSTTAANNDDAALLOONNEE DDVVRRSSHHAA--110044..VV22//110088..VV22 UUSSEERR M MAANNUUAALL Step 3. Choose Mobile card or SD card as an installation location. Step 4. Click “Continue” button to make sure the application program you installed may visit network or dial phone when popping-up the dialog box. Step 5. After successful installation system will prompt you “Installation Complete”. 90 All Rights Reserved www.kguardsecurity.
KKGGUUAARRDD SSTTAANNDDAALLOONNEE DDVVRRSSHHAA--110044..VV22//110088..VV22 UUSSEERR M MAANNUUAALL Step 6. If the program is installed into SD card, please enter into ”Application” menu to find “Mobile Viewer” icon. Step 7.
KKGGUUAARRDD SSTTAANNDDAALLOONNEE DDVVRRSSHHAA--110044..VV22//110088..VV22 UUSSEERR M MAANNUUAALL Step 8. For first time using or Need some change on the Parameters, click the【Setup】 】button, you will enter into the window. Click [Play] button to enter into live display. Default Access point:Allow you select network type based on your mobile net environment. Server address: herein indicate public IP address connected to DVR or dynamic domain name used by DVR.
KKGGUUAARRDD SSTTAANNDDAALLOONNEE DDVVRRSSHHAA--110044..VV22//110088..VV22 UUSSEERR M MAANNUUAALL 5.10. Install & Operate (iPhone®) (A)Download iTunes Step 1. Visit Apple website http://www.apple.com/itunes/ to download & install the iTunes. Step 2. After download the file of iTunes , click ” ” icon to install it. Step 3. After finished installation of iTunes, click ” ”icon or system will enter the login page ,automatically. Step 4.
KKGGUUAARRDD SSTTAANNDDAALLOONNEE DDVVRRSSHHAA--110044..VV22//110088..VV22 UUSSEERR M MAANNUUAALL Step 5. Step 6. Step 7. The login page will display. Click ”STORE iTunes Store” option. Click on “Store Create Account” to create your own account. Click ”Continue” button to proceed next step. 94 All Rights Reserved www.kguardsecurity.
KKGGUUAARRDD SSTTAANNDDAALLOONNEE DDVVRRSSHHAA--110044..VV22//110088..VV22 UUSSEERR M MAANNUUAALL Step 8. Check the term and conditions, and then click ”Continue” button. Step 9. Create your personal account and fill out all information which was requested by system. After fill-out all information . Click ”Continue” button to proceed next step. Step 10. Fill in your personal info & click “Continue” button.
KKGGUUAARRDD SSTTAANNDDAALLOONNEE DDVVRRSSHHAA--110044..VV22//110088..VV22 UUSSEERR M MAANNUUAALL Step 11. Finished the register, and go to your email box to verify your account. Step 12. Click the link included in the email message. It will connect to the iTunes store and turn to iTunes interface. Step13. Sign in your account. The register of your iTunes store account has been done. 96 All Rights Reserved www.kguardsecurity.
KKGGUUAARRDD SSTTAANNDDAALLOONNEE DDVVRRSSHHAA--110044..VV22//110088..VV22 UUSSEERR M MAANNUUAALL Step 14. Click and then Key-in the characters “ASee” in the” search” column . For connecting cable, please contact your local i-Phone service. Or go to i-phone website for support : http://www.apple.com/support/iphone/ Step 15. Download and install the “ASee” program to your mobile by connecting cable. Step 16. After finishing installation, “ ASee” icon will be displayed to mobile phone interface.
KKGGUUAARRDD SSTTAANNDDAALLOONNEE DDVVRRSSHHAA--110044..VV22//110088..VV22 UUSSEERR M MAANNUUAALL Step 17. Click , “ ASee” icon to enter the main screen, as below: Functions 1 Channels select. 2 PTZ Lens control (Area Selection(ZOOM+、ZOOM-), Aperture(I+,I -), Focus(focus +, focus-)) PTZ Direction ( left, right, up, down) 3 4 Function buttons from left to right in turn are: Pause, Full-screen, Snapshot, setup, help and Access setup.
KKGGUUAARRDD SSTTAANNDDAALLOONNEE DDVVRRSSHHAA--110044..VV22//110088..VV22 UUSSEERR M MAANNUUAALL Step 19. Click “ ” button, to back to main screen. Step 20. Click “Play & Pause ” button, to view videos, remotely . 99 All Rights Reserved www.kguardsecurity.
KKGGUUAARRDD SSTTAANNDDAALLOONNEE DDVVRRSSHHAA--110044..VV22//110088..VV22 UUSSEERR M MAANNUUAALL 5.11. Installation & Operation (Blackberry Mobile) 5.11.1. Installation Step 1. Download and Install the Blackberry Desktop Manager on the computer. Step 2. Connect your Mobile to your PC via USB cable. Step 3. Open the Desktop Manager. Step 4. Choose ‘Application Loader’ from the Main Menu. Step 5. Click “Start” Button on the ”Add/Remove application” menu. 100 All Rights Reserved www.kguardsecurity.
KKGGUUAARRDD SSTTAANNDDAALLOONNEE DDVVRRSSHHAA--110044..VV22//110088..VV22 UUSSEERR M MAANNUUAALL Step 6. Click “Browse” button and check the “ASee.alx” file. Step 7. Click “Finish” button to finish the installation. 101 All Rights Reserved www.kguardsecurity.
KKGGUUAARRDD SSTTAANNDDAALLOONNEE DDVVRRSSHHAA--110044..VV22//110088..VV22 UUSSEERR M MAANNUUAALL 5.11.2. Setup & Operation Step 1. The Blackberry viewer will be installed to the “Downloads” directory. Step 2. Enter into the “Downloads” directory, and then click the “ASee’ icon. Step 3. Enter into the below interface. 1 ---Connect/disconnect 2 ---Full screen 3 ---Snapshot 4 ---Setup 5 ---Help 6 ---Next page 7 ---PTZ Control Step 4.
KKGGUUAARRDD SSTTAANNDDAALLOONNEE DDVVRRSSHHAA--110044..VV22//110088..VV22 UUSSEERR M MAANNUUAALL Step 5. Select the Network Type supported by Blackberry phone. Step 6. Click “ Step 7. Click “ ” button to save the setting. Next Page’ icon to search “Channel” option, and then choose the channel which you would like to display. 103 All Rights Reserved www.kguardsecurity.
KKGGUUAARRDD SSTTAANNDDAALLOONNEE DDVVRRSSHHAA--110044..VV22//110088..VV22 UUSSEERR M MAANNUUAALL Step 8. Click “ play’ icon to view video. Step 9. Click “Full screen” icon to enter into full screen display mode, again click the “Trackball” button of mobile to quit the full screen mode. Step 10. Click “ Next page” button to find the “PTZ Control” icon and enter into the mode. Now you could freely control your PTZ camera through your Mobile phone. 104 All Rights Reserved www.kguardsecurity.
KKGGUUAARRDD SSTTAANNDDAALLOONNEE DDVVRRSSHHAA--110044..VV22//110088..VV22 UUSSEERR M MAANNUUAALL Step 11. Click “Close” button to exit the program . For further information just click “Help” button to view the software’s Help instruction. if your mobile had connect to other DVR, you can delete it , as below. Step 1. Click the “ ” button to enter into the History List. Step 2. Highlight one record and click “Enter” button to enter into pop up menu.
KKGGUUAARRDD SSTTAANNDDAALLOONNEE DDVVRRSSHHAA--110044..VV22//110088..VV22 UUSSEERR M MAANNUUAALL Step 3. When selecting “Edit” option, system will allow you edit the history record. Step 4. When selecting “Delete” option, the history record will be deleted. 106 All Rights Reserved www.kguardsecurity.
KKGGUUAARRDD SSTTAANNDDAALLOONNEE DDVVRRSSHHAA--110044..VV22//110088..VV22 UUSSEERR M MAANNUUAALL 5.12. Android Mobile *Please make sure that the software is compatible with your Android Mobile. Step 1. Make sure your mobile have been connected to network and could download the software. Step 2. Enter into “Program” option and highlight “E-market” icon . Step 3. Enter into the “E-market” interface . Step 4.
KKGGUUAARRDD SSTTAANNDDAALLOONNEE DDVVRRSSHHAA--110044..VV22//110088..VV22 UUSSEERR M MAANNUUAALL Step 5. Highlight and install the program which was searched by system. Step 6. Proceeding to the next step for installation. Step 7. Enter into “Program” file and click “ ApkInstaller” icon. 108 All Rights Reserved www.kguardsecurity.
KKGGUUAARRDD SSTTAANNDDAALLOONNEE DDVVRRSSHHAA--110044..VV22//110088..VV22 UUSSEERR M MAANNUUAALL Step 8. Find the “ASee.apk” file you would like to install. Step 9. Click the software to install to your phone. Step 10. Enter into “Program” option to click “ ASee” icon . 109 All Rights Reserved www.kguardsecurity.
KKGGUUAARRDD SSTTAANNDDAALLOONNEE DDVVRRSSHHAA--110044..VV22//110088..VV22 UUSSEERR M MAANNUUAALL Step 11. Step 12. Enter into “ASee” main screen. 1 PTZ Direction 2 Zoom+ - 3 Aperture 4 Focus+ - 5 CH Selection 6 Play & Pause 7 Full/Normal Screen 8 Snapshot 9 Setup 10 CH change 11 Help Click “Setup” button(9), to set the “Device info”.
KKGGUUAARRDD SSTTAANNDDAALLOONNEE DDVVRRSSHHAA--110044..VV22//110088..VV22 UUSSEERR M MAANNUUAALL Step 13. Click “ ” button, to back to previous page. Step 14. Click “Play & Pause ” button, to view videos , remotely. When your DVR is connecting internet through router, you need to forward the port at the virtual server option of your router. For more information, please refer to Appendix (mobile) in this section, as below: 111 All Rights Reserved www.kguardsecurity.
KKGGUUAARRDD SSTTAANNDDAALLOONNEE DDVVRRSSHHAA--110044..VV22//110088..VV22 UUSSEERR M MAANNUUAALL Forwarding the port of Router for Mobile phone Step 1. Setup the IP address and port of DHCP(3),and the click on ”Apply” to confirm settings. *The DHCP setting is for your reference only, there are 2 types of different internet PPPoE & Static IP. 112 All Rights Reserved www.kguardsecurity.
KKGGUUAARRDD SSTTAANNDDAALLOONNEE DDVVRRSSHHAA--110044..VV22//110088..VV22 UUSSEERR M MAANNUUAALL Step 2. Click “Device” icon and then click “Mobile” icon. Step 3. key-in the user name and password as well as server port. *The port the mobile must the same as server port. 113 All Rights Reserved www.kguardsecurity.
KKGGUUAARRDD SSTTAANNDDAALLOONNEE DDVVRRSSHHAA--110044..VV22//110088..VV22 UUSSEERR M MAANNUUAALL Step 4. Click ”Apply” button. For customized support instructions of port forwarding ,due to the model of router is variety, please go to website: http://portforward.com/english/applications/port_forwarding/KGuard_KG-SHA_DVRs/KGuard_KG-SHA_DVRsindex.htm *For applying free Kguard DDNS , Please proceed to Appendix D. 114 All Rights Reserved www.kguardsecurity.
KKGGUUAARRDD SSTTAANNDDAALLOONNEE DDVVRRSSHHAA--110044..VV22//110088..VV22 UUSSEERR M MAANNUUAALL Глава 6. Спецификация Model Video Compression Video System Operation System Video Input / Output Audio Input / Output Audio Compression Display Frame Rate Playback Resolution Recording Frame Rate Recording Mode Recording Pack Time HDD Interface Network Interface Network Protocol Network Function USB 2.
KKGGUUAARRDD SSTTAANNDDAALLOONNEE DDVVRRSSHHAA--110044..VV22//110088..
KKGGUUAARRDD SSTTAANNDDAALLOONNEE DDVVRRSSHHAA--110044..VV22//110088..VV22 UUSSEERR M MAANNUUAALL Baghdad GMT + 03:00 ˇ Apr 1, 3:00 Oct 1, 4:00 Kuwait, Riyadh, Nairobi GMT + 03:00 Moscow, St.
KKGGUUAARRDD SSTTAANNDDAALLOONNEE DDVVRRSSHHAA--110044..VV22//110088..VV22 UUSSEERR M MAANNUUAALL Приложение B – Утилита воспроизведения Installation (Utility Software/Applications ) Step1. Step2. Insert the Installation CD into the CD-ROM. Execute ‘’Autorun.exe’’. and then click on ‘’Utility’’ button. *If your computer can’t execute the CD automatically, please click” ,finally click on “ ”(MY computer) and then click ” icon to execute it. 118 All Rights Reserved www.kguardsecurity.
KKGGUUAARRDD SSTTAANNDDAALLOONNEE DDVVRRSSHHAA--110044..VV22//110088..VV22 UUSSEERR M MAANNUUAALL Step 3. Click icon to install playback file. Step 4. The system will display the following setup procedure: Step 5. Click button to proceed to install playback software. 119 All Rights Reserved www.kguardsecurity.
KKGGUUAARRDD SSTTAANNDDAALLOONNEE DDVVRRSSHHAA--110044..VV22//110088..VV22 UUSSEERR M MAANNUUAALL Step 6. Click” Or you can click ” button to proceed to the installation process. button to change to file folder. 120 All Rights Reserved www.kguardsecurity.
KKGGUUAARRDD SSTTAANNDDAALLOONNEE DDVVRRSSHHAA--110044..VV22//110088..VV22 UUSSEERR M MAANNUUAALL Step 7. ” box, and then click After completed installation, Check ” button. *The Playback main screen will display. 121 All Rights Reserved www.kguardsecurity.
KKGGUUAARRDD SSTTAANNDDAALLOONNEE DDVVRRSSHHAA--110044..VV22//110088..VV22 UUSSEERR M MAANNUUAALL Playback Player Select the playback file you desired from the files. Please select the file with *.264 format or *.nvr. The record file backed-up by U.S.B Device or removable disk is with *.264 format, and DVD Recorder with *.nvr format. Play & Review Backup File Double click the record event at the right side of screen to start record file playback. 122 All Rights Reserved www.kguardsecurity.
KKGGUUAARRDD SSTTAANNDDAALLOONNEE DDVVRRSSHHAA--110044..VV22//110088..VV22 UUSSEERR M MAANNUUAALL The button functions from left to right in turn are as follows: All Functions Button Functions Start playing record file Play Pause the record file playback Pause Stop the record file playback Stop Rewind Rewind playing the record file at X2, X4, X8 and X16 speeds. Forward Forward playing the record file at X2, X4, X8 and X16 speeds. Play the record file frame by frame.
KKGGUUAARRDD SSTTAANNDDAALLOONNEE DDVVRRSSHHAA--110044..VV22//110088..VV22 UUSSEERR M MAANNUUAALL B = The total space was used by HDD per hour. Appendix D- Applying Free DDNS Host from Kguard Step 1. Step 2. Go to our website: http://global.kguardsecurity.com/main/index.aspx?flag=1 Click on If your IE browser was blocked ,please go to web site: http://kguard.org/ Step 3. The pop-up menu will display. 124 All Rights Reserved www.kguardsecurity.
KKGGUUAARRDD SSTTAANNDDAALLOONNEE DDVVRRSSHHAA--110044..VV22//110088..VV22 UUSSEERR M MAANNUUAALL Step 4. Key-in the information, below. Key-in your E-mail address. Setup your own password. Reconfirm your password Key-in your first name Key-in your last name Key-in authentic code For junk mail block, we highly recommended you to avoid use free E-mail, for example, Gmail , yahoo mail…。 Step 5. Step 6. Click on button. Define your own domain name. 125 All Rights Reserved www.kguardsecurity.
KKGGUUAARRDD SSTTAANNDDAALLOONNEE DDVVRRSSHHAA--110044..VV22//110088..VV22 UUSSEERR M MAANNUUAALL Step 7. After complete applying process , the status will display “check” symbol in green, and also display your domain name. *Please remind or write down this domain name. 126 All Rights Reserved www.kguardsecurity.
KKGGUUAARRDD SSTTAANNDDAALLOONNEE DDVVRRSSHHAA--110044..VV22//110088..VV22 UUSSEERR M MAANNUUAALL Appendix E- Applying free DDNS from internet Step 1. Please go to http://www.dyndns.com and Click “Get a free Domain name” button. Step 2. Click “Sign up free” icon. Step3. Choose free sign up Step 4. Click ” Renew Services” option, in order to create new account. 127 All Rights Reserved www.kguardsecurity.
KKGGUUAARRDD SSTTAANNDDAALLOONNEE DDVVRRSSHHAA--110044..VV22//110088..VV22 UUSSEERR M MAANNUUAALL Step 5. Create your own username, password, E-mail and enter the image numbers to create an account Step 6. After you created your account, the company will sent an e-mail to verify your e-mail account Step 7. Check your e-mail and see if you have received an e-mail from DynDNS. Click on the link in the e-mail to complete the verification. 128 All Rights Reserved www.kguardsecurity.
KKGGUUAARRDD SSTTAANNDDAALLOONNEE DDVVRRSSHHAA--110044..VV22//110088..VV22 UUSSEERR M MAANNUUAALL Step 8. Now, go to http://www.dyndns.com and log in your username and password. Step 9. Click ”MY Account” “My Hosts” option. Step 10. key-in your hostname, IP address and then click “Add To Cart”. 129 All Rights Reserved www.kguardsecurity.
KKGGUUAARRDD SSTTAANNDDAALLOONNEE DDVVRRSSHHAA--110044..VV22//110088..VV22 UUSSEERR M MAANNUUAALL Step 11. Click “Next” button. 130 All Rights Reserved www.kguardsecurity.
KKGGUUAARRDD SSTTAANNDDAALLOONNEE DDVVRRSSHHAA--110044..VV22//110088..VV22 UUSSEERR M MAANNUUAALL Step 12. Click “Activate Services” Step 13. When activation is successful, the webpage will display the message: 131 All Rights Reserved www.kguardsecurity.
KKGGUUAARRDD SSTTAANNDDAALLOONNEE DDVVRRSSHHAA--110044..VV22//110088..VV22 UUSSEERR M MAANNUUAALL Step 14. Click on ”Network” icon. 132 All Rights Reserved www.kguardsecurity.
KKGGUUAARRDD SSTTAANNDDAALLOONNEE DDVVRRSSHHAA--110044..VV22//110088..VV22 UUSSEERR M MAANNUUAALL Step 15. Step 16. Step 17. Step 18. Step 19. Step 20. Enable the DDNS Choose the DDNS Server Type Fill out the Hostname(you just applied) Fill out the Username(you just applied) Fill out the Password(you just applied) Click “Apply” button to Confirm the settings. Приложение F- Структурная диаграмма дисплея OSD Заголовок камеры Настройка цвета Экран Настройка приватности Настройка авточувст.
KKGGUUAARRDD SSTTAANNDDAALLOONNEE DDVVRRSSHHAA--110044..VV22//110088..VV22 UUSSEERR M MAANNUUAALL Главное меню Приложение G - Часто возникающие вопросы (FAQ) 1. Q: What can I do if the system does not detect the HDD? A: Check the data and power cables and make sure they are securely connected. B: For new H.D.D, you have to format it first. C: Make sure that the power of adaptor is correct, 12V/3A. 2.
KKGGUUAARRDD SSTTAANNDDAALLOONNEE DDVVRRSSHHAA--110044..VV22//110088..VV22 UUSSEERR M MAANNUUAALL 4. Q: Can the DVR have problems if it gets too hot, how can I prevent this? A: Please place the DVR in a place where there is good air circulation and away from high temperatures to increase stability and life of the DVR. 5.
KKGGUUAARRDD SSTTAANNDDAALLOONNEE DDVVRRSSHHAA--110044..VV22//110088..VV22 UUSSEERR M MAANNUUAALL www.yahoo.com www.google.com @yahoo.com.tw smtp.mail.yahoo.com.tw pop.mail.yahoo.com.tw @yahoo.com smtp.mail.yahoo.com pop.mail.yahoo.com @gmail.com smtp.gmail.com(465/587) pop.gmail.
KKGGUUAARRDD SSTTAANNDDAALLOONNEE DDVVRRSSHHAA--110044..VV22//110088..VV22 UUSSEERR M MAANNUUAALL Производитель Адреса сайтов технической поддержки смартфонов Поддержка (web-сайт) Blackberry http://na.blackberry.com/eng/support/ http://uk.blackberry.com/support/ http://fr.blackberry.com/support/ http://sa.blackberry.com/support/ Nokia http://europe.nokia.com/support http://www.nokia.ca/get-support-and-software http://www.nokiausa.com/get-support-and-software/product-support Sony Ericsson http://www.
KKGGUUAARRDD SSTTAANNDDAALLOONNEE DDVVRRSSHHAA--110044..VV22//110088..
KKGGUUAARRDD SSTTAANNDDAALLOONNEE DDVVRRSSHHAA--110044..VV22//110088..
KKGGUUAARRDD SSTTAANNDDAALLOONNEE DDVVRRSSHHAA--110044..VV22//110088..VV22 UUSSEERR M MAANNUUAALL GARMIN GOOGLE BlackBerry Android Android Garminfone Nexus One BlackBerry 8900/ BlackBerry 9000 Bold/ BlackBerry 9100 Pearl BlackBerry (9105 Pearl) /BlackBerry 9630 Tour /BlackBerry 9650 Tour2 /BlackBerry 9700 Onyx (Bold, 9020)/8900/8910/8980/9000/9630/9650/9700/9780/9800 i-Phone SIEMENS i-Phone Windows Apple iPhone 3G/3GS (OS 3.
KKGGUUAARRDD SSTTAANNDDAALLOONNEE DDVVRRSSHHAA--110044..VV22//110088..VV22 UUSSEERR M MAANNUUAALL ST3500320SV 500GB 32M ST3750330SV 750GB 32M ST31000340SV 1TB 32M SV35.4 ST3320410SV 320GB 16M SV35.
KKGGUUAARRDD SSTTAANNDDAALLOONNEE DDVVRRSSHHAA--110044..VV22//110088..VV22 UUSSEERR M MAANNUUAALL WD3200AAJS 320GB 8M WD5000AADS 500GB 32M WD10EADS 1TB 32M WD RE4-GP WD2002FYPS 2TB 64M Hitachi Модель WD Caviar Green Ёмкость (GB) Кеш (M) ) HDT721032SLA360 320GB 16M HDT725032VLA380 320GB 8M HDS721010KLA330 1TB 32M CinemaSta HCT721075SLA380 750GB 8M SAMSUNG Модель Ёмкость (GB) Кеш (M) ) HD502HI 500GB 16M HD103SI 1TB 32M 142 All Rights Reserved www.kguardsecurity.
KKGGUUAARRDD SSTTAANNDDAALLOONNEE DDVVRRSSHHAA--110044..VV22//110088..VV22 UUSSEERR M MAANNUUAALL 143 2011-09-01 All Rights Reserved www.kguardsecurity.