
Owner's manual


ENGLISH
Chapter 4: Using the DVR
DVR User’s Manual
53
Email Alarm Nocaons
To set up an email for alarm nocaons, do the following:
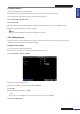
1 In preview mode, right-click on the mouse to display the Pop-up menu.
Be sure that the DVR network connecon is properly congured before proceeding with the email setup.
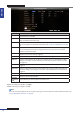
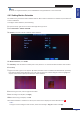
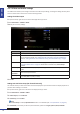
2 Select Main Menu > DEVICE > ALARM.
3 Check the E-mail check box and click E-mail Setup.
4 On SSL, check Enable check box if your email server needs the SSL vericaon. Check with your email service
provider for the applicable seng.
5 Enter the SMTP port and SMTP Server of the sending email server, the email address and password of the sender in
Sender and Sender PWD respecvely.
Note:
By default, the SMTP port is 25 for email without SSL vericaon. For Gmail server or for email that needs SSL
vericaon, the SMTP port is 465, by default. Check with your ISP for the correct seng.
6 In Receiver, enter the email address where the email alarm is to be sent. In Interval, select an email sending interval.
7 Aer all sengs are complete, click Apply.
8 When data saving is complete, click OK.
Note:
When email setup is complete, click Test to check if your email sengs are properly congured.
4.4.3 PTZ Setup
Aer the PTZ speed dome is properly installed via RS-485 connecon, you can customize its sengs using the PTZ
SETUP menu.
To set up the PTZ camera seng, do the following:
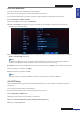
1 In preview mode, right-click on the mouse to display the Pop-up menu.
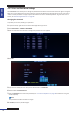
2 Select Main Menu > DEVICE > PTZ.
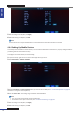
3 Select the channel which the PTZ camera is connected to.
4 Set the PTZ Protocol, Baud Rate, Data BIT, Stop BIT, Parity, Address code.
4 Enable or disable Cruise mode.