
Owner manual


Table Of Contents
- About this Manual
- Chapter 1: Product Overview
- Chapter 2: Installation
- Chapter 3: Getting Started
- Chapter 4: Using the DVR
- Chapter 5: KGuard Web Client
- 5.1 Login
- 5.2 The Interface
- 5.3 Live Viewing
- 5.4 Searching and Playing Recorded Videos
- 5.5 Remote Settings
- 5.6 Local Settings
- Chapter 6: Using KView Series Software
- Chapter 7: Troubleshooting & FAQ
- Appendix: Specifications
ENGLISH
Chapter 2: Installaon
12
DVR User’s Manual
Chapter 2: Installaon
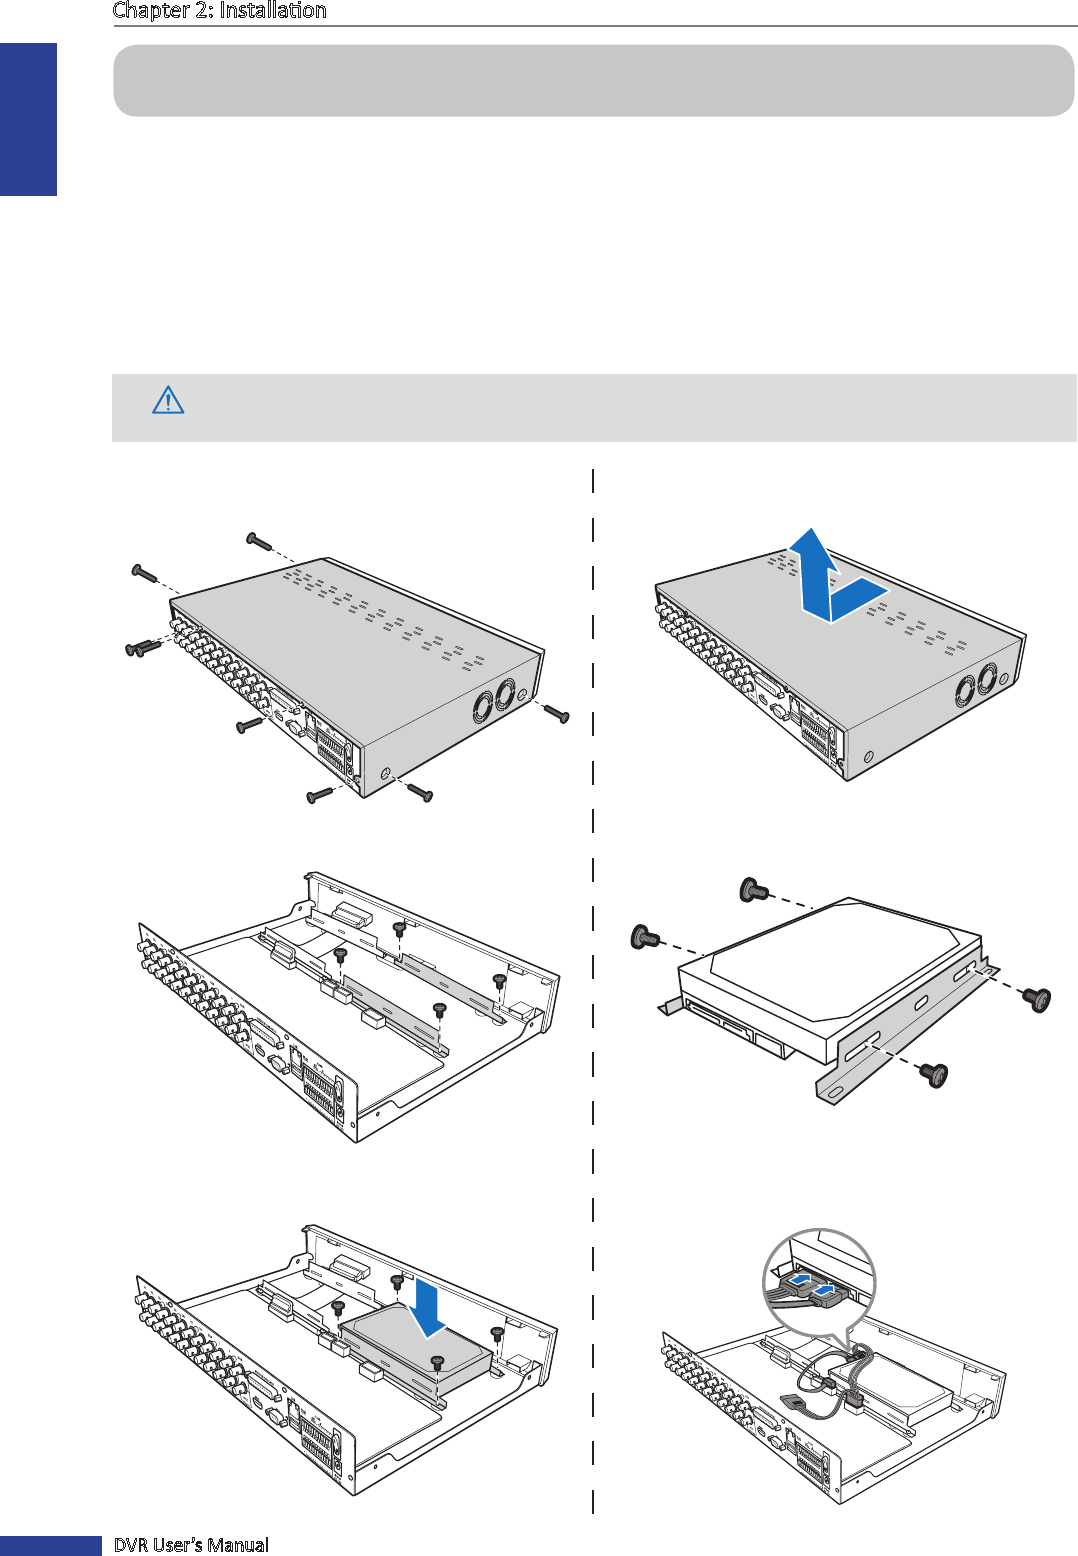
2.1 Installing the Hard Disk Drive
Depending on the package you have purchased, the hard disk drive may be included in the full package. If it is not pre-
installed, follow the steps below to install the hard disk drive.
You can install up to two 3.5” SATA hard disk drive into your DVR. Be sure to remove the power adapter before
installing the hard disk drive.
DO NOT install or remove hard disk drive while the device power is turned on.
1 Loosen the screws in the le, right, and rear sides as
shown.
2 Push back then li up the cover to remove it.
3 Detach the screws to remove the HDD bracket. 4 Aach the HDD to the bracket using 4 screws.
5 Aach the bracket back to the compartment using 4
screws.
6 Connect the data and power cables to the hard disk
drive (HDD) and the DVR.