
Installation Guide

STEP IV. Installation
When you have a design and system selected, installation can be a snap if you follow some simple step by step
instructions.
Note: Remember that landscape lighting is very flexible, so if you are not sure about a location of a light, it is easy to move it at
any time.
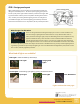
4 Step by Step Instructions
1. You will first want to choose the location of your transformer. This is where all the cables from the
lights will be routed underground. There are plug-in and hardwire transformer models available. The
transformer should be mounted near an outside grounded outlet when using the “plug-in” model.
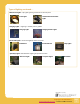
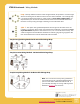
2. Next, place the fixtures near where they will be installed. Lay out your cable from
your transformer to the fixtures according to the wiring method notated in your
design, then install the lights to the cable and mount them as necessary. Wires are
connected together either by a quick connect, or by twisting them and using a Wire
Nut. To ensure a proper connection, put a small amount of sealant in the Wire Nut
and use electrical tape to seal the connection. You may also solder the wires to-
gether if able..
Note: After all fixtures are connected, you should test the voltage at each fixture to ensure the voltage is between
10.8V – 12.5V. You might also want to look at the system at night before completing step 3.
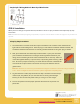
3. Dig trenches for the cable, they should be 4-6” deep. Use some sort of landscape
material (soil, dirt, pebbles, etc.) to cover the cable. If running cable through
bushes, you do not necessarily need to bury it, so long as it is out of sight.
4. Turn on the system to ensure proper operation. Be sure to test any timers and
photo cells.
Questions or comments?
www.lightingdirect.com - Toll Free: 800 375-3410
Page
7
Broughttoyouby:
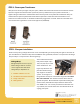
Sample Split-T Wiring Method - More Equal Distribution