
Installation Guide
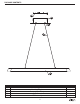
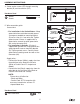
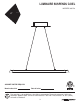

1. The hanging length of the cable (D) for this
fixture is adjustable. Hold the fixture canopy
(A) up against the ceiling to determine the
desired length before the entire fixture is
assembled.
The cable (D) is held in place by a
compression fitting (C). Push up, and hold,
the fitting’s spring loaded tube (C) to release
the cable (D) for adjustment.
A
D
C
1b
1a
C
D
4
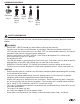
ASSEMBLY INSTRUCTIONS
PREPARATION
Before beginning assembly of product, make sure all parts are present. Compare parts with package
contents list. If any part is missing or damaged, do not attempt to assemble the product.
Estimated assembly time: 30 minutes to 1 hour
Tools Required for Assembly (not included): Phillips screwdriver, flathead screwdriver, wire strippers,
electrical tape, ladder, safety glasses.
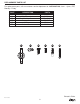
Short Machine
Screw
x 2
BB
Hardware Used
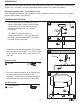
3
B
BB
Outlet Box
Arm
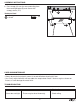
3. Orient the mounting bracket (B) so that the arms
are facing away from the outlet box (not
included). Connect the mounting bracket (B) to
the outlet box with short machine screws (BB).
Hardware Used
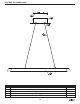
2. Temporarily raise mounting bracket (B) to ceiling.
Mark location for anchor (DD). Use 9/32 size drill
to drill holes for anchor (DD). Insert anchor (DD)
into hole.
x 2Anchor
DD
2
Ceiling
DD
B