
User Guide


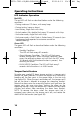


Step 2
Mounting Instructions:
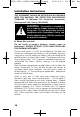
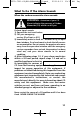
CAUTION: YOUR SMOKE/CO ALARM IS SEALED AND
THE COVER IS NOT REMOVABLE!
1. To help identify the date to replace the unit, write the "Replace
by" date (10 years from initial power up) in permanent marker
in the space provided on the side of the alarm. See Alarm
Replacement section for additional information.
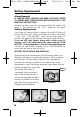
2. Remove the mounting bracket from the back of the alarm by
holding the mounting bracket and twisting the alarm in the
direction indicated by the “OFF”arrow on the alarm cover.
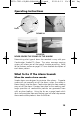
3. Selecting the proper location for your Smoke/CO Alarm, as
described on Pages 8-11. To ensure aesthetic alignment of the
alarm with the hallway, or wall, the “A” line on the mounting
bracket must be parallel with the hallway when ceiling
mounted, or horizontal when wall mounted.
4. Install the alarm on the mounting bracket and rotate the
alarm in the direction of the “ON” arrow on the cover until
the alarm ratchets into place (this ratcheting function allows
for aesthetic alignment). Note: The alarm will mount to the
bracket in 4 positions (every 90 degrees).
5. Two labels are included with your alarm. They have important
information on what to do in case of an alarm. Add the
phone number of your emergency service provider (Fire
Department or 911) in the space provided. Place one label
next to the alarm after it is mounted, and one label near a
fresh air source such as a door or window.
6. Remove the red cardboard from the battery compartment,
install batteries, close battery door.
11
!
Installation Instructions
2553-7201-00(KN-COSM-BA)_V5.qxd:_ 2013.9.13 10:39 AM Pag