ITEM #0143820 0205829 STAINLESS STEEL KITCHEN SINK MODEL #PSS604S PSS604B Español p. 9 ATTACH YOUR RECEIPT HERE Purchase Date Questions, problems, missing parts? Before returning to your retailer, call our customer service department at 1-866-389-8827, 8 a.m. - 8 p.m., EST, Monday - Friday.
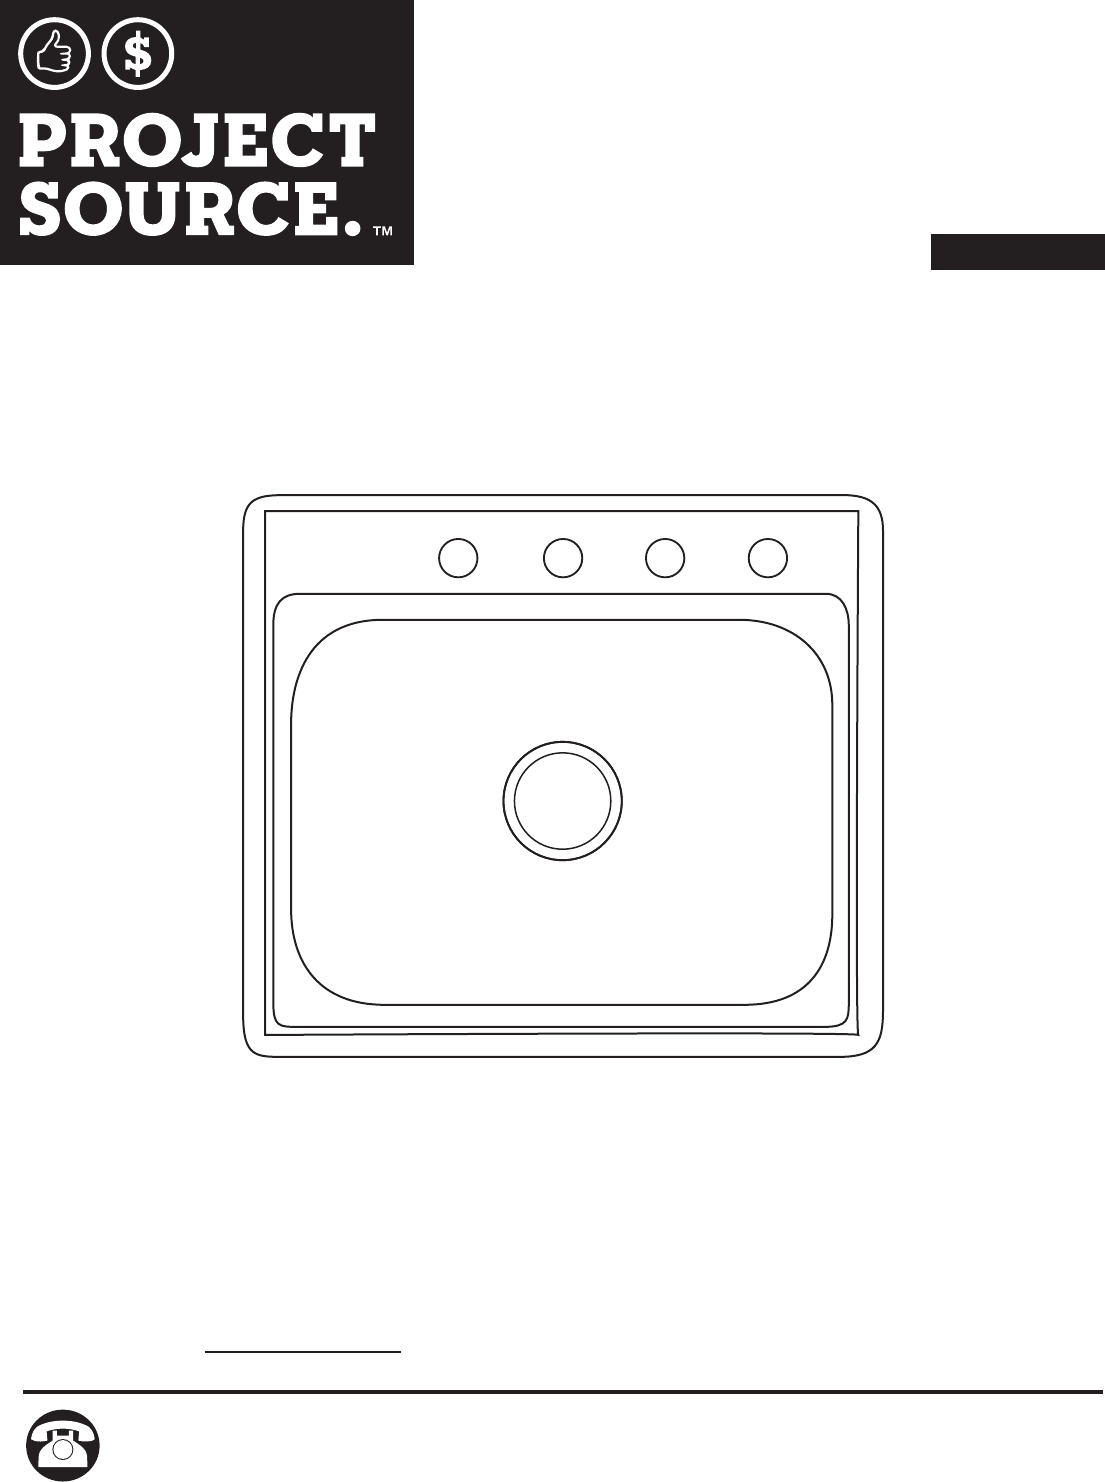
PRODUCT SPECIFICATIONS SPECIFICATIONS 25 in. x 22 in. x 6 in. SPECIFICATIONS 25 in. x 22 in. x 7 in. 7 6 in. Depth SAFETY INFORMATION Please read and understand this entire manual before attempting to assemble, operate or install the product. WARNING Risk of personal injury. Metal surfaces are sharp and can cause severe cuts. Use gloves and handle sink edges carefully. CAUTION It is recommended all countertops be cut and installed by an approved or certified professional.
PACKAGE CONTENTS A PART A DESCRIPTION Sink QUANTITY 1 HARDWARE CONTENTS (shown actual size) AA Clip Qty. 6 + 2 extra PREPARATION Before beginning assembly of product, make sure all parts are present. Compare parts with package contents list and diagram above. If any part is missing or damaged, do not attempt to assemble the product. Contact customer service for replacement parts.
INSTALLATION INSTRUCTIONS 1. Remove Existing Sink 1 A. Leave the faucet and drain outlet in place. A B. Shut off water supply valves (usually under sink). C. Relieve pressure by opening hot and cold faucet valves. Let water run until it stops flowing. D. Disconnect the supply lines from the water supply valves. Supply Lines E. Disconnect the drain fitting from the waste trap. Waste Trap F. Remove frame or rim fasteners around underside of old sink. Supply Valves G.
INSTALLATION INSTRUCTIONS 4. Prepare a New Countertop (using provided template) A. Template is located on the outside of the carton. Cut along dotted line. Measure the cutout line and compare to all sink dimensions. The cutout line should be 3/4 in. smaller than overall sink dimension. 4 B. Trace on the countertop completely around the edge of the template. C. Drill a pilot hole inside the cutting line. ou C D. Using a jigsaw, cut along the inside line to cut the opening in the countertop.
INSTALLATION INSTRUCTIONS 7. Insert Sink and Tighten Mounting Clips A. With sink (A) in the upside down position, place a continuous and generous bead of silicone sealant or plumber’s putty around the entire perimeter of the rim. This serves as a watertight seal. 7 Countertop AA B. Turn clips (AA) back as noted in diagram. A C. Lift sink (A), turn face up, and lower into the countertop cutout opening. Countertop AA D. Line up front rim of sink (A) with the front edge of the counter. E.
CARE AND MAINTENANCE Rinse and towel dry to keep sink shining and relatively free of water spots, especially if you have hard water. To clean the sink, use the mildest procedure that will do the job, generally liquid detergent and water. Rinse and dry. To avoid hard water spots, wipe sink dry with clean soft towel after use. CAUTION. Steel wool pads leave tiny particles that may cause rust spots. Rubber mats are acceptable if removed after each use. Chlorine bleach can cause corrosion and pitting.
LIMITED LIFETIME WARRANTY The manufacturer warrants this product to be free of manufacturing defects in material and workmanship under normal residential usage for the lifetime of the sink. Warranties are not applicable to products sold by unauthorized resellers. The consumer accepts responsibility to research the integrity and reputation of the reseller to ensure they are authorized to sell and provide appropriate pre purchase and post purchase service.
ARTÍCULO #0143820 0205829 FREGADERO DE COCINA DE ACERO INOXIDABLE MODELO #PSS604S PSD604B ADJUNTE SU RECIBO AQUÍ Fecha de compra ¿Preguntas, problemas, piezas faltantes? Antes de volver a la tienda, llame a nuestro Departamento de Servicio al Cliente al 1-866-389-8827, de lunes a viernes de 8 a.m. a 8 p.m., hora estándar del Este.
63,5 cm 63,5 cm 39,37 cm 15,25 cm 5 5 , 9 cm ESPECIFICACIONES 63,5 cm x 55,9 cm x 17,78 cm 55, 9 c m ESPECIFICACIONES 63,5 cm x 55,9 cm x 15,25 cm 17,78 cm de profundidad de profundidad 54,61cm 54,61cm 39,37 cm ESPECIFICACIONES DEL PRODUCTO INFORMACIÓN DE SEGURIDAD Lea y comprenda completamente este manual antes de intentar ensamblar, usar o instalar el producto. ADVERTENCIA Riesgo de lesiones personales. Las superficies de metal son filosas y pueden causar cortes graves.
CONTENIDOS DEL PAQUETE A PIEZA A DESCRIPCIÓN Fregadero CANTIDAD 1 ADITAMENTOS (se muestran en tamaño real) AA Abrazadera Cant. 6 + 2 adicionales PREPARACIÓN Antes de comenzar a ensamblar el producto, asegúrese de tener todas las piezas. Compare las piezas con la lista de contenido del paquete y el diagrama anterior. No intente ensamblar el producto si faltara alguna pieza o si éstas estuvieran dañadas. Póngase en contacto con el Departamento de Servicio al Cliente para obtener piezas de repuesto.
INSTRUCCIONES DE INSTALACIÓN 1. Retire el fregadero existente A. Deje el grifo y la salida de desagüe en el lugar. 1 A B. Cierre las válvulas de suministro de agua (generalmente se encuentran debajo del fregadero). C. Abra las válvulas del gripo de agua caliente y fría para liberar la presión. Deje que el agua corra hasta que deje de fluir. D. Desconecte las tuberías de suministro desde las válvulas de suministro de agua. Tuberías de suministro Sifón de desechos E.
INSTRUCCIONES DE INSTALACIÓN 4. Prepare una cubierta prefabricada nueva (usando la plantilla proporcionada) 4 A. La plantilla está ubicada en el exterior de la caja. Corte por la línea punteada. Mida la línea de corte y compare con todas las dimensiones del fregadero. La línea de corte debe ser 1,27 cm más pequeña que la dimensión general del fregadero. B. Marque sobre la cubierta prefabricada todo alrededor del borde de la plantilla. rta a ie a d ub ric C fab e pr C.
INSTRUCCIONES DE INSTALACIÓN 7. Inserte el fregadero y apriete las abrazaderas de montaje A. Con el fregadero (A) en posición invertida, coloque un cordón continuo y abundante de sellador de silicona o masilla de plomero alrededor de todo el perímetro del borde. Esto sirve como sello impermeable. 7 Cubierta prefabricada AA B. Gire las abrazaderas (AA) hacia atrás como se indica en el diagrama. A C. Levante el fregadero (A), colóquelo boca arriba y bájelo hacia la abertura de la cubierta prefabricada.
CUIDADO Y MANTENIMIENTO Enjuague y seque con una toalla para mantener el fregadero brillante y relativamente sin marcas de agua, especialmente si tiene agua dura. Para limpiar el fregadero, use el procedimiento más suave, generalmente detergente líquido y agua. Enjuague y seque. Para evitar marcas de agua dura, seque el fregadero con una toalla suave y limpia después de usarlo. PRECAUCIÓN. Las almohadillas de lana de acero dejan partículas pequeñas que pueden causar puntos de óxido.
GARANTÍA LIMITADA DE POR VIDA El fabricante garantiza que este producto no tiene defectos de fabricación en el material ni en la mano de obra bajo uso residencial normal por el período de duración del fregadero. Las garantías no se aplican a productos vendidos por revendedores no autorizados. El consumidor acepta la responsabilidad de investigar la integridad y reputación del revendedor para asegurar que esté autorizado para vender y proporcionar un servicio adecuado previo y posterior a la compra.