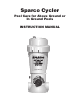
Sparco Cycler Pool Care for Above Ground or In Ground Pools INSTRUCTION MANUAL CYCLER MODEL 5510
TABLE OF CONTENTS Introduction 3 Swimming Pool Tips 3 Start-up and Operation 4 Replacing Sparco Chamber 5 Replacing Control Dial O-Rings 6 Replacing Cap O-Ring 6 Replacing Knob 6 Winterizing 7 Parts List 7 In Ground In-Line Installation 8 Above Ground Filter Installation 9 Above Ground Base Installation 10 For Proper Performance 11 Warranty Back Page For information on King Technology’s entire product line, visit our website at www.kingtechnology.
Welcome to easier pool care that ensures crystal clear, sparkling water in your pool. This manual will explain how to install and operate the Sparco Cycler for a more enjoyable experience with less work and worry and more time relaxing and having fun. CYCLER MODEL 5510 Sparco Cycler Sparco Chlorine Chamber The Sparco Cycler is on constant watch dispensing chlorine to control bacteria and provide a protective bank of sanitizer for your pool.
Start-up and Operation 1. 2. Add a stabilizer or conditioner to the pool at the beginning of the season if the stabilizer level is below 20 ppm. This will prevent chlorine burn off. Follow manufacturer's directions carefully. Shock the pool with chlorine to rid water of all contaminants before beginning. Follow manufacturer's directions carefully. 3. Insert chamber into Sparco Cycler.
Replacing a chamber CAUTION Read Carefully – USE ONLY the factory recommended replacement chamber. (See label.) DO NOT USE any other chamber or bulk chemical tablets in the Sparco Cycler. Use of any other product could result in over chlorination, bleached liners, unsafe pool conditions, fire or explosion. Warranty will be void if the correct chamber is not used. MIN 1. Turn off pump. Turn dial to Minimum.
SPARCO Cycler Maintenance Replacing the Control Dial O-Rings Replacing Cap O-Ring 1. • 1. 2. • Using a needle nose pliers, find the snap ring tail located at approximately the five o'clock position under the control dial. Hold cap in front of you upside down with the o-ring groove facing up. Place one end of o-ring into cap groove at the point closest to you. Hold o-ring down with the thumb and forefinger of one hand. • Pull down and out of the groove. 2. 3. 4.
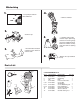
Winterizing 1. Turn pump off and turn dial to Minimum. • 4. • Remove chamber. MIN. 2. • 3. Remove cap. 5. If chamber still contains chlorine wrap in plastic bag and store in shed or garage away from children and pets. Make sure chamber is away from open flame or anything metal. • • Unscrew knob in the back of Sparco Cycler. Allow all water to drain. 6. Replace the cap and knob loosely. • Parts List 8 9 10 CYCLER DIAGRAM/PARTS LIST REF. # PART NUMBER DESCRIPTION QTY. REQ.
In ground, In-Line Installation TOOLS NEEDED: AUTOMATIC WATER TREATMENT SYSTEM Pipe Wrench Install after all equipment and as far as possible from heater. Call 800-222-0169 for an In Ground test cap to use at start-up to ensure proper back pressure.
TOOLS NEEDED Above Ground Filter Installation Screwdriver 1. 2. 3. PIPE TH READ Pipe Wrench PIPE TH READ MATERIALS NEEDED: Pipe Thread Sealant PIPE TH READ Following pipe thread sealant directions, brush sealant on filter threads. 4. Water CYCLER Meter ed Pool Screw nipple into the filter return. Brush sealant on one threaded end of nipple. 5. Purifier Water CYCLER Meter ed Pool Tighten turning 1 to 2 revolutions with wrench. DO NOT OVER TIGHTEN. 6.
Above Ground Base Installation TOOLS NEEDED: PUMP Screwdriver ATTENTION BUILDER: Call 800-222-0169 for an In Ground test cap to use at start-up to ensure proper back pressure. FILTER AUTOMATIC WATER TREATMENT SYSTEM Wrench TO POOL MATERIALS NEEDED: Pipe Thread Sealant PIPE THREAD SEALANT The Sparco Cycler should always be installed between the filter and pool (or between heater and pool if applicable). 1.
For Proper Performance 1) Run pump for at least 6 hours per day at high speed (at least 40 gpm). If the pump will run on low speed 24 hours per day or less than 6 hours per day on high speed, you must bleed the air while the pump is on by unscrewing the cap knob until water appears. Then screw the knob back on. Repeat this process each time the cap is removed for any reason. A. With High GPMS Install T-fittings exactly as shown.
Limited One-Year Warranty King Technology, Inc. warrants to the original purchaser this unit will be free from any defects in workmanship and/or material, for a period of one (1) year from the date of original purchase. This warranty covers body, cap and control dial, but specifically excludes o-rings. King Technology at its option may replace any defective parts or the entire unit without charge after it is determined what is needed to correct any deficiency.