Owner's Manual Original Instructions Window Type Air Conditioner Thank you for choosing our product. Please read this Owner’s Manual carefully before operation and retain it for future reference. If you have lost the Owner's Manual, please contact the local agent or visit www.gree.com or send an email to global@cn.gree.com for the electronic version.
GJC15BY-A6NRNC5A GJC15BY-A6NRND2A
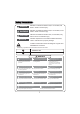
Contents Operation and Maintenance Installation Operation Notices Installation Notice Safety Precautions ..........................1 Precautions.....................................4 Parts Name.....................................5 Installation and Maintenance.........17 Preparation before installation.......19 Window Types and Requirements...20 Operation Guide Function and Control.......................6 Introduction of remote controller ....9 Instruction for fan direction adjusting..................
This appliance is not intended for use by persons (including children) with reduced physical, sensory or mental capabilities or lack of experience and knowledge, unless they have been given supervision or instruction concerning use of the appliance by a person responsible for their safety. Children should be supervised to ensure they are away from the appliance.
Please read this operating manual carefully before operating the unit. Caution, risk of fire. Before use the appliance, read the owner’s manual first. Before install the appliance, read the installation manual first. Before repair the appliance, read the service manual first. The figures in this manual may be different with the material objects, please refer to the material objects for reference.
WARNING: Do not use means to accelerate the defrosting process or to clean, other than those recommended by the manufacturer. The appliance shall be stored in a room without continuously operating ignition sources (for example: open flames, an operating gas appliance or an operating electric heater.) Do not pierce or burn. Be aware that refrigerants may not contain an odor. Adopt R32 flammable refrigerant. When maintaining or disposing the unit, the refrigerant inside the system must be eliminated.
DANGER Indicates a hazardous situation that, if not avoided, will result in death or serious injury. WARNING Indicates a hazardous situation that, if not avoided, could result in death or serious injury. CAUTION Indicates a hazardous situation that, if not avoided, may result in minor or moderate injury. NOTICE Indicates important but not hazard-related information, used to indicate risk of property damage. Indicates a hazard that would be assigned a signal word WARNING or CAUTION.
Safety Precautions CAUTION When the air filter is to be removed, do not touch the metal parts ofthe unit. It may cause an injury. ! When the unit is to be cleaned, switch off, and turn off the circuit breaker. Do not clean unit when power is on as it may cause fire and electric shock, it may cause an injury. ! Stop operation and close the window in storm or hurricane. Operation with windows opened may cause wetting of indoor and soaking of household furniture.
Safety Precautions WARNING CAUTION “ ” WARNING Operation of Current Device NOTICE: Please contact Customer Service. with a new cord - please contact Customer Service.
Precautions WARNING Air Conditioner should be properly grounded. Incorrect grounding may cause electric shock. purpose socket. Otherwise, it may cause r, otherwise the remote controller may be broken. o not spray water on air conditioner. It may cause electric shock or mal unction. personal injury or damage. r, or put heavy objects. It may cause damage or personal injury. n. aning air conditioner. Otherwise, it may cause electric shock. ic shock or damage.
Parts Name Air outlet frame Fan direction adjusting rod Control panel Air-in panel Power cord NOTE:Panel outlook picture,just for reference,please take the real unit as standard.
Function and Control After putting through the power, air conditioner will give out a sound and indicators on control panel will be on. After that, you operate the air conditioner through remote controller or control panel. Light indicates the unit is in the temperature or delay time Set mode.
Press this button can turn on or turn off air conditioner. NOTE:Press this button to turn on air conditioner, the unit will operate in Energy Save mode; if the unit is energized after power failure, the unit will still operate according to the status before power failure. Mode button Press this button can your required operation mode in turn. Corresponding indicator will be on.
Filter check button After fan rotates for 250h totally, lamp of cleaning filter is on to remind customer clean it. Note: When user cleaned the filter, press Filter check button to clear the operation time. Meanwhile, the warning indicator will turn off. ȑ ȑ/ button ȑ Under temperature setting status, after each pressing of “ ȑ ” or “ ” button, temperature will increase or decrease 1°F. Temperature setting range: 61~86°F.
Introduction of remote controller Note: This is a general use remote controller, it could be used for the air conditioners with multifunction; For some function, which the model doesn’t have, if press the corresponding button on the remote controller that the unit will keep the original running status.
MODE button Each time you press the button, a mode is selected in a sequence that goes from AUTO, COOL, SAVE, FAN and DRY, as the following: AUTO COOL SAVE FAN DRY - / + button Pressing + or - button once will increase or decrease set temperature by 1°F(°C). Hold + or - button for 2s, set temperature on remote controller will change quickly. Release the button after your required set temperature is reached.
SLEEP button Press this button to go into the SLEEP operation mode. Press it again to cancel this function. This function is available in COOL, HEAT (Only for models with heating function) or DRY mode to maintain the most comfortable temperature for you. TIMER button Press this button to initiate auto-on/auto-off timer.Turning on the unit with timer of remote controller, the unit will operate in energy-saving mode.To cancel auto-timer program, press this button twice.
Instruction for fan direction adjusting You can adjust the fan direction adjusting rod to select left&right air outlet direction according to your requirement. Fan direction adjusting rod You can adjust the air outlet frame to select up&down air outlet direction according to your requirement.
Clean and Maintenance WARNING Turn off the air conditioner and disconnect the power before cleaning the air conditioner to avoid electric shock. ater to avoid electric shock. air conditioner. 1. Open the panel Pull the groove at both sides of panel forcibly to open (below 113°F) dissolved with neutral abluent, and then put it under the shady place. NOTICE: ation environment , you can increase the clean times.
Malfunction analysis General phenomenon analysis Please check below items before asking for maintenance. If the problem still can't be solved, please contact dealer or professional person. Phenomenon Troubleshooting of ! " Air conditioner can't operate $ Solution Wait after power recovery.
Whether air outlet or air inlet is blocked? Under heating mode, whether indoor temperature is reached No fan blowed to set temperature? out from air conditioner Whether heating mode is started up just now? Eliminate the obstacles. The unit will stop blowing fan after reaching to set temperature. In order to prevent cold air, air conditioner will delay for a while to be started up, which is the normal phenomenon.
Note: E malfunction code is only applicable fo $ F1/F2/F4/FJ malfunction codes are only applicable for electric WARNING If there's below phenomenon, please turn off the air conditioner and disconnect the power immediately. After that, please contact dealer at once. ^ ^_ " ! ration. ^_ " ! ^ ! ! y.
Installation and Maintenance WARNING `! * p { ! Z% $ Selection of Installation Location Basic requirement I f | $ != } _ * $ ? Q _
Requirements for Electric Connection Safety precaution 1. Must follow the electric safety regulations when installing the unit. and air switch. 3. Make sure the power supply matches with the requirement of air conditioner. hazard or malfunction. 4. Please make sure the power supply complies with the requirement of air conditioner. Unstable power supply or wrong wiring may lead to electric 5. Properly connect the live wire, neutral wire and grounding wire of power socket. 6.
Preparation before installation Tools for installation Phillips screwdriver Level bar Screwdriver Scissors Pencil Measuring tape Window type unit Products and spare parts list Sealing strip ( without adhesive) Upper guide rail Sealing strip ( with adhesive)(2) Sponge Sealing strip ( with adhesive)(2) Type A screw (10) Remote controller Type B screw (2) Batteries R1 Sealing sponge of flexible screen(2) Left tripod (1) Right tripod (1) Type C screw (4) Type E screw (4) Type F screw (2)
Window types and requirements NOTICE: The description for below installation is for the standard window. If it’s other types of window, you may need to adjust the window. $ , you may not need for details. strap, brick or metal.
Installation procedure Location How to install: Choose a location where there are no any obstacle surrounding the unit, and the plug is accessible. Choose the installation space according to the following diagram. The distance between the air conditioner and the around obstacles should meet the requirement as below: over 300mm (upper side), over 500mm (left side), over 500mm (right side), over 1500mm (front side) and over 500mm (rear side).
Note: When removing the front case, pull out the bottom and then lift the front case upwards to remove it. control panel screw front case screw screw screw at the two sides of outer case, and then pull out the main unit from the outer case. (It is advised that two persons handle this operation, one person holding the outer case and the other person holding the clasp of main unit and pulling out the main unit from outer case.
5.Tear off the binder fixing gasket and then take out the gasket and binder. gasket Step 2: Install upper guide rail 1. Tear off the paster at the back of sealing strip, and then align it at the bottom edge of upper guide rail to stick the sealing strip at the bottom of upper guide rail. upper guide rail upper guide rail sponge lower guide rail rails.
2. Stick one sealing strip respectively on the left side and right side of flexible screen installation frame, as shown in the figure. 3. 4 A: Tighten screws from inside to outside of outer case. B: Tighten screws from outside to inside of outer case.
Step 4: Stick sealing strip Stick the sealing strip (with adhesive) at the bottom of window frame. Sealing strip ( with adhesive) Step 5: Install outer case 1. Put the outer case at the windowsill, and the lower guide rail should be stuck to the windowsill. The outer case stays at the middle; the upper guide rail stays at the middle lower part of window; the window can stick to the upper screw 2. Install the supporter to the tripod with screw; clamp the supporter at the and the unit with screw.
outer case type E screw supporter 3. Adjust the position of screw connecting the tripod and supporter into order (Note: The outer case should be placed horizontally or inclined outwards slightly.) horizontal or inclined about 3° 3° Can be moved vertically to adjust the gradient of outer case.
plastic window wooden window Step 7: Plug sealing strip Plug the sealing strip (without adhesive) in the window. Step 8: Install main unit 1. Ask two persons to push the main unit slowly into the outer case.
2. l cover with screw.
Sponge Sticking Method and Procedures 1. Install flexible screen sub-assy. After finishing installation, measure the width L between outer case of air conditioner and window frame. / 2. Take out R1 sponge from the package. Cut off the sponge in rectangular shape with scissors. / 3. Stick sponges evenly on the flexible screen and the screen of window frame. The redundant 2~3mm of sponge in height can be stuffed into the frame for fixing.
Safety operation of flammable refrigerant All the work men who are engaging in the refrigeration system should bear the for dealing with the refrigeration system recognized by this industry. If it needs other technician to maintain and repair the appliance, they should be supervised 2. It can only be repaired by the method suggested by the equipment’s manufacturer. Installation notes 2. The air conditioner must be installed in a room that is larger than the minimum room area.
Welding 1. If you should cut or weld the refrigerant system pipes in the process of maintaining, please follow the steps as below a. Shut down the unit and cut power supply b. eliminate the refrigerant c. vacuuming d. clean it with N2 gas e. cutting or welding f. carry back to the service spot for welding 2. The refrigerant should be recycled into the specialized storage tank. and it’s well-ventilated. Filling the refrigerant ferent kinds of refrigerant won’t contaminate with each other.
GREE ELECTRIC APPLIANCES, INC. OF ZHUHAI Add: West Jinji Rd, Qianshan, Zhuhai, Guangdong, China, 519070 Tel: (+86-756) 8522218 Fax: (+86-756) 8669426 E-mail: global@cn.gree.com Web: www.gree.