SP70 SMART PHONE User Manual
Precautions n Use only the AC adapter and battery supplied with the SMART PHONE , and keep them away from high temperature and a humid environment. Using other AC adapters or batteries may cause malfunction or danger. n Should the battery becomes deformed, please do not use to avoid danger. n Removing the battery incorrectly may cause danger. n Use the battery according to the instructions in the document. n Recycle used batteries. Dispose of used batteries according to the instructions.
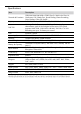
ii Specifications Item Description Network & Functions GSM 900/1800/1900 MHz, GPRS Class B / Multi-slot Class 10, Conference Call, Hands Free, Speed Dialing, Phone Recording, Voice Dialing, Caller ID, Profile... Display 2.8” 262,144 colors LTPS TFT LCD, 240x320 Pixels DSC/DV CPU Operating System Memory Size & Weight Battery & Capacity Input Method 1.3 Mega Pixels Camera, up to 2.
iii NOTE Kinpo Electronics, Inc. (herein after referred to as “Kinpo”) is the sole owner of this product, including its accessories, software and hardware. No imitation, copy, plagiarism or translation is allowed without Kinpo’s permission. All brand names, product names, and pictures used in this user manual are trademarks, registered trademarks, or trade name of their respective holders. ©Copyright 2006 Kinpo Electronics, Inc. All rights reserved. No reproduction is allowed.
iv Customer Service Information Congratulations on purchasing KINPO SP70 SMART PHONE . You will enjoy a whole new experience using it. For further information on using SP70, please contact our customer service center: e-mail: service@iDo-mobile.com Website: www.iDo-mobile.
Table of Contents Precautions..................................................................................................................i Specifications............................................................................................................. ii 1 Getting Started............................................................................... 1-1 1.1 1.2 1.3 1.4 1.5 1.6 2 Basic Operation............................................................................. 2-1 2.1 2.
vi 3.6 3.7 3.8 3.9 4 Contacts......................................................................................... 4-1 4.1 4.2 4.3 4.4 5 5.2 Recording Messages in Notes...................................................................... 5-2 Creating a Recording.................................................................................... 5-2 Recording Formats....................................................................................... 5-2 AMR Recorder.........................
vii 7.2 7.3 7.4 7.5 7.6 7.7 7.8 7.9 7.10 7.11 7.12 7.13 7.14 7.15 7.16 7.17 8 Getting Connected......................................................................... 8-1 8.1 8.2 8.3 8.4 8.5 9 GPRS Auto Configuration............................................................................ 8-2 Beam............................................................................................................. 8-2 Sending Information..................................................................
viii 10.2 10.3 10.4 10.5 11 Microsoft ActiveSync.................................................................... 11-1 11.1 11.2 11.3 11.4 11.5 11.6 12 Installing Microsoft ActiveSync................................................................. 11-2 Connecting to Your Desktop Computer...................................................... 11-3 Synchronizing with Your Desktop Computer............................................. 11-3 Synchronizing Directly with Exchange Server..................
ix 14.4 Using the FaceMagic Feature..................................................................... 14-3 14.5 Using Effects.............................................................................................. 14-4 Painting....................................................................................................... 14-4 Effect.......................................................................................................... 14-4 Frame.........................................
15.12 SIM Contacts............................................................................................ 15-14 15.13 Search....................................................................................................... 15-15 15.14 Games....................................................................................................... 15-15 Solitaire.................................................................................................... 15-15 Bubble Breaker..................
Chapter 1 Getting Started 1.1 1.2 1.3 1.4 1.5 1.
SP70 User Manual Package Content Congratulations on purchasing your Pocket PC Phone. Its powerful features and functions help you manage effectively your most important business and personal information. You can also use the Pocket PC Phone to make phone calls as well as send or receive emails. Please verify that you have the items listed below as soon as you unpack your Pocket PC Phone box. If any item is damaged or missing, notify your dealer immediately.
Getting Started 1-3 SP70 User Manual 1.2 Views of SP70 Slot Cover With the cover removed, you may install an optional numeric dummy keypad. AC Power Indicator GSM/Notification Indicator Indicates the GSM signal status and notifications. miniSD Slot Insert a miniSD card here. Touch Panel Battery Switch Slide the latch to remove the battery. Start Menu Button Displays the Start menu. Left Soft Key Press to perform the command shown on the bottom-left corner of the screen.
SP70 User Manual 1-4 Getting Started Capture Key Press to take pictures or record videos. Volume±/ Zoom in/out Press to adjust the volume in Standard mode; or zoom in/out in Camera mode. LED Photoflash Camera Lens Power Key Press for 2 seconds to turn GSM/WLAN module off; or press to wake up the device from suspend/ sleep mode. Voice Recording Button Press to start Notes options; press and hold to start recording, and release to stop recording. Reset Switch Press to restart the Pocket PC Phone.
Getting Started 1-5 SP70 User Manual 1.3 Installing the SIM Card and Battery Apply for a Subscriber Identification Module (SIM) card from your mobile phone service provider. The SIM card contains information of security certifications, and can store your contact data. The Pocket PC Phone functions are only available when a SIM card is installed securely. 1.
SP70 User Manual After the charging is complete, press on both sides of the converter to detach it from the Pocket PC Phone. • • • • • • • 1.5 Charge the battery fully before turning on the Pocket PC Phone for use. When charging the battery for the very first time, you should charge it for at least 10 hours. Fully charging a discharged battery takes about 2.5 hours. The actual charging time may vary depending on the using conditions.
Getting Started 1-7 SP70 User Manual Turning Off After the initial startup, press the power key to enter the standby mode. To turn off the Pocket PC Phone (and enter the suspend mode), press and hold the power key for 2 seconds. • 1.6 By default, your Pocket PC Phone will automatically suspend after 1 minute (default setting) of → Settings inactivity when operating on battery power. You can change the setting by tapping > System > Power > Advanced.
Chapter 2 Basic Operation 2.1 2.2 2.3 2.4 2.5 2.6 2.7 2.8 2.9 2.10 2.
2-2 SP70 User Manual 2.1 Using the Stylus The stylus is a tool for you to communicate with your Pocket PC Phone. With the stylus, you can navigate and select objects on the screen. Basic Operation The stylus allows you to: n Tap Touch the screen once with the stylus to open items and select options. n Drag Hold the stylus on the screen and drag across the screen to select text and images. Drag in a list to select multiple items.
SP70 User Manual 2.5 2-3 Volume Adjustment You can tap the volume icon on the Today screen to adjust the system volume, such as the sound you hear when you tap on program names and menu options, and the phone volume. 2.6 Navigation Bar and Command Bar The navigation bar, located at the top of the screen, displays the active programs and current time. Tap to open the Start menu and select the desired program.
2-4 SP70 User Manual 2.7 Status Icons Status icons are displayed on the navigation bar and command bar of the Today screen. You can tap a status icon to display the associated control panel or more information related to the item. Icon Description The speaker is on. Basic Operation The speaker is off. The battery is charging. The battery power is low. The battery power is very low. The battery is fully charged. The connection is active. The connection is not active.
SP70 User Manual Icon 2-5 Description Word Mobile Creates new documents, or view and edit Word documents created on your desktop computer. MyAlbum Displays pictures and videos. AMR Recorder Records sound or voice messages. VideoCam Takes pictures or records videos. SIM Contacts Displays the contact information stored in the SIM card. Calculator Performs basic arithmetic. Pocket MSN Allows you to register MSN Messenger. Search Finds files or items on your Pocket PC Phone quickly.
2-6 SP70 User Manual Basic Operation Icon 2.9 Program Description Power Tap to view the remaining battery power. Voice Commander To launch application via voice commander. Brightness Tap to adjusts the brightness of the display. IE Favorites Allows you to use the built-in Web links quickly. Shortcut Menus With shortcut menus, you can quickly choose an action for an item.
SP70 User Manual 2-7 Using the Input Panel Use the Input panel to enter information in any program on your Pocket PC Phone. You can either type words by n using the soft keyboard; or n writing with your hand. In any case, the characters appear as typed text on the screen. When you use the Input panel, your Pocket PC Phone anticipates the word you are typing or writing and displays it above the Input panel. When you tap the displayed word, it is inserted into your text at the insertion point.
2-8 SP70 User Manual Writing on the Screen In any program that accepts writing—such as the Notes program and the Notes tab in Calendar, Contacts and Tasks—you can use your stylus to write directly on the screen. Write the way you do on paper. You can edit and format what you have written and convert the information to text later. Basic Operation Writing To write on the screen, tap Menu > Draw to switch to writing mode. This action displays lines on the screen to help you write.
SP70 User Manual 2-9 Drawing on the Screen You can draw on the screen in the same way that you write on the screen. The difference between writing and drawing on the screen is how you select items and how they can be edited. For example, selected drawings can be resized, while writing cannot. Creating a Drawing To create a drawing, cross three ruled lines on your first stroke. A drawing box appears. 2. Subsequent strokes in or touching the drawing box become part of the drawing.
Chapter 3 Using the Phone Feature 3.1 3.2 3.3 3.4 3.5 3.6 3.7 3.8 3.
SP70 User Manual 3.1 3-2 Making a Call The phone mode indicator glows in green when you use the phone feature. Using the On-Screen Phone Keypad There are several ways to make a call. The most direct method is by using the Phone keypad. > Phone, or press the Call button. 1. Tap 2. From the on-screen Phone keypad, tap the number you want to call. 3. Tap Talk to dial the number. You can make a call from Contacts without having to look up or manually enter the number.
3-3 SP70 User Manual From Call History Using the Phone Feature Use Call History to quickly call someone you have recently called or someone who has just called you. > Phone, or press the Call button. 1. Tap 2. From the Phone keypad, tap Call History. 3. Tap the icon (such as ) next to the desired number. Using Speed Dial Speed dial numbers enable you to quickly place a call without having to actually enter the number.
SP70 User Manual 3-4 During a call, you can do the following: n To end a call, tap End or press the Hook button. n To hold a call, tap Hold, or press and hold the Call button. To ignore a call, tap Ignore or press the Hook button. Using the Speakerphone and Muting a Call Speakerphone During a call, you can use the speakerphone function to send out the other party’s voice through the speaker. To use the speakerphone function, tap Speaker On. Tap Speaker Off to disable the speakerphone function.
3-5 SP70 User Manual 3.4 Taking Notes During a Call Using the Phone Feature You can take notes on the Pocket PC Phone during a call. 1. During a call, tap Note. 2. Enter your note on the note screen or record a message. When finished, tap OK. 3. The note will appear on your note list. To access a note you created during a call: > Phone, or press the Call button. 1. Tap 2. 3. From the Phone keypad, tap Call History.
SP70 User Manual 3.5 3-6 Creating a Speed Dial Entry You can create speed dials to call frequently-called numbers with a single tap. Before you can create a speed dial entry for a phone number, that number must already exist in Contacts. From Phone > Phone, or press the Call button. Tap From the Phone keypad, tap Speed Dial > Menu > New. 3. Tap the desired contact name and number. 4.
3-7 SP70 User Manual 3.6 Call History Call History provides the time and duration of all incoming, outgoing, and missed calls, and a summary of total calls. Call History also provides easy access to any notes taken during a call (see Section 3.5 for more information). Using the Phone Feature To view Call History: > Phone, or press the Call button. 1. Tap 2. From the Phone keypad, tap Call History. 3. To quickly see the date, time, and duration of a call, tap the white area of the call’s entry.
SP70 User Manual 3.7 3-8 Changing Phone Settings You can customize phone settings, such as the ring type and ring tone to be used for incoming calls, and the keypad tone to be used when entering phone numbers. You can also protect your phone from unauthorized use. Changing the Ring Type You can change the way that you are notified of incoming calls. For example, you can choose to be notified by a ring, a vibration, or a combination of both. > Phone, or press the Call button. 1. Tap 2.
3-9 SP70 User Manual Using the Phone Feature Changing the Keypad Tone > Phone, or press the Call button. 1. Tap 2. From the Phone keypad, tap Menu > Options > Phone. 3. Tap the Keypad list, select the desired option, and tap OK. Securing Your Phone You can protect your phone from unauthorized use by assigning a type of password called a PIN (Personal Identification Number). Your first PIN will be given to you by your mobile phone service provider. > Phone, or press the Call button. 1. Tap 2.
SP70 User Manual 3-10 Changing Phone Network Settings You can view available networks and change their settings. > Phone, or press the Call button. 1. Tap 2. From the Phone keypad, tap Menu > Options > Network. 3. The network your device is currently using will be listed at the top of the screen. You can specify whether you want to change networks manually or automatically, and determine the order in which your phone accesses another network if the current one is unavailable.
3-11 SP70 User Manual 3.9 Turning the Phone On and Off You can turn your phone on and off while keeping your actual device On. Your phone is off when it is in flight mode. Turning the phone off: on the navigation bar, and then tap Wireless Manager on the pop-up message. Tap the signal icon 2. Tap Phone. The phone signal status will show Off. Using the Phone Feature 1. > Turning the phone on: on the navigation bar, and then tap Wireless Manager on the pop-up message. 1. Tap the signal icon 2.
Chapter 4 Contacts 4.1 4.2 4.3 4.
4-2 SP70 User Manual 4.1 Creating a Contact Microsoft Contacts maintains a list of your friends and colleagues so that you can easily find the information you’re looking for, whether you’re at home or on the road. You can enter both personal and business information. From Microsoft Contacts, you can create a new contact to store in Microsoft Contacts or on the SIM card. Contacts For Microsoft Contacts > Contacts, or tap the Contacts soft key. 1. Tap 2.
SP70 User Manual 6. 4-3 To set a caller ring tone, tap Ring tone and browse for a sound file stored on the Pocket PC Phone or miniSD card (if inserted). The sound formats supported by the Pocket PC Phone include: Polyphonic, Monophonic, MIDI, AMR, WAV, MP3, WMA, AAC, and AAC+. 5. You can assign a contact to a category so that you can use these groupings to quickly display only the information you want. Tap Categories. Select the categories that you want to assign the contact to.
4-4 SP70 User Manual 4.3 View Modes You can display the contact list in Name or Company view. > Contacts, or tap the Contacts soft key. 1. Tap 2. Tap Menu > View By > Name or Company. In Name view, you can search for a contact by entering a name or number, or by using the alphabetical index. In Company view, you can view a list of contacts employed by a specific company. 4.4 Contacts 1. Tap Changing List View Settings > Contacts, or tap the Contacts soft key. 2. Tap Menu > Options. 3.
Chapter 5 Recording Messages 5.1 5.
5-2 SP70 User Manual 5.1 Recording Messages in Notes In any program where you can write or draw on the screen, you can also quickly capture thoughts, reminders and phone numbers by recording a message. The recordings will be saved as .wav files in the \My Documents folder on the Pocket PC Phone. You can record a message when the Record button appears on the command bar. In Pocket Word, use the recording function by the View menu. Creating a Recording 1.
SP70 User Manual 5.2 5-3 AMR Recorder Besides the built-in recording program described in the previous section, you can also use the AMR Recorder program to record messages. AMR Recorder will save the recordings as AMR files in the My Device\My Documents\Recording folder on the Pocket PC Phone. > Programs > AMR Recorder. 1. Tap 2. Hold your Pocket PC Phone’s microphone near your mouth or other source of sound. Then tap the icon to start recording. Recording/ playback progress Tap to play back 3.
Chapter 6 Customizing Personal Settings 6.1 6.2 6.3 6.4 6.5 6.6 6.7 6.8 6.9 6.10 6.
SP70 User Manual 6.1 Tap 6-2 Buttons > Settings > Personal > Buttons. Use this item to assign programs to the hardware buttons and set the repeat rate of the Up/Down direction keys. 6.2 Tap Input > Settings > Personal > Input. This item sets up items related to Block Recognizer, soft keyboard, Letter Recognize, Transcriber input methods and voice recording format.
6-3 SP70 User Manual 6.3 Lock > Settings > Personal > Lock. Tap This item allows you to set a password for security. > Settings > Personal > Password. 1. Tap 2. Check the Prompt if device unused item and select a value to set the time for the Pocket PC Phone to prompt for password after idling. 3. Select the type of password you would like to use. You can set a four-digit password or a long password containing a combination of at least seven characters, numbers or punctuation. 4.
SP70 User Manual 6.6 Tap 6-4 Owner Information > Settings > Personal > Owner Information. Use this item to enter your personal information. 6.7 Tap Phone > Settings > Personal > Phone. This item changes the phone-related settings. See Section 3.8 for detailed information. 6.8 Tap Sounds & Notifications > Settings > Personal > Sounds & Notifications. This item sets the conditions and types of the sounds, system volume and methods of notifications.
6-5 SP70 User Manual 6.9 Tap Today > Settings > Personal > Today. Tap Appearance to select a desired theme for the background. You can also tap Beam to exchange favorite themes with your friends. Tap Items to select the information you want displayed on the Today screen. You can also select a period of time (4 hours by default) for your Pocket PC Phone to automatically return to the Today screen. 6.10 Tap Today Plus > Settings > System > Today Plus.
Chapter 7 Customizing System Settings 7.1 7.2 7.3 7.4 7.5 7.6 7.7 7.8 7.9 7.10 7.11 7.12 7.13 7.14 7.15 7.16 7.
SP70 User Manual 7.1 Tap 7-2 About > Settings > System > About. This item shows the hardware information of the Pocket PC Phone and defines the device name that your Pocket PC Phone uses for identifying itself to other computers. 7.2 Tap Backlight > Settings > System > Backlight. This item adjusts the brightness of the display and sets the automatic turnoff for power saving purposes. 7.3 Tap Certificates > Settings > System > Certificates.
7-3 SP70 User Manual Managing Certificates > Settings > System > Certificates. 1. Tap 2. The list displays the names of the certificate issuers and the expiration date. 3. To view more information about a certificate, tap it in the list. 4. To delete a certificate, tap and hold it in the list and then tap Delete. 7.4 Tap Clock & Alarms > Settings > System > Clock & Alarms. This item allows you to change the date and time and to set alarms. 7.5 Tap Contrast > Settings > System > Contrast.
SP70 User Manual 7.6 Tap 7-4 Error Reporting > Settings > System > Error Reporting. Use this item to send information needed by technical support groups to diagnose a program error. 7.7 Tap GPS > Settings > System > GPS. This item is used to configure the GPS port settings. However, your Pocket PC Phone does not support the GPS function. Beside you buy a GPS receiver to support GPS function. 7.8 Tap Memory > Settings > System > Memory.
7-5 SP70 User Manual 7.9 Tap Microphone Environment > Settings > System > Microphone Environment. This item sets the microphone environment for the recording mode. 7.10 Tap Power > Settings > System > Power. This item shows the remaining battery power and sets the time for the Pocket PC Phone to turn off automatically. 7.11 Tap Regional Settings > Settings > System > Regional Settings.
SP70 User Manual 7.12 7-6 Remove Programs > Settings > System > Remove Programs. Tap This item allows you to remove programs you have added to the memory of your Pocket PC Phone. Tap the desired program and then tap Remove. 7.13 Screen > Settings > System > Screen. Tap This item allows you to adjust the touch screen for accurate screen taps and to enable ClearType feature for easier reading of text in programs that support ClearType. 7.
Customizng System Settings 7-7 SP70 User Manual n Tap Hardware to view the hardware information of the Pocket PC Phone. n Tap Identity to view the model name and operating system of the Pocket PC Phone. n Tap Log to view the talk time for incoming and outgoing phone calls.
SP70 User Manual 7.15 7-8 Wake Up Screen > Settings > System > Wake Up Screen. Tap Use this item to select the displayed screen when the Pocket PC Phone wakes up from the standby mode. 7.16 SmartX > Settings > System > SmartX. Tap You can customize the displayed items on the SmartX menu. The items for selection include: n Auto close closes the current program. n Close All closes all running programs. n Close Inactive closes inactive programs.
Chapter 8 Getting Connected 8.1 8.2 8.3 8.4 8.
SP70 User Manual 8.1 8-2 GPRS Auto Configuration GPRS is a high-speed transmission through the mobile phone network, which provides permanent on-line connection. When you apply for the GPRS service, your service provider may have already set up a GPRS connection for you. You can also perform automatic GPRS configuration on your Pocket PC Phone. • If you have subscribed to the GPRS and MMS services from your mobile phone service provider, GPRS connection is active, and so is MMS connection.
8-3 SP70 User Manual Receiving Information > Settings > 1. Before receiving beamed information, tap Connections > Beam. 2. Select Receive all incoming beams, and tap OK. 3. Align the IR ports so that they are unobstructed and within a close range. 4. The Pocket PC Phone will search for the other device and receive information automatically. 8.3 Bluetooth Bluetooth is a short-range wireless communications technology.
SP70 User Manual 8-4 Receiving a Bluetooth Beam > Settings > Connections > Beam. 1. Tap 2. Turn on the Bluetooth as described earlier in the “Turning on and off Bluetooth” section. 3. Make sure that the device is powered on, discoverable, and within 10 meters (30 feet) of your device. 4. When prompted to receive an incoming beam, tap Yes.
8-5 SP70 User Manual Connecting to the Internet 1. Obtain the following information from your ISP: ISP server phone number, user name, and password. > Settings > Connections > Connections. 2. Tap 3. In My ISP, tap Add a new modem connection. 4. Enter a name for the connection, such as your company’s name. In the Select a modem list, tap your modem type. Tap Next. 5. 6. Enter the phone number. Tap Next. Enter your user name, password, and domain name as provided by your ISP.
SP70 User Manual 4. Enter a name for the connection, such as your company’s name. In the Select a modem list, tap your modem type. 5. Enter the phone number. Tap Next. 6. Enter your user name, password, and domain name as provided by your network administrator. If a domain name was not provided, try the connection without entering a domain name. You need not to change any advanced settings. Tap Finish. 8-6 Tap Next.
8-7 SP70 User Manual > Settings > Connections > Connections. 1. Tap 2. In My Work Network, tap Add a new proxy server. 3. Select This network connects to the Internet and This network uses a proxy server to connect to the Internet. In the Proxy server box, enter the proxy server name. 4. To change such settings as port number or proxy server type, tap Advanced and change desired settings. 5. When you are finished, tap OK. 8.