
Use and Care Manual


58
The Kirby Company
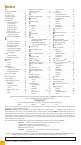
Index
Index
A
About this Manual ............4
Accessories
................29
Accessory Lock
.............18
Air Intake Guard
............22
AttachingBar...............18
Attachments
................19
AttachmentHose.........18
Crevice Tool ............20
DusterBrush ............20
Extension Tubes .........19
Inflator/Deflator
.........23
Massage Cup ............21
Suction Control Grip ......21
Upholstery Nozzle........20
Wall&CeilingBrush .....20
B
Bag
Assembly-removal ...... 10
BagReleaseButton .......15
BagSupportStrap ....... 10
ChangingBags .......... 9
DisposableFilterBags .... 9
OuterPermanentBag .... 10
Top Adaptor............. 9
Belts
ChangingBelts ..........46
ReplacementBelts........57
BeltLifter................. 10
Blower
set-up ..................21
using ..................23
BrushRoll
adjusting for
optimum performance .....48
height adjustment ........48
indicator light ........... 11
C
Canister Cleaner.............17
Carpet Fluffer
...............40
Carpet Shampoo System
......30
BeltLifter ..............30
cleaning ................33
replacing the belt .........35
set-up ..................30
Suds Control Valve .......32
tray....................30
using ..................32
Carrying your machine
........7
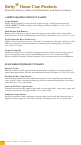
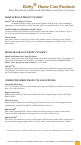
Cleaning products
...........56
Crevice Tool
................20
D
DisposableFilterBags .......9,57
DusterBrush ...............20
E
Extension Tubes ............. 19
F
FloorBuffer . . . . . . . . . . . . . . . . 38
Belt
...................38
set-up ..................38
using ..................39
G
Getting Started ...............6
H
Handle
AttachingPortableHandle . 15
HandleTiltLatch.......... 7
HandleReleaseButton ....15
removingUprightHandle ..15
HardFloorPad..............15
I
Inflator/DeflatorTool.........23
K
Kirby
®
Carpet Shampoo ....31,56
M
Maintenance tips ............45
Massage Cup
...............21
Mattress cleaning
............16
Mini Em-Tor
®
-emptying
..... 10
Moving your machine
......... 7
O
Operating Tips ..............45
Optional Accessories
.........29
Owner’s Manual-using
.........4
P
Portable Cleaner.............15
PortableHandle .............15
Portable Shampooer
set-up ..................26
using ..................27
Portable Sprayer
adjusting spray ..........25
cleaning ................25
Dip Tube ...............25
Jar
..................24,25
reassemble ..............26
set-up ..................24
spray opening ...........26
using ..................24
Power Nozzle
changing the belt .........46
disengagingBrushRoll ....14
height setting ............ 8
lowering................ 8
raising ................. 8
removal ................18
Rug Plate ...............46
BrushRoll ..............46
Power Switch
...............13
Q
Questions&Answers.........51
R
ReplacementBelts ........... 57
S
Safety Instructions ........... 2
Straight Suction Cleaning
.....14
Suction Control Grip
.........21
Surface Nozzle
..............19
T
Table of Contents ............ 3
TechDrive
®
description .............. 8
ON/OFFPedal........... 8
Turning off ............. 8
Turning on.............. 8
Tilt Latch
.................. 7
Toe-Touch Control
TM
........ 7
Turbo Accessory System
TM
...41
clamp levers ............41
Dust Shroud.............42
massage ................43
polishing ...............43
rear clamp ..............42
sanding ................42
scouring ................43
set-up ..................41
U
Upholstery Nozzle ...........20
Upright Cleaner
.............13
UprightHandle-removing .....15
Z
Zippbrush
TM
Turbine ................44
cleaning ................44
OuterBrushRing ........43
using ..................43
The wires in the main lead are coloured in accordance with the following code:
Blue
...............................NeutralBrown...............................Live
As the colours of the wires in the mains lead of this appliance may not correspond with the coloured marking identifying the
terminals in your plug, proceed as follows:
WARNING: DO NOT connect either wire to the terminal marked “E” or with the earth symbol. No wire is connected to
this terminal. The wire which is coloured Blue must be connected to the terminal which is marked with the letter N or
colouredblack.ThewirewhichiscolouredBrownmustbeconnectedtotheterminalwhichismarked withtheletterLor
colouredred.IfaU.K.:13A(BS1363)plugisused,fita5Afuse.Foranyothertypeplug,protectwitha5Afuseorfusewire
in the adaptor or distribution board. If the plug does not fit the sockets in the user’s house, it should be cut off and safely dis-
posed of and the correct plug fitted.
The Ultimate G series
™
ModelG7EisapprovedbytheBritishElectrotechnicalApprovalsBoard(BEAB).
Warning: There is a shock hazard if a plug that has been cut from the
supply cord is inserted in a 13A socket outlet. Any
replacement fuse in the plug must be an ASTA approved
BS13625AfuseintheU.K.
Warning: If the fuse cover is removable, never use the plug with the
fuse cover removed.
The following information need only apply when changing plugs on Ultimate G’s that are used in the
U.K., Australia, South Africa and New Zealand.
IMPORTANT
Ifsupplycordisdamagedandneedstobereplaced,thereplacementpartnumberis:890801-Australia/NewZealand;
890901-ContinentalEurope;890701-SouthAfrica;890601-UnitedKingdom;192001-U.S.A.;
P/N 260001 Rev. B - U.S., Canada and U.K. Printed in U.S.A. ©2002 The Scott Fetzer Company