
- Kiss Digital Video Recorder USER GUIDE VR-558

13
- For more information about setting up a network, please refer to the PC TO DVD CONNECTION section of this manual, or the connecting guide available at www.kiss-technology.com, in the
“support” section under “online guides”: www.kiss-technology.com/support
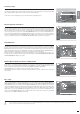
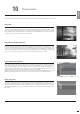
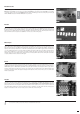
TV channels manager
Select TV TUNER and choose MANAGE TV CHANNELS. A list of the available channels will appear. Select the channel you want
to move by pressing ENTER. The selected line will become yellow. Select now the other channel to be moved by pressing ENTER.
The two channels will be swapped. Press the left arrow to exit the TV Channel Manager.
To find out how to rename TV Channel, please look under the Electronic Program Guide Section.
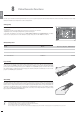
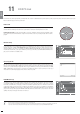
Choose the Ethernet Configuration menu to setup a network connection between a PC and your DVD Player. Connecting your DVD
player to a network enables you to use the online services and play audio/video/ pictures files from your connected PC with KiSS
PC-Link. Depending how your VR-558 and your PC are connected together, you will require to ENABLE or DISABLE DHCP Client.
To know if you need either or, please refer to the PC TO DVD CONNECTION section. If you decide to DISBALE DHCP Client, a
new section will appear: ENTER THE TCP/IP SETTINGS MANUALLY. Read the section below to see how to set this up. Read also
below how to set up NTP Client. Choose SHOW CURRENT TCP/IP SETTINGS to view your VR-558's current network settings and
connect to your Hard Disk via FTP. Refer to the MANAGING YOUR HARD DISK chapter to learn how to set up the FTP.
Ethernet configuration and FTP Access
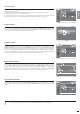
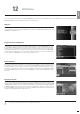
DHCP Client holds the parameters of your Player's Network settings (IP address, Subnet mask, DNS...). Leave this menu ENABLED
if you have connected your player to a network that involves Internet. This way the player will set the parameters automatically.
DISABLED should only be selected if you have a connection that doesn't involve Internet. If you just connect your player to your
PC by a straight cable for example. By selecting DISABLED, you will be asked to ENTER THE TCP/IP SETTINGS MANUALLY. The
numbers should be different than the ones on your PC. We recommend to use the following numbers:
IP Address: 192.168.000.002; Network Mask: 255.255.255.000; Default Gateway: 192.168.000.001; DNS Sever: 192.168.000.001.
You will now be able to establish a connection between your PC and Player. See PC TO DVD CONNECTION, NETWORK USING
A DIRECT CONNECTION TO THE PC for more details.
Setting DHCP Client
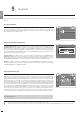
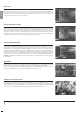
The misc. settings available in the advanced setup will enable you to set many different options, such as PARENTAL CONTROL, or
FRONT PANEL BRIGHTNESS. To set PARENTAL CONTROL for the first time, select first PARENTAL CONTROL PASSWORD, enter
a 4 digit number, then repeat it to confirm it. Then, select PARENTAL CONTROL LEVEL, enter your 4 digit password. You can now
choose between: OFF (No control), G (Suitable for general audiences), PG (Parental guidance suggested), PG13 (Parental guidance
suggested, unsuitable for children under 13), R (Restricted, unsuitable for young viewers), NC17 (Adult content, unsuitable for
children under 17). You can also RESTORE DEFAULT SETTINGS of your player or choose to go back to the QUICK SETUP menu.
A sixth section named FORMAT HARD DISK is also available from this menu. It enables you to format (erase) your Hard Disk
completely. Just select FORMAT HARD DISK and choose OK.
Misc. settings
If your VR-558 is on a network connected to the Internet, you can choose to get the displayed time automatically from the
Internet. To do so, turn on Network Timing (NTP Client) by selecting ENABLED. If you decide to DISABLE this function, you will
need to enter the time and date information yourself by going to REGIONAL SETTINGS and TIME or DATE.
PC-LINK SERVER allows you to watch the content of your Hard Disk on other KiSS Players.
WEB SCHEDULE enable you to schedule recordings via the web, a mobile phone or a PDA. See Chapter 13 KiSS Remote EPG
for more details.
NTP Client (Network Timing), PC-Link Server and Web Schedule
english