3.0 L (13-Cup) Food Processor 5KFP1333 INSTRUCTIONS 3.0 L Processador de alimentos KJA13 INSTRUÇÕES 3.
Table of Contents FOOD PROCESSOR SAFETY Important Safeguards.................................................................................................3 Electrical Requirements-Plastic Models .....................................................................4 Electrical Requirements-Metal Models ......................................................................5 Electrical Requirements for Brazil Only ....................................................................6 PARTS AND FEATURES......
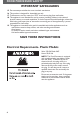
ENGLISH FOOD PROCESSOR SAFETY IMPORTANT SAFEGUARDS When using electrical appliances, basic safety precautions should always be followed, including the following: 1. Read all instructions. 2. To protect against risk of electrical shock, do not put Food Processor in water or other liquid. 3. Close supervision is necessary when any appliance is used by or near children. 4. Unplug from the outlet when not in use, before putting on or taking off parts, and before cleaning. 5. Avoid contacting moving parts. 6.
FOOD PROCESSOR SAFETY IMPORTANT SAFEGUARDS 15. 16. 17. 18. Do not attempt to defeat the cover interlock mechanism. This product is designed for household use only. To disconnect, turn any control to “OFF,” then remove plug from wall outlet.
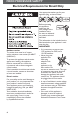
FOOD PROCESSOR SAFETY Volts: 220-240 Volts VAC Hertz: 50/60 Hz NOTE: This Food Processor has a grounded plug. To reduce the risk of electrical shock, this plug will Àt in an outlet only one way. If the plug does not Àt in the outlet, contact a qualiÀed electrician. Do not modify the plug in any way. Do not use an extension cord. If the power supply cord is too short, have a qualiÀed electrician or serviceman install an outlet near the appliance.
FOOD PROCESSOR SAFETY Electrical Requirements for Brazil Only Use appropriate outlet type for your appliance plug, as shown below: Residence mains: The mains wires must be of copper with a minimum cross-section per ABNT (NBR-5410). To protect this appliance and the mains against over loading, this appliance must be connected to a circuit that is protected with a thermo-magnetic circuit breaker. If the household circuit does not include a circuit breaker, contact an electrician to have one installed.
PARTS AND FEATURES ENGLISH Julienne Disc (select models only) Reversible (2 mm and 4 mm) Shredding Disc Externally Adjustable Slicing Disc Thin to Thick 945 ml (4-Cup) Mini-Bowl and Mini-Blade Stainless Steel Multipurpose Blade Disc Adapter Slicing Adapter Drive Adapter Dough Blade 3-Piece Food Pusher Work Bowl Cover with 3-in-1 Feed Tube 3.0 L (13-Cup) Work Bowl Chef’s Accessory Case Externally Adjustable Slicing Control Heavy-Duty Base 2.
PARTS AND FEATURES Important parts and accessories included with your new Food Processor are highlighted below. Refer to the following pages for additional details on accessories included with your Food Processor as well as optional accessories you can order separately (some optional accessories included with select models).
ACCESSORIES Disc Assembly Overview There are two different disc adapters included with the food processor. One is used exclusively with the adjustable slicing disc. The other is used with all other discs.
ACCESSORIES Accessories Selection Guide Not all accessories shown are included with all models.
PREPARING THE FOOD PROCESSOR FOR FIRST USE ENGLISH 2. Lift out the mini-bowl. Before First Use Before using your Food Processor for the Àrst time, wash the work bowl, work bowl cover, mini-bowl, feed tube pushers, discs, and blades either by hand or in the dishwasher (see “Cleaning the Food Processor”). Removing the Work Bowl Cover from the Work Bowl Your Food Processor is shipped with the work bowl cover installed on the work bowl, with the mini-bowl inside the work bowl.
SETTING UP YOUR FOOD PROCESSOR Attaching the Work Bowl 1. Place the Food Processor on a dry, level countertop with the controls facing forward. Do not plug in the Food Processor until it is completely assembled. 2. Place the work bowl on the base, aligning the raised portion with the indentation on the base. The center hole should Àt over the power shaft. Attaching the Work Bowl Cover NOTE: Be sure to install the desired accessory before attaching the work bowl cover. 1.
SETTING UP YOUR FOOD PROCESSOR IMPORTANT: The adjustable slicing disc can only be installed in one direction. TIP: You may need to turn the disc/drive adapter until it drops down into place. 4. Install the work bowl cover, being sure it locks into place. 1. With the work bowl installed, place the drive adapter on the power shaft of the base. 2. Holding the adjustable slicing disc by the 2 Ànger grips, align the pins onto the adjustable slicing disc adapter into the L-slots on the disc.
SETTING UP YOUR FOOD PROCESSOR Installing Other Slicing or Shredding Discs IMPORTANT: The optional julienne and plane/shave discs can only be installed in one direction. When using the reversible shredding disc, have the desired side (medium/Àne) facing UP. 3. With the work bowl installed, slide the drive adapter onto the power shaft. TIP: You may need to turn the disc/drive adapter until it drops down into place. 1.
SETTING UP YOUR FOOD PROCESSOR IMPORTANT: The multipurpose blade and dough blade can only be used with the work bowl. 1. Place the blade on the power shaft. 2. Rotate the blade so it falls into place on the power shaft. Installing the Mini-Bowl and Mini-Blade 1. Place the mini-bowl inside the work bowl over the power shaft. Rotate the minibowl until the tabs on the top edge of the bowl drops into the indents on the top of the work bowl. 2.
SETTING UP YOUR FOOD PROCESSOR Installing the Chef’s Bowl Using the 3-in-1 Feed Tube The Chef’s Bowl can only be used with the slicing or shredding discs. It cannot be used with the multipurpose blade. 1. Place the Chef’s Bowl inside the work bowl, sliding it down over the power shaft. Rotate the Chef’s Bowl until it drops into place. Once in place, it cannot be rotated. The 3-in-1 feed tube features a 3-piece food pusher.
USING YOUR FOOD PROCESSOR 1. To turn on the Food Processor, press the Speed 1 or Speed 2 button. The Food Processor will run continuously and the indicator light will glow. 2. To stop the Food Processor, press the “O” (OFF) button. The indicator light will go out and the blade or disc will stop within a few seconds. 3. Wait until the blade or disc comes to a complete stop before removing the work bowl cover.
USING YOUR FOOD PROCESSOR Removing Processed Foods 5. If using the mini-bowl, grasp and remove the bowl using the Ànger grips located along the top edge of the bowl. 1. Press the “O” (OFF) Button. 2. Unplug the Food Processor before disassembling. 3. Turn the work bowl cover to the left and remove. 6. Turn the work bowl to the left to unlock it from the base. Lift to remove. 4. If using a disc, remove it before removing the bowl. Holding the disc by the 2 Ànger grips, lift it straight up.
1. Press the “O”(OFF) Button. 2. Unplug the Food Processor before Cleaning. 3. Wipe the base and cord with a warm, sudsy cloth, and wipe clean with a damp cloth. Dry with a soft cloth. Do not use abrasive cleansers or scouring pads. 4. Please note these BPA-free bowls require special handling. If you choose to use a dishwasher instead of hand washing, please follow these guidelines. - All parts are top rack dishwasher safe. - Avoid laying the bowl on its side. - Use gentle dishwashing cycles such as Normal.
TIPS FOR GREAT RESULTS To Ànely chop citrus peel: With sharp knife, peel colored portion (without white membrane) from citrus. Cut peel in small strips. Process until Ànely chopped. To mince garlic or to chop fresh herbs or small quantities of vegetables: With processor running, add food through the feed tube. Process until chopped. For best results, make sure work bowl and herbs are very dry before chopping.
To slice or shred fruits and vegetables that are small, such as strawberries, mushrooms, and radishes: Position food vertically or horizontally in layers within the feed tube. Fill feed tube in order to keep food positioned properly. Process, using even pressure. Or use the small feed tube in the two-piece food pusher. Position food vertically in the tube and use the small food pusher to process food. To slice uncooked meat or poultry, such as stir-fry meats: Cut or roll food to Àt feed tube.
TIPS FOR GREAT RESULTS To capitalize on the speed of the processor, drop ingredients to be chopped through the feed tube while the processor is running. Different foods require varying degrees of pressure for best shredding and slicing results. In general, use light pressure for soft, delicate foods (strawberries, tomatoes, etc.), moderate pressure for medium foods (zucchini, potatoes, etc.), and Àrmer pressure for harder foods (carrots, apples, hard cheeses, partially frozen meats, etc.).
PART NUMBERS FOR ACCESSORIES The following accessories are available for separate purchase for your Food Processor.
W10508883B © 2012. All rights reserved.