®itchen_kid ® SUPERBA ®BUILT-IN CONVECTION MICROWAVE OVEN For questions about features, operation/performance, parts accessories or visit our website at www.kitchenaid.com or service, call: 1-800-422-1230 In Canada, call for assistance, installation and service, call: 1-800-807-6777 or visit our website at www.KitchenAid.ca FOUR A MICRO-ONDES ENCASTRI_ SUPERBA ®CUISSON PAR CONVECTION Au Canada, pour assistance, installation ou service composez le 1-800-807-6777 www.KitchenAid.
TABLE OF CONTENTS BUILT-IN MICROWAVE OVEN SAFETY ....................................... Electrical Requirements ............................................................... PARTS AN D FEATU RES ................................................................ Turntable ...................................................................................... Convection Grid ........................................................................... Crisper Pan and Handle .....................................
BUILT-IN MICROWAVE OVEN SAFETY Your safety and the safety of others are very important. We have provided many important safety messages in this manual and on your appliance. Always read and obey all safety messages. This is the safety alert symbol. This symbol alerts you to potential hazards that can kill or hurt you and others. All safety messages will follow the safety alert symbol and either the word "DANGER" or "WARNING.
iMPORTANT m SAFETY iNSTRUCTiONS Liquids, such as water, coffee, or tea are able to be overheated beyond the boiling point without appearing to be boiling. Visible bubbling or boiling when the container is removed from the microwave oven is not always present. THIS COULD RESULT IN VERY HOT LIQUIDS SUDDENLY BOILING OVER WHEN THE CONTAINER IS DISTURBED OR A SPOON OR OTHER UTENSIL IS INSERTED INTO THE LIQUID. To reduce the risk of injury to persons: - Do not overheat the liquid.
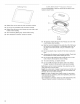
PARTS AND FEATURES This manual covers different models. The microwave oven you have purchased may have some or all of the parts and features listed. The location and appearance of the features shown here may not match those of your model. +> Q,() '?V_]_([ Ii_I01] S=,+ _ , Ilia The convection grid provides optimal heat circulation for convection cooking. H G A. Electronic oven control B. Convection element and fan (hidden behind back panel) C. Light (inaccessible, in ceiling) D.
Use the KITCHENAID TM Steamer Vessel with the Steam Cook feature to steam foods. / A / / B • Baking Tray can be used only with convection cooking. • Do not use in combination • Baking Tray will become hot. Always use oven mitts or pot holders when handling. • See "Positioning Baking Tray" section before using. • See "Assistance or Service" section to reorder. with microwave cooking. u \ A. Lid B. Insert C. Base The steamer vessel will become hot.
ELECTRONIC This manual appearances OVEN CONTROL covers different models. The oven you have purchased may have some of the items shown here may not match those of your model. or all of the items listed. The locations and Combination Oven Models A B D C E F G H ....//_'"% _ow_ S A. Lower oven controls (see separate Use and Care Guide) B. Timer G. Crisping H. Microwave I. Microwave J. Microwave K. Microwave L. Microwave C. Number keys D. Upper microwave oven display E. Cook time F.
A B Lower A. Oven Oven cavity Display (combination A Upper Microwave Oven Display (combination oven models) A. Microwave cavity symbol B. Timer display Microwave Oven Display (single oven models) A. Microwave cavity symbol B. Time of day/timer display oven models) symbol B. Time of day/timer display When power is first supplied to the oven, the clock will be flashing the message "clock-enter time." Time can be entered by touching either CLOCK SET/START or START to allow operation.
The OFF key stops any upper or single oven function except for the Clock, Timer and Control Lock. The oven will also turn off when the door is opened. When the door is opened, the element(s) and fan will turn off, but the oven light will remain on. Close the door and touch START to resume the preset cycle (except for sensor cooking). The oven cooling fan may continue to operate even after an oven function has been canceled or completed, depending on the oven temperature.
BUILT-IN MICROWAVE OVEN USE A magnetron in the oven produces microwaves which reflect off the metal floor, walls and ceiling and pass through the turntable and appropriate cookware to the food. Microwaves are attracted to and absorbed by fat, sugar and water molecules in the food, causing them to move, producing friction and heat which cooks the food. • Do not lean on or allow children to swing on the microwave oven door. Do not operate microwave oven when it is empty.
Cookware and dinnerware must fit on the turntable. Always use oven mitts or pot holders when handling because any dish may become hot from heat transferred from the food. Do not use cookware and dinnerware with gold or silver trim. Use the following chart as a guide, then test before using. MATER IAL R ECOMM EN DATIONS Aluminum Foil, Metal See "Aluminum Browning Dish Bottom must be at least 3Ae"(5 mm) above the turntable. Follow manufacturer's recommendations.
PERCENT/NAME NUMBER USE For best cooking performance: 60% 6 Cooking sensitive foods such as cheese and egg dishes, pudding and custards. Before using a sensor cook function, make sure power has been supplied to the microwave oven for at least 2 minutes, the room temperature is not above 95°F (35°C), and the outside of the cooking container and the microwave oven cavity are dry. Cooking non-stirrable casseroles, such as lasagna. 50%, Medium 40% 5 4 Cooking ham, whole poultry and pot roasts.
3. Touch OFF or open the door to clear the display and/or stop reminder tones. Use the following chart as a guide. CRISPER PAN FRYING CHART FOOD Eggs, Fried 2 eggs 4 eggs Omelet 4 eggs Sausage Patties 1.5 oz (42.5 g) each 4 patties COOKTIME* INSTRUCTIONS Times are for overeasy doneness. Side 1: 30-45 sec Side 2:30-45 sec Side 1:1 min Side 2:45 sec 2-3 min Mix eggs and 4 tbs of water.
To Reheat Beverage: 1. Touch CUSTOM REHEAT. 2. Use the following chart as a guide. CUSTOM DEFROST CHART Touch number key "6" OR Touch CUSTOM REHEAT repeatedly to scan and select the Beverage setting. FOOD CODE WEIGHT Meats* 1 0.1 - 6.6 Ibs (45 g - 3 kg) 3. Touch number key to enter cups quantity. Poultry* 2 0.1 - 6.6 Ibs (45 g - 3 kg) 4. Touch number keys 1 to 3 to select Warm, Hot, Very Hot, OR Touch CUSTOM REHEAT repeatedly to scan and select temperature setting. Fish* 3 0.1 - 4.
Use the following chart as a guide when defrosting meat, poultry, or fish. DEFROST PREPARATION 3. CHART When the steam time has ended, the oven will shut off automatically and "steam complete" will appear in the display. MEAT Beef: ground, steaks, roast, stew Lamb: stew and chops Pork: chops, ribs, roasts, sausage The narrow or fatty areas of irregular shaped cuts should be shielded with foil before defrosting. Do not defrost less than 1¼Ib (113 g) or two 4 oz (113 g) patties.
3. Touch START. The upper oven display will count down the popping time. • Do not use plastic utensils on the crisper pan, as it becomes very hot quickly and could melt the utensils. When the stop time is reached, the oven will shut off automatically and "cooking complete" will appear in the display. • Do not use metal utensils, as they can scratch the pan. • Do not use the crisper pan in any other microwave oven or in a standard thermal oven.
Soften and Melt functions may be used to soften or melt your food. Times and cooking powers have been preset for a number of food types. Use the following chart as a guide. SOFTEN CHART FOOD CODE QUANTITY PREPARATION Butter 1 1/2-2sticks Margarine 2 1/2-2sticks Unwrap and place in microwave-safe container. Ice cream 3 16, 32, or 64 oz (454, 907 g, or 1.8 Kg) Cream cheese 4 3 or 8 oz. (85g or 227g) Unwrap and place in microwave-safe container.
• Use convection cooking for items such as souffles, breads, cookies, angel food cakes, pizza, and most meats and fish. • All EasyConvect TM functions require preheating before use. Place food in microwave oven after preheating is complete. To Use: 1. Position convection grid on turntable in microwave oven or place baking tray on slide rails and close the door. 2. Touch EASYCONVECT TM function. 3. Convection temperatures and times differ from those of standard cooking.
Cleaning Method: TURNTABLE Average soil • Mild, nonabrasive soaps and detergents: Rinse with clean water and dry with soft, lint-free cloth. Heavy soil • Mild, nonabrasive soaps and detergents: Heat 1 cup (250 mL) of water for 2 to 5 minutes in oven. Steam will soften soil. Rinse with clean water and dry with soft, lint-free cloth. Odors • Lemon juice or vinegar: Heat 1 cup (250 mL) of water with 1 tbs (15 mL) of either lemon juice or vinegar for 2 to 5 minutes in oven.
TROUBLESHOOTING Try the solutions suggested here first in order to avoid the cost of an unnecessary service call. Turntable rotates both directions Nothing will operate • Has a household fuse blown, or has the circuit breaker tripped? Replace the fuse or reset the circuit breaker. If the problem continues, call an electrician. • Is the appliance wired properly? See Installation Instructions. Microwave • This is normal and depends on motor rotation at beginning of cycle.
ASSISTANCE OR SERVICE Before calling for assistance or service, please check "Troubleshooting." It may save you the cost of a service call. If you still need help, follow the instructions below. When calling, please know the purchase date and the complete model and serial number of your appliance. This information will help us to better respond to your request. If you need replacement parts If you need to order replacement parts, we recommend that you use only factory specified parts.
KITCHENAID ®BUILT-IN OVEN & MICROWAVE WARRANTY LIMITED WARRANTY For one year from the date of purchase, when this major appliance is operated and maintained according to instructions attached to or furnished with the product, KitchenAid brand of Whirlpool Corporation or Whirlpool Canada LP (hereafter "KitchenAid") will pay for Factory Specified Parts and repair labor to correct defects in materials or workmanship. Service must be provided by a KitchenAid designated service company.
p p _. SECURITE DU FOUR A MICRO-ONDES Votre securite ENCASTRE p et celle des autres est tres importante. Nous donnons de nombreux messages de s6curit6 importants dans ce manuel et sur votre appareil m6nager. Assurez-vous toujours lire tousles messages de s6curit6 et de vous y conformer. de Ce symbole d'alerte de s6curit6 vous signale les dangers potentiels de d6c_s et de blessures graves & vous et & d'autres. Voici le symbole d'alerte de s6curit6.
IMPORTANTES iNSTRUCTiONS Les liquides tels que I'eau, le caf6 ou le th6 peuvent trop chauffer - au-del& du point d'6bullition - sans sembler bouillir. II n'y a pas toujours des bulles ou une 6bullition Iorsqu'on retire le r6cipient du four & microondes. _, CAUSE DE CECI, DES LIQUIDES TR_:S CHAUDS POURRAIENT Dt_BORDER LORSQU'ON BOUGE LE RECIPIENT OU QUE L'ON UTILISE UNE CUILLERE OU UN AUTRE USTENSILE POUR LE REMUER. DE SECURITE [] Ne pas remiser le four & micro-ondes & I'ext6rieur.
PIECES ET CARACTERISTIQUES Ce manuel couvre differents modeles. Le four & micro-ondes que vous avez achete peut comporter I'ensemble des pieces et caracteristiques enumerees ou seulement certaines d'entre elles. L'emplacement et I'apparence des caracteristiques illustrees peuvent ne pas correspondre & ceux de votre modele. ,:,,_,_,__ _ _- H A. Plateau rotatif B. Support et roulettes C. Axe Le plateau rotatif tourne dans les deux sens pour permettre une cuisson plus uniforme.
..0;, ....F, .. g_....... _ %7 Utiliser le cuiseur-vapeur KITCHENAID TM avec la caracteristique de cuisson & la vapeur pour cuire les aliments a la vapeur. A La peele a croustiller, avec sa surface antiadhesive et sa poignee amovible, a ete con£;ue specialement pour I'utilisation au four & micro-ondes et est ideale pour faire sauter (brunir) des aliments dans le four a micro-ondes. • La peele & croustiller deviendra chaude.
p COMMANDE ELECTRONIQUE DU FOUR Ce manuel couvre differents modeles. Le four que vous avez achete peut comporter tousles articles enum6r6s ou seulement certains d'entre eux. Les emplacements et aspects des articles illustres ci-dessous peuvent ne pas correspondre a ceux de votre modele. ModUles de fours combin4s A B D C E F G H ....//%% S RQ A. Commandes du four inf_rieur (voir Guide d'utifisation et d'entretien s_par_) B. Minuterie G. Cuisson pour consistance croustillante H.
A B Afficheur du four inf_rieur (modUles de fours combin_s) A. Symbole de la cavit_ du four B. Afficheur de I'heure/minuterie A B Afficheur du four _ micro-ondes sup_rieur (modUles de fours combin_s) A. Symbole de la cavit_ du four _ micro-ondes B. Afficheur de la minuterie Afficheur du four _ miero-ondes (mod_les de four simple) A. Symbole de la cavit_ du four _ micro-ondes B.
Quatre bips • Touche Start appuyee Iorsque la porte est ouverte Le verrouillage des commandes desactive les touches du tableau de commande pour eviter I'utilisation involontaire du four. Si le verrouillage des commandes a et6 regl6, la fonction reste activee apr_s une panne de courant. • Lorsque les commandes sont verrouillees, seules les touches TIMER SET/START (reglage minuterie/mise en marche) et TIMER OFF (arret minuterie) fonctionnent.
La temperature est prer6gl6e en Fahrenheit, mais elle peut _tre modifiee et affichee en Celsius. R_glage : 1. Appuyer sur TIMER SET/START (reglage de la minuterie/mise en marche). Appuyer & nouveau pour passer des MIN/SEC aux HR/MIN. Modification : Appuyer sur OPTIONS, puis sur "1" pour passer de Fahrenheit a Celsius. En mode Fahrenheit, "°F" apparait apres la temperature En mode Celsius, "°C" apparait apres la temperature du four. du four.
Remuer et tourner Remuer et tourner les aliments redistribue la chaleur de maniere uniforme pour eviter la cuisson excessive des bords externes des aliments. M61anger de I'exterieur vers le centre. Si possible, retourner les aliments. Disposition S'il s'agit d'aliments de formes irregulieres ou de dimensions differentes, les parties plus minces et les morceaux plus petits doivent _tre disposes pres du centre.
Toujours utiliser des mitaines de four ou des maniques Iors de I'enlevement des contenants du four & micro-ondes. Le papier d'aluminium et certains metaux peuvent etre utilises dans le four & micro-ondes. Si ces articles ne sont pas correctement utilises, des arcs (un eclair bleu) peuvent survenir et causer des dommages au four a micro-ondes.
R6glage d'une puissance de cuisson autre que 100 % : 1. Appuyer sur les touches num6riques pour regler la duree de cuisson. 2. Appuyer sur POWER (puissance). 3. Appuyer sur la touche num6rique en utilisant le tableau de puissance de cuisson aux micro-ondes. 4. Appuyer sur START (mise en marche). Utilisation 1. : Appuyer sur COOK TIME (duree de cuisson) puis sur les touches numeriques pour regler une duree de cuisson OU Le compte a rebours de la duree de cuisson s'affiche.
2= Appuyer sur START (mise en marche). ALIMENT CODE QUANTITI_ Sauce Placer dans un recipient resistant aux micro-ondes. Recouvrir d'une pellicule de plastique et laisser une ouverture d'echappement de I'air. Remuer et laisser reposer pendant 2 & 3 minutes apres le rechauffage. 2 1 & 4 tasses (250 mL 1 L) Le compte a rebours de la duree de cuisson s'affiche.
R_chauffage manuel : 1. Appuyer sur CUSTOM REHEAT. 2. Appuyer sur la touche "7" OU Appuyer sur CUSTOM REHEAT de fa£;on rep6t6e pour parcourir le reglage manuel. On peut utiliser la caracteristique Custom Defrost (decongelation personnalisee) ou regler manuellement le four & micro-ondes pour la decongelation en utilisant la puissance de cuisson & 30 %. En cas d'utilisation d'une puissance de cuisson & 70 %, passer directement & I'etape 4.
Appuyer sur START (mise en marche). 4, VOLAILLE L'affichage du four superieur procede a un compte a rebours de la duree de decong61ation. Pour les meilleurs resultats, un temps de pause prer6gl6 est compris dans la duree de decong61ation. Cette action peut faire sembler le temps de decong61ation plus long que prevu.
Appuyer sur START (mise en marche). L'afficheur du four superieur demarre le compte a rebours de la cuisson a la vapeur une fois que le detecteur a identifie la duree de cuisson. 3. Lorsque I'heure d'arr_t est atteinte, le four s'arr_te automatiquement et "steam complete" (cuisson & la vapeur terminee) apparait sur I'afficheur.
TABLEAU DE CUlSSON POUR CONSISTANCE CROUSTILLANTE La caracteristique de consistance croustillante utilise I'el6ment de cuisson au gril et les micro-ondes pour brunir et rendre croustillants les aliments. La fonction de consistance croustillante peut _tre utilisee pour saisir les viandes et les legumes, frire le bacon et les ceufs et pour rendre croustillantes et brunes les pizzas et les frites. Toujours utiliser la po_le & croustiller. Voir la section "Po_le & croustiller et poignee" avant I'utilisation.
5, Appuyer sur START (mise en marche). Les signaux sonores de fin de programme se font entendre (si actives), suivis des signaux de rappel & intervalles d'une minute. L'affichage du four superieur procede a un compte a rebours de la duree de ramollissement. 6. Lorsque I'heure d'arr6t est atteinte, le four s'arr6te automatiquement et "soften complete" (ramollissement termine) apparait sur I'afficheur.
TABLEAU DE CONVECTION RI_GLAGE ALIMENTS CODE PLATS CUlSINleS Biscuits, pains : & cuisson rapide, & levure, 1 4. Appuyer sur les touches numeriques pour regler la temperature standard. La temperature peut etre reglee entre 170°C et 450°C (77°C et 232°C). 5. Appuyer sur les touches numeriques pour regler la duree de cuisson standard. On peut regler une duree de 11 minutes et 59 secondes.
r CAVITE DU FOUR A MICRO-ONDES PLATEAU ROTATIF Ne pas utiliser de tampons & recurer savonneux, de nettoyants abrasifs, de tampons en laine d'acier, de chiffons de lavage rugueux ou certains essuie-tout recycles. Des dommages peuvent survenir. Remettre le plateau rotatif en place immediatement apr_s le nettoyage. Ne pas faire fonctionner le four a micro-ondes Iorsque le plateau rotatif est enlev& Sur les modeles en acier inoxydable, frotter dans le sens du grain pour eviter d'endommager le fini.
p DEPANNAGE Essayer les solutions sugg_r_es ici d'abord afin d'_viter le co_t d'une visite de service inutile. Rien ne fonctionne Des messages s'affichent • Un fusible est-il grill_ ou le disjoncteur s'est-il d_clench_? Remplacer le fusible ou reenclencher le disjoncteur. Si le probleme persiste, appeler un electricien. • L'appareil est-il correctement raccord_? Voir les Instructions d'installation.
ASSISTANCE OU SERVICE Avant de faire un appel pour assistance ou service, consulter la section "Depannage". Ce guide peut vous faire economiser le coQt d'une visite de service. Si vous avez encore besoin d'aide, suivre les instructions ci-dessous. Lors d'un appel, veuillez connaftre la date d'achat, le numero de modele et le numero de serie au complet de I'appareil. Ces renseignements nous aideront & mieux repondre a votre demande.
ARTICLES La pr_sente 1. 2. 3. 4. 5. garantie limit_e ne couvre EXCLUS DE LA GARANTIE pas : Les visites de service pour rectifier I'installation du gros appareil menager, montrer & I'utilisateur comment utiliser I'appareil, remplacer ou reparer des fusibles ou rectifier le c&blage ou la plomberie du domicile. Les visites de service pour reparer ou remplacer les ampoules electriques de I'appareil, les filtres & air ou les filtres & eau. Les pieces consomptibles ne sont pas couvertes par la garantie.