Instructions for use
Precautions and general recommendations 4 Parts of the dishwasher 6 Options and display description 7 Program table 8 First time use 9 Daily check 10 Daily use 12 How to load the racks 13 Maintenance and care 16 What to do if...
Precautions and general recommendations 1. Packing The packaging materials are 100% recyclable and marked with the recycling symbol . 2. Removing the packaging and inspecting the contents After unpacking, make sure the appliance is undamaged and the door closes correctly. If in doubt, contact a qualified technician or your local retailer. 3. Before using the dishwasher for the first time - The appliance is designed to operate with a minimum ambient temperature of 5°C.
and turn off the water tap; also disconnect in the event of any malfunction. - Repairs and technical modifications must be carried out exclusively by a qualified technician. - The appliance is not intended to be used without decorative plate. Please ensure that appliance after instalation always have decorative plate. 7. Resistance to frost If the appliance is placed in surroundings exposed to the risk of frost, it must be drained completely.
Parts of the dishwasher 1. salt reservoir 2. rinse aid dispenser 3. detergent dispenser 4. racks system 5,6,7,8. available functions on the panel 9. filters 10.
Options and display description Before using the appliance for the first time carefully read this quick reference guide and the assembly instructions! If “Fx Ey” messages appears on the display, see chapter “What to do if...”. The control panel of this dishwasher activates pushing any button except cancel/off button. For energy saving the control panel deactivates automatically after 30 seconds if no cycle has started. Delayed start button Push the button (repeatedly) to delay the start of the program.
Program table Table of programs Available options Programs P1 Sensor Dynamic Clean P2 Pre-Wash P3 P4 Consumption Detergent Loading instructions Use for normal soiled dishes with dried-on food. Senses the level of soiling on the dishes and adjusts Delay the program accordingly. When Multizone the sensor is detecting the soil 40-70°C Dynamic level an animation appears in the display and the cycle duration is Clean Antibacterial updated.
First time use How to set water hardness in order to always assure the best cleaning results. Water hardness level is factory set for medium-hard water (level 4). Detergents Water hardness should be set only before the first wash or if water hardness has been changed. When you use Powder or Gel you must use salt and set up water hardness level as indicated in the table on the right. Also when you use Tablets which include salt functionality you must still add regeneration salt.
Daily check Filling the salt reservoir Dissolve limescale (not necessary if water hardness level is set to “soft 1”!) Once regeneration salt is added, immediately start a wash program (the “Pre-wash” program alone is not sufficient). Residual saline solution or grains of salt can lead to deep-down corrosion, irreparably damaging the stainless steel components. The guarantee is not applicable if faults are caused by such circumstances.
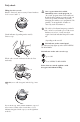
Adding rinse aid (not necessary when you use tablets). How to adjust the rinse aid dosage regulator Check the rinse aid indicator to check the level into the dispenser. (depending on the model) Visual indicator Rinse aid indicator on the control panel The indicator lamp lights up when RINSE AID NEEDS TO BE ADDED. Rinse aid indicator on the dispenser dark: OK. If required, open the cover B (press the dedicated button).
Daily use Use only one tablet per one cycle, only placed in detergent dispenser. Some type of tablets could not dissolve completely during the short programs (Fast, Fragile, Handwash); placing the tablet on the tub bottom can help dissolving and washing. Adding detergent Use only detergent specifically for dishwashers in accordance with the supplier’s recommendations Open the cover A (press the dedicated button). Only fill the detergent dispenser prior to starting a wash program.
How to load the racks How to adjust upper rack height (if available). It could be useful to lift up the upper rack to have more space in lower rack or bring it down to load long stem glasses. - Grasp and take out the two lateral handles (C) (they must be on the same level) and lift up or take down the upper rack. UPPER RACK - depending on the model A - Adjustable flaps (2 or 4): in horizontal position for cups/long utensils/stemmed glasses.
LOWER RACK - depending on the model E - Cutlery basket F - Grid: helps to keep the cutlery separate for better washing results. G - Vertical plate holders: they can be folded down to load pots. H - Lateral support with foldable flaps (if available): shelves can be used to hold long tools or cups onto. THE LATERAL SUPPORT CAN BE REMOVED: pull the support to the front of the basket and lift to remove it. 2. Load pots and casseroles inclined vertically in Dynamic Clean area.
Select program Overview of programs The max. possible number of programs is illustrated in the chapter "Program table". The corresponding programs for your appliance can be found on the panel Switching off the appliance. Everything OK... After the program is completed appliance turns into Standby mode automatically. All indicator lamps switch off. Exercise caution when opening the door: beware of hot steam.
Maintenance and care Filters Check and clean if necessary Rectifying minor faults yourself... Spray arms Remove blockages/ deposits. Unscrew microfilter (1), remove it (2) and remove fine sieve (3)... Unscrew and remove upper arm... Rinse under running water... Unscrew and remove lower arm... Insert. Clean spray nozzles under running water (use toothpicks if necessary)... Screw on microfilter NOTE MARK! Insert and screw on upper and lower arms tightly.
What to do if... If a fault occurs, before contacting the After-sales Service, make the following checks to try and remedy the problem. Most faults can be remedied by taking the following courses of action, quickly restoring normal appliance operation. The appliance... salt indicator is lit Possible causes... Solutions... • Salt reservoir is empty. (After refill • Refill reservoir with salt the sale indicator may remain lit at • Adjust water hardness - see table. the end of several wash cycles).
After taking the above course of action, the fault message must be reset. In the majority of cases the fault is thus eliminated. RESET: - Press the button. - Close the door. - Water drains automatically for up to 1 minute. - The appliance is now ready to be restarted. Crockery and cutlery... Possible causes... Solutions... ...are not perfectly clean/have food residues • Too little space between dishes (incorrect arrangement of the concave items in the rack).
Crockery and cutlery... Possible causes... Solutions... ...are not dry • Plastic containers dry badly. • Synthetic materials do not dry well; if wet at end of cycle, wipe dry. • Clean dishes left in dishwasher for • In this situation, the presence of a long time after end of cycle (e.g. drops of water on dishes and on the when using “Delayed start” option). sides of the dishwasher is normal. Try releasing the door 5 minutes before removing the dishes.
Crockery and cutlery... Possible causes... Solutions... ...rust marks • Pre-wash program not used. • Salty or acidic food residues can cause rust marks even on stainless steel cutlery. To avoid this, always use the pre-wash program if the dishes are to be washed later. ...other marks • Rinse aid dosage too low. ...streaks • Rinse aid dosage too high. ...suds • Unsuitable dosage of detergent/rinse aid. • In the presence of marks, increase the rinse aid dosage (see “Adding rinse aid”).
Printed in Italy 02/14 5019 500 00067 n