
Owner's Manual


27
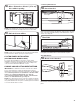
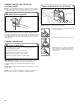
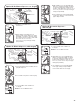
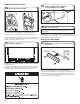
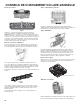
Check that the lower edge of the access panel touches the oor.
Adjust if necessary.
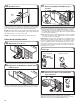
Use a 5/16" nut driver to reinstall the screws through the holes in
the access panel.
CHECK OPERATION
■ Read the dishwasher Quick Start Guide that came with your
dishwasher.
■ Check that all parts have been installed and no steps were
skipped. Check that you have used all tools.
■ Run the Installation Cycles as follows (Note that it can be
benecial to run this with the access panel removed in order
to look for presence of water under the unit. If running in this
state, the oat switch wire MUST still be connected to the oat
switch.)
■ If the dishwasher is not working properly, disconnect power
or unplug dishwasher and refer to the “If Dishwasher Does Not
Operate” section.
■ Press any 3 keys in the sequence 1-2-3-1-2-3-1-2-3 with
no more than 1 second between key presses to enter the
Installation Cycle.
■ The cycle will start when the door is closed.
■ All LEDs turn on immediately upon receiving entry sequence.
■ A tone may play depending on the model.
■ The cycle will pause when the door is opened and resume
when closed. No Start/Resume key press required to resume.
■ The installation cycle may last several minutes.
■ Press Cancel key to exit service diagnostic mode. The product
will exit this mode after 10 minutes or if power is removed from
the appliance.
IF DISHWASHER DOES NOT OPERATE
First try the solutions suggested here to possibly avoid the cost
of a service call.
■ Has the circuit breaker tripped or the house fuse blown?
■ Is the door closed tightly and latched?
■ Has the cycle been set correctly to start the dishwasher?
■ Is the water turned on?
■ Is the oat switch wire under the product connected to the oat
switch?
If none of these possible solutions work, please see the Quick
Start Guide for service contact information.
51. Check access panel edge
52. Reinstall access panel