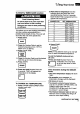
Use and Care Guide KitchenAid FOR' THE- WAY IT'S MADE _ t A Note to You .......................................2 Oven Safety..........................................3 Parts and Features..............................5 Using Your Oven .................................6 Usingthe electronicoven control ....6 Oven settings...................................11 Settingthe clock..............................12 Usingthe timer ................................12 Baking/Roasting..............................
Note to You T_atl_z_Jou for buying a KITCHENAID ® appliance! KitchenAid designs the best tools for the most important room in your house. To ensure that you enjoy many years of trouble-free operation, we developed this Use and Care Guide. It contains valuable information concerning how to operate and maintain your new appliance properly and safely. Please read it carefully. Also, please complete and mail the enclosed Product Registration, Card. Please record your model's information.
Oven Safety Your safety and the safety of others is very important. We have provided many important safety messages in this manual and on your appliance. Always read and obey all safety messages. This is the safety alert symbol. This symbol alerts you to hazards that can kill or hurt you and others. All safety messages will be preceded by the safety alert symbol and the word "DANGER" or "WARNING." These words mean: You will be killed or seriously injured if you don't follow instructions.
Oven Safety IMPORTANT SAFETY INSTRUCTIONS • Placement of Oven Racks -Atways place oven racks in desired location while oven is cool. If rack must be moved while oven is hot, do not let potholder contact hot heating element in oven. • DO NOT TOUCH HEATING ELEMENTS OR INTERIOR SURFACES OF OVEN - Heating elements may be hot even though they are dark in color. Interior surfaces of an oven become hot enough to cause bums.
Parts and Features (Model KEBI276D shown) Electronic oven control (p.6) I I Oven vent oven light switch (on latch assembly) oveoven door) (p. 22) Dual broil Oven lock latch (p.11) Oven light (on left oven wall) (p. 29) Oven light (on right oven wall) (p. 29) (hidden under oven cavity floor) (p. 11) Model end serial number (on right mounting rail) 0 0 Lower oven _. (double ovens _.
sing Your Oven Using the electronicoven control (double oven shown) NOTE: Displays and command pads shown are for double upper ovens. In some cases, lower oven and single oven displays and command pads may Iookdifferent than those shown. Oven display (see below) Timed and delayed Number Time of day/timer display pads Start pad (p. 7) DD© K;O Oven Oven setting pads (pp. 13, 18, 24) selector pads (double ovens only) (p. 7) Control lock pad (p. 8) Oven light pad (p. 29) Clock set/start pad (p.
Using Your Oven Starting an operation To turn on and off all reminder After (single or double ovens): PRESS and hold for 5 seconds programming a function, you must tones function. If youtodo not the press press START start START within 5 seconds of programming, "START?" display as a reminder. Canceling CANCEL/OFF (single ovens) OR will show on the an operation will cancel any function, except for the Clock and Timer functions.
fusing Your Oven Using the control lock The control lock prevents unwanted use of the oven by disabling the control panel command pads. To SET the Sabbath mode: 1. Open the oven door. 2. Press CANCEL/OFF. NOTES: • Control lock is only available when oven is not in Self-Cleaning cycle or Sabbath mode. • CANCEL/OFF e will still work during control lock, but you will need to press it for 1 second. • On both single and double ovens, the control lock will not disable the Timer.
..Jsing Your Oven To START a TIMED BAKE function: Food Poisoning Hazard Do not let food sit in oven more than one hour before or after cooking. Doing so can result in food poisoning" or sickness. This allows you to start cooking immediately and stop cooking automatically for a predetermined length of time. The oven will shut off at the end of the preset time. t. Press BAKE. 2. Press the Number Pads to set the desired temperature from 500°F (77°C to 260°C). 3. Press COOK TIME. 2.
r'L/sing Your Oven • If you open the oven door when the elements are off, the elements will not turn on. Elements will not turn on immediately after the door is closed. If you open the oven door when the elements are on, the elements will turn off after a delay. Again, elements will not turn on immediately after the door is closed. • The preset temperature will remain the same prior to entering the Sabbath mode unless the preset temperature is changed.
' sing Your Oven Oven settings This chart tells you when to use each setting. It also explains which elements heat up for each setting. SETTING DIAGRAM BAKE SE'I-rlNG INFORMATION • The bottom element and both top elements heat up. Use this setting for standard baking and roasting. • The elements maintain Bake element (not visible) BROIL (MAXl/ECONO) Use this setting for broiling regular-sized and smaller cuts of will turn on and off to the oven temperature.
'_sing Your Oven Setting the clock Using the timer The Timer does not start or stop the oven. It works like a regular kitchen timer. It can be set in hours and minutes up to 99 hours, 59 minutes, or in minutes and seconds up to 99 minutes, 99 seconds. NOTES: • These examples are for double upper ovens only. Other ovens may look slightly different. • If a timed oven function is active or programmed, you cannot change the clock.
Using 4. When time is up, turn off Timer. When time is up, you will hear four tones unless end-of-cycle tone is disabled. Press TIMER CANCEL to clear the display. Also, four tones will sound every minute as an audible reminder unless they are disabled. (See "Changing Audible Signals" in the "Using Your Oven" section.) Your Oven IMPORTANT: Never place food directly on the oven door or the oven bottom. Your oven(s) has 2 racks and 5 rack positions.
' sing Your Oven 4. When roasting or cooking casseroles, put food in oven. You do not have to preheat the oven when roasting or cooking casseroles. 5. Preheat oven (baking)/start oven (roasting). PRESS Roasting meats and poultry • For even cooking, place the meat on a rack in a shallow pan. This keeps the meat out of the drippings and allows the heat to circulate better. , Use a meat thermometer for the most accurate doneness.
q sing Where to place WHEN HAVE pans: Rack placement YOU Your Oven for specific foods: FOOD RACK POSITION Frozen pies, large roasts, turkeys, . angel food cakes 1st or 2nd rack guide from bottom Bundt cakes, most quick breads, yeast breads, casseroles, meats 2nd rack guide from bottom Cookies, biscuits, muffins, cakes, nonfrozen pies 2nd or 3rd rack guide from bottom PLACE 1 pan In center of the oven rack. 2 pans Side by side or slightly staggered.
Using Your Oven NOTES: Using aluminum foil • Do not line the oven bottom with any type of foil, liners, or cookware. Permanent damage will occur to the oven bottom finish. • Do not block the oven bottom vents. • DO not cover the entire rack with aluminum foil. Doing so will reduce air circulation and overall oven performance. = To catch splllovers from pies or casseroles place foil on the oven rack below. Foil should be turned up at edges and be at least I inch (2. 5 cm) larger than dish.
Using Each time you press BROIL, the displayed temperature will decrease by 5°F (3°C). (To determine the amount of adjustment needed, see the chart below.) Your Oven m Broiling NOTE: If there is no "F" after the temperature, you are in the Celsius mode. 3. Enter the adjustment. PRESS • These examples are for double upper ovens only. Other ovens may look slightly different. • Preheating is not necessarywhen broiling.
_.]sing Your Oven 3. Close door. NOTE: Do not keep the door open as on other electric ovens. Unlike other electric ovens, the broil element will only stay on with the door closed. This gives you the high heat you need for broiling. However if you leave the door open, the broil element will go off. 5. Set temperature (optional). Do this step if you want to use variab(e temperature broiling (see below). PRESS 4. Press BROIL. Once for Maxi Broil PRESS 6. Start oven.
"-(._]singYour Oven • Thicker and fish, chicken better if you temperatures Broiling unevenly shaped cuts of and other meats may cook use lower broiling when cooking to well-done. • For easier cleaning, line the bottom of the pan with aluminum foil. Clean the pan and gdd as soon as possible after each use. guidelines • Use only the broiler pan ed. They are designed to from the cooking surface. helps prevent spatter and • After broiling, remove the pan from the oven when removing the food.
Using Your Oven Timed cooking 2. Choose setting. PRESS to select oven (for double ovens) NOTE: These examples are for double upper ovens only. Other ovens may look slightly different. The electronic clock/oven control will turn the oven on and off at times you set, even when you are not around. Delayed time cooking is ideal for foods which do not require a preheated oven, such as meats and casseroles. Do not use delayed time cooking for cakes, cookies, etc. - they will not rise properly.
Using 6. Start oven. Your Oven _J_ 3. Set temperature (optional). Do this step if you want to set a PRESS temperature PRESS 7. When baking/roasting is done: "End" will show on the display. Four tones will sound, followed by four reminder tones (unless they have been disabled), every minute until you open the door, or press CANCEL/OFF. NOTE: See a reliable cookbook for temperature To delay start and stop automatically: other than the one displayed. recommendations. 4. Press COOK TIME. 1.
fusing Your Oven 7. Set stop time. PRESS The oven vent(s) Hot air and moisture escape from the oven(s) through vent(s). The vent is above the oven door. It is needed for air circulation. Do not block the vent(s). roasting can result. 8. Press START, Oven vent 9. When baking/roasting is done: "End" will show on the display. Four tones will sound, followed by four reminder tones (unless they have been disabled), every minute until you open the door, or press CANCEL/OFF.
Using the Self-Cleaning Cycle Burn Hazard Do not touch the oven during the Self-Cleaning Keep children away from oven during Do not use commercial oven cleaners cycle. Self-Cleaning cycle. in your oven. Failure to follow these instructions can result in burns, or illness from inhaling dangerous fumes. Before you start DO NOT hand-clean gasket Hand-clean frame around edge Before you start the Self-Cleaning cycle, make sure you: NOTE: DO NOT clean, move, or bend the gasket.
r_sing the Self-Cleaning Cycle 1, Press CLEAN. TIPS: A 3_-hour Self-Cleaning cycle will be set, (The first 3 hours are for cleaning, the last 30 minutes are for cooling.) • Keep the kitchen well ventilated during the Self-Cleaning cycle to help get rid of heat, odors, and smoke. • Clean the oven before it gets heavily soiled. Cleaning a very soiled oven takes longer and results in more smoke than usual. PRESS • Do not block the vent during the SelfCleaning cycle.
'_/sing the Self-Cleaning 4. After the Self-Cleaning cycle ends: YOU SEE Cycle • Use 2½ hours for light soil. • Use 3½-4½ hours for moderate to heavy soil. 3. Press STOP TIME. STOP I (double oven display) To delay cleaning start time: 1. Press CLEAN. A 3_-hour Self-Cleaning cycle will be set. (The first 3 hours are for cleaning, the last 30 minutes are for cooling.) PRESS 4, Set Stop time. Example for 7:00: PRESS to select oven (for double ovens) PRESS 5.
_Jsing the Self-Cleaning To stop the Self-Cleaning cycle at any time: Cycle How the cycle works The Self-Cleaningcycle uses very high heat to burn away soiland grease. During the cycle,the oven gets much hotterthan it does fornormal baking or broiling. This high heat breaks up the soilor grease and burns it away. Your oven is preset for a 3_-hour SelfCleaning cycle. However, you can adjust the cycle time to the amount of soil in your oven. You can set the cycle anywhere between 2½ and 4½ hours.
Caring for Your Oven Explosion Do not store flammable this appliance, Doing so can result'in Cleaning Hazard materials . such as gasoline death, explosion, near or fire, Chart Before cleaning, always make sure all controls are off and the range is cool. Refer to instructions on all cleaning products before using them to clean your range.
B Caring for Your Oven PART CLEANING METHOD SPECIAL Oven racks • Soap and water • Steel wool pad • Wash, rinse and dry. • Self-cleaning cycle • Place On 2nd and 4th rack guides. Racks will discolor and become harder to slide. After cleaning, apply vegetable oil to rack guides for easier sliding. • Soap and water • Steel wool pad • Wash, rinse and dry. Broiler pan and grid INSTRUCTIONS • Dishwasher • Solution of 1/2cup (125 mL) • Soak for 20 minutes, then scrub ' ammonia to 1 gallon (3.
Caring for Your Oven To replace: 1, Fit hinge arms into slots in frame. Push in at lower comers to insure that hinge arms are fully engaged. Using and replacing the oven lights The oven lightswill (x)me on when you open the oven door.To turn the lights on when the oven door is closed, press OVEN LIGHT {_ on the control panel. Press {_ again to turn off the lights. NOTES: • Make sure the oven is cool before replacing the light bulb. • The oven lights will not work during the Self-Cleaning cycle.
roubleshooting Most cooking problems often are caused by little things you can find and fix without tools of any kind. Check the lists below and on the next page before calling for assistance or service. If you still need help, see "Requesting Assistance or Service" on pages 32 and 33. Ifnothing operates,check the following: • Is the oven wired intoa livecircuit with the proper voltage? (See Installation Instructions.
._Troubleshooting PROBLEM Unevenly items CAUSE/SOLUTION baked • Check that the oven is level. • Bake in center of oven with 2 inches (5 cm) of space around each pan. • Check Crust edge browns before is done to make sure batter is level in pan, • Shield edge with foil. pie The display is showing "PF" • There has been a power failure. Reset the clock. (See "Setting the clock" in "Using Your Oven" section.) A letter followed • Press CANCEL/OFF.
questing Service Assistance or Before calling for assistance or service, please check the "Troubleshooting Guide" section. It may save you the cost of a service call. If you still need help, follow these instructions. If you need assistance or service Call the KitchenAld Consumer • Use and maintenance free: 1-800-422-1230. Our consultants are ssistance to Center toll available assist you.
_questing Assistance or Service If you need assistance or service in Canada: • Accessory and repair parts sales. Call the KitchenAid Consumer • Specialized customer assistance (French speaking, hearing impaired, limited vision, etc.). 8:30 a.m. - 6 p.m. (EST) at 1-800-461-5681. Our consultants are available ssistance Center toll free: to assist you. L_ • Referrals to local dealers, service companies, and repair parts distributors.
_tes 34
._tes 35
KitchenAid Electric Built-in Oven r arranty LENGTH OF WARRANTY: KITCHENAID WILLPAYFOR: KITCHENAID WILL NOT PAY FOR: ONE-YEAR FULL WARRANTY FROM DATE OF INSTALLATION. Replacement A. Service parts and repair labor costs to correct defects in materials or 1. Correct or workmanship. Replacement parts for solid state touch control or KITCHENAID Replacement parts for the porcelain oven cavity/inner door if the part rusts through due to defects in materials or workmanship. AND KITCHENAID B.