PAVT-1 Use & Care Guide Table of Contents Safety . . . . . . . . . . . . . . . . . . 1-2 Operating Tips . . . . . . . . . . 3-4 Detergent Loading Additional Tips Special Features . . . . . . . 10-11 Liquid Bleach Dispenser Fabric Softener Dispenser Finger Faucet End of Cycle Signal Automatic Lint Filtering System Safety Spin Unbalanced Spin Load Compensator Overload Protector Using the Controls (Two-Speed Models) . . . . . . . .
Safety Installer: Please leave this manual with this appliance. Consumer: Please read and keep this manual for future reference. Keep sales receipt and/or canceled check as proof of purchase. Model Number _______________________________ Serial Number ________________________________ Date of Purchase ______________________________ If you have questions, call: Maytag Customer Assistance 1-800-688-9900 U.S.A. 1-800-688-2002 Canada (Mon.-Fri., 8am-8pm Eastern Time) Internet: http://www.maytag.com U.S.
Safety Destroy the carton and plastic bags after unpacking the washer. Cartons covered with rugs, bedspreads, or plastic sheet can create a chamber with inadequate ventilation. WARNING To reduce the risk of fire, explosion, electric shock, or personal injury when using your washer, follow basic safety precautions, including the following: Remove the door to the washing compartment before the washer is removed from service or discarded. 1. Read all instructions carefully before using the washer.
Operating Tips Detergent • Use either liquid or granular laundry detergent. For best results, be sure detergent is added to the washer BEFORE the load and be sure the wash water is above 65° F. • Use the correct amount of detergent for the load size, soil level and water conditions. Use more detergent if you have hard water and very soiled loads. If you have soft water or a lightly soiled load, use less detergent. (See manufacturer’s instructions.) • Wipe up any detergent spills on the washer.
Operating Tips Additional Tips • During the spin, it is possible for the load to become unevenly distributed in the tub. If this happens, push in the control knob, open the lid, redistribute the load, close the lid and pull out the control knob. The spin will resume at the point it was interrupted. • If you open the lid during a spin cycle, the washer will stop. When the lid is closed and the control dial pulled out, the washer will continue the cycle at the point it was interrupted.
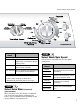
Using the Controls – Two-Speed Models STEP 1 STEP Select Water Level Select Wash/Rinse Temperature Determine the selected setting based on clothes load size. Selection should provide sufficient water to permit clothes to circulate freely during agitation. Your washer gives you a choice of hot, warm or cold water for washing and cold or warm water for rinsing. Use the chart below as a guide. It may become necessary, due to bulky fabrics, to adjust the water level after agitation begins.
Control features vary by model. STEP 3 STEP 4 Select Cycle Pull Control Dial Out to Start To select a cycle, push the control dial IN (off position) and turn it to the right (clockwise) until the pointer is at the soil level needed for the wash load in the Regular, Wrinkle Free Fabrics or Delicates cycles. You may stop the washer at any time by simply pushing the control dial IN. Therefore it is possible to obtain a non-agitated soak or to shorten, skip or repeat any part of a cycle.
Using the Controls – Speed Select Models STEP 1 STEP Select Water Level Select Wash/Rinse Temperature Determine the selected setting based on clothes load size. On select models, the infinite control allows you to select a specific setting or anywhere in between. Your washer gives you a choice of hot, warm or cold water for washing and cold or warm water (select models) for rinsing. Use the chart below as a guide.
Control features vary by model. WASH/RINSE TEMPS LOAD TYPE These settings feature Automatic Temperature Control: A.T.C. Hot/Cold Assures hot water wash temperature of approximately 110° F. Provides optimum cleaning results. A.T.C. Warm/Cold Assures warm water wash temperature of 78° F. Use for most loads. A.T.C. Cold/Cold Assures cold water wash temperature of 65° F to properly activate detergent 4 Select Wash/Spin Speed Your washer has selectable wash and spin speed combinations.
Using the Controls – Speed Select Models STEP 5 Select Cycle Wrinkle Free Fabrics/Delicates Cycles Regular Cycle Wrinkle Free Fabrics/Delicates Cycles share the same portion of the control dial. For wrinkle free fabrics, select the cycle and turn the Wash/Spin Speed dial to Wrinkle Free. For delicate loads, select Delicate Wash/Spin Speed. Regular Cycle is used for normal, sturdy fabrics and uses the following settings: PREWASH (select models): approximately 14 minutes of wash time.
Special Features Liquid Bleach Dispenser Fabric Softener Dispenser The dispenser automatically dilutes liquid chlorine bleach before it reaches your wash load. To use, follow these steps: The dispenser automatically releases liquid fabric softener at the proper time during the cycle. To use, follow these steps: 1. Measure liquid chlorine bleach carefully, following the instructions on the bottle. 1. Pour a measured amount of fabric softener into the dispenser to fill line only. 2.
Special Features, cont. End of Cycle Signal (select models) The end of cycle signal will sound once the cycle is completed. Unbalanced Spin Load Compensator Your new washer is designed to handle out-of-balance loads without shutting down or interrupting the washing cycle. For this reason, the cycle will always be completed.
Care & Cleaning 1. After washing, leave the lid open until the interior is dry. 2. Check hoses to be sure there are no kinks or knots. 3. Your washer should not be installed where temperatures will go below freezing, as damage to the washer could result. 4. To clean, occasionally wipe exterior with a clean damp sponge or cloth. Do not use polish on plastic parts. 5. Lifetime lubrication is done at the factory, so your washer never needs to be oiled or greased. 6.
Troubleshooting For problem laundry solutions (i.e. fabric damage, residue, tangling) and special laundry care procedures, see the enclosed Laundering Tips brochure. 13 Won’t Fill • • • • • • Plug cord into live electrical outlet. Check fuse or reset circuit breaker. Turn the control knob to proper cycle and pull knob out to start the washer. Turn both faucets on fully. Straighten inlet hoses. Disconnect hoses and clean screens. Hose filter screens may be plugged.
Troubleshooting Fills with the Wrong Temperature Water • Turn both faucets on fully. • If equipped with a temperature selector knob, be sure it is set directly on a temperature setting and not between settings. • Make sure temperature selection is correct. • If Auto Temperature Control (select models) is selected, cold water may feel warmer than cold water from the tap. (See page 7-8). • Make sure hoses are connected to correct faucets and inlet connections. Be sure water supply is regulated correctly.
Service & Warranty Washer Warranty Full One-Year Warranty For one (1) year from the date of original retail purchase, any part which fails in normal home use will be repaired or replaced free of charge.
PAVT-1 Guide d’utilisation et d’entretien Table des matières Sécurité . . . . . . . . . . . . . . 17-18 Conseils d’utlisation . . . . 19-20 Détergent Chargement Conseils supplementaires Commandes (Modèles à deux vitesses) Distributeur d’agent de blanchiment liquide Distributeur d’assouplissant Finger Faucet Signal – fin de cycle Filtre à charpie autonettoyant Essorage sécuritaire Compensateur de charge déséquilibrée pendant l’essorage Dispositif de protection contre les surcharges . . .
Sécurité Installateur : Veuillez laisser le présent guide avec l’appareil. Client : Veuillez lire le présent guide et le conserver pour référence future. Conservez aussi les reçus de caisse et les chèques oblitérés à titre de preuve d’achat.
Sécurité Détruisez l’emballage en carton et les sacs en plastique après avoir déballé la laveuse. Les emballages recouverts de tapis, de dessus de lit ou de plastique peuvent donner lieu à la formation d’espaces non aérés. AVERTISSEMENT Pour réduire les risques d’incendie, d’explosion, de choc électrique ou de blessures lors de l’utilisation de cet appareil, suivez les précautions d’usage, dont les suivantes : 1. 2. Lisez attentivement toutes les instructions avant d’utiliser la laveuse.
Conseils d’utilisation Détergent • Utilisez du détergent liquide ou en poudre. Pour des résultats optimums, ajoutez suffisamment de détergent dans la laveuse AVANT de la remplir et réglez la température de l’eau à plus de 18° C (65° F). • Utilisez la quantité de détergent qui convient à la charge, au degré de saleté et à la dureté de l’eau. Utilisez plus de détergent si l’eau est dure et que la charge est très sale. Si l’eau est douce ou que la charge est peu sale, utilisez moins de détergent.
Conseils d’utilisation Conseils supplémentaires • Il est possible que la charge se trouve déséquilibrée pendant l’essorage. Si cela se produit, appuyez sur le sélecteur, ouvrez le couvercle, rééquilibrez la charge, fermez le couvercle et tirez sur le sélecteur. L’essorage reprend au point où il s’était interrompu. • Cette laveuse effectue des pauses à plusieurs reprises au cours d’un cycle de lavage. Ces pauses momentanées font partie de son fonctionnement normal.
Commandes – modèles à deux vitesses ÉTAPE 1 ÉTAPE Sélection du niveau d’eau Réglez le sélecteur sur le réglage correspondant au volume de la charge. Cette sélection devrait fournir le niveau d’eau suffisant pour permettre le mouvement du linge au cours de l’agitation. Il peut s’avérer nécessaire, en raison de l’épaisseur de certains tissus, de régler le niveau d’eau après le début de l’agitation.
Les caractéristiques des commandes varient selon le modèle. ÉTAPE 3 Sélection du cycle Pour sélectionner un cycle, POUSSEZ sur le sélecteur (en position « off ») et tournez-le vers la droite (dans le sens des aiguilles d’une montre) jusqu’à ce que la flèche soit sur le degré de saleté correspondant au linge pour les cycles Regular (normal), Wrinkle Free Fabrics (tissus infroissables) ou Delicates (délicats).
Commandes – modèles avec sélection de la vitesse ÉTAPE 1 ÉTAPE Sélection du niveau d’eau Réglez le sélecteur sur le réglage correspondant au volume de la charge. Sur certains modèles, le sélecteur permet de sélectionner tout niveau d’eau (variation infinie). Il peut s’avérer nécessaire, en raison de l’épaisseur de certains tissus, de régler le niveau d’eau après le début de l’agitation.
Les caractéristiques des commandes varient selon le modèle. TEMPÉRATURE LAVAGE/RINÇAGE TYPE DE CHARGE Ces réglages comportent une commande automatique de température (C.A.T.) : A.T.C. Hot/Cold (chaude/froide) (C.A.T.) Maintien de la température de l’eau à environ 44° C (110° F) ; pour un nettoyage optimum. (tiède/froide) (C.A.T.) Maintien de la température de l’eau à 26° C (78° F). À utiliser pour la plupart des charges. A.T.C.
Commandes – modèles avec sélection de la vitesse ÉTAPE 5 Sélection du cycle Cycles Wrinkle Free Fabrics/Delicates (tissus infroissables/délicats) Pour sélectionner un cycle, POUSSEZ sur le sélecteur et tournez-le vers la droite (dans le sens des aiguilles d’une montre) jusqu’à ce que la flèche soit sur le degré de saleté correspondant au linge. Les cycles pour tissus infroissables/délicats partagent la même portion du sélecteur.
Caractéristiques spéciales Distributeur d’agent de blanchiment liquide Le distributeur dilue automatiquement l’agent de blanchiment liquide avant qu’il n’atteigne le linge. Pour l’utiliser, procédez comme suit : 1. Mesurez avec soin la quantité d’agent de blanchiment liquide en suivant les instructions sur le récipient. 2. Versez le produit dans le distributeur avant d’ajouter le linge. Évitez les éclaboussures ou le débordement du distributeur.
Caractéristiques spéciales, suite Signal – fin de cycle (certains modèles) Le signal sonore de fin de cycle est émis une fois après l’achèvement du cycle. Compensateur de charge déséquilibrée pendant l’essorage Cette laveuse est conçue pour contenir des charges déséquilibrées sans s’arrêter ou interrompre le cycle de lavage. Pour cette raison, le cycle sera toujours achevé.
Nettoyage et entretien 1. Après le lavage, laissez le couvercle ouvert jusqu’à ce que l’intérieur soit sec. 2. 3. 4. 7. Vérifiez les tuyaux pour vous assurer qu’ils ne s’entortillent pas et ne font pas de noeuds. Le dessus de la machine à laver ne doit pas être utilisé pour détacher les vêtements. Certains détachants, pour la rouille, entre autres, abîmeront le fini. 8. La laveuse ne doit pas être installée là où la température descend sous le point de congélation car cela pourrait l’endommager.
Recherche des pannes Pour des solutions aux problèmes de lessive (tissus abîmés, résidus, linge emmêlé, par exemple) et des méthodes spéciales d’entretien du linge, voyez la brochure « Conseils de lavage » incluse. 29 Ne se remplit pas • • • • • • Brancher la laveuse dans une prise murale sous tension. Vérifiez le fusible ou réenclenchez le disjoncteur. Mettez le sélecteur sur le cycle voulu et tirez dessus pour le mettre en position de marche. Ouvrez les deux robinets à fond.
Recherche des pannes Se remplit d’eau à une température qui n’est pas la bonne • Ouvrez les deux robinets à fond. • Si la laveuse est dotée d’un sélecteur de température, vérifiez que celui-ci est bien placé sur une température et non pas entre deux réglages. • Assurez-vous que la température sélectionnée est la bonne. • Si le réglage « Auto Temperature Control » (certains modèles) a été sélectionné, l’eau froide peut paraître plus chaude par rapport à l’eau du robinet (pages 23-24).
Garantie et service après-vente Garantie de la laveuse Garantie totale d’un an Pendant un (1) an à partir de la date de l’achat d’origine, toute pièce qui vient à être défectueuse dans des conditions normales d’utilisation domestique sera réparée ou remplacée gratuitement.
PAVT-1 Guía de uso y cuidado Tabla de materias Seguridad . . . . . . . . . . . . 33-34 Características especiales . . 42-43 Sugerencias para el funcionamiento . . . 35-36 Detergente Colocación de la carga de ropa Sugerencias adicionales Uso de los controles (Modelos con dos velocidades) .
Seguridad Instalador: Deje este manual con el electrodoméstico. Usuario: Lea y conserve este manual para futuras referencias. Conserve el recibo de compra y/o el cheque cancelado como comprobante de compra. Número de modelo ________________________________ Número de serie___________________________________ Fecha de compra __________________________________ Si tiene preguntas llame a: Maytag Customer Assistance 1-800-688-9900 EE.UU. 1-800-688-2002 Canadá (De lunes a viernes de 8 a.m. a 8 p.m.
Seguridad estas ayudas del lavado siguiendo las instrucciones del fabricante observando todas las advertencias indicadas en las etiquetas de los envases. ADVERTENCIA A fin de reducir el riesgo de incendio, explosión, choque eléctrico o lesión personal cuando use su lavadora, siga las precauciones básicas de seguridad, incluyendo las siguientes: 1. 2. Destruya las cajas y las bolsas de plástico después de desempacar la lavadora.
Sugerencias para el funcionamiento Detergente • Utilice detergente líquido o granulado para lavar ropa. Para obtener los mejores resultados, asegúrese de añadir el detergente a la lavadora ANTES de colocar la carga de ropa y que la temperatura del agua de lavado sea superior a 18,3 °C (65 °F). • Use la cantidad de detergente adecuada para el tamaño de la carga, el nivel de suciedad y las condiciones del agua. Utilice más detergente si el agua es dura y las ropas están muy sucias.
Sugerencias para el funcionamiento Sugerencias adicionales • Durante el centrifugado es posible que la ropa no quede uniformemente distribuida en la tina. Si esto sucede, oprima la perilla de control, abra la tapa, vuelva a distribuir la ropa, cierre la tapa y tire hacia afuera la perilla de control. El centrifugado continuará desde el punto en que fue interrumpido. • La lavadora se detendrá brevemente a través de cada ciclo. Estas pausas son normales.
Uso de los controles Modelos con dos velocidades PASO 1 PASO Seleccione el nivel del agua Determine el ajuste de acuerdo con el tamaño de la carga de ropa. Este ajuste debe proporcionar suficiente agua para permitir que la ropa se mueva libremente durante la agitación. Es posible que sea necesario, como por ejemplo en el caso de telas voluminosas, ajustar el nivel del agua después de que comienza la agitación.
Las caracteristicas de control y los estilos varían según el modelo. PASO 3 Seleccione el ciclo Para seleccionar un ciclo, OPRIMA la perilla de control (posición fin) y gírela a la derecha hasta que el indicador quede en el nivel de suciedad necesario para lavar la carga de ropa en los ciclos Regular/Regulares, Wrinkle Free Fabrics/Planchado Permanente o Delicates/Delicados. Ciclo para telas regulares Ofrece velocidades de agitación y centrifugado normales para lavar algodones y artículos muy sucios.
Uso de los controles Modelos con dos velocidades PASO 1 PASO Seleccione el nivel del agua Determine el ajuste de acuerdo con el tamaño de la carga de ropa. En los modelos selectos, el control infinito le permite seleccionar un ajuste específico o en cualquier punto entre los ajustes. Es posible que sea necesario, como por ejemplo en el caso de telas voluminosas, ajustar el nivel del agua después de que comienza la agitación.
Las características de control y los estilos varían según el modelo. TEMP. DE LAVADO/ENJUAGUE TIPO DE CARGA Estos ajustes tienen control automático de la temperatura: A.T.C. Hot/Cold (A.T.C. caliente/fría) A.T.C. Warm/Cold (A.T.C. tibia/fría) A.T.C. Cold/Cold (A.T.C. fría/fría) Asegura una temperatura de lavado con agua caliente de aprox. 110° F, (44° C). Proporciona resultados de limpieza óptimos. Asegura una temperatura de lavado con agua tibia de 95° F, (26° C). Use para la mayoría de las cargas.
Uso de los controles Modelos con selección de velocidad PASO 5 Seleccione el ciclo Para seleccionar un ciclo, OPRIMA la perilla de control y gírela a la derecha hasta que el indicador quede en el nivel de suciedad necesario para lavar la carga de ropa. Regular (regular) Estos ciclos comparten la misma porción de la perilla de control. Para telas inarrugables seleccione el ciclo y gire la perilla ‘Wash/Spin’ a ‘Wrinkle Free’.
Características especiales Distribuidor de blanqueador líquido Distribuidor de suavizador de telas El distribuidor diluye automáticamente el blanqueador de cloro líquido antes de que éste entre en contacto con la carga de ropa. Siga estos pasos para usar el distribuidor: Este distribuidor automáticamente descarga el suavizante líquido de telas en el momento propicio durante el ciclo. Siga estos pasos para usar el distribuidor : 1.
Características especiales, cont. Avisador de fin de ciclo (modelos selectos) El avisador de fin de ciclo sonará una vez cuando se ha completado el ciclo. Compensador de carga en caso de centrifugado no equilibrado Su nueva lavadora está diseñada para corregir cargas no equilibradas sin necesidad de apagar o interrumpir el ciclo de lavado. Por esta razón siempre se completará el ciclo.
Cuidado y limpieza 1. Después de lavar la ropa deje la lavadora abierta hasta que se seque el interior. 2. Revise las mangueras para asegurarse de que no estén torcidas ni dobladas. 3. Su lavadora no debe ser instalada donde las temperaturas descenderán bajo el punto de congelación pues puede dañarse. 4. Ocasionalmente limpie el exterior de la lavadora con una esponja o paño limpio y húmedo. No use pulidor en las piezas de plástico. 5.
Localización y solución de averías Para las soluciones de problemas de lavado (es decir, daño de las telas, residuos, ropa enredada) y procedimientos especiales para cuidado de la ropa, vea el folleto adjunto “Sugerencias para el Lavado”. 45 La lavadora no se llena • Enchufe el cordón en un tomacorriente eléctrico con corriente. • Verifique el fusible o reponga el disyuntor. • Gire la perilla de control al ciclo apropiado y tire de la perilla hacia afuera para poner en marcha la lavadora.
Localización y solución de averías La lavadora tiene ruido • Asegúrese de que lavadora esté debidamente nivelada como se describe en el manual de instalación. • Los pisos débiles pueden causar vibración y movimiento. • Los sonidos del funcionamiento variarán de acuerdo con la de agitación. La lavadora se llena pero con temperatura incorrecta del agua • Abra ambas llaves completamente.
Garantía y servicio Lo que no cubren estas garantías: Garantía de la lavadora de ropa Garantía completa de un año Durante un (1) año desde la fecha original de compra al por menor, se reparará o reemplazará gratuitamente cualquier pieza que falle durante el uso normal en el hogar.