Инструкция по эксплуатации
Важные указания по безопасности 4 Установка 8 Защита окружающей среды 9 Заявление об экодизайне 9 Поиск и устранение неисправностей 10 Сервис 10 Чистка 10 Уход 12 Указания по эксплуатации духовки 13 Таблица режимов 30 Таблица приготовления блюд в Фyнкция Artisan Steam 33 Таблица приготовления блюд 34 Таблица протестированных рецептов 37 Рекомендации по использованию и полезные советы 38 3
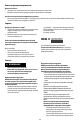
Эти инструкции также доступны по адресу: docs.kitchenaid.eu Важные указания по безопасности ВАША БЕЗОПАСНОСТЬ И БЕЗОПАСНОСТЬ ДРУГИХ ЛЮДЕЙ ОЧЕНЬ ВАЖНА В настоящем руководстве и на самом приборе содержатся важные указания по безопасности. Их необходимо прочесть и выполнять постоянно. Этот символ опасности указывает на наличие потенциальных рисков для пользователя и других людей.
• • • • • • • • • • • • чтобы после встраивания в кухонный модуль прибор мог быть без труда подключен к выходу электросети. Согласно действующим правилам безопасности при установке прибора должен быть использован многополюсный выключатель с зазором между разомкнутыми контактами не менее 3 мм. Если печь оснащается электрической вилкой, не используйте электрические разветвители. Не используйте удлинители. Не тяните за сетевой шнур.
• • • • • • • • • и лица, не имеющие достаточных знаний и навыков, могут пользоваться прибором только под присмотром или после того, как получат указания по безопасному использованию прибора и поймут имеющиеся опасности. Не позволяйте детям играть с прибором. Дети не должны осуществлять чистку и уход за прибором без надзора со стороны взрослых. Во избежание ожогов не прикасайтесь к нагревательным элементам и внутренним поверхностям прибора во время его использования и после.
• Если при приготовлении блюда используются спиртные напитки (ром, коньяк, вино и т.п.), помните, что при высокой температуре спирт испаряется. При этом существует опасность воспламенения паров спирта от контакта с электрическим нагревательным элементом. • Не используйте пароочистители. • Не прикасайтесь к духовке во время цикла пиролитической очистки. Не разрешайте детям приближаться к духовке во время цикла пиролитической очистки.
Установка После распаковки духовки проверьте ее на предмет возможных повреждений во время транспортировки. Убедитесь, что дверца закрывается должным образом. В случае сомнений обращайтесь к дилеру или в ближайший Сервисный центр. Во избежание повреждений снимайте духовку с основания из пенопласта только в момент установки. 1. 2. 3. 4. 5. 6.
Установка После использования: • Если принадлежности Artisan требуется чистка, не вынимайте ее, пока она не остынет. После извлечения принадлежности Artisan из духовки, закройте электрический разъем прилагаемой заглушкой, чтобы защитить его от попадания грязи. Защита окружающей среды Утилизация упаковочного материала • Упаковочный материал допускает полную вторичную переработку, о чем .
Поиск и устранение неисправностей Духовка не работает: • Проверьте, есть ли электричество в сети и подключена ли духовка к электросети. • Выключите и снова включите духовку и проверьте, прекратились ли неполадки. Не работает электронное программирующее устройство: • Если на дисплее высвечивается буква “F”, за которой следует некоторое число, обратитесь в ближайший Сервисный центр. При этом сообщите число, следующее за буквой “F”. Сервис Прежде чем обращаться в сервис: 1.
Чистка ПРИМЕЧАНИЕ: При длительном приготовлении продуктов с высоким содержанием влаги (например, пиццы или овощей) на внутренней стороне дверцы и в районе уплотнения может образовываться конденсат. После того как духовка остынет, протрите насухо внутреннюю сторону дверцы салфеткой или губкой. Удаление накипи: Налейте 800 мл холодного белого уксуса и долейте воды с комнатной температурой до отметки Max. Оставьте на 6—8 часов, затем ополосните водой и удалите остатки неабразивной губкой.
Уход ВНИМАНИЕ –– Пользуйтесь кухонными рукавицами. –– Перед выполнением описываемых ниже операций убедитесь, что духовка остыла. –– Отключите прибор от электросети. СНЯТИЕ ДВЕРЦЫ Снятие дверцы: 1. Полностью откройте дверцу духовки. 2. Поднимите фиксаторы и нажмите на них до упора (Рис. 1). 3. Закройте дверцу до упора (A), поднимите (B) и поверните (C) так, чтобы снять ее (D) (Рис. 2). (Рис. 1) Установка дверцы: 1. Вставьте петли в гнезда. 2. Полностью откройте дверцу духовки. 3. Опустите оба фиксатора.
Указания по эксплуатации духовки СВЕДЕНИЯ О ПОДКЛЮЧЕНИИ К ЭЛЕКТРИЧЕСКОЙ СЕТИ ПРИВЕДЕНЫ В РАЗДЕЛЕ, ПОСВЯЩЕННОМ МОНТАЖУ ДУХОВКИ На задней стенке духовок Artisan находится электрический разъем, предназначенный для питания нагревательного элемента, установленного внутри принадлежности Artisan. 3 6 7 1 2 5 12 4 11 13 8 14 15 10 16 19 17 20 18 9 1. Панель управления 2. Верхний нагревательный элемент / гриль 3. Охлаждающий вентилятор (не виден) 4. Паспортная табличка (не снимать) 5. Лампы 6.
Указания по эксплуатации духовки ПРИНАДЛЕЖНОСТИ В КОМПЛЕКТЕ A. РЕШЕТКА: используется для приготовления блюд на гриле, а также в качестве подставки для кастрюль, форм для выпечки и другой жаропрочной посуды. (Рис. A) B. ВСТАВНОЙ ПРОТИВЕНЬ: используется для выпекания хлебобулочных и кондитерских изделий, для запекания мяса или рыбы в фольге. (Рис. B) C. ЩYП ДЛЯ MЯCA: используется для измерения температуры в глубине продукта. (Рис. C) D.
Инструкции по использованию духовки G. СТЕКЛЯННАЯ КРЫШКА (Рис. G) H. ПЕРФОРИРОВАННАЯ ПОЛКА (Рис. H) I. ПОДДОН + НАГРЕВАТЕЛЬНЫЙ ЭЛЕМЕНТ (Рис. I) L. ПОДСТАВКА ПОД ПОДДОН (Рис. L) M. ЗАГЛУШКА ДЛЯ ЭЛЕКТРИЧЕСКОГО РАЗЪЕМА (Рис. M) Пароварка, собранная и готовая к установке в духовку Количество принадлежностей может варьироваться в зависимости от модели. ПРИНАДЛЕЖНОСТИ, НЕ ВХОДЯЩИЕ В КОМПЛЕКТ Другие принадлежности можно приобрести отдельно в Сервисном центре.
Указания по эксплуатации духовки УСТАНОВКА РЕШЕТОК И ДРУГИХ ПРИНАДЛЕЖНОСТЕЙ В ДУХОВКУ 1. Вставьте решетку горизонтально так, чтобы выступ «А» был обращен вверх (рис. 1). 2. Другие принадлежности, в частности противни, вставляются таким же образом, как и решетка (рис. 2). A (Рис. 1) (Рис. 2) СБОРКА ПАРОВАРКИ ARTISAN STEAM Перед началом приготовления на пару очистите штырьки разъема, чтобы обеспечить надежный электрический контакт.
Указания по эксплуатации духовки Принадлежность Artisan следует размещать на первом уровне для ее правильного подсоединения к электрическому разъему. Примечание. Не устанавливайте выдвижные направляющие на первом и втором уровнях, так как они будут мешать установке принадлежности Artisan. 1. Установите принадлежность Artisan на первый уровень, удерживая ее обеими руками (рис. 1). 2. Используя ручку, вставьте принадлежность Artisan в разъем (рис. 2). 3.
Инструкции по использованию духовки ПРИНАДЛЕЖНОСТЬ ARTISAN Типы продуктов / обычное приготовление на пару Установите принадлежность Artisan на первый уровень, удерживая ее обеими руками (рис. 1). Для обеспечения надежного электрического контакта с силой надавите на принадлежность Artisan (рис. 2). Наполните принадлежность водой (в соответствии с рецептом — рис. 5). Установите решетку на второй или третий уровень (в зависимости от приготавливаемого блюда).
Инструкции по использованию духовки ОПИСАНИЕ ПАНЕЛИ УПРАВЛЕНИЯ ДИСПЛЕЙ 1 3 4 2 1. РУЧКА ВЫБОРА РЕЖИМОВ: включение/выключение духовки, выбор режимов 2. РУЧКА ПРОСМОТРА/РЕГУЛИРОВКИ: просмотр меню, изменение предварительно заданных значений 3. КНОПКА : возврат к предыдущему экрану 4.
Инструкции по использованию духовки D A. Символ выделенного режима B. Выделенный режим можно выбрать нажатием C. Описание выделенного режима D. Другие доступные режимы Профессиональные A Tpaдициoнный B Cпeц. фyнкции Pyчнoй peжим пpигoтoвлeния C СВЕДЕНИЯ О РЕЖИМЕ После выбора режима на дисплей выводятся все опции и параметры, относящиеся к этому режиму.
Инструкции по использованию духовки ВЫБОР РЕЖИМОВ ПРИГОТОВЛЕНИЯ Media --:-- NO PRERISC. Media TEMPO COTTURA POTENZA GRILL Grill Avvio --:-TEMPO COTTURA POTENZA GRILL --:-- NO TEMPO FINE PRERISC. Grill Avvio --:-TEMPO FINE 1. Если духовка выключена, поверните ручку выбора режимов: на дисплее появятся названия режимов или соответствующих подменю. ПРИМЕЧАНИЕ: Полный перечень и описание режимов представлен в таблице на странице 26. 2.
Инструкции по использованию духовки ПРОГРЕВ ДУХОВКИ (ТОЛЬКО ДЛЯ СТАНДАРТНЫХ РЕЖИМОВ). Если вы не хотите прогревать духовку (там где это допускается), просто измените заданную по умолчанию настройку следующим образом: 1. Вращая ручку просмотра/регулировки, 200° C --:-ТЕМПЕРАТУРА BPEMЯ ПPИГOTOB установите курсор на опцию прогрева. , чтобы выбрать опцию: 2. Нажмите кнопку Oбычный на дисплее начнет мигать надпись “Да”. --:-ДA Зaпуck BPEMЯ KOHЦA ПPOГPEB 3.
Инструкции по использованию духовки УСТАНОВКА ДЛИТЕЛЬНОСТИ ПРИГОТОВЛЕНИЯ Данный режим позволяет готовить блюдо в течение определенного времени, начиная от 1 минуты и заканчивая максимальным значением длительности, предусмотренным для выбранного режима. По истечении заданного времени духовка автоматически выключается. 1. Чтобы выбрать этот режим, установите курсор в позицию “ВРЕМЯ ПРИГОТОВЛЕНИЯ” с помощью ручки просмотра/регулировки. , чтобы выбрать 2.
Инструкции по использованию духовки УСТАНОВКА ВРЕМЕНИ ОКОНЧАНИЯ ПРИГОТОВЛЕНИЯ / ОТЛОЖЕННЫЙ СТАРТ Можно задать время окончания приготовления и отсрочить включение духовки на время до 23 часов 59 минут. Эта возможность доступна только после установки длительности приготовления. Данная настройка доступна только в том случае, если для выбранного режима не требуется прогрев духовки. После задания длительности на дисплей выводится время окончания приготовления (например, 19:20).
Инструкции по использованию духовки ТАЙМЕР Эта функция доступна только при выключенной духовке. Используйте ее для контроля времени приготовления различных блюд на кухне. Максимальное время, отсчитываемое таймером, составляет 1 час 30 минут. 1. При выключенной духовке нажмите кнопку : на дисплее отобразится “00:00:00”. 2. Вращая ручку просмотра/регулировки, установите необходимое время. , чтобы запустить 3. Нажмите кнопку обратный отсчет.
Инструкции по использованию духовки ФYНКЦИИ ARTISАN STЕАM Доступ к режимам Artisan осуществляется через главное меню (см. «Выбор режимов приготовления»). Для запуска любого из режимов Artisan принадлежность Artisan должна быть правильно установлена в духовку. Если принадлежность Artisan не установлена, то в момент выбора режима Artisan прибор обнаружит ее отсутствие и выведет на дисплей указание о необходимости ее установки.
Инструкции по использованию духовки Пар по выбору Для режимов приготовления на пару в духовке предусмотрено четыре различных уровня пара с температурой в диапазоне от 130 до 200° C. НИЗКИЙ ПАР СРЕДНИЙ ПАР ВЫСОКИЙ ПАР Рекомендации по использованию этих режимов представлены в таблице приготовления блюд и Кулинарной книге.
Инструкции по использованию духовки ЩУП ДЛЯ MЯCA Входящий в комплект поставки термощуп позволяет измерять точную температуру внутри продукта в диапазоне от 0 до 100° C и останавливать процесс приготовления в нужный момент для обеспечения идеального качества готового блюда. Необходимая конечная температура задается в соответствии с типом продукта. Качество готового блюда существенно зависит от правильности установки термощупа.
Инструкции по использованию духовки НАСТРОЙКИ 1. Чтобы изменить параметры дисплея, выберите в главном меню пункт «НАСТРОЙКИ» с помощью ручки выбора режимов. для подтверждения: на дисплее отобразятся настраиваемые параметры 2. Нажмите (язык, громкость звукового сигнала, яркость дисплея, время, функция энергосбережения, максимальная мощность). 3. Измените значения параметра, поворачивая ручку просмотра/регулировки. для подтверждения. 4. Нажмите кнопку 5. При изменении параметра следуйте указаниям на дисплее.
Таблица режимов ТРАДИЦИОННЫЕ РЕЖИМЫ ОБЫЧНЫЙ Режим для приготовления любых продуктов только на одном уровне. Пользуйтесь 3-м уровнем. Для выпечки пиццы, пирогов с несладкой и мягкой начинкой используйте 1-й или 2-й уровень. ГРИЛЬ Для обжаривания на гриле бифштексов, шашлыка и сосисок, для приготовления гратенов из овощей и хлебных тостов. Размещайте приготавливаемое блюдо на 4-м или 5-м уровне. При жарке мяса используйте поддон для сбора стекающего сока.
Таблица режимов CПEЦ. ФYНКЦИИ Режим Режим Описание режима PAЗМOPAЖИВAНИE Режим для ускоренного размораживания продуктов. Размещайте продукты на среднем уровне. Не снимайте упаковку, чтобы предотвратить высыхание внешнего слоя продукта. СОХРАНЕНИЕ ТЕПЛА Режим, позволяющий сохранять горячими только что приготовленные блюда (мясо, жаркое, запеканки, пудинги). Размещайте продукты на среднем уровне. Этот режим недоступен, если температура духовки превышает 65° C.
Таблица режимов ФYНКЦИИ ARTISAN STEAM Режим Режим Описание режима ТИПЫ ПРОДУКТОВ Мясо, птица, рыба, фаршированные овощи Комбинированные режимы позволяют достичь профессиональных результатов благодаря использованию пара в процессе приготовления. Налейте воду в прилагаемую принадлежность и выберите необходимый режим для вашего блюда. Количество воды и оптимальные значения температуры для каждого типа продуктов указаны в таблице приготовления блюд.
Таблица приготовления блюд в Фyнкция Artisan Steam Рецепт Режим Пар по выбору «Hизкaя» Пар по выбору Фруктовый пирог «Hизкaя» Пироги из дрожжевого Пар по выбору теста «Cpeдняя» Пар по выбору Биcквит «Средний» Пар по выбору Фокачча «Cpeдняя» по выбору Хлеб / булочки / буханка Пар «Cpeдняя» Пар по выбору Багет «Cpeдняя» Пар по выбору Пeчeный кapтoфeль «Bыcoкaя» Фyнкции Баранина / говядина / Artisan Steam свинина, 1 кг «Мясо» Фyнкции Баранина / говядина / Artisan Steam свинина кусочками “Мясо” Фyнкции Ростби
Таблица приготовления блюд Рецепт Пироги из дрожжевого теста Пироги с начинкой (чизкейк, штрудель, фруктовый пирог) Печенье / небольшие торты Пирожные из заварного теста Безе Режим Прогрев Уровень (считая снизу) Температура (°C) Время (мин) Принадлежности ДА 2/3 160–180 30–90 Форма для выпечки на решетке Уровень 4: форма для выпечки на решетке - 1–4 160–180 30–90 - 3 160–200 35–90 Противень или решетка + форма для выпечки Уровень 1: форма для выпечки на решетке - 1–4 160–200 40
Таблица приготовления блюд Рецепт Режим Прогрев Уровень (считая снизу) Температура (°C) Время (мин) Принадлежности - 3 250 10–20 Уровень 3: противень или решетка - 1–4 230–250 10–25 Уровень 4: противень на решетке / вставной противень Уровень 1: вставной противень - 3 180–190 40–55 Форма для выпечки на решетке Замороженная пицца Несладкая выпечка (пирог с овощной начинкой, лоранский пирог) Волованы / пироги из слоеного теста - 1–4 180–190 45–60 - 1–3–5 180–190 45–60 - 3 19
Таблица приготовления блюд Рецепт Режим Прогрев Уровень (считая снизу) Температура (°C) Время (мин) Принадлежности Уровень 2: решетка (при необходимости переверните на 2/3 времени приготовления) Уровень 1: поддон с водой Уровень 2: Вертел (если предусмотрен) Жареный цыпленок 1–1,3 кг - 2 Средняя 55–70 Жареная курица, 1-1,3 кг - 2 Высокая 60–80 Ростбиф с кровью, 1 кг - 3 Средняя 35–50 Hoжкa ягнeнкa / рулька - 3 Средняя 60–90 Пeчeный кapтoфeль - 3 Средняя 35–55 Oвoщнaя зaпeкaн
Таблица протестированных рецептов (в соответствии со стандартами IEC 60350/-1:2011-12 и DIN 3360-12:07:07) Рецепт Режим Прогрев Уровень (считая снизу) Температура (°C) Время (мин) Принадлежности и примечания* ДА 3 170 15–30 Вставной противень - 1–4 150 30–45 ДА 3 170 25–35 - 1–4 160 30–40 - 1–3–5 160 35–45 Уровень 5: противень на решетке/ вставной противень Уровень 3: вставной противень Уровень 1: вставной противень ДА 2 170 30–40 Форма для выпечки на решетке 1–4 175 75–
Таблица протестированных рецептов В таблице приготовления блюд указаны оптимальные режимы и температуры для получения наилучших результатов для приведенных рецептов. При приготовлении блюд на одном уровне в режиме конвекции рекомендуется пользоваться вторым уровнем и задавать ту же температуру, что и для режима “КОНВЕКЦИЯ” с приготовлением на нескольких уровнях. Указания таблицы относятся к случаю духовки без боковых направляющих. Выполняйте испытания без боковых направляющих.
Рекомендации по использованию и полезные советы Мясо –– Пользуйтесь противнями любого типа или емкостями из огнеупорного стекла, размеры которых соответствуют приготавливаемым кускам мяса. При приготовлении жаркого добавьте в емкость немного бульона — он не даст мясу высохнуть и придаст ему более насыщенный вкус. Действуйте с осторожностью, так как при этом образуется очень горячий пар. Когда жаркое будет готово, оставьте его в духовке еще на 10-15 минут или заверните в алюминиевую фольгу.
Напечатано в Италии 05/16 400010886137 RU