Instructions for use
IImportant safety instructions EC Declaration of conformity Safeguarding the environment Installation Mounting the appliance Prior to connecting After connecting Before first use Accessories Probe placing Start protection Key lock Doneness (auto functions only) Messages Cooling down Shortcuts On/Off Changing settings Continuos cooking Delayed start Kitchen timer Cook and reheat with microwaves Jet start Rapid pre-heat Conventional Conventional + MW Grill Grill + MW Turbo Grill Turbo Grill + MW Forced Air Fo
These instructions shall also be available on website: www.kitchenaid.eu Important safety instructions YOUR SAFETY AND THAT OF OTHERS IS VERY IMPORTANT This manual and the appliance itself provide important safety warnings, to be read and observed at all times. This is the danger symbol, pertaining to safety, which alerts users to potential risks to themselves and others.
•The power cable must be long enough for connecting the Appliance, once fitted in its housing, to the main power supply. •For installation to comply with current safety regulations, an all-pole disconnect switch with minimum contact gap of 3 mm must be used. •Do not use multiple plug adaptors if the oven is fitted with a plug. •Do not use extension leads. •Do not pull the power supply cable. •The electrical components must not be accessible to the user after installation.
instructions on safe appliance use and if they understand the hazards involved. Children shall not play with the appliance. Cleaning and user maintenance should not be done by unsupervised children. •During and after use, do not touch the heating elements or interior surfaces of the appliance: risk of burns. Do not allow the appliance to come into contact with cloths or other flammable materials until all the components have cooled down completely.
•Use containers suitable for use in a microwave oven only. •Overheating the liquid beyond boiling point can occur without evidence of bubbling. This could result in a sudden boil over of the hot liquid. •Do not use microwave oven for deep-frying, because the oil temperature cannot be controlled. •After heating baby food or liquids in a baby bottle or in a baby food jar, always stir and check the temperature before serving. Ensure the lid and the teat is removed before heating.
•Do not use harsh abrasive cleaners or sharp metal scrapers to clean the appliance door glass since they can scratch the surface, which may result in shattering of the glass. •Do not use corrosive chemicals or vapors in this appliance. This type of appliance is specifically designed to heat or cook food. It is not designed for industrial or laboratory use. •Do not remove any cover. The door seals and the door seal areas must be regularly inspected for damage.
EC Declaration of conformity • This oven, which is intended to come into contact with foodstuffs, complies with European Regulation ( ) n. 1935/2004 and has been designed, manufactured and sold in conformity with the safety requirements of the “Low Voltage” directive 2006/95/CE (which replaces 73/23/CEE and subsequent amendments), the protection requirements of “EMC” 2004/108/CE.
Prior to connecting Check that the voltage on the rating plate corresponds to the voltage in the home. Do not remove the microwave inlet protection plates located on the side of the microwave oven cavity wall. They prevent grease & food particles from entering the microwave inlet channels. Ensure the microwave oven cavity is empty before mounting. Ensure that the appliance is not damaged.
Accessories GENERAL WIRE SHELF Use the wire shelf with all cooking methods, except when using the Microwave function only. The Wire shelf allows hot air circulation around the food. When you put food directly on the Wire shelf, place the Glass drip tray under it. Ensure the tilt protection hump is facing outwards when you push the glass driptray & Wire shelf combination into the oven. The Wire shelf may be used with Convection Bake. It may also be used when you combine these functions with Microwaves.
Probe placing 1. Place the temperature probe in the food while it is still on the kitchen counter. Never immerse the probe in water when cleaning. Simply wipe clean with a clean, damp cloth or kitchen roll after use. The oven must not be operated with the temperature probe in the cavity if it is not plugged into the oven. If you do operate the oven without complying with the above you will damage the probe. Only use the supplied or by service recommended food probe.
Start protection The start protection function is activated one minute after the oven has returned to "stand by mode". The door must be opened and closed e.g. putting food into it, before the safety lock is released. Safety Lock is activated close door and press Key lock 19:30 q q 1. Press the BACK and OK buttons simultaneously and keep pressed until two beeps are heard (3 seconds). Use this function to hinder children from using the oven unattended.
Doneness (auto functions only) Doneness is available in most of the auto functions. You have the possibility to personally control the end result through the Adjust doneness feature. This feature enables you to achieve higher or lower end temperature compared to the default standard setting. When using one of these functions the oven chooses the default standard setting. This setting normally gives you the best result.
Cooling down When a function is finished, the oven may carry out a cooling procedure. This is normal. After this procedure the oven switches off automatically. 180°C TEMPERATURE 35:00 COOK TIME Oven is Hot! If the temperature is higher than 100°C, the current cavity temperature is displayed. Be careful not to touch the cavity inside when removing food. Use oven mittens. If the temperature is less than 50°C, the 24 hour clock is displayed.
On/Off The appliance is turned ON or OFF using the On/Off button or simply by turning the Multifunction Knob. When the appliance is turned ON, all buttons & knobs function normally and the 24 hour clock is not displayed. When the appliance is turned OFF. The 24 hour clock is displayed. Note: The oven behavior may differ from the above described, depending on the ECO function being turned ON or OFF (see ECO for more information). The descriptions in this IFU assume that the oven is turned ON.
Clock setting Brightness Time Volume Appliance and display settings wr qe 1. Turn the adjust knob until Time is displayed. 2. Press the ok button. (The digits flicker). 3. Turn the adjust knob to set the 24 hour clock. 4. Press the ok button again to confirm the change. Turn +/- to set time, to confirm The clock is set and in operation. Time has been set Sound Setting Time Volume Brightness Appliance and display settings 1. Turn the adjust knob until Volume is displayed. wr qe High 2.
Brightness Volume Brightness Eco Mode Appliance and display settings w r q 1. Turn the adjust knob until Brightness is displayed. e High 2. Press the ok button. Medium 3. Turn the adjust knob to set the level of brightness suitable to your preference. Low For normal living conditions 4. Press the ok button again to confirm your selection. Brightness has been set Eco Brightness Eco Mode Language Appliance and display settings wr qe 1. Turn the adjust knob until Eco Mode is displayed.
During cooking Once the cooking process has been started: The time can easily be increased in 30-second steps by pressing the Start button. Each press increases the time with 30 seconds. You may also Turn the Adjust Knob to increase or decrease the time. By turning the adjust knob, you may toggle between the parameters to select which you wish to alter. High GRILL POWER 07:00 COOK TIME 200 g WEIGHT Pressing the ok button selects and enables it to be changed (it flashes).
Delayed start Use this function when you need to have the cooking finished at a specific time. The oven needs to know the desired cooking duration and the time of day when the food should be ready. 1. Follow the setting procedure for the function you wish to use and stop when the cooking time has been set. DELAYED START WORKS WITH THESE FUNCTIONS Do not press start button. CONVENTIONAL 2. Press the OK button 3. Turn the adjust knob to select End Time. GRILL 4.
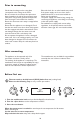
Cook and reheat with microwaves Microwave e q 1. 2. 3. 4. 5. Turn the multifunction knob until Microwave is shown. Turn the adjust knob to set the cooking time. Press the OK button to confirm your setting. Turn the adjust knob to set the microwave power level. Press the start button. t wr 750W POWER 00:05 COOK TIME Microwave 19:00 END TIME Use this function for normal cooking and reheating, such as vegetables, fish, potatoes and meat.
Jet start 900 W POWER 03:00 MM:SS Cooking 19:03 END TIME 1. Turn the multifunction knob until Microwave is shown. 2. Press the on / off button. 750W POWER 00:05 COOK TIME Microwave 3. Press the start button to automatically start with full microwave power level and the cooking time set to 30 seconds. Each additional press increases the time with 30 seconds. 19:00 END TIME This function is used for quick reheating of food with a high water content such as; clear soups, coffee or tea.
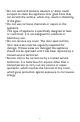
Rapid pre-heat Rapid Preheat 1. Turn the multifunction knob until you find the Rapid Pre-heat function. 180°C TEMPERATURE 2. Turn the adjust knob to set the temperature. Rapid Preheat 3. Press the start button. 180°C TEMPERATURE Preheating Use this function to preheat the empty oven. Preheating is always done with the oven empty just like you would in a conventional oven before cooking or baking. Do not place food before or during preheating in the oven. It will be burned from the intense heat.
Conventional Conventional 1. Turn the multifunction knob to the Conventional position. Conventional + MW 2. Press the ok button to confirm your selection. Conventional 3. Turn the adjust knob to set the temperature. 4. Press the OK button to confirm your selection. For baked food such as cookies, cakes and rolls 5. Turn the adjust knob to set the cooking time. 200°C TEMPERATURE 6. Press the start button.
Conventional + MW Conventional 1. Turn the multifunction knob to the Conventional position. 2. Turn the adjust knob to the Conventional + MW position. Conventional + MW 3. Press the OK button to confirm your selection. 4. Turn the adjust knob to set the cooking time. Conventional For baked food such as fruit cakes and tin bread 5. Press the OK button to confirm your selection. 200°C TEMPERATURE 6. Turn the adjust knob to set the temperature. 01:00 COOK TIME 7.
Grill Grill Functions For food like cheese toast, steaks and sausages, place the food on the Wire rack Turbo Grill + MW Grill 1. Turn the multifunction knob to the Grill position. Grill + MW 2. Press the ok button to confirm your selection. To quickly give food a brown surface 3. Turn the adjust knob to set the Grill power level. 4. Press the ok button to confirm your setting. Medium GRILL POWER 00:00 COOK TIME 5. Turn the adjust knob set the cooking time. 6. Press the start button.
Grill + MW Grill Functions 1. Turn the multifunction knob to the Grill position. Grill 2. Turn the adjust knob to the Grill + MW position. Grill + MW 3. Press the OK button to confirm your selection. 4. Turn the adjust knob to set the cooking time. Turbo Grill For food such as lasagna, fish - and potatoe gratin 5. Press the OK button to confirm your selection. 6. Turn the adjust knob to set the Grill power level. Medium GRILL POWER 01:00 COOK TIME 7. Press the OK button to confirm your selection.
Turbo grill Grill Functions 1. Turn the multifunction knob until Grill is shown. Grill + MW 2. Turn the adjust knob until Turbo Grill is shown. Turbo Grill 3. Press the OK button to confirm your selection. Turbo Grill + MW 4. Turn the adjust knob to set the Grill power level. 5. Press the OK button to confirm your setting. For food such as vegetables and fruit crumbles Medium GRILL POWER 6. Turn the adjust knob set the cooking time. 00:00 COOK TIME 7. Press the start button.
Turbo Grill + MW q Grill Functions et o u wr yi 1. Turn the multifunction knob until Grill is shown. Turbo Grill 2. Turn the adjust knob until Turbo Grill + MW is shown. Turbo Grill + MW 3. Press the OK button to confirm your selection. 4. Turn the adjust knob to set the cooking time. Grill For food such as poultry, stuffed vegetables and... 5. Press the OK button to confirm your setting. 6. Turn the adjust knob set the Turbo Grill power level. Medium GRILL POWER 01:00 COOK TIME 7.
Forced Air q Forced Air Functions wr y 1. Turn the multifunction knob until you find the Forced Air position. et Forced Air + MW Forced Air 2. Press the OK button to confirm your selection. 3. Turn the adjust knob to set the temperature. To cook pastry, cakes, poultry and roast meats 4. Press the OK button to confirm your selection. 175°C TEMPERATURE 5. Turn the adjust knob to set the cooking time. 00:00 COOK TIME 6. Press the start button.
Forced Air + MW q Forced Air Functions et o u 1. Turn the multifunction knob until you find the Forced Air position. wry i Forced Air + MW 2. Turn the adjust knob until you find the Forced Air + MW is shown. Forced Air To bake, roast and cook fresh and frozen.. 3. Press the OK button to confirm your selection. 4. Turn the adjust knob to set the cooking time. 175°C TEMPERATURE 01:00 COOK TIME 5. Press the OK button to confirm your setting. 6. Turn the adjust knob to set the temperature.
Special - Keep warm Special 1. Turn the multifunction knob to the Special position. Dough Proving 2. Turn the adjust knob to the Keep Warm position. Keep Warm 3. Press the OK button to confirm your selection. For maintaining serving temperature 4. Turn the adjust knob to set the cooking time. 5. Press the OK button to confirm your setting. 60°C TEMPERATURE 6. Turn the adjust knob to set the temperature. 00:00 COOK TIME 7.
Special - Dough proving Special 1. Turn the multifunction knob to the Special position. 2. Turn the adjust knob to the Dough Proving position. Dough Proving Keep Warm 3. Press the ok button to confirm your selection. For proving your dough 4. Turn the adjust knob to set the cooking time. 5. Press the ok button to confirm your setting. 35°C TEMPERATURE 6. Turn the adjust knob to set the temperature. 00:00 COOK TIME 7.
Auto Reheat Automatic 1. Turn the multifunction knob to the Automatic position. Rapid Defrost 2. Turn the adjust knob to the Auto Reheat position. Reheat 3. Press the ok button to confirm your selection. For reheating ready-made food 4. Turn the adjust knob to select food class. 5. Press the ok button to confirm your selection. Beverage 6. Turn the adjust knob to set the weight. Chilled Dinner Plate 7. Press the ok button to confirm your setting. Frozen Dinner Plate 8.
Auto Reheat When you are saving a meal in the refrigerator or "plating" a meal for reheating, arrange the thicker, denser food to the outside of the plate and the thinner or less dense food in the middle. Always cover food when using this function except when reheating chilled soups in which case a cover is not needed! If the food is packaged in such way that it already have a cover, the package should be cut with 2-3 scores to allow for excess pressure to escape during reheating.
Rapid Defrost Automatic 1. Turn the multifunction knob to the Auto position. Reheat 2. Turn the adjust knob to the Rapid Defrost position. Rapid Defrost Recipes 3. Press theokbutton to confirm your selection. For defrosting 5 types of food 4. Turn the adjust knob to select the type of food you want to defrost. Bread 5. Press the OK button to confirm your selection. Meat 6. Turn the adjust knob to set the weight of the food. Poultry 7. Press the start button.
FROZEN FOODS: If the food is warmer than deep-freeze temperature (-18°C), choose lower weight of the food. If the food is colder than deep-freeze temperature (-18°C), choose higher weight of the food. WEIGHT: This function needs to know the net weight of the food. The oven will then automatically calculate the needed time to finish the procedure. If the weight is lesser or greater than recommended weight: Follow the procedure for "Cook & Reheat with microwaves" and choose 160 W when defrosting.
Manual Defrost Follow the procedure for "Cook & Reheat with microwaves" and choose power level 160 W when defrosting manually. Shield areas of food with small pieces of aluminum foil if they start to become warm (e.g. chicken legs and wing tips). Check and inspect the food regularly. Experience will give you the times needed for various amounts. Turn large joints halfway through the defrosting process. Boiled food, stews and meat sauces defrost better if stirred during defrosting time.
Pro Bakery Use this function when baking bread and Pizzas. Pro 1. Turn the multifunction knob to the PRO position. Pro Roasting 2. Turn the adjust knob to the Pro Bakery position. Pro Bakery 3. Press the OK button to confirm your selection. Pro Pastry 4. Turn the adjust knob to select food class. For baking bread and pizzas 5. Press the OK button to confirm your setting. Bread Sticks 6. The oven begin to preheat the oven cavity.
Pro Pastry Use this function when baking pastry. Pro 1. Turn the multifunction knob to the PRO position. Pro Bakery 2. Turn the adjust knob to the Pro Pastry position. Pro Pastry 3. Press the OK button to confirm your selection. Pro Roasting 4. Turn the adjust knob to select food class. For baking Pastry 5. Press the OK button to confirm your setting. Short Pastry 6. The oven begin to preheat the oven cavity.
Pro Roasting Use this function when preparing roasts. This function is primarely designed to be used with meat probe but can also be run as a traditional oven without the probe. Pro Pro Pastry 1. Turn the multifunction knob to the PRO position. Pro Roasting 2. Turn the adjust knob to the Pro Roasting position. Pro Bakery 3. Press the OK button to confirm your selection. For preparing roasts 4. Turn the adjust knob to select food class. Manual 5. Press the OK button to confirm your setting. 6.
FOOD CLASS UTENSILS SHELF LEVEL OVEN °C PROBE °C TIME ADD WATER Roast Pork / Veal Roasting pan on wire rack Level 1 190°C 68°C 50-80 MIN AFTER 20 MIN Roast Beef (rare) Wire rack on glass drip pan Level 1 200°C 48°C 35 MIN AFTER 12 MIN Roast Beef (medium) Wire rack on glass drip pan Level 1 200°C 54°C 55 MIN AFTER 12 MIN Roast Chicken Roasting pan on wire rack Level 1 200°C 85°C 60-80 MIN AFTER 20 MIN Leg of Lamb (medium) Roasting pan on wire rack Level 1 190°C 70°C 70
Maintenance and cleaning Cleaning is the only maintenance normally required. DISHWASHER SAFE: Failure to maintain the oven in a clean condition could lead to deterioration of the surface that could adversely affect the life of the appliance and possibly result in a hazardous situation. Wire shelf Do not use metal scouring pads, abrasive cleansers, steelwool pads, gritty washcloths, etc. which can damage the control panel, and the interior and exterior oven surfaces.
Data for test heating performance IN ACCORDANCE WITH IEC 60705. The International Electrotechnical Commission has developed a standard for comparative testing of heating performance of different microwave ovens. We recommend the following for this oven: Test Amount Approx. time Power level Container Custard 1000 g 11 min 750 W Pyrex 3.227 Sponge cake 475 g 6 min 750 W Pyrex 3.827 Meat loaf 900 g 16 min 750 W Pyrex 3.
Recommended use and tips How to read the cooking table The table indicates the best functions to use for any given food. Cooking times, where indicated, start from the moment when food is placed in the microwave oven cavity, excluding pre-heating (where required). Cooking settings and times are purely for guidance and will depend on the amount of food and type of accessory used. Always cook food for the minimum cooking time given and check that is it cooked through.
Trouble shooting guide The appliance does not work • The turntable support is in place. • The door is properly closed. • Check the fuses and ensure that there is power available. • Check that the appliance has ample ventilation. Wait for 10 minutes, then try to operate the appliance once more. • Open and then close the door before you try again. • Disconnect the appliance from the power supply. Wait for 10 minutes before reconnecting and trying again.
Printed in Italy 02/15 400010769945 n GB