BUILT-IN MICROWAVE COMBINATION OVENS MICROWAVE OVEN USER INSTRUCTIONS THANK YOU for purchasing this high-quality product. Register your built-in oven at www.kitchenaid.com. In Canada, register your microwave oven at www.kitchenaid.ca. For future reference, please make a note of your product model and serial numbers. These can be found on the label located on the oven frame behind the top right side of the oven door.
BUILT-IN OVEN SAFETY Your safety and the safety of others are very important. We have provided many important safety messages in this manual and on your appliance. Always read and obey all safety messages. This is the safety alert symbol. This symbol alerts you to potential hazards that can kill or hurt you and others. All safety messages will follow the safety alert symbol and either the word “DANGER” or “WARNING.
IMPORTANT SAFETY INSTRUCTIONS ■ Liquids, such as water, coffee, or tea are able to be overheated beyond the boiling point without appearing to be boiling. Visible bubbling or boiling when the container is removed from the microwave oven is not always present. THIS COULD RESULT IN VERY HOT LIQUIDS SUDDENLY BOILING OVER WHEN THE CONTAINER IS DISTURBED OR A SPOON OR OTHER UTENSIL IS INSERTED INTO THE LIQUID. To reduce the risk of injury to persons: – Do not overheat the liquid.
PARTS AND FEATURES This manual covers different models. The oven you have purchased may have some or all of the items listed. The locations and appearances of the features shown here may not match those of your model. Turntable A H A B B I C,D E NOTE: By touching the Turntable On/Off keypad, it is possible to switch the turntable On and Off during some microwave cycles.
Crisper Pan and Handle KitchenAid™ Steamer Vessel Use the Steamer Vessel with the Steam Cook feature to steam foods. A The crisper pan, with its nonstick surface and detachable handle, has been specifically designed for microwave use, and is ideal for pan-frying (pan-browning) foods in the microwave oven. B ■■ The crisper pan will become hot. Always use the handle and oven mitts or pot holders when handling. Place gripping end on the edge of pan, squeeze handle, and lift pan.
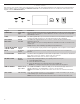
Control Panel This manual covers several models. Your model may have some or all of the items listed. Refer to this manual or the Frequently Asked Questions (FAQs) section of our website at www.kitchenaid.com for more detailed instructions. In Canada, refer to the Service and Support section at www.kitchenaid.ca. Keypad Feature Instructions OVEN LIGHT Oven cavity light The Oven Light keypad controls the oven light. While the oven door is closed, touch OVEN LIGHT to turn the oven light on and off.
Welcome Guide The Welcome Guide allows you to set up your new microwave oven. This appears on your display the first time the microwave oven is powered up or after resetting the oven to factory defaults. After every selection, a tone will sound. Touch BACK at any time to return to the previous screen. 1. Select your language and touch OK. 2. To connect the oven to the mobile app, touch YES OR touch NOT NOW to skip this step and complete setup. Go to Step 7. 3.
Function Set Screen After selecting a microwave oven function, the Function Set screens have a variety of options to customize the cycle. Not all options are available on all microwave oven functions. Touch the option in the menu on the left to change the setting. INPUT TIME A (UP TO 90:00 MINUTES) MANUAL COOK -- :-- B M I N :S EC 100% C P O W E R L E VE L ON D T U RN TAB L E 1 2 3 4 5 6 7 8 9 0 CLEAR Amount Touch to set the amount of food being cooked.
Status Screen Cooking Modes While the microwave oven is in use, the display will show a timeline with information about the current microwave oven function(s). If one of the ovens is not in use, a button to use that oven will appear. The microwave oven has a variety of cooking modes to achieve the best results every time. The cooking modes can be accessed by touching the Home icon and then selecting the desired oven or a previously saved Favorite recipe.
Tones/Sounds Tones are audible signals, indicating the following: Setting Available Selections Date & Time ■■ Auto (Off/On)* Time (AM/PM/24-Hour)* ■■ Valid keypad touch ■■ ■■ Function has been entered. ■■ Daylight Savings (Off/On)* ■■ Oven is preheated. ■■ ■■ Invalid keypad touch Date Format (MM/DD/YYYY, DD/MM/ YYYY, YYYY/MM/DD)* End of a cooking cycle ■■ See Date* ■■ When timer reaches zero Includes using the kitchen timer for functions other than cooking.
BUILT-IN MICROWAVE OVEN USE A magnetron in the oven produces microwaves which reflect off the metal floor, walls, and ceiling and pass through the turntable and appropriate cookware to the food. Microwaves are attracted to and absorbed by fat, sugar, and water molecules in the food, causing them to move, producing friction and heat which cooks the food. ■■ To avoid damage to the microwave oven, do not lean on or allow children to swing on the microwave oven door.
Cookware and Dinnerware Cookware and dinnerware must fit on the turntable. Always use oven mitts or pot holders when handling because any dish may become hot from heat transferred from the food. Do not use cookware and dinnerware with gold or silver trim. Use the following chart as a guide, then test before using. Aluminum Foil and Metal Always use oven mitts or pot holders when removing dishes from the microwave oven. Aluminum foil and some metal can be used in the microwave oven.
Microwave Cooking Power Many recipes for microwave cooking specify which cooking power to use by percent, name, or number. For example, 70%=Medium‑High=7. Use the following chart as a general guide for the suggested cooking power of specific foods. The power level cannot be changed in Sensor cooking modes. MICROWAVE COOKING POWER CHART Percent/ Name Sensor Cook The Sensor is used in auto cooking modes. During the Sensor Cook function a sensor automatically adjusts the cook time and power level.
Defrost Times and cooking powers have been preset for defrosting a number of food types. Manual Defrost requires that a cook time and power level be entered if using other than 30% cook power. Reheat Times and cooking powers have been preset for reheating a number of food types. Manual Reheat requires that a cook time and a power level be entered if using other than 70% cook power. Use the following chart as a guide.
EasyConvect™ Conversion A B C D A. Broil element B. Convection fan Steam Cooking Steam Cook is a sensor cooking function that uses microwaves to steam food. Always use steamer vessel. See the “KitchenAid™ Steamer Vessel” section before using. Use Steam Cook for foods such as vegetables, fish and potatoes. ■■ Times and cooking powers have been preset for steaming a number of food types. ■■ Manual Steam Cook requires that a cook time be entered.
BUILT-IN MICROWAVE OVEN CARE General Cleaning IMPORTANT: Before cleaning, make sure all controls are off and the microwave oven is cool. Always follow label instructions on cleaning products. Soap, water, and a soft cloth or sponge are suggested first, unless otherwise noted. Cleaning Method: Warm water, mild detergent and a sponge. To clean: 1. Push the fastening thread gently towards the back of the ceiling and then lower it to release the broil element.
TROUBLESHOOTING First try the solutions suggested here. If you need further assistance or more recommendations that may help you avoid a service call, refer to the warranty page in this manual or visit http://www.kitchenaid.com/customer-service. In Canada, visit http://www.kitchenaid.ca. Contact us by mail with any questions or concerns at the address below: In the U.S.A.
Problem Possible Cause Solution Radio or TV Interference Is the microwave oven plugged into the same outlet? Try a different outlet. Is the radio or TV receiver near the microwave oven? Move the receiver away from the microwave oven, or adjust the radio or TV antenna. Are the microwave oven door and sealing surfaces clean? Make sure these areas are clean. ACCESSORIES For accessories in the U.S.A., you can visit our website at www.kitchenaid.com or call us at 1-800-422-1230.
KITCHENAID® BUILT‑IN OVEN & MICROWAVE LIMITED WARRANTY ATTACH YOUR RECEIPT HERE. PROOF OF PURCHASE IS REQUIRED TO OBTAIN WARRANTY SERVICE. Please have the following information available when you call the Customer eXperience Center: ■■ Name, address and telephone number ■■ Model number and serial number ■■ A clear, detailed description of the problem ■■ Proof of purchase including dealer or retailer name and address IF YOU NEED SERVICE: 1.
Notes 20
FOUR À MICRO-ONDES ET COMBINÉ – INSTRUCTIONS D’UTILISATION DU FOUR À MICRO-ONDES Nous vous REMERCIONS d’avoir acheté ce produit de grande qualité. Enregistrer le four encastré au www.kitchenaid.com. Au Canada, enregistrez votre four micro-ondes au www.kitchenaid.ca. Pour référence ultérieure, consigner par écrit les numéros de modèle et de série de votre produit. Consulter la plaque signalétique située sur le châssis du four, derrière le côté droit supérieur de la porte du four.
SÉCURITÉ DU FOUR ENCASTRÉ Votre sécurité et celle des autres est très importante. Nous donnons de nombreux messages de sécurité importants dans ce manuel et sur votre appareil ménager. Assurez-vous de toujours lire tous les messages de sécurité et de vous y conformer. Voici le symbole d’alerte de sécurité. Ce symbole d’alerte de sécurité vous signale les dangers potentiels de décès et de blessures graves à vous et à d’autres.
IMPORTANTES INSTRUCTIONS DE SÉCURITÉ ■ Les liquides tels que l’eau, le café ou le thé peuvent trop chauffer – au-delà du point d’ébullition – sans sembler bouillir. Il n’y a pas toujours des bulles ou une ébullition lorsqu’on retire le récipient du four à micro-ondes. À CAUSE DE CECI, DES LIQUIDES TRÈS CHAUDS POURRAIENT DÉBORDER LORSQU’ON BOUGE LE RÉCIPIENT OU QUE L’ON UTILISE UNE CUILLÈRE OU UN AUTRE USTENSILE POUR LE REMUER.
Spécifications électriques Observer les dispositions de tous les codes et règlements en vigueur. Le four à micro-ondes doit être connecté aux deux côtés de 120 V sur un circuit de 208/240 V requis pour l’alimentation électrique. Si la tension d’entrée du four à micro-ondes est de moins de 120 V, les temps de cuisson peuvent être prolongés. Demander à un électricien qualifié de vérifier votre système électrique.
Le plateau rotatif tourne dans les deux sens pour permettre une cuisson plus uniforme. Ne pas faire fonctionner le four à micro-ondes lorsque le plateau rotatif est enlevé. Voir la section “Assistance ou service” pour commander de nouvelles pièces. Insérer les protubérances arrondies au centre du dessous du plateau rotatif entre les trois rayons de l’axe. L’axe fait tourner le plateau rotatif pendant l’utilisation du four à micro-ondes.
Tableau de commande Ce manuel couvre plusieurs modèles. Votre modèle peut comporter toutes les caractéristiques énumérées ou seulement certaines d’entre elles. Se reporter à ce manuel ou à la section Foire Aux Questions (FAQ) de notre site Web au www.kitchenaid.com pour des instructions plus détaillées. Au Canada, consulter la section Service et soutien technique au www.kitchenaid.ca.
Guide de bienvenue Le Guide de bienvenue permet à l’utilisateur de régler le nouveau four à micro-ondes. Ce message apparaît sur l’affichage la première fois où le four à micro-ondes est alimenté ou après la réinitialisation du four aux réglages d’usine. Après chaque sélection, un signal sonore retentit. Appuyer sur le bouton ARRIÈRE à tout moment pour revenir à l’écran précédent. 1. Sélectionner la langue, puis appuyer sur OK (d’accord). 2.
Écran de réglage des fonctions Après avoir sélectionné une fonction du four à micro-ondes, l’écran de réglage des fonctions propose différentes options pour personnaliser le programme. Certaines options ne sont pas disponibles avec certaines fonctions du four à micro-ondes. Appuyer sur option dans le menu de gauche pour modifier les réglages. INPUT TIME A (UP TO 90:00 MINUTES) MANUAL COOK -- :-- B M I N :S EC 100% C P O W E R L E VE L ON D A. B. C. D.
Écran de statut Lorsque le four à micro-ondes est en marche, l’écran affiche un fil d’actualité des informations concernant les fonctions actuellement utilisées sur le four à micro-ondes. Si l’un des fours n’est pas utilisé, un bouton permettant d’utiliser ce four apparaîtra. B A Modes de cuisson Le four à micro-ondes propose différents modes de cuisson pour vous permettre d’obtenir d’excellents résultats toutes les fois.
Tons/sons Les signaux sonores avertissent l’utilisateur de divers événements : Réglage Sélections accessibles Date et heure ■■ Auto (marche/arrêt)* ■■ Heure (AM, PM ou 24 heures) ■■ Touche numérique valide ■■ Heure avancée (non/oui)* ■■ Saisie d’une fonction. ■■ ■■ Four préchauffé.
UTILISATION DU FOUR À MICRO-ONDES ENCASTRÉ Un magnétron dans le four produit des micro-ondes qui rebondissent du plancher, des parois et de la voûte en métal et qui passent à travers le plateau rotatif et les ustensiles de cuisson appropriés pour atteindre l’aliment. Les micro-ondes sont attirées et absorbées par le gras, le sucre et les molécules d’eau des aliments, elles font bouger ces molécules, ce qui produit la friction et la chaleur qui fait cuire les aliments.
Ustensiles de cuisson et vaisselle La vaisselle et les ustensiles de cuisson doivent pouvoir être placés sur le plateau rotatif. Toujours utiliser des mitaines de four ou des poignées lors de la manipulation, car les plats peuvent devenir chauds puisqu’ils sont en contact avec des aliments. Ne pas utiliser des ustensiles de cuisson ou de la vaisselle avec garniture en or ou en argent. Utiliser le tableau suivant comme guide, ensuite faire un test avant utilisation.
Puissance de cuisson au four à micro-ondes De nombreuses recettes de four à micro-ondes précisent quelle puissance de cuisson doit être utilisée en indiquant un pourcentage, un nom ou un chiffre. Par exemple, 70 % = moyenne à élevée = 7. Utiliser le tableau suivant comme guide général pour la puissance de cuisson d’aliments spécifiques. La puissance ne peut pas être modifiée avec les modes de cuisson par détection.
Décongeler Réchauffage Les durées et puissances de cuisson ont été préréglées pour décongeler plusieurs types d’aliments. La décongélation manuelle nécessite de régler une durée et une puissance de cuisson si on utilise une puissance de cuisson autre que 30 %. Les durées et puissances de cuisson ont été préréglées pour réchauffer plusieurs types d’aliments. Le réchauffage manuel nécessite de régler une durée et une puissance de cuisson si on utilise une puissance de cuisson autre que 70 %.
Conversion EasyConvect™ A B C D A. Élément de cuisson au gril B. Ventilateur de convection C. Élément de convection D. Grille de convection La cuisson par convection utilise l’élément de convection, l’élément de cuisson au gril et le ventilateur. L’air chaud circule dans tout le four par le ventilateur. L’air constamment en mouvement entoure l’aliment pour chauffer rapidement la portion extérieure.
ENTRETIEN DU FOUR À MICRO-ONDES ENCASTRÉ Nettoyage général IMPORTANT : Avant le nettoyage, s’assurer que toutes les commandes sont désactivées et que le four à micro-ondes est froid. Toujours suivre les instructions figurant sur les étiquettes des produits de nettoyage. L’usage de savon, d’eau et d’un chiffon doux ou d’une éponge est suggéré en priorité, sauf indication contraire. Méthode de nettoyage : Eau tiède, détergent doux et éponge. Nettoyage : 1.
DÉPANNAGE Essayez d’abord les solutions suggérées ici. Pour obtenir de l’aide ou des recommandations supplémentaires pour éviter un appel de service, reportez-vous à la page de garantie de ce guide ou visitez le http ://www.kitchenaid.com/customer-service. Au Canada, visiter le http ://www.kitchenaid.ca.
Problème Cause possible Solution Les durées de cuisson semblent trop longues La puissance de cuisson est-elle bien réglée? Voir la section “Puissance de cuisson au four à microondes” à la section “Utilisation du four à micro-ondes”. Chauffe-t-on de grosses quantités d’aliments? Les quantités plus grandes d’aliments nécessitent des durées de cuisson plus longues.
GARANTIE DU FOUR ET DU FOUR À MICRO-ONDES ENCASTRÉ KITCHENAID® ATTACHEZ ICI VOTRE REÇU DE VENTE. UNE PREUVE D’ACHAT EST OBLIGATOIRE POUR OBTENIR L’APPLICATION DE LA GARANTIE.
CLAUSE D’EXONÉRATION DE RESPONSABILITÉ AU TITRE DES GARANTIES IMPLICITES LES GARANTIES IMPLICITES, Y COMPRIS LES GARANTIES APPLICABLES DE QUALITÉ MARCHANDE OU D’APTITUDE À UN USAGE PARTICULIER, SONT LIMITÉES À UN AN OU À LA PLUS COURTE PÉRIODE AUTORISÉE PAR LA LOI.