Brugsanvisninger
VIGTIGE ANVISNINGER VEDRØRENDE SIKKERHEDEN 4 Installation 8 Værn om miljøet 9 Erklæring om miljøvenligt design 9 Fejlfindingsoversigt 9 Serviceafdelingen 10 Rengøring 10 Vedligeholdelse 11 Brugsanvisninger til ovn 13 Tabel med funktionsbeskrivelser 23 Tilberedningstabel 25 Afprøvede opskrifter 27 Anbefalet brug og gode råd 28 3
Disse anvisninger står desuden til rådighed på websitet: www.kitchenaid.eu VIGTIGE ANVISNINGER VEDRØRENDE SIKKERHEDEN VORES PRIORITET ER SIKKERHEDEN Denne brugsvejledning og selve apparatet er forsynet med vigtige oplysninger om sikkerhed, der altid skal læses og overholdes. Dette er symbolet for fare, der advarer om potentielle risici for brugeren og andre.
• Strømforsyningskablet skal være tilstrækkelig langt til, at det er muligt at slutte det indbyggede apparat til strømforsyningen. • For at opfylde de gældende sikkerhedsdirektiver for installation skal der anvendes en flerpolet afbryderkontakt med en afstand på mindst 3 mm. • Brug ikke multistikdåser, hvis ovnen er udstyret med et stik. • Brug ikke forlængerledninger. • Træk ikke strømforsyningskablet ud. • Efter endt installation må der ikke være direkte adgang til de elektriske dele.
• • • • • • • • • • apparatet, hvis de er under opsyn eller har fået den nødvendige oplæring i sikker brug af apparatet samt forstår farerne ved forkert brug. Børn må ikke lege med apparatet. Rengøring og brugervedligeholdelse må ikke udføres af børn uden opsyn. Rør ikke ved apparatets opvarmede dele under og efter brug, da de vil kunne forårsage forbrændinger. Undgå kontakt med klude eller andet brændbart materiale, indtil alle apparatets dele er fuldstændig afkølet.
• • • • • • • spiritus fordamper ved høje temperaturer. Der kan gå ild i dampene, når de kommer i kontakt med det elektriske varmelegeme. Anvend aldrig damprensere. Rør ikke ved ovnen under pyrolysecyklussen. Sørg for, at der ikke kommer børn i nærheden af ovnen under pyrolysecyklussen. Alt overskydende spild skal fjernes fra ovnrummet, før renseprogrammet startes (angår kun ovne med pyrolysefunktion).
Installation Kontrollér efter udpakning, at ovnen ikke er blevet beskadiget under transporten, og at ovnlågen lukker korrekt. Kontakt forhandleren eller Serviceafdelingen, hvis der er problemer. For at undgå beskadigelser anbefales det, at ovnen ikke fjernes fra underlaget af polystyrenskum, før den skal installeres. FORBEREDELSE AF INDBYGNINGSNICHEN • Alle tilstødende køkkenelementer skal være varmebestandige (min. 90 °C). • Skær køkkenelementet til, så det passer, før ovnen installeres.
Værn om miljøet Bortskaffelse af emballagen • Emballagen er fremstillet af 100 % genbrugsmateriale og er mærket med . genbrugssymbolet • De forskellige dele af emballagen skal derfor bortskaffes i overensstemmelse med lokale regler om affaldsbehandling. Bortskaffelse af apparatet • Dette apparat er mærket i overensstemmelse med EU-direktiv 2012/19/EU om Affald af elektrisk og elektronisk udstyr (WEEE).
Serviceafdelingen Før servicecenteret kontaktes: • Undersøg, om det er muligt selv at rette fejlen ved at følge anvisningerne i afsnittet ”Fejlfinding”. • Sluk for apparatet, og tænd for det igen for at kontrollere, om fejlen er afhjulpet. Hvis apparatet stadig ikke fungerer korrekt, kontaktes Service. Angiv altid: • En kort beskrivelse af fejlen; • Ovntype og -model. • Servicenummeret (tallet står efter ordet ”Service” på typepladen) er anbragt på højre kant af ovnrummet (synlig når lågen er åben).
Rengøring • • • Hvis ovnen er installeret under en kogesektion, skal man kontrollere, at blussene eller kogepladerne er slukkede under selvrensningen (pyrolysen) Før pyrolysen aktiveres, skal alt tilbehør tages ud af ovnen (også metalribberne i siderne). For at opnå en optimal rensning af ovnlågen skal det værste snavs fjernes med en fugtig klud, før pyrolysefunktionen anvendes. Apparatet er udstyret med 2 pyrolysefunktioner: 1. Økonomisk program (HURTIG/ØKO PYRO): Bruger ca.
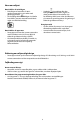
Vedligeholdelse FJERNELSE AF OVNRIBBERNE I SIDERNE 1. Fjern ribberne ved at løfte dem (1) og dreje dem (2) som vist i fig. 3. UDSKIFTNING AF PÆREN Udskiftning af den bageste pære (afhængigt af model) 1. Tag stikket ud af stikkontakten. 2. Skru lampeglasset af, skift pæren ud (se bemærkningen angående type), og skru lampeglasset på igen. 3. Sæt stikket i stikkontakten igen. 1 2 Fig. 3 BEMÆRK: –– Brug kun 25-40 W/230 V glødepærer af typen E-14, T300°C, eller halogenpærer 20-40 W/230 V af typen G9, T300°C.
Brugsanvisninger til ovn SE AFSNITTET OM INSTALLATION ANGÅENDE TILSLUTNING TIL STRØMFORSYNINGEN 3 1 6 2 7 5 12 4 13 8 11 10 9 1. 2. 3. 4. 5. 6. 7. 8. 9. 10. 11. 12. 13.
Brugsanvisninger til ovn MEDFØLGENDE TILBEHØR A. RIST: risten anvendes til grilning af mad eller som en støtte for gryder, tærteforme og andet ovnfast kogegrej. (Fig. A) B. BRADEPANDE: Dryppebakken anvendes til opsamling af fedt, når den er anbragt under risten, eller som en plade, når der f.eks. tilberedes kød, fisk, grønsager, focacciaboller el. lign. (Fig. B) C. BAGEPLADE: Kan bruges til at tilberede brød og tærter, men også steg, fisk i fad, etc. (Fig. C) D.
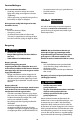
Brugsanvisninger til ovn INDSÆTNING AF RISTE OG ANDET TILBEHØR I OVNEN 1. Før grillristen vandret ind, med den hævede del “A” vendt opad (Fig. 1). 2. Andet tilbehør, så som dryppebakken og bagepladen, sættes i på samme måde som grillristen (Fig. 2). A Fig. 1 Fig. 2 BESKRIVELSE AF BETJENINGSPANELET DISPLAY 1 3 4 2 1. FUNKTIONSKNAP: tænding/slukning og valg af funktioner 2. NAVIGERINGSKNAP: navigering i menuen, regulering af forudindstillede værdier 3.
Brugsanvisninger til ovn BESKRIVELSE AF DISPLAYET I H G F E A B C D A. Visning af de aktive varmelegemer for de forskellige funktioner B. Symboler for tidsfunktioner: timer, tilberedningens varighed, tidspunktet for endt tilberedning, klokkeslæt C. Informationer om de valgte funktioner D. Auto-funktionen BREAD/PIZZA (BRØD/PIZZA) valgt E. Angivelse af, at ovnlågener låst under den automatiske rengøring (pyrolyse) F. Intern ovntemperatur G. Funktionen "Pyro" H. Bruning I.
Brugsanvisninger til ovn INDSTILLING AF TEMPERATUR/GRILLEFFEKT Gå frem på følgende måde for at ændre temperaturen eller grilleffekten: 1. Drej navigeringsknappen, til den ønskede værdi vises. for at bekræfte. 2. Tryk på tasten Ovnen bekræfter automatisk valget 10 sekunder efter den sidste handling. HURTIG FORVARME PRE 1. Vælg funktionen Hurtig forvarme ved at dreje funktionsknappen. : Indstillingerne vises på displayet. 2. Bekræft ved at trykke på tasten . Gå frem som 3.
Brugsanvisninger til ovn Gå frem på følgende måde, for at udskyde tilberedningens afslutning, og dermed også tilberedningens start: 1. Drej “navigeringsknappen” til det klokkeslæt, tilberedningen ønskes afsluttet på (f.eks. 16:00) : De to prikker i klokkeslættet for endt tilberedning blinker, 2. Bekræft valget ved at trykke på tasten for at angive, at indstillingen er udført korrekt. 3. Ovnen udsætter automatisk tilberedningens start, så retten er færdig på det indstillede klokkeslæt.
Brugsanvisninger til ovn BRUNING For visse funktioner foreslår displayet, efter endt tilberedning, at der udføres en efterbruning af retten. Denne funktion kan kun aktiveres, hvis der blev indstillet en tilberedningstid. PRESS Efter endt tilberedningstid viser displayet: “PRESS TO BROWN”. Hvis der trykkes på tasten , starter ovnen en efterbruningscyklus med en varighed på 5 minutter. Funktionen kan udføres to gange.
Brugsanvisninger til ovn STEGETERMOMETER (TERMOMETER) Det medfølgende stegetermometer giver mulighed for at måle den nøjagtige temperatur (op til 100°C) under tilberedningen for at sikre den optimale tilberedning. Det er muligt at programmere den ønskede kernetemperatur afhængigt af den pågældende ret. Det er meget vigtigt at placere stegetermometeret korrekt for at opnå det ønskede tilberedningsresultat.
Brugsanvisninger til ovn INDSTILLINGER Drej “funktionsknappen” over på “UCLOCKR” for at få adgang til en undermenu, der indeholder fem displayindstillinger, som kan ændres. Ur Drej på “navigeringsknappen”, indtil “CLOCK” vises. Se det foregående afsnit (INDSTILLING AF KLOKKESLÆT) vedrørende ændring af klokkeslættet. Lysstyrke Gå frem på følgende måde for at ændre lysstyrken på displayet: 1. Drej navigeringsknappen, til “BRIGHTNESS” vises. : Displayet viser tallet 1. 2. Tryk på tasten 3.
Brugsanvisninger til ovn AUTOMATISK RENGØRING AF OVNEN Indhent en beskrivelse af denne funktion i kapitlet RENGØRING og i funktionstabellen på side 7. COOL PYRO Gå frem på følgende måde for at starte en automatisk rengøring (pyrolyse) af ovnen: 1. Drej “funktionsknappen” over på PYRO. for at bekræfte dit valg og starte pyrolyserengøringen. 2. Tryk på tasten Drej navigeringsknappen for at vælge ECO rengøring: Nederst til højre på displayet vises ØKO. Tryk på for at starte det korte program.
Tabel med funktionsbeskrivelser FUNKTIONSKNAP OFF (SLUKNING) Til afbrydelse af tilberedningen og slukning af ovnen. LAMP (OVNLYS) Til tænding/slukning af ovnlyset. DEFROST (OPTØNING) WARM KEEPING (VARMHOLDNING) YOGURT (YOGHURT) SPECIAL FUNCTIONS (SPECIALFUNKTIONER) NAVIGERINGSKNAP RISING (DEJHÆVNING) MEAT SLOW COOKING (LANGTIDSSTEGNING KØD) FISH SLOW COOKING (LANGTIDSSTEGNING FISK) ECO FORCED AIR (ØKO VARMLUFT) CONVENTIONAL (KONVENTIONEL) Bruges til hurtig optøning af madvarer.
Tabel med funktionsbeskrivelser FUNKTIONSKNAP CONVECTION BAKE (VARMLUFTSBAGNING) GRILLFUNKTIONER NAVIGERINGSKNAP FORCED AIR (VARMLUFT) GRILL INDSTILLINGER NAVIGERINGSKNAP BREAD / PIZZA (BRØD / PIZZA) NAVIGERINGSKNAP TURBO GRILL Til tilberedning af kød og tærter med (krydret eller sødt) fyld på én ribbe. Brug 3. ribbe. Det anbefales at forvarme ovnen inden tilberedningen. Til samtidig tilberedning på to ribber af forskellige retter, der skal tilberedes ved samme temperatur (f.eks.
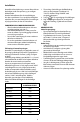
Tilberedningstabel Opskrift Forvarme Ribbe (fra bunden) Temperatur (°C) JA 2/3 160 - 180 30 - 90 JA 1-4 160 - 180 30 - 90 JA 3 160 - 200 30 - 85 JA 1-4 160 - 200 35 - 90 JA 3 170 - 180 15 - 45 Dryppebakke/bageplade JA 1-4 160 - 170 20 - 45 Ribbe 4: rist Ribbe 1: Dryppebakke/ bageplade JA 3 180 - 200 30 - 40 Dryppebakke/bageplade JA 1-4 180 - 190 30 - 40 Ribbe 4: Bradepande på rist Ribbe 1: Dryppebakke/ bageplade JA 3 90 110 - 150 Dryppebakke/bageplade JA 1-4 90
Tilberedningstabel Opskrift Funktion Forvarme Ribbe (fra bunden) Temperatur (°C) Kylling, kanin, and 1 kg JA 3 200 - 230 50 - 100 Dryppebakke eller bradepande på rist Kalkun / gås 3 kg JA 2 190 - 200 80 - 130 Dryppebakke eller bradepande på rist Fisk i fad (filet, hel) JA 3 180 - 200 40 - 60 Dryppebakke eller bradepande på rist Fyldte grønsager (tomater, courgetter, auberginer) JA 2 180 - 200 50 - 60 Bradepande på rist - 5 3 (Høj) 3-6 Toast Tid (min.
Afprøvede opskrifter i overensstemmelse med IEC 60350-1:2011-12 og DIN 3360-12:07:07) Opskrift Funktion Forvarme Ribbe (fra bunden) Temperatur (°C) Tid (min.) Tilbehør* og bemærkninger* JA 3 170 15 - 25 Dryppebakke/bageplade JA 1-4 150 25 - 35 JA 3 170 20 - 30 Dryppebakke/bageplade JA 1-4 160 25 - 35 JA 2 170 30 - 40 Tærteform på rist JA 1-4 160 35 - 45 JA 2/3 185 70 - 90 Tærteform på rist JA 1-4 175 75 - 95 - 5 3 (Høj) 3-6 IEC 60350-1:2011-12 § 7.5.
Anbefalet brug og gode råd Sådan læses tilberedningstabellen Tabellen angiver, hvilken funktion det er bedst at bruge til en bestemt madvare, der skal tilberedes på én ribbe eller flere ribber samtidigt. Tilberedningstiderne gælder fra det tidspunkt, retten sættes i ovnen, bortset fra tilberedninger, der kræver forvarmning. Tilberedningstemperaturerne og -tiderne er kun vejledende, og de afhænger af mængden af madvarer og den anvendte type tilbehør.
Anbefalet brug og gode råd Tips til retter, som tilberedes vha.
WHIRLPOOL EUROPE s.r.l. Socio Unico Viale G. Borghi, 27 21025 COMERIO (Varese) ITALY Telefon +39 0332 759111 – Fax +39 0332 759268 www.whirlpool.