Инструкция по эксплуатации
ВАЖНЫЕ УКАЗАНИЯ ПО БЕЗОПАСНОСТИ 4 Установка 8 Защита окружающей среды 9 Заявление об экодизайне 9 Поиск и устранение неисправностей 9 Сервис 10 Чистка 10 Уход 11 Указания по использованию духовки 13 Таблица функций/режимов 26 Таблица приготовления блюд 28 Таблица проверенных рецептов 32 Рекомендации по использованию и полезные советы 33
Эта инструкция также доступна на нашем сайте: www.kitchenaid.eu ВАЖНЫЕ УКАЗАНИЯ ПО БЕЗОПАСНОСТИ ВАША БЕЗОПАСНОСТЬ ПРЕВЫШЕ ВСЕГО В настоящем руководстве и на самом приборе содержатся важные указания по технике безопасности. Их необходимо прочесть и выполнять постоянно. Этот символ опасности указывает на наличие потенциальных рисков для пользователя и других людей.
• Сетевой шнур должен иметь достаточную длину для того, чтобы после встраивания прибор мог быть без труда подключен к выходу электрической сети. • Согласно действующим правилам безопасности при установке прибора должен быть использован многополюсный выключатель с зазором между разомкнутыми контактами не менее 3 мм. • Если духовка оснащается электрической вилкой, не используйте электрические разветвители. • Не используйте удлинители. • Не тяните за сетевой шнур.
• • • • • • • • • способностями и лица, не имеющие достаточных знаний и навыков, могут пользоваться прибором только под присмотром или после того, как получат указания по безопасному использованию прибора и поймут имеющиеся опасности. Не позволяйте детям играть с прибором. Дети не должны осуществлять чистку и уход за прибором без надзора со стороны взрослых. Во избежание ожогов не касайтесь нагревательных элементов и внутренних поверхностей прибора во время его использования и после.
• Если при приготовлении блюда используются спиртные напитки (ром, коньяк, вино и т. п.), помните, что при высокой температуре спирт испаряется. При этом существует опасность воспламенения паров спирта от контакта с электрическим нагревательным элементом. • Не используйте пароочистители. • Не прикасайтесь к духовке во время цикла пиролитической очистки. Не разрешайте детям приближаться к духовке во время цикла пиролитической очистки.
Установка После распаковки духовки проверьте, не была ли она повреждена во время транспортировки, и убедитесь в том, что дверца закрывается должным образом. В случае сомнений обращайтесь к дилеру или в ближайший сервисный центр. Во избежание повреждений снимайте духовку с основания из пенопласта только в момент установки. Подготовка мебели к установке • Кухонная мебель, контактирующая с духовкой, должна быть стойкой к высоким температурам (не менее 90°C).
Защита окружающей среды Утилизация упаковочных материалов • Упаковочные материалы допускают полную вторичную переработку, о чем свидетельствует символ . • Различные части упаковки должны быть утилизированы в полном соответствии с действующими местными нормами по утилизации отходов. Утилизация прибора • Данный прибор несет маркировку в соответствии с Европейской Директивой 2012/19/EC по утилизации электрического и электронного оборудования (WEEE).
Сервис Прежде чем обращаться в сервис: • Попытайтесь устранить неисправность самостоятельно, следуя указаниям раздела “Поиск и устранение неисправностей”. • Выключите и снова включите прибор и проверьте, не исчезла ли неисправность. • • расположенной на правом торце камеры — видна при открытой дверце прибора). Сервисный номер также указан в гарантийном талоне; ваш полный адрес; ваш номер телефона.
Чистка В этом режиме происходит выжигание накопившихся в процессе приготовления пищи загрязнений при температуре около 500°С. При такой высокой температуре отложения превращаются в золу, которую можно легко удалить влажной тряпкой, когда духовка остынет. Не включайте режим пиролиза после каждого использования духовки. Используйте его, только когда духовка сильно загрязнена или если в процессе предварительного нагрева или приготовления из нее идет дым.
Уход СНЯТИЕ БОКОВЫХ РЕШЕТОК Боковые решетки крепятся двумя винтами (рис. 3), обеспечивающими их устойчивость. 1. Снимите винты и соответствующие шайбы, используя монету или отвертку (рис. 4). 2. Чтобы снять решетки, поднимите их (1) и поверните (2) как показано на рис. 5 ЗАМЕНА ЛАМПЫ Замена задней лампы (при наличии): 1. Отсоедините духовку от электросети. 2. Выкрутите плафон, замените лампу (тип лампы указан в примечании) и накрутите плафон в исходное положение. 3. Подключите духовку к электросети.
Указания по использованию духовки ПОДКЛЮЧЕНИЕ ДУХОВКИ К ЭЛЕКТРОСЕТИ ОПИСЫВАЕТСЯ В РАЗДЕЛЕ “УСТАНОВКА” 3 1 6 2 7 5 12 4 13 8 11 14 10 9 1. 2. 3. 4. 5. 6. 7. 8. 9. 10. 11. 12. 13. 14.
Указания по использованию духовки ПРИНАДЛЕЖНОСТИ В КОМПЛЕКТЕ A. РЕШЕТКА: используется для приготовления блюд на гриле, а также в качестве подставки для кастрюль, форм и другой жаропрочной посуды. (Рис. A) B. ПОДДОН: устанавливается под решеткой для сбора жира и кусочков пищи, может также использоваться в качестве емкости при приготовлении мяса, рыбы, овощей, лепешек и других подобных блюд. (Рис. B) C.
Указания по использованию духовки УСТАНОВКА РЕШЕТОК И ДРУГИХ ПРИНАДЛЕЖНОСТЕЙ В ДУХОВКУ 1. Вставьте решетку горизонтально так, чтобы выступ А был обращен вверх (рис. 1). 2. Другие принадлежности, такие как поддон и противень, устанавливаются тем же способом, что и решетка (Рис. 2). A Рис. 1 Рис. 2 ОПИСАНИЕ ПАНЕЛИ УПРАВЛЕНИЯ ДИСПЛЕЙ 1 2 3 4 1. РУЧКА ВЫБОРА РЕЖИМОВ: включение/выключение духовки, выбор режимов 2. РУЧКА УСТАНОВКИ: просмотр меню, изменение настроек по умолчанию 3.
Указания по использованию духовки СПИСОК ФУНКЦИЙ/РЕЖИМОВ При повороте ручки выбора режимов происходит включение духовки: на дисплей выводятся названия функций/режимов или соответствующие им подменю. A. Символ выделенной функции B. Выбор подсвеченной функции можно осуществить нажатием C. Описание подсвеченной функции D. Другие доступные функции, которые можно выбрать D Профессиональные A Tpaдициoнный B Cпeц.
Указания по использованию духовки ВЫБОР РЕЖИМА ПРИГОТОВЛЕНИЯ Media --:-- NO PRERISC. Media TEMPO COTTURA POTENZA GRILL Grill Avvio --:-TEMPO COTTURA POTENZA GRILL --:-- NO TEMPO FINE PRERISC. Grill Avvio --:-TEMPO FINE 1. Если духовка выключена, поверните ручку переключения режимов на дисплей будет выведен список режимов приготовления или соответствующие режимам подменю. ПРИМЕЧАНИЕ: список и описание функций приведены в соответствующей таблице на стр. 26. 2.
Указания по использованию духовки ПРОГРЕВ ДУХОВКИ Если вы не хотите выполнять предварительный нагрев духовки в тех режимах, в которых он предусмотрен, просто измените заданную по умолчанию опцию, действуя следующим образом: 1. Поверните ручку просмотра/ 200° --:-регулировки в такое положение, ТЕМПЕРАТУРА BPEMЯ ПPИГOTOB чтобы курсор установился на опцию Обычный предварительного прогрева. ДA ПPOГPEB , чтобы выбрать 2. Нажмите кнопку опцию: На дисплее начнет мигать надпись "Да".
Указания по использованию духовки УСТАНОВКА ДЛИТЕЛЬНОСТИ ПРИГОТОВЛЕНИЯ Эта функция позволяет задавать длительность приготовления в пределах от 1 минуты до максимального значения, предусмотренного для выбранного режима. По истечении установленного времени духовка автоматически выключается. 1. Чтобы выбрать эту функцию, установите курсор с помощью ручки просмотра/ регулировки в положение "BPEMЯ ПPИГOTOB" , чтобы выбрать 2. Нажмите кнопку опцию; на экране будет мигать значение "00:00". 3.
Указания по использованию духовки УСТАНОВКА ВРЕМЕНИ ОКОНЧАНИЯ ПРИГОТОВЛЕНИЯ / ОТЛОЖЕННЫЙ СТАРТ Пользователь может задать время окончания 180° -00:30 приготовления, отсрочив включение ТЕМПЕРАТУРА BPEMЯ ПPИГOTOB духовки на время до 23 часов 59 минут. Эта Обычный операция возможна только после задания 19:20 HEТ продолжительности приготовления.
Указания по использованию духовки ТАЙМЕР Эта функция может использоваться только при выключенной духовке; она полезна, например, для контроля времени приготовления какого-либо блюда на плите. Максимальное время, которое можно задать, составляет 1 час 30 минут. 1. При выключенной духовке нажмите : на дисплее отобразится кнопку "00:00:00". 2. Поверните ручку просмотра/ регулировки, чтобы выбрать нужное время. для запуска 3. Нажмите кнопку обратного отсчета.
Указания по использованию духовки ЩУП ДЛЯ МЯСА Входящий в комплект поставки термощуп позволяет точно измерять температуру внутри продукта во время его приготовления в диапазоне от 0° до 100°C для обеспечения идеального качества готового блюда. Необходимая температура задается в соответствии с типом продукта. От правильности установки термощупа существенно зависит качество готового блюда. Полностью вставьте термощуп в наиболее мясистую часть продукта, избегая костей и жирных частей (рис. A).
Указания по использованию духовки ЛЮБИМЫE PEЦEПТЫ Духовка позволяет вам сохранять настройки, используемые для приготовления ваших любимых блюд. По окончании приготовления, если вы хотите сохранить выполненные настройки (режим приготовления, время . приготовления, температуру...) нажмите кнопку Haжaть для coxpaнeния, для oтмeны При этом на дисплее отображается сообщение "Haжaть для coxpaнeния".
Указания по использованию духовки САМООЧИСТКА ДУХОВКИ Описание этой функции см. в главе "ЧИСТКА" и таблице функций/режимов на стр. 24. Для запуска цикла автоочистки духовки (пиролитической очистки) действуйте следующим образом: Пиpoлиз 75 мин. Пиролиз 180-минyтнaя выcoкoтeмпepaтypнaя чиcткa -03:00 ВРЕМЯ 1. С помощью ручки выбора режима выберите функцию "Чистка". На дисплее отобразится "Пиpoлиз 75 мин." и "Пиpoлиз 180 мин.". Чистка 2.
Указания по использованию духовки 5. После окончательного подтверждения начинается цикл очистки духовки и дверца автоматически блокируется: на дисплее отображается в предупреждение и символ течение примерно трех секунд. Сразу же после этого на дисплее появится индикатор выполнения цикла очистки. Двepь блoкиpyeтcя вo вpeмя чиcтки -02:59 ВРЕМЯ Чистка Чистка Примечание: Если дверца духовки будет открыта до того, как она автоматически заблокируется, на дисплее появится предупредительное сообщение.
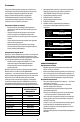
Таблица функций/режимов ГЛАВНОЕ МЕНЮ Режим Режим Описание НАСТРОЙКИ Настройки параметров дисплея (язык, время, яркость, уровень громкости звукового сигнала, режим энергосбережения) Специальные функции для выпекания соответствующих типов блюд с рекомендованными оптимальными температурам приготовления.
Таблица функций/режимов CПEЦ. ФYНКЦИИ PAЗМOPAЖИВAНИE Режим для ускоренного размораживания продуктов. Размещайте продукты на среднем уровне. Не снимайте упаковку, чтобы предотвратить высыхание внешнего слоя продукта. СОХРАНЕНИЕ ТЕПЛА Идеальный режим для поддержания только что приготовленных блюд (например, мяса, жаркого, пудингов) в горячем и свежем состоянии. Размещайте продукты на среднем уровне. Режим недоступен, если температура внутри духовки превышает 65°C. ПОДЪЕМ ТЕСТА MEДЛ. OБЖAP. МЯCA MEДЛ.
Таблица приготовления блюд Рецепт Режим Прогрев Уровень (снизу) Температура (°C) Время (мин) ДА 2-3 160 - 180 30 - 90 - 1-4 160 - 180 30 - 90 - 3 160 - 200 35 - 90 - 1-4 160 - 200 40 - 90 ДА 3 170 - 180 20 - 45 - 1-4 150 - 170 20 - 45 - 1-3-5 150 - 170 20 - 45 - 3 180 - 200 30 - 40 Торты из дрожжевого теста Пироги с начинкой (чизкейк, штрудель, яблочный пирог) Печенье / небольшие торты - 1-4 180 - 190 35 - 45 - 1-3-5 180 - 190 35 - 45 - 3 90 Пирожные из за
Таблица приготовления блюд Рецепт Режим Прогрев ДА Уровень (снизу) Температура (°C) 1/2 190 - 250 Время (мин) 15 - 50 Несладкая выпечка (пирог с овощной начинкой, лоранский пирог) Поддон / вставной противень Уровень 4: противень на решетке/ противень для выпечки Уровень 1: Поддон / вставной противень Уровень 5: противень на решетке/ противень для выпечки Уровень 3: противень на решетке/ противень для выпечки Уровень 1: Противень для сбора жира - 1-4 190 - 250 20 - 50 - 1-3-5 190 - 250 25 -
Таблица приготовления блюд Рецепт Уровень (снизу) Температура (°C) - 3 190 - 200 45 - 65 Поддон или противень на решетке - 3 190 - 200 80 - 110 Поддон или противень на решетке Курица / кролик / утка, 1 кг - 3 200 - 230 50 - 100 Поддон или противень на решетке Индейка / гусь, 3 кг - 2 190 - 200 80 - 130 Поддон или противень на решетке - 3 180 - 200 40 - 60 Поддон или противень на решетке - 2 180 - 200 50 - 60 Противень на решетке Тосты - 5 (Высокая) 3-6 Рыба, филе / ку
Таблица приготовления блюд Рецепт Запеканка из овощей Режим Прогрев - Уровень (снизу) Температура (°C) 3 Высокая Время (мин) 10 - 25 Принадлежности Поддон или противень на решетке Уровень 4: противень на решетке Уровень 1: поддон или противень на решетке Уровень 4: противень на решетке Уровень 1: поддон или противень на решетке Уровень 4: противень на решетке Уровень 1: поддон или противень на решетке Уровень 5: противень на решетке Уровень 3: противень на решетке Уровень 1: поддон или противень на
Таблица проверенных рецептов (в соответствии со стандартами IEC 60350/-1:2011-12 и DIN 3360-12:07:07) Рецепт Режим Прогрев Уровень (снизу) Температура (°C) Время (мин) Принадлежности и примечания* IEC 60350-1:2011-12 § 7.5.2 ДА 3 170 15 - 30 - 1-4 150 30 - 45 ДА 3 170 20 - 30 - 1-4 160 25 - 35 Песочное печенье Поддон / вставной противень Уровень 4: вставной противень Уровень 1: Поддон / вставной противень IEC 60350-1:2011-12 § 7.5.
Таблица проверенных рецептов В таблице приготовления блюд указаны оптимальные режимы и температура, необходимые для получения наилучших результатов для каждого типа блюд. Если вы хотите готовить в режиме конвекции только на одном уровне, поместите блюдо на третью полку и выберите температуру, рекомендованную для режима “КОНВЕКЦИЯ” при одновременном приготовлении на нескольких полках. Значения таблицы указаны случая для духовки без выдвижных направляющих. Выполняйте испытания без боковых направляющих.
Рекомендации по использованию и полезные советы –– Для приготовления десертов с жидкой начинкой (пироги с сыром или фруктами) используйте режим “ПOДPYМЯНИВAНИE”. Если основание пирога не пропеклось, ставьте форму на более низкий уровень, а основание перед выкладкой начинки посыпьте панировочными сухарями или раскрошенным печеньем. Мясо –– Пользуйтесь противнями любого типа или емкостями из огнеупорного стекла, размеры которых соответствуют приготавливаемым кускам мяса.
ВИЕРЛПУЛ ЮРОП с.р.л. Социо Унико Виале Гвидо Борги, 27 21025, Комерио (Варезе) ИТАЛИЯ Тел. +39 0332 759111 – Факс +39 0332 759268 www.whirlpool.