Models/Modèles KERS206X, KERS208X W10328277A 316902700
Table of Contents Setting Delay Start .......................................................... Broil ................................................................................ Convect Bake ................................................................. Convect Roast ................................................................ EasyConvect Feature (some models) ........................ Product Record/Serial Plate Location .............................. 2 Important Safety Instructions .........
Important Safety Instructions Read all instructions before using this appliance. This manual contains important safety symbols and instructions. Please pay attention to these symbols and follow all instructions given. All ranges can tip. Injury to persons could result. Install anti-tip device packed with range. See Installation Instructions. To reduce the risk of tipping, the range must be secured by properly installed anti-tip bracket provided with the range.
Important Safety Instructions NEVER cover any slots, holes or passages in the oven bottom or cover an entire oven rack with materials such as aluminum foil. Aluminum foil linings may trap heat, causing a fire hazard. Do not heat unopened food containers buildup of pressure may cause container to burst and result in injury. DO NOT LEAVE CHILDREN ALONE children should not be left alone or unattended in the area where appliance is in use.
Important Safety Instructions IMPORTANT INSTRUCTIONS FOR USING YOUR COOKTOP IMPORTANT INSTRUCTIONS FOR CLEANING YOUR RANGE Know which knob controls each surface heating unit. Place a pan of food on the surface element unit before turning it on, and turn the element off before removing the pan. Before manually cleaning any part of the range, be sure all controls are turned OFF and the range is COOL. The range may be hot and can cause burns.
Before Setting Oven Controls Oven vent location Types of oven racks The oven vent is located under the left side of the control panel (See Fig. 1). When the oven is on, warm air passes through this vent. This venting is necessary for proper air circulation in the oven and good baking results. Do not block oven vent. The flat oven rack (some models) or flat handle oven rack (some models) may be used for most cooking needs.
Before Setting Surface Controls Using proper cookware Cookware material types The size and type of cookware used will influence the radiant element power level setting needed for best cooking results. Be sure to follow the recommendations for using proper cookware as illustrated in both Figs. 1 & 2. The cookware material determines how evenly and quickly heat is transferred from the surface element to the pan bottom. The most popular materials available are: Aluminum - Excellent heat conductor.
Before Setting Surface Controls About the ceramic glass cooktop Cooktop On and Hot Surface indicator lights The ceramic cooktop has radiant surface elements located below the surface of the glass. The design of the ceramic cooktop outlines the area of the surface element underneath. Be sure to match the pan size with the diameter of the element outline on the cooktop and only flat-bottomed cookware should be used.
Before Setting Surface Controls Types of cooktop surface elements Home Canning The ceramic glass cooktop has radiant surface elements located below the surface of the glass. The patterns on the ceramic glass outline the size and type of element available. The single radiant element or elements will have one round outline pattern shown on the cooktop. The Warm Zone feature located on the center rear area of the cooktop uses one round outline and is designed to keep food warm only.
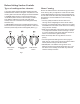
Setting Surface Controls Single radiant surface elements Important notes: To operate a single radiant element: For efficient cooking, turn OFF the element several minutes before cooking is complete. This will allow residual heat to complete the cooking process. The surface control knobs do not have to be set exactly on a particular spot. Use the graphics provided as a guide and adjust the control knob as needed. Each surface element provides a constant amount of heat at each setting.
Setting Surface Controls Radiant surface element settings The size and type of utensil used, and the amount and type of food being cooked will influence the surface element power level setting needed for best cooking results. The suggested settings found in Fig. 1 below are based when cooking with medium-weight aluminum pans with lids. Settings may vary when using other types of pans.
Setting Surface Controls Warm Zone (some models) Temperature selection - Refer to the Warm Zone recommended food settings (See Fig. 3). If a particular food is not listed, start with the medium level, and adjust as needed. Most foods can be kept at serving temperatures by using the medium level. The purpose of the Warm Zone is to keep hot cooked foods at serving temperature. Use the Warm Zone feature (See Fig.
Oven Control Functions For satisfactory use of your oven, become familiar with the various keypad functions and features of the oven. (some models) Bake Use to enter a normal Bake function. Broil Use to select variable Broil function. Preheat Use to precondition the oven temperature. Convect Bake EasyConvect Baked Goods (some models) Add 1 Minute Use to select EasyConvect Feature Baked Goods. Recipes EasyConvect Meats (some models) Use to select EasyConvect Feature Meats.
Setting Oven Controls Setting Clock Add 1 Minute When the appliance is first powered up, 12:00 will flash in the display (See Fig. 1). The time of day must first be set before operating the oven. Use the Add 1 Minute to set additional minutes to the timer. Each press of the keypad will add 1 additional minute. If Add 1 Minute keypad is pressed when the timer is not active, the timer will activate and begin counting down from 1 minute.
Setting Oven Controls Changing oven temperature display Setting Control Lock The oven control is preset to display °F (Fahrenheit) when shipped from the factory. The control can be changed to display either Fahrenheit or Celsius. The control may be programmed to lock the oven control keypads. Example To change the temperature to display °C (Celsius) or °F (Fahrenheit): 1. Press and hold START until you hear a tone indicating Control Lock has been activated. 2. Loc will appear in the display (See Fig.
Setting Oven Controls Setting Preheat Setting Bake For best baking performance, use the Preheat feature to bring the oven up to the set cooking temperature. A reminder tone will sound indicating when the set temperature is reached and to place the food in the oven. When the oven reaches the desired temperature the preheat feature will perform like the Bake feature and continue to maintain the oven set temperature until cancelled.
Setting Oven Controls Setting Cook Time Setting Delay Start Use Cook Time to program the oven control to automatically turn the oven function off after a desired length of time. Delay Start sets a delayed starting time to oven cooking or cleaning functions. Prior to setting a delay start, be sure the time of day is set correctly. FOOD POISONING HAZARD. Do not let food sit for more than one hour before or after cooking. Doing so can result in food poisoning or sickness.
Setting Oven Controls Broil Use the broil function to cook meats that require direct exposure to radiant heat for optimum browning results. The Broil feature is factory preset to broil at 550°F. The Broil function temperature may be set at any temperature between 400°F (205°C) and 550°F (288°C). 7 6 5 Be aware that the suggested broil settings table (Fig. 3) are recommendations only. Increase or decrease broiling times, or move to a different rack position to suit for doneness.
Setting Oven Controls Convect Broil Convection Features Benefits of the convection features Use the convect broil feature to cook thicker cuts of meats that require direct exposure to radiant heat and the convection fan for optimum browing results. The Convect Broil function temperature may be set at any temperature between 400°F (205°C) and 550°F (288°C).
Setting Oven Controls EasyConvect Feature Meats and Baked Goods (some models) EasyConvect Feature (some models) The EasyConvect Feature allows you to convert any baking recipe using the convection feature. The control uses the normal recipe settings and adjusts to a lower temperature for convection baking.
Setting Oven Controls Keep Warm Recipes Use the Recipes feature to record and recall your favorite baking recipe setting. The Keep Warm feature will keep cooked foods warm for serving up to 3 hours after cooking has finished. After 3 hours Keep Warm will shut-off automatically. Keep Warm should only be used with foods that are already at serving temperatures. Keep Warm will maintain the oven temperature at 170° F (77°C). Example To store a recipe setting.
Setting Oven Controls Operating Oven Light Adjusting Oven Temperature The interior oven light will automatically turn ON when the oven door is opened. Press Oven Light to turn the interior oven light ON and OFF whenever the oven door is closed. Note that the oven light will not work during a Self Clean cycle. The interior oven light is located at the upper left rear wall of the oven interior and is covered with a glass shield held by a wire holder.
Setting Oven Controls Sabbath Feature (for use on the Jewish Sabbath & Holidays) Example To turn off the Sabbath feature: Press and hold both Cook Time and Delay Start keypads simultaneously for at least 3 seconds to turn the Sabbath feature off. The control will provide an acceptance tone and SAb will disappear from the display. The oven is no longer programmed for the Sabbath feature.
Setting Warming Drawer Controls (some models) Storage in or on applianceflammable materials should not be stored in an oven, warming drawer, near surface units. This includes paper, plastic and cloth items, such as cookbooks, plasticware and towels, as well as flammable liquids. Do not store explosives, such as aerosol cans, on or near the range. Warming Drawer The purpose of the warming drawer is to keep hot cooked foods at serving temperatures.
Setting Warming Drawer Control (some models) Warming Drawer indicator light The indicator light is located above the Warming drawer thermostat control knob. It turns on when the control is set, and stays on until the control is turned OFF (See Fig. 1). Fig. 1 Setting Warming Drawer The thermostat control knob is used to select the temperature for the warming drawer. It is located on the control panel. The temperatures are approximate, and are marked Lo, Med and Hi (See Fig. 1). FOOD POISONING HAZARD.
Self Clean Remove any excessive spillovers. Any spills on the oven bottom should be wiped-up and removed before starting a self-clean cycle. To clean, use hot, soapy water and a cloth. Large spillovers can cause heavy smoke or fire when subjected to high temperatures. DO NOT allow food spills with a high sugar or acid content (such as milk, tomatoes, sauerkraut, fruit juices or pie filling) to remain on the surface as they may leave a dull spot even after cleaning.
Self Clean Delayed Start Self Clean As soon as Self Clean becomes active, a motor driven lock mechanism will begin locking the oven door automatically, and door Loc will appear in the display (See Fig. 1). DO NOT open the oven door when door Loc is displayed (allow 15 seconds for the lock mechanism to lock the oven). Once the oven door has locked, CLn will appear in the display indicating Self Clean has started (Fig. 2). Fig.
Care & Cleaning Cleaning recommendation table Surface type Recommendation Control knobs Painted body parts Painted decorative trim Aluminum, plastic or vinyl trim pieces For general cleaning, use hot, soapy water and a cloth. For more difficult soils and built-up grease, apply a liquid detergent directly onto the soil. Leave on soil for 3060 minutes. Rinse with a damp cloth and dry. Do not use abrasive cleaners on any of these materials; they can scratch.
Care & Cleaning Cooktop maintenance Cooktop cleaning Consistent and proper cleaning is essential to maintaining your ceramic glass cooktop. DO NOT use a cooktop cleaner on a hot cooktop. The fumes can be hazardous to your health, and can chemically damage the ceramic-glass surface. Prior to using your cooktop for the first time, apply the recommended Cooktop Cleaning Creme to the ceramic surface (on the web visit www.KitchenAid.com for replacement cooktop cleaner, item number 31464).
Care & Cleaning Cooktop cleaning Aluminum foil and utensils Do not use the following on the cooktop: NEVER cover any slots, holes or passages in the oven bottom or cover an entire oven rack with materials such as aluminum foil. Aluminum foil linings may trap heat, causing a fire hazard. Do not use abrasive cleaners and scouring pads, such as metal and some nylon pads. They may scratch the cooktop, making it more difficult to clean.
Care & Cleaning Removing and replacing the lift-off oven door To avoid possible injury when removing or replacing the oven door, follow the instructions below carefully and always hold the oven door with both hands positioned away from the door hinge area. Oven door hinge locations The door is heavy. For safe, temporary storage, lay the door flat with the inside of the door facing down. To remove oven door: 1. Open oven door completely (horizontal with floor - Fig.1). 2.
Before You Call Solutions to common problems Before you call for service, review the following list. It may save you time & expense. Possible solutions to these problems are provided with the problem listed: Problem Solution Poor baking results. Many factors affect baking results. Make sure the proper oven rack position is used. Center food in the oven and space pans to allow air to circulate. Allow the oven to preheat to the set temperature before placing food in the oven.
Before You Call Solutions to common problems Problem Oven smokes excessively when broiling. Solution Incorrect setting. Follow broiling instructions in Setting Oven Controls section. Be sure oven door is opened to broil stop position when broiling. Meat too close to the broil element. Reposition the broil rack to provide proper clearance between the meat & the element. Preheat the broil element for searing. Meat not properly prepared. Remove excess fat from meat.
Before You Call Solutions to common problems Problem Solution Scratches or abrasions on cooktop surface. Coarse particles such as salt or hardened soils between cooktop and utensils can cause scratches. Be sure cooktop surface and bottoms of utensils are clean before usage. Small scratches do not affect cooking and will become less visible with time. Cleaning materials not recommended for ceramic-glass cooktop have been used.
Assistance or Service Accessories Before calling for assistance or service, please check Troubleshooting. It may save you the cost of a service call. If you still need help, follow the instructions below. When calling, please know the purchase date and the complete model and serial number of your appliance. This information will help us to better respond to your request. Accessories U.S.A.