
User Guide

Example Program
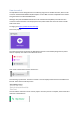
An example program using all the blocks in the Klip Motor Extension can be seen by following the
link below:
https://makecode.microbit.org/_LRfcowLAiero
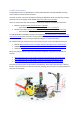
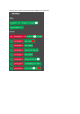
The program starts by setting up three ZIP LEDs to be attached to the Klip Motor board, with their
brightness set to ‘Normal’. The first ZIP LED in the chain, LED 0, is set be red and then the changes
are made visible. Nothing else will happen until either button A or B on the BBC micro:bit is pressed.
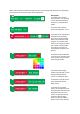
If button A is pressed, a rainbow pattern will be displayed across the ZIP LEDs attached to the board.
The colour pattern will then rotate around the ZIP LED chain 25 times before all the ZIP LEDs are
turned off.
If button B is pressed, all the ZIP LEDs will light up green. After that, both motors will turn in the
forward direction at 75% speed for two seconds before turning off. There will then be a 500 ms
pause before the both turn on again, this time spinning in the opposite direction and now at 50%
speed. They will spin for two seconds before once again both turning off.
Other Extensions
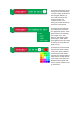
As well as using the specific Klip Motor Extension, there are also other Extensions available which
work well with the Klip Motor and can be used at the same time as the Klip Motor Extension. Three
of these are other Kitronik Extensions which go alongside the Kitronik :CITY products talked about in
the ‘How to use it’ section of this guide:
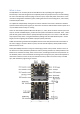
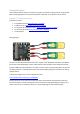
The Klip Motor board is also compatible with the ‘Neopixel’ extension (Note: the ZIP LED output on
the Klip Motor is linked to Pin 8 on the BBC micro:bit).