
Installation Instructions

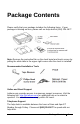
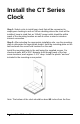
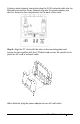
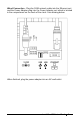
Table Of Contents
- THIS EQUIPMENT COMPLIES WITH FCC REQUIREMENTS
- Package Contents
- Install the CT Series Clock
- PayClock Online
- Using the CT Clock
- Employee Transactions
- Clocking IN/Out - Finger Sensor (CT72)
- Clocking IN/Out - Badge
- Clocking IN/Out - PIN
- Department Transfers - Finger Sensor (CT72)
- Department Transfers - Badge
- Department Transfers - PIN
- Amount Entries - Finger Sensor (CT72)
- Amount Entries - Badge
- Amount Entries - PIN
- Viewing Totals - Finger Sensor (CT72)
- Viewing Totals - Badge
- Viewing Totals - PIN
- Employee Transactions
- Supervisor Transactions
- Enrolling Fingers
- Administrator Functions
- Troubleshooting the CT Series
- Appendix A – Testing the Connection to PayClock Online
- Appendix B – Installing a Battery
- Appendix C – Adjusting Finger Sensitivity
- Appendix D – Bell Relay Connections
- Appendix E – Access Relay Connections
- Appendix F – Add/Edit/Delete Bell Events
- Blank Page

4 • Install the CT Series Clock
Wi-Fi or Wired Network Connection
The CT series clock can communicate with PayClock Online via a Wi-Fi
or Wired Network Connection.
Wi-Fi Connection – With the power adapter connected and the clock
mounted follow these steps to set up the connection. Note: A wireless
access point on the network is required.
• From the CT clock touchpad tap Settings and enter the
administrator password and tap OK.
• The Administrator Menu will display.
• Tap Wireless and select Wi-Fi Networking On if it isn’t already.
• A list of available wireless networks will display.
• Select the desired wireless network, the WIFI Passcode screen
will display.
• Using the master buttons to select upper case letters, lower case
letters, number or symbols enter the passcode for the wireless
network. Note: You may need to contact your network
administrator for wireless passcode information.
• Tap OK when the passcode has been entered. A confirmation
message will display when connected.
• Tap back until you have reached the main screen.
ABC @&% abc 123