
Installation Instructions


Once you have marked your space, locate the center
point on the wall from the 84-3/4" line. You may find it
helpful to build your closet from the center out.
The core of your closet will be built from uprights and
shelves. Cam locks will be used to connect the pieces
together and are included with the shelves.
It is best to build your closet one base at a time, starting
with the shelves. Once your all closet bases are secured
to the wall, you will then install doors, drawers, closet
rods and additional accessories.
Snap a chalk line or draw a level line at 84-3/4" from the
highest point of your finished floor. It may be helpful
to draw out your closet layout on the wall. This will give
you a guide to follow as you go.
PREPARATION
4
2
1
3
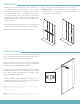
CLOSET UPRIGHTS
Closets fit best on square walls. Walls that are out
of square will require modification to ensure closet
installation goes smoothly. For proper closet operation
and overall appearance, it is essential for the closet to
be mounted level, plumb, and square in relationship
to the floor and walls. If there is any unevenness, your
closet uprights must be shimmed and adjusted for
proper function.
Start by checking how level your floor is, and make note
of the highest points before installing closet uprights.
Use a stud finder to mark any studs in the wall.
3
Note: The location of where the dowel is installed differs for
14" depth and 24" depth uprights.
See details on page 7
Note: The notch indicates the bottom of the upright and is
designed to fit over existing base moulding.
84-3/4"
Using a Phillips head screwdriver, install the cam
dowels (included in the cam lock pack from the shelf
kit) into each upright of the closet.
1