RW-10d, RW-12d, RSW-10d IMPORTANT SAFETY INSTRUCTIONS 1. READ these instructions. 2. KEEP these instructions. 3. HEED all warnings. 4. FOLLOW all instructions. 5. DO NOT use this apparatus near water. 6. CLEAN ONLY with dry cloth. 7. DO NOT block any ventilation openings. Install in accordance with the manufacturer's instructions. 8. DO NOT install near any heat sources such as radiators, heat registers, stoves, or other apparatus (including amplifiers) that produce heat. 9.
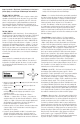
RW-10d / RW-12d “HIGH LEVEL IN” - These connections can be used as an alternate connection method to the line level hook up. Using 16- gauge or larger speaker wire, connect the Red “positive” (+) terminal of your amplifier’s Left channel to the Red “positive” (+) terminal of your subwoofer’s Left channel ”HIGH LEVEL IN” terminal. Connect the Black “negative” (-) terminal of your amplifier’s Left channel to the Black “negative” (-) of your subwoofer’s Left channel ”HIGH LEVEL IN” terminal.
RW-10d, RW-12d, RSW-10d experiment with intermediate settings. From this screen press the down or up cursor key to access other control settings. “Save Settings:” - This screen is used to store all of the above control settings in one of three memory presets (“Music”, “Movie” and “Night”). Use the Left/Right cursor keys to select the desired preset and press the Enter key to store your current control settings. “Settings Saved!” will be displayed.
PROHIBITED BY LAW, THIS WARRANTY IS EXCLUSIVE AND IN LIEU OF ALL OTHER EXPRESS AND IMPLIED WARRANTIES WHATSOEVER, INCLUDING BUT NOT LIMITED TO, THE WARRANTY OF MERCHANTABILITY AND FITNESS FOR A PRACTICAL PURPOSE. Some states do not allow the exclusion or limitation of incidental or consequential damages or implied warranties so the above exclusions may not apply to you. This Warranty gives you specific legal rights, and you may have other rights, which vary from state to state.
RW-10d, RW-12d, RSW-10d CONSIGNES DE SÉCURITÉ IMPORTANTES 1. LIRE ces instructions. 2. CONSERVER ces instructions. 3. RESPECTER tous les avertissements. 4. SUIVRE toutes les instructions. 5. NE PAS utiliser cet appareil à proximité de l’eau. 6. NETTOYER UNIQUEMENT avec un chiffon sec. 7. NE PAS OBSTRUER les orifices de ventilation. Installer conformément aux instructions du constructeur. 8.
temps les entrées « High Level » (haut niveau) et « Line Level » (niveau ligne), car cela risque d’endommager votre matériel. cristaux liquides. Toute erreur dans le contenu de l’afficheur est corrigée lors du changement de mode d’affichage. RW-10d / RW-12d / RSW-10d « LINE IN » (entrée ligne) – Cette entrée est prévue comme entrée standard ou par défaut du caisson de graves.
RW-10d, RW-12d, RSW-10d processeur ambiophonique. À partir de cet écran, appuyez sur la flèche descendante ou montante pour accéder aux autres réglages. « Phase » – Cet écran permet de régler la phase acoustique du caisson de graves en fonction de celle des enceintes principales. Utilisez les flèches gauche/droite pour régler la phase du caisson de graves entre 0° et 180°. Le bonne valeur de ce réglage dépend fortement de l’acoustique de la pièce et de la position occupée par le caisson de graves.
ne couvre pas les dégâts résultant d’une utilisation, d’un entretien ou d’une installation incorrecte, ou d’une tentative de réparation par quiconque autre que KLIPSCH ou un détaillant KLIPSCH autorisé par KLIPSCH à effectuer une réparation sous garantie. Toute réparation non autorisée annule la présente garantie. Cette garantie ne couvre pas les produits vendus EN L’ÉTAT. LE SEUL RECOURS DU CLIENT EST LA RÉPARATION OU LE REMPLACEMENT SELON LES TERMES DE CETTE GARANTIE.
RW-10d, RW-12d, RSW-10d WICHTIGE SICHERHEITSHINWEISE 1. LESEN Sie diese Anweisungen durch. 2. BEHALTEN Sie diese Anweisungen. 3. BEACHTEN Sie alle Warnhinweise. 4. FOLGEN Sie allen Anleitungen. 5. Verwenden Sie diese Geräte NICHT in der Nähe von Wasser. 6. Reinigen Sie sie NUR mit einem trockenen Tuch. 7. Blockieren Sie KEINE Lüftungsöffnungen. Installieren Sie die Geräte entsprechend den Herstelleranweisungen. 8.
RW-10d / RW-12d / RSW-10d „LINE IN“ – Dieser Eingang dient als Standard- oder Vorgabeeingang des Subwoofers. Dieser Eingang empfängt Signale des linken und rechten Vorverstärkerkanals, der Subwoofer- oder LFE-Ausgänge Ihrer Elektronik über RCA-Buchsen. Schließen Sie ihn an die Eingänge „RIGHT“ und/oder „LEFT/LFE“ an der Rückseite des Subwoofers an (siehe Abbildungen 3 und 5). RW-10d / RW-12d „HIGH LEVEL IN“ – Diese Anschlüsse können als Alternative zur Line-Level-Verbindung verwendet werden.
RW-10d, RW-12d, RSW-10d „Phase“ – Dieser Bildschirm dient dazu, die akustische Phase des Subwoofers an die der Hauptlautsprecher anzupassen. Mit den linken und rechten Cursor-Tasten können Sie die Phase des Subwoofers von 0° bis 180° einstellen. Die richtige Einstellung hängt stark von der Raumakustik und der Platzierung des Subwoofers im Raum ab.
ISTRUZIONI IMPORTANTI PER LA SICUREZZA 1. LEGGERE queste istruzioni. 2. CONSERVARE queste istruzioni. 3. PRESTARE ATTENZIONE alle avvertenze. 4. ATTENERSI a tutte le istruzioni. 5. NON utilizzare questo apparecchio in prossimità di acqua. 6. PULIRE SOLO con un panno asciutto. 7. NON bloccare le aperture per la ventilazione. Installare secondo le istruzioni fornite dal fabbricante. 8.
RW-10d, RW-12d, RSW-10d RW-10d / RW-12d / RSW-10d “LINE IN” - Questo è l'ingresso standard predefinito per il subwoofer. Accetta segnali dai canali destro e sinistro del preamplificatore e dalle uscite subwoofer o LFE dei componenti elettronici tramite gli spinotti di ingresso RCA. Collegare agli ingresso destro “RIGHT” e/o sinistro “LEFT/LFE” sul pannello posteriore del subwoofer (vedere le figure 3 e 5).
destro fino a quando viene visualizzato il messaggio “Lowpass OFF LFE Mode” (passa basso Off modalità LFE). Per ulteriori informazioni sulla gestione dei bassi, fare riferimento al manuale dell'utente del processore surround. Da questa schermata premere il tasto in basso o in alto per accedere alle altre impostazioni di controllo. “Phase” (Fase) - Questa schermata viene utilizzata per regolare la fase acustica del subwoofer per farla corrispondere a quella dei diffusori principali.
RW-10d, RW-12d, RSW-10d INSTRUÇÕES DE SEGURANÇA IMPORTANTES 1. LEIA estas instruções. 2. GUARDE estas instruções. 3. FIQUE ATENTO a todos os avisos. 4. SIGA todas as instruções. 5. NÃO use este aparelho perto de água. 6. LIMPE APENAS com um pano seco. 7. NÃO bloqueie nenhuma abertura de ventilação. Instale de acordo com as instruções do fabricante. 8.
CONEXÕES E CONTROLES CUIDADO: Desligue o amplificador e o subwoofer antes de fazer qualquer tipo de conexão. Não conecte as entradas "High Level" (Nível elevado) e "Line Level" (Nível de linha) simultaneamente, pois isso poderá danificar o equipamento. RW-10d / RW-12d / RSW-10d “LINE IN” – Esta é a entrada padrão do subwoofer. Aceita sinais das saídas do pré-amplificador dos canais esquerdo e direito, subwoofer ou LFE dos equipamentos eletrônicos através de tomadas de entrada RCA.
RW-10d, RW-12d, RSW-10d reprodução limitada de graves, e um ajuste de freqüência mais baixa é geralmente usado com modelos maiores de piso. O filtro pode ser ajustado de 40 Hz a 120 Hz, conforme necessário, ou ignorado se a função do filtro passa-baixa estiver sendo executada pelos componentes eletrônicos do sistema de som. Use as teclas de cursor "esquerda/direita" para ajustar o filtro passa-baixa.
INSTRUCCIONES IMPORTANTES DE SEGURIDAD 1. LEA estas instrucciones. 2. GUARDE estas instrucciones. 3. RESPETE todas las advertencias. 4. SIGA todas las instrucciones. 5. NO use este aparato cerca del agua. 6. LÍMPIELO SOLAMENTE con un paño seco. 7. NO bloquee las aberturas de ventilación. Instale el aparato de acuerdo con las instrucciones del fabricante. 8. NO lo instale cerca de fuentes de calor, tales como radiadores, rejillas de piso, cocinas u otros aparatos (incluso amplificadores) que producen calor.
RW-10d, RW-12d, RSW-10d RW-10d / RW-12d / RSW-10d Línea de entrada. (LINE IN). Esta es la entrada estándar o predeterminada del subwoofer. Acepta señales de las salidas de subwoofer, Efectos de Baja Frecuencia (Low Frequency Effects, LFE) o canal derecho e izquierdo de preamplificador de sus componentes electrónicos a través de entradas de enchufes RCA. Conecte las entradas derecha (RIGHT) y/o izquierda y de LFE (LEFT/LFE) al panel de atrás del subwoofer (vea las figuras 3 y 5).
para ajustar el filtro de pasabajas. Para anular este filtro, oprima y mantenga oprimida la tecla de cursor Derecha hasta que aparezca en pantalla la frase "Modalidad LFE con pasabajas desactivado" (“Lowpass OFF LFE Mode”). Consulte el manual del propietario del procesador de surround para obtener más información sobre administración de bajos. En esta pantalla, oprima la tecla de cursor Abajo o la tecla de cursor Arriba para llegar a otras configuraciones de control. Fase (Phase).
RW-10d, RW-12d, RSW-10d Chinese
RW-10d, RW-12d, RSW-10d
Japanese
RW-10d, RW-12d, RSW-10d
RW-10d, RW-12d, RSW-10d FIGURE 1 FIGURE 2 STEREO PLACEMENT MULTICHANNEL PLACEMENT FIGURE 3 RW-10d/RW-12d LINE LEVEL CONNECTIONS [OR]
FIGURE 4 RW-10d/RW-12d HIGH LEVEL CONNECTIONS Main speaker outputs on receiver connected to high level inputs on subwoofer amplifier (Right channel is shown, repeat for Left) FIGURE 5 RSW-10d LINE LEVEL CONNECTIONS [OR]
3502 Woodview Trace, Suite 200 Indianapolis, Indiana 46268 1. 800 . KLIPSCH • www.klipsch.