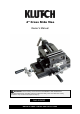
4" Cross Slide Vise Owner’s Manual WARNING: Read carefully and understand all ASSEMBLY AND OPERATION INSTRUCTIONS before operating. Failure to follow the safety rules and other basic safety precautions may result in serious personal injury.
Thank you very much for choosing a Klutch® product! For future reference, please complete the owner’s record below: Serial Number/Lot Date Code: ________________________________ Purchase Date: ____________________________________________ Save the receipt, warranty, and this manual. It is important that you read the entire manual to become familiar with this product before you begin using it. This drill press vise is designed for certain applications only.
Table of Contents Intended Use .......................................................................................................................................... 4 Packaging Contents .............................................................................................................................. 4 Technical Specifications ...................................................................................................................... 4 Important Safety Information .................
Intended Use The Klutch 4" Cross Slide Drill Press Vise has replaceable serrated 4in. jaws that open 3 in. wide. Two swivel crank handles adjust both forward and sideways for versatile clamping and precise drilling capabilities. Set screws hold positioning tightly for drilling. Longitudinal movement of 3 5/8 in. with cross travel of 3 5/8 in. Vise is secured to drill press by 3 slots on 2 sides and 1 slot on one end.
⚠WARNING PROP 65 • This product can expose you to chemicals including lead, which is known to the State of California to cause cancer. For more information, go to www.p65warnings.ca.gov. • Some dust created by power sanding, sawing, grinding, drilling, and other construction activities contains chemicals known to the state of California to cause cancer, birth defects, or other reproductive harm.
• Stay alert, watch what you are doing, and use common sense when operating the tool. Do not use the tool while you are tired or under the influence of drugs, alcohol, or medication. A moment of inattention while operating the tool may result in serious personal injury. • Dress properly. Do not wear loose clothing, dangling objects, or jewelry. Keep your hair, clothing and gloves away from moving parts. Loose clothes, jewelry, or long hair can be caught in moving parts.
• Keep the vise clean for best and safest performance. • DO NOT exceed this rated capacity. Never apply excessive force to a work piece. • Only use this vise on a surface that is stable, level, dry, and capable of sustaining the load. Keep the surface clean, tidy and free from unrelated materials and ensure that there is adequate lighting. • Inspect the vise before each use. DO NOT use if bent, broken, cracked or otherwise damaged.
Main Parts of Vise Assembly Instructions ⚠WARNING Check that all main parts are securely tightened. Loosen the nut on handle-1 and handle-2. Install each of the handle levers. Fasten the nut. The drill press vise is fully assembled.
Before Each Use ⚠WARNING • Ensure the drill press vise is firmly attached. • Never touch the jaws without wearing gloves. Attach the drill press to the work table using two bolts. User needs to prepare two sets of bolts and nuts (M8). Operating Instructions ⚠WARNING • Designed for woodworking and metalworking only. • Any work should be done within the vise’s maximum capacity. • Use protective glasses and ear protection.
Step 1 Make sure the jaws are attached to the body securely and the body is stabilized on a suitable stand firmly before operating. Step 2 Verify that each jaw can open and close when the handle is depressed and recover when the handle lifts up. Step 3 Place metal in the middle of the jaw box and press the handle down when forming.
After Each Use Clean up the scraps in the jaws after each forming. Apply preventive oil on the jaw after each use. Maintenance Proper maintenance can help extend the life of this vise. It is recommended that the general condition of any tool be examined before it is used. Keep your vise in good repair by adopting a program of conscientious repair and maintenance in accordance with the recommended procedures found in this manual.
Parts Diagram Parts List Part Number 1 2 3 4 5 6 7 8 9 10 11 12 13 14 15 16 17 18 Part Description Handle Nut Bushing Screw Bracket Lock Screw Spring Washer Lead Screw Base Bushing Bracket Lead Screw Nut Gib Screw Nut Central Slide Bar Mid-Base Page 12 of 15 Quantity 2 2 1 3 1 4 4 1 1 1 1 1 1 2 6 6 1 1
Part Number 19 20 21 22 23 24 25 Part Description Lock Screw Upper-Base Lead Screw Nut Jaw Plate Slide Wing Nut Quantity 4 1 1 1 2 1 2 Replacement Parts • For replacement parts and technical questions, please call Customer Service at 1-800-222-5381. • Not all product components are available for replacement. The illustrations provided are a convenient reference to the location and position of parts in the assembly sequence.
Limited Warranty Northern Tool and Equipment Company, Inc. ("We'' or "Us'') warrants to the original purchaser only ("You'' or "Your") that the Klutch product purchased will be free from material defects in both materials and workmanship, normal wear and tear excepted, for a period of 1 year from date of purchase. The foregoing warranty is valid only if the installation and use of the product is strictly in accordance with product instructions.
Distributed by: Northern Tool & Equipment Company, Inc. Burnsville, Minnesota 55306 www.northerntool.