
Product Manual


1. Wh
e
2. Inst
a
3. Inst
a
NOTE:
I
Experi
m
idea of
h
or need
Make s
u
outlet b
e
(See th
e
5. Ch
e
Ho
p
can
e
n you open
a
ll the front
w
a
ll the back
w
I
t is recomm
e
m
ent by runni
h
ow to run t
h
to be towel
e
u
re the Pow
e
e
fore makin
g
e
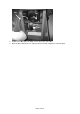
Parts Diag
r
e
ck to make
s
p
per without
s
observe the
the cartons,
w
heel(#9)
w
heel and
h
e
nded that
y
ng concrete
h
e Curbing
M
e
d.
e
r Switch (1
4
g
any adjust
m
r
am).
s
ure the Co
m
s
craping or
b
inner worki
n
#4
0
P
Operat
i
you will find
h
andle(#9,#4
y
ou first test
t
sand or mo
r
M
achine. Thi
s
4
) is OFF an
d
m
ents inside
m
paction Ra
m
b
inding on ei
n
gs of the m
a
0
P
age 12 of
2
ing Inst
r
d
the followin
0)
t
he Curbing
r
tar sand (sli
g
s
experimen
t
d
the Curbin
g
the Motor a
n
m
(64) is m
o
ther edge.
B
a
chine and
m
2
1
r
uctions
g parts.
M
achine in
y
g
htly moist
a
t
is done wit
h
g
Machine is
n
d Gear Bo
x
o
ving back a
n
B
y pulling th
e
m
ake any ne
y
our drivewa
y
a
nd without c
h
out risk bec
unplugged
f
compartme
n
n
d forth in th
e
Shield (12)
cessary adj
u
y
or garage.
c
ement) to g
e
c
ause it will
n
f
rom its elec
t
nt or the Ho
p
e
bottom of
t
off the Hop
p
u
stments.
e
t an
n
ot set up
t
rical
p
per.
t
he
p
er, you